
Photoshop Snow Effect – Add Falling Snow To A Winter Photo
In this Photoshop Effects tutorial, we'll learn how to easily add realistic falling snow to a winter photo. This version of the tutorial is for Photoshop CS5 and earlier. Photoshop CS6 and CC (Creative Cloud) users will want to check out our fully updated Photoshop Weather Effects – Snow tutorial.
Call me crazy, but I love winter. Sure, it's not always easy to drive in, and scrapping ice off the car windshield is never fun. But to me, there's nothing better than waking up to a fresh blanket of snow covering the city, or hearing that crunching sound the snow makes under my boots, or watching the snowflakes glisten and sparkle under the street lights as I take my dog for a walk in the quiet calm of a cold winter night. Or maybe it's all just a shameful excuse to drink too much hot chocolate. Who knows.
Of course, as with any season of the year, getting Mother Nature to pose for our photos isn't always easy. You may have found the perfect winter landscape scene or snapped a great photo of your kids building their very first snowman, and the only thing that would have made the photo even better is if it had been snowing at the time, which of course, it wasn't. Fortunately, when the weather forecast fails us, Photoshop can still save the day. In fact, one of the great things about Photoshop is that if you focus on learning techniques rather than on memorizing steps, you'll soon discover that the same techniques can be used to create entirely different effects! In this tutorial, we're going to be adding falling snow to our photo, but if you've been following along with some of our other tutorials, you may recognize the technique we'll be using here, since we've used to same basic technique to add rain to a photo and to create a starry night sky. Memorizing steps can give you a serious case of tunnel vision in Photoshop, where all you ever see is what's directly in front of you. But when you focus on the techniques themselves, not the actual steps or the final results, and begin to understand the "why" behind what you're doing, you may just find yourself staring at something one day and thinking "You know, I bet I know how to do that in Photoshop!". Life after that will never be the same.
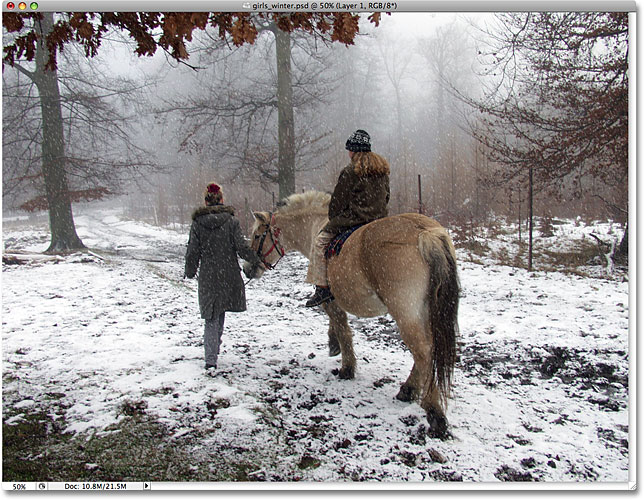
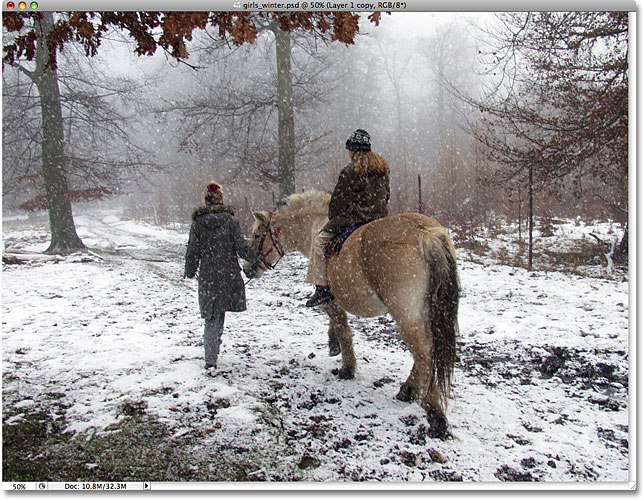
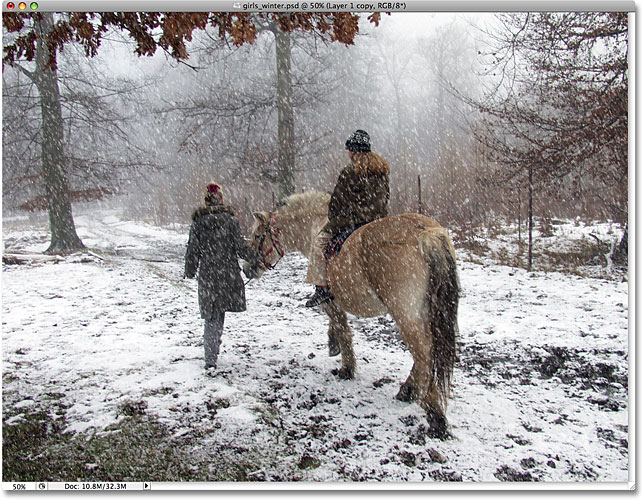
Here's the photo I'll be using for this tutorial:

Here's how it will look once we've added in our falling snow effect:

How To Add Snow With Photoshop
Step 1: Add A New Blank Layer
To begin, let's add a new blank layer above our photo. If we look in our Layers palette, we can see that our photo is sitting on the Background layer, which is currently the only layer we have. Click on the New Layer icon at the bottom of the Layers palette. It's the icon second from the right, beside the Trash Bin:
Nothing will seem to have happened in the document window since the layer we just added has nothing on it yet, but if we look again in the Layers palette, we can see that we now have a new blank layer, which Photoshop has automatically named "Layer 1" for us, sitting directly above the Background layer:
Step 2: Fill The New Layer With Black
Now that we have our new layer, let's fill it with black. Normally, to do anything to a specific layer, we first have to select the layer in the Layers palette, but in this case, Photoshop has automatically selected our new layer for us, so we're good to go. We can tell that "Layer 1" is selected because it's highlighted in blue. To fill the layer with black, we'll use Photoshop's Fill command. Go up to the Edit menu at the top of the screen and choose Fill:
This brings up the Fill command dialog box. At the top of the dialog box is the Contents section. This is where we tell Photoshop which color we want to use to fill the layer with. Choose Black from the list, then click OK to exit out of the dialog box:
Since "Layer 1" is sitting above our photo on the Background layer, filling "Layer 1" with black blocks our photo from view. The entire document window now becomes filled with black:
Step 3: Add Some Noise
Let's add some noise to this layer, which in just a few short steps will become our falling snowflakes. When most people hear the word "Noise", they immediately think of whatever music those darn teenagers are listening to these days, but in Photoshop, noise is actually nothing more than a whole bunch of little dots. Photoshop has a filter built specifically for adding noise to an image, and by sheer coincidence, it happens to be called the Add Noise filter. Go up to the Filter menu at the top of the screen, choose Noise, and then choose Add Noise:
This brings up the Add Noise filter dialog box. Use the Amount slider in the middle of the dialog box to adjust the amount of noise that's being added. There's no specific amount to add for this effect, we just need a lot of noise. Dragging the slider to a value of around 150% or so should do the trick. At the bottom of the dialog box, select the Gaussian option, and way down at the very bottom, select the Monochromatic option, which will give us little black and white dots for our noise instead of the default red, green and blue dots:
Click OK when you're done and you'll see your document window fill with noise:

Step 4: Apply Some Blurring To The Noise
Let's soften our noise up a little bit by applying some blurring to it. This will also help to clump some of the little dots together, creating different sizes and shapes for our snowflakes! The most popular way to blur something in Photoshop is with the Gaussian Blur filter because it's very simple to use and yet still gives us control over the amount of blurring being applied, but for this effect, we can use something even simpler. Go up to the Filter menu, choose Blur, and then choose Blur More:
The Blur and Blur More commands have been around since forever in Photoshop and both give us a quick, no-hassle way of blurring an image. Blur offers a subtle amount of blurring, and Blur More offers a slightly stronger amount. Problem is, as you may have noticed when you applied the Blur More command, there's no dialog box associated with them, which means we have no control over the amount of blurring that's applied. Normally, that's a bad thing, and it's a good reason to stick with the Gaussian Blur filter or one of the other more advanced blurring filters in Photoshop. For this effect though, all we needed was a subtle amount of blurring to apply to our noise, so this was a rare case where the Blur More command worked just fine.
Step 5: Reduce The Amount Of Noise With The Levels Command
At this point, our document is filled with lots of noise. Too much noise, in fact. We need to get rid of some of it so our noise looks more like snowflakes and less like, well, noise. For that, we'll use Photoshop's Levels command. Go up to the Image menu at the top of the screen, choose Adjustments, and then choose Levels:

This brings up the Levels dialog box. In the center of the dialog box is a graph known as a histogram which gives us a visual representation of the tonal, or brightness, range of our image. In other words, it shows us how many pixels in the image, if any, are pure black, how many, if any, are pure white, and where the rest of the pixels fall along the brightness scale between black and white. Directly below the histogram are three little sliders - a black one on the far left, a white one on the far right, and a gray one in the middle. We're going to use these sliders to not only remove much of the noise but also to brighten the noise so that our snowflakes appear white and not some dull gray color.
First, to brighten the noise, click on the white slider below the histogram and drag it to the left until it's just past the point where the right side of the histogram slope begins. You'll see the noise in your image become brighter. Then, to remove much of the noise, click on the black slider and drag it to the right. As you drag the black slider, you'll see large areas of the noise getting progressively darker and eventually disappearing into pure black:
Continue dragging the black slider towards the right until you've removed enough noise so that what remains looks less like noise and more like snow, then click OK to exit out of the Levels dialog box. Your image should now look something like this:
Step 6: Change The Blend Mode Of The Layer To "Screen"
Things are starting to look a bit more wintry, but we do have one small problem. We've created all these nice white specks to use as snowflakes in our photo, but we can't actually see our photo! It's still being blocked from view. We need to hide all the black areas on the layer while keeping the white specks visible. Fortunately, Photoshop makes this incredibly easy thanks to layer blend modes! Blend modes give us all kinds of interesting ways to blend layers together, and one of them in particular will do exactly what we're looking for. With "Layer 1" still selected, go up to the Blend Mode option at the top of the Layers palette. It doesn't actually say "Blend Mode" anywhere, but you'll see a drop-down box that by default is set to "Normal". This is the Blend Mode option. Select the Screen blend mode from the list:
With the blend mode of "Layer 1" set to Screen, any areas on the layer that are pure black will completely disappear from view, revealing our photo on the Background layer behind it, while our white snowflakes will remain visible! If we look at our image in the document window, we can see that sure enough, our photo is now visible behind the snowflakes:

Step 7: Apply The "Motion Blur" Filter
Our snowflakes are still looking a little harsh, and they also look like they're just stuck on the photo rather than falling from the sky. Let's give them some motion using Photoshop's Motion Blur filter. Go up to the Filter menu, choose Blur, and then choose Motion Blur:
This brings up the Motion Blur dialog box. At the bottom of the dialog box are the two controls for the filter. The first one is Angle, where we can set the direction we want our snowflakes to be falling from. Set it to around -65°. Below that is the Distance option where we decide how much of a motion trail we want an object to have. Let's give our snowflakes just a hint of motion, not too much. I'm going to set mine to around 8 pixels:
Click OK when you're done to exit out of the dialog box, and your falling snowflakes should now look more realistic:
Step 8: Duplicate The Layer
Now that we have one layer of falling snow, let's use it to create a second layer, this time with bigger snowflakes, to give the snow a sense of depth. First, let's duplicate "Layer 1". Go up to the Layer menu at the top of the screen, choose New, and then choose Layer via Copy. Or, for a much faster way, simply press the keyboard shortcut Ctrl+J (Win) / Command+J (Mac). Either way duplicates "Layer 1" and if we look in the Layers palette, we can see that we now have a new layer named "Layer 1 copy" sitting above "Layer 1":
Step 9: Rotate The New Layer 180°
Let's try to cover up the fact that we're using a copy of the exact same snowflakes by rotating the new layer 180°. With "Layer 1 copy" selected in the Layers palette, go up to the Edit menu at the top of the screen, choose Transform, then choose Rotate 180°:
This way, the snowflakes on the new layer will still appear to be falling at the same angle as the originals on "Layer 1" but they'll be spaced out differently. In fact, it will now look like you have twice as much snow falling in your image, when all we've done is made a copy of our original snowflakes layer and rotated it.
Step 10: Apply The "Crystallize" Filter
We need to convert our small snowflakes into bigger ones, and for this effect, Photoshop's Crystallize filter works nicely. Go up to the Filter menu, choose Pixelate, and then choose Crystallize:
This brings up the Crystallize filter dialog box. The Crystallize filter breaks an image into little sections, or "cells", of color, and you can adjust the size of the cells with the Cell Size option at the bottom of the dialog box. The default value of 10 usually works well for this effect. If you look in the preview area of the dialog box, you'll see that our snowflakes have increased in size. They don't exactly look like snowflakes at the moment, but we'll fix that in a moment:
Click OK to exit out of the dialog box. The photo now has a nice mix of small snowflakes and larger, well, white shapes that will look more like snowflakes once we give them some motion:
Step 11: Apply The "Motion Blur" Filter
We need to give our larger snowflakes some motion so they look more realistic in the photo. Go up to the Filter menu, choose Blur, and then choose Motion Blur once again. When the Motion Blur dialog box appears, leave the Angle set to -65° so the larger snowflakes appear to be falling at the same angle as the smaller ones. Since these flakes are larger than the original ones we created, we'll need to increase the length of the motion blur a little bit. Set your Distance option to around 16 pixels:
Click OK to exit out of the dialog box. And with that, our main "falling snow" effect is complete:

At this point, if you're happy with the results, you can stop here. If you find that your falling snow is a little hard to see in the image and you want to brighten it up a bit, follow along with the next couple of steps.
Step 12: Merge The Two Snow Layers Together
With the top "Layer 1 copy" layer still selected in the Layers palette, go up to the Layer menu and choose Merge Down:
This will merge the top two layers together, and we can see in the Layers palette that our two snowflakes layers have been merged into "Layer 1":
Step 13: Duplicate "Layer 1"
Now that all of our snowflakes are on a single layer, let's duplicate the layer. Use the keyboard shortcut Ctrl+J (Win) / Command+J (Mac) to quickly duplicate it. Our Layers palette shows that we're back to having two snowflakes layers, except this time, each layer contains all of our snowflakes:
With both layers now containing the exact same snowflakes and both layers set to the Screen blend mode, if we look at our image in the document window, we can see that we've doubled the brightness of the falling snow:
Step 14: Lower The Opacity Of The Top Layer
If you find that your falling snow is now too bright, simply lower the opacity of the top layer until you're happy with the results. You'll find the Opacity option directly across from the Blend Mode option at the top of the Layers palette. I'm going to lower mine all the way down to about 35%:
Once you've adjusted the brightness of the snow with the Opacity option, you're done! Here's my final result: