
Interweaving Photo Strips With Photoshop
In this Photoshop Effcts tutorial, we're going to learn how to create an interesting photo effect by taking an image and turning it into a series of interweaving strips. We'll be using a few layers and layer masks in the tutorial, as well as a couple of clipping masks and a layer style, and we'll be turning on Photoshop's grid to help us out.
The first time I saw this Photoshop effect, I thought "Wow, there's some really advanced stuff going on there!". But as with most things in life, after thinking about it for a few minutes, I realized just how simple it really is, as we'll see!
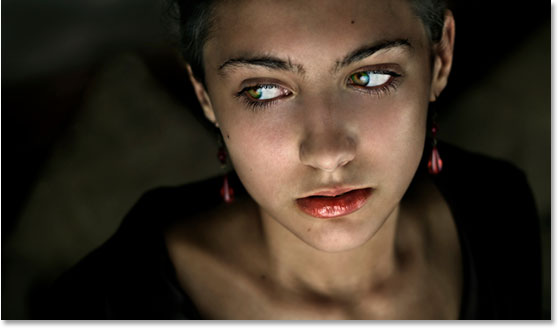
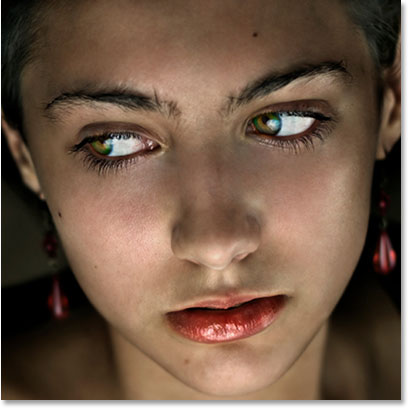
Here's the photo I'll be using for this tutorial. It's the same image I used in the Ghosting An Image tutorial but it works great with this effect as well:
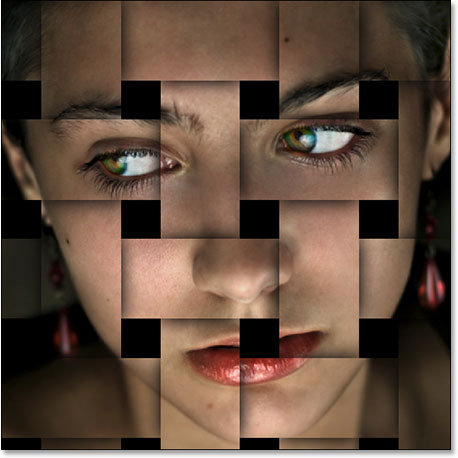
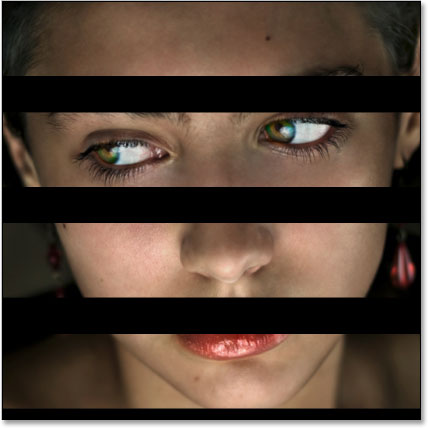
And here's the same image after turning it into interweaving strips. Notice how the vertical and horizontal strips seem to alternate between going above and below each other (which is where the "interweaving" part comes from):
This tutorial is from our Photo Effects series. Let's get started!
Step 1: Crop The Image Into A Square
The first thing we need to do for this effect is crop the image into a square, although technically you could leave the image as a 4x6 or whatever size it happens to be, but the effect tends to look best as a square, so let's crop it. We'll use Photoshop's Crop Tool for this, so select it from the Tools palette:
You could also press the letter C to quickly select it with the keyboard shortcut. Then, with the Crop Tool selected, hold down your Shift key and drag a selection around the person's face. Holding Shift tells Photoshop to constrain the selection to a perfect square:
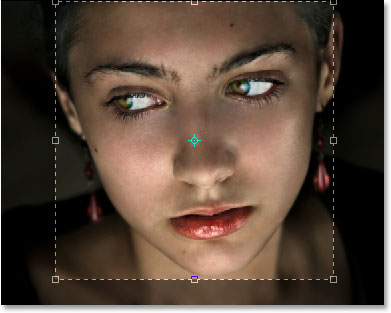
Press Enter (Win) / Return (Mac) when you're done dragging out the selection, and Photoshop goes ahead and crops the image into a square:
Step 2: Duplicate The Background Layer Twice
The next thing we're going to do is create a couple of copies of our image. If we look in the Layers palette, we can see that we currently have one layer which is named Background and it contains our original image (or at least, what's left of our original image now that we've cropped it). We need to duplicate the Background layer a couple of times, so use the keyboard shortcut Ctrl+J (Win) / Command+J (Mac) to duplicate it once and then use the same keyboard shortcut again to create a second copy. You should see three layers now in your Layers palette. Double-click directly on the name of the layer on top and rename it "Vertical Strips", then double-click directly on the name of the layer below it and rename it "Horizontal Strips":
Step 3: Fill The Background Layer With Black
Press D on your keyboard to reset Photoshop's Foreground and Background colors to their defaults of black as the Foreground color and white as the Background color (yours may already be set the default colors). Then click on the original Background layer (the bottom layer) in the Layers palette to select it. We're going to fill it with black, and with black now as our Foreground color, we can use the keyboard shortcut Alt+Backspace (Win) / Option+Delete (Mac) which fills the currently selected layer with the current Foreground color (black). Nothing will seem to have happened to the image, since the two layers above the Background layer are blocking it from view, but if we look in the Layers palette, we can see that the Background layer's thumbnail is now filled with black, telling us that the layer itself is filled with black:
Step 4: Turn The Top Layer Off For Now
We're going to create our horizontal strips first, but the "Vertical Strips" layer on top is going to block our view so we need to temporarily turn it off. To do that, click on the layer visibility icon (the "eyeball" icon) to the left of the "Vertical Strips" layer in the Layers palette. You won't see anything happen to the image itself since the "Vertical Strips" and "Horizontal Strips" layers are identical at the moment, but when you click the eyeball icon, the eyeball will disappear, letting you know that the layer is now hidden:
Step 5: Turn On Photoshop's Grid
We're going to create our vertical and horizontal strips, and to help us out, we'll use Photoshop's grid. Go up to the View menu at the top of the screen, choose Show, and then choose Grid. You can also use the keyboard shortcut Ctrl+' (Win) / Command+' (Mac) to easily turn the grid on and off. When your grid appears, if you find that you can't see it very well because the grid color is blending in with the colors of your image, press Ctrl+K (Win) / Command+K (Mac) to quickly bring up Photoshop's Preferences. Then, from the drop-down menu at the top, choose Guides, Grid and Slices. From here, we can change the color of the grid. In the Grid options, click on the color swatch in the top right corner, which will bring up Photoshop's Color Picker. Select a color for your grid that you'll be able to see in front of your image and then click OK to exit out of the Color Picker. You can see in the screenshot below of the Grid options that I've changed my grid color to yellow:
Click OK to exit out of the Preferences dialog box. You should now see your grid in your new color (in my case yellow) over top of your image:

Step 6: Drag Out A Series Of Horizontal Selections
Let's create our horizontal strips first. Grab your Rectangular Marquee Tool from the Tools palette, or press M on your keyboard to quickly select it:
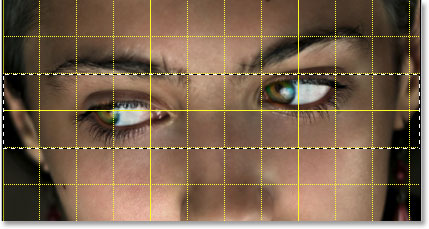
Now let's use our grid to help us create our horizontal strips. First, make sure the "Horizontal Strips" layer is selected in the Layers palette (the currently selected layer is highlighted in blue). I'm going to create horizontal strips that are two grid rows high, with one grid row separating them from each other. Now, I want to make sure that the woman's eyes are included in the final effect, so I'm going to start by dragging out a selection around the two grid rows in front of her eyes. By default, my selection will snap to the grid as I'm dragging to make things easy. If you find that your selection is not snapping to the grid, go up to the View menu at the top of the screen, choose Snap To, and then choose Grid. You should see a checkmark to the left of the word "Grid".
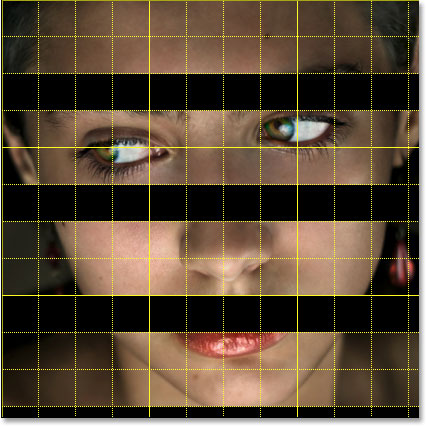
Here's my selection around the two grid rows in front of her eyes:
This selection will become one of our horizontal strips. Now let's create the rest of them. Hold down your Shift key, which will tell Photoshop to add these next selections to our original selection, and drag out more horizontal selections, keeping each one two grid rows high and leaving one grid row separating each selection. Your image should look like this when you're done:

Step 7: Add A Layer Mask
With our horizontal selections in place, click on the Layer Mask icon at the bottom of the Layers palette to add a layer mask to the "Horizontal Strips" layer:
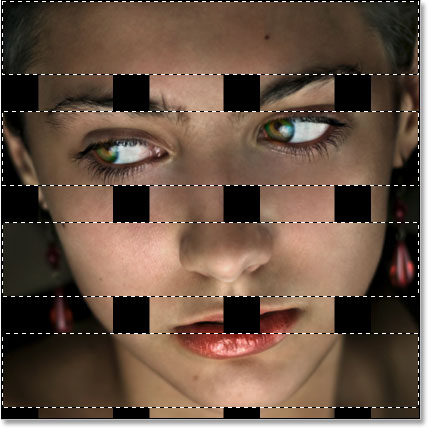
Photoshop adds a mask to the layer and uses the selections we've created to determine which parts of the layer will remain visible and which parts will become hidden from view. The areas that were inside our horizontal selections remain visible, while the areas that were in the grid columns that separated our selections disappear, revealing the black-filled layer underneath:
I'm going to press Ctrl+'(Win) / Command+' (Mac) to temporarily hide my grid so we can see more clearly what's happened. We've now created our horizontal strips:
Step 8: Turn The "Vertical Strips" Layer Back On
We're going to do the same thing now to create our vertical strips. First, click on the top "Vertical Strips" layer in the Layers palette to select it, then click back on its layer visibility icon to bring back the eyeball and turn the layer itself back on:
Step 9: Drag Out A Series Of Vertical Selections
Just as we did when creating the horizontal strips, let's drag out a series of selections, this time vertical ones. We'll make the vertical selections two grid columns wide, leaving one grid column between them. Use your Rectangular Marquee Tool to drag out your first selection, then hold down Shift and drag out the rest of your selections. Your image should now look like this:

Step 10: Add A Layer Mask
With our vertical selections in place, click on the Layer Mask icon at the bottom of the Layers palette:
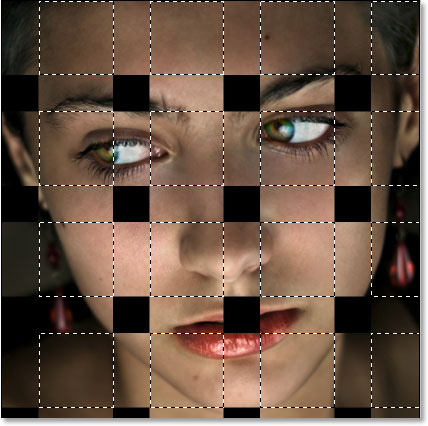
Photoshop adds a layer mask to the layer and just as before, it uses our selections to determine which areas of the layer remain visible and which ones disappear from view. The areas inside our selections remain visible, and the areas that were inside the grid columns separating our selections disappear revealing both the "Horizontal Strips" layer and the black-filled layer below:

Once again I'll turn off my grid temporarily with Ctrl+' (Win) / Command+' (Mac) so we can see the image itself more easily. Your image should now look something like this:

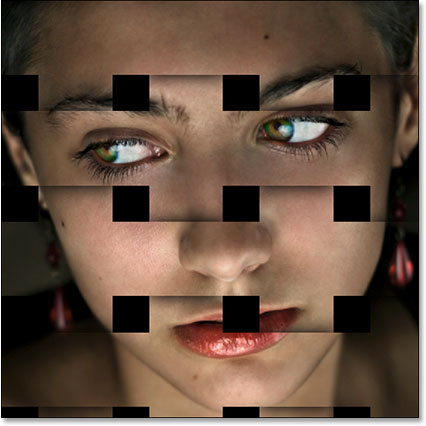
Step 11: Select All The Strip Intersection Points
We have our vertical and horizontal strips, but all it really looks like at the moment is that we have a bunch of black squares covering our image. We need to create the illusion that the strips are weaving above and below each other. To do that, we need to select the areas where the vertical and horizontal strips intersect. Before we do that though, press Ctrl+' (Win) / Command+' (Mac) to turn off the grid if you haven't already, since we no longer need it. Then, hold down your Ctrl (Win) / Command (Mac) key and click directly on the "Horizontal Strips" layer's layer mask thumbnail:
This will load the horizontal selections back into the image:
Then hold down Shift+Ctrl+Alt (Win) / Shift+Command+Option (Mac) and click directly on the "Vertical Strips" layer mask thumbnail:

This will do two things: One, it will load the vertical selections back in to the image, and two, it will tell Photoshop to keep the selection around only the areas where the horizontal and vertical selections intersect. Everything else becomes deselected:
Step 12: Save The Selection
Before we go any further, we need to save this selection. To do that, go up to the Select menu at the top of the screen and choose Save Selection. When the "Save Selection" dialog box appears, simply click OK in the top right corner to exit out of it:
Step 13: Deselect Every Other Square Selection
With your Rectangular Marquee Tool still active, hold down your Alt (Win) / Option (Mac) key and drag a selection around every other square selection. This will deselect the selections you drag around. Continue dragging around every other square selection to deselect it until only half of the original square selections remain. Your image should look like this:

Step 14: Copy The Selection To A New Layer
Click on the "Horizontal Strips" layer thumbnail in the Layers palette to select it. Then press Ctrl+J (Win) / Command+J (Mac) to copy the selected areas to a new layer. You won't see anything happen to the image itself, but if you look in the Layers palette, you'll see a new layer named "Layer 1" added between the "Horizontal Strips" and "Vertical Strips" layers which contains our square selected areas:
Step 15: Create A Clipping Mask
With the new layer selected, go up to the Layer menu at the top of the screen and choose Create Clipping Mask. You can also use the keyboard shortcut Ctrl+Alt+G (Win) / Command+Option+G (Mac). Either way "clips" the new layer to the layer below it. We can't see any difference in the image itself, but in the Layers palette, we can see that the new layer is now indented to the right which tells us that it's being clipped by the layer below it:
Step 16: Reload The Saved Selection
Let's bring back the selection we saved a moment ago, and we can do that easily using the keyboard shortcut Ctrl+Alt+4 (Win) / Command+Option+4 (Mac):
Step 17: Deselect The Opposite Square Selections
With the Rectangular Marquee Tool still selected, once again hold down your Alt (Win) / Option (Mac) key and drag around every other square selection to deselect it. This time though, you want to keep the square selections you deleted the first time we did this and deselect all the ones you kept, so that when you're done, your image looks like this:

Step 18: Copy The Selection To A New Layer
Click on the "Vertical Strips" layer at the top of the Layers palette to select it, then press Ctrl+J (Win) / Command+J (Mac) to copy the selected areas to a new layer. Again, we won't see anything happen to the image itself, but the Layers palette shows us a new layer named "Layer 2" above the "Vertical Strips" layer which contains our selected square areas:

Step 19: Create A Clipping Mask
Just as we did a moment ago, either go up to the Layer menu and choose Create Clipping Mask or press Ctrl+Alt+G (Win) / Command+Option+G (Mac) to create a clipping mask. We can now see the new layer indented to the right telling us that it is being clipped by the "Vertical Strips" layer below it:
Step 20: Add An Outer Glow Layer Style
With the top layer still selected, click on the Layer Styles icon at the bottom of the Layers palette:
Select Outer Glow from the list of Layer Styles that appears:
This brings up the "Layer Style" dialog box set to the "Outer Glow" options in the middle. We're going to turn our "glow" into a shadow, and to do that, we need to change the Blend Mode at the top from Multiply. We also don't want yellow as our shadow color, so click on the color swatch just below the word "Noise", which brings up Photoshop's Color Picker, and select black as the color. Click OK once you've selected black to exit out of the Color Picker. Lower the Opacity value to about 60% so the shadow isn't quite as dark and intense. Finally, in the "Elements" section in the middle of the dialog box, raise the Size value to around 40 pixels:
You may need to adjust the "Size" value depending on the size and resolution of the image you're using. Click OK when you're done to exit out of the Layer Style dialog box. Your image should now look something like this. We're almost done:
Step 21: Copy And Paste The Layer Style Onto "Layer 1"
All that's left to do now is apply the exact same Outer Glow layer style to "Layer 1". Rather than adding another Outer Glow and having to change all the settings in the options again, we can simply copy our layer style from "Layer 2" and paste it onto "Layer 1". To do that, go up to the Layer menu at the top of the screen, choose Layer Style, and then choose Copy Layer Style. Then click on "Layer 1" in the Layers palette to select it, go back up to the Layer menu, choose Layer Style once again, and this time, choose Paste Layer Style.
As soon as you do that, the Outer Glow, along with all the settings we just changed, is pasted onto "Layer 1", and the "interweaving photo strips" effect is complete:
And there we have it! That's how to create an interweaving photo strips effect in Photoshop! Visit our Photo Effects section for more Photoshop effects tutorials!