
Fill A Photo With More Photos In Photoshop
In this Photoshop Effects tutorial, we're going to create a bit of an optical illusion, filling one photo with many smaller photos, or at least, many copies of a couple of smaller photos. The number of smaller photos you use for this effect is completely up to you. If you view the photo from a distance, you'll see the larger main photo, and if you view it up close, you'll see all the smaller photos inside of it.
I originally saw this effect used in a job recruitment poster for a well-known restaurant chain, but it also works great with family photos, wedding photos, or just as a fun thing to do with photos of all your friends.
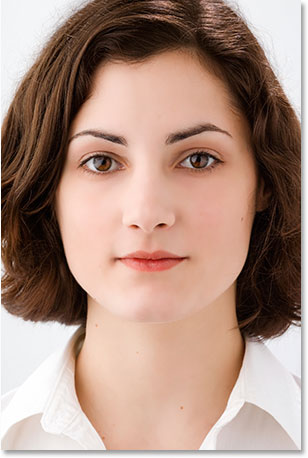
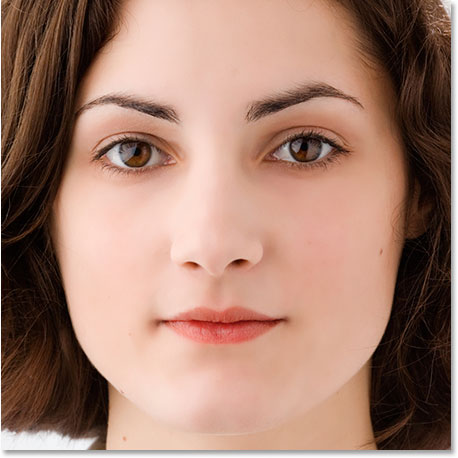
Let's say we have a photo of a mother:
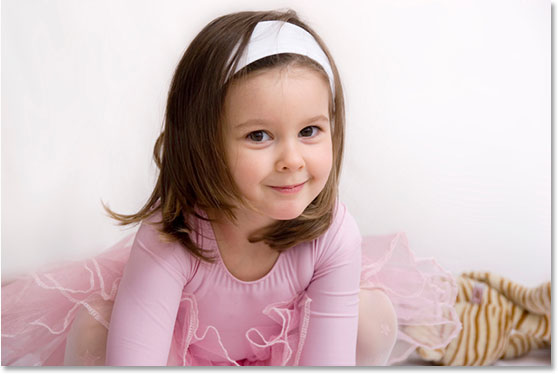
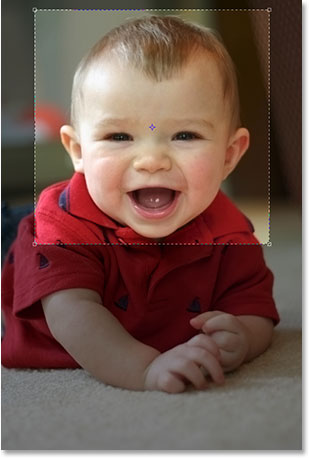
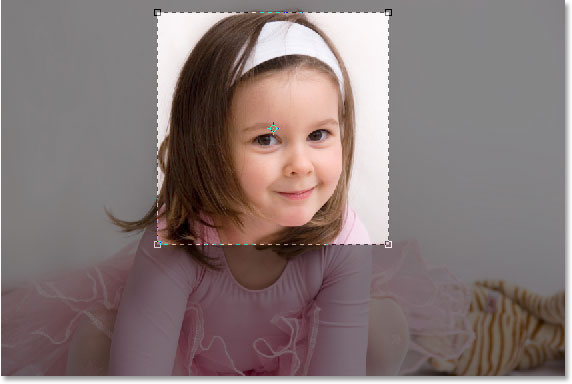
And mom has a couple of kids. Here's the photos of the kids:

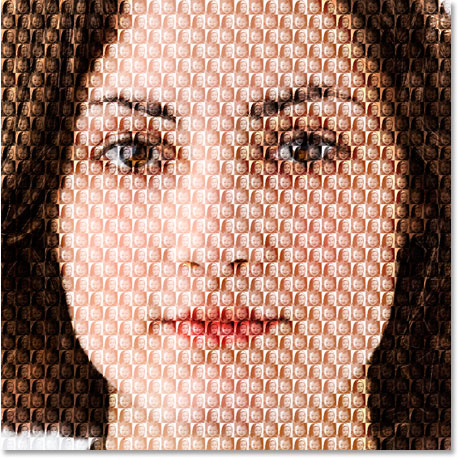
We're going to create our effect by taking the photos of the two kids and using them to fill the photo of their mom. Here's the effect we're going for:
This tutorial is from our Photo Effects series. Let's get started!
Step 1: Crop The Main Photo Into A Close-Up Of The Person's Face
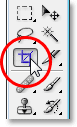
I'm going to work on the main photo (the photo of mom) first, and what we need to do is crop it into a close-up of her face. Cropping the main image into a square works best for this effect, so grab your Rectangular Marquee Tool from the Tools palette, or press M to quickly access it with the keyboard shortcut:

Then, with the Rectangular Marquee Tool selected, drag out a square selection around the person's face. Hold down your Shift key as you drag to constrain the selection to a perfect square. If you need to reposition your selection as you're dragging it, hold down your spacebar and as you move your mouse, your selection will move along with it. Release the spacebar to continue dragging out the selection:
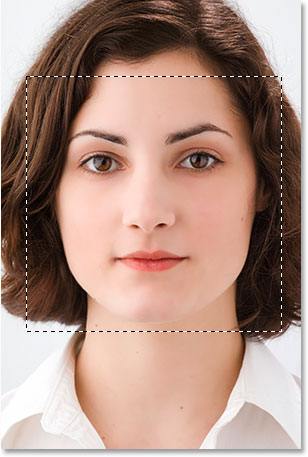
Now that we have our selection, we can use it to crop the image. Go up to the Image menu at the top of the screen and choose Crop. Photoshop will go ahead and crop the image around the selection, leaving you with just the square area you selected:
That's all we need to do with the main photo for now. Let's work on the photos of the kids.
Step 2: Crop The Smaller Photos
We're going to crop the smaller photos next, and we'll be cropping them into a square, just like we did with the main photo. Rather than using the Rectangular Marquee Tool though, let's use the Crop Tool, since we're going to be cropping these photos down to a specific size. Now, the actual size that you crop them to is going to depend on the size of your main photo and also on how many smaller photos you want to use to fill your main photo with, so you may need to experiment a little with this.
Grab your Crop tool from the Tools palette, or press C on your keyboard to select it:
With the Crop Tool selected, go up to the Options Bar at the top of the screen and enter in a value of 50 px (pixels) for both the width and height:

Again, you may need to experiment a little with the sizes depending on the size of your main image.
Now that we have our width and height entered for the Crop Tool, I'm going to drag a selection around the head of the child in the first photo. No need to hold down my Shift key this time to constrain my selection to a perfect square since we've already specified a width and height in the Options Bar. If you need to reposition your selection though as you're dragging it out, hold down the spacebar once again to move the selection around on the screen, then release the spacebar to continue dragging the selection:
You can use the handles in any of the four corners to resize your selection after you release your mouse button. You can also reposition the selection by clicking inside of it and dragging it around with your mouse. When you're happy with your selection, press Enter (Win) / Return (Mac) to accept it, and Photoshop will not only crop the image around your selection, it will also resize it to 50x50 pixels (or whatever size you entered for the width and height in the Options Bar):

Do the same thing with the second photo, dragging a selection around the person's head with the Crop Tool, resizing and repositioning it as needed, and then pressing Enter (Win) / Return (Mac) to accept the selection and have Photoshop crop and resize it for you. Here's my selection around the young girl in the second photo:
And after pressing Enter/Return, here is my cropped, 50x50 pixel image:

Step 3: Open A New 100 px x 100 px Document
Now that we have our cropped and resized images, we're going to create our pattern out of them. Go up to the File menu at the top of the screen and select New..., or use the keyboard shortcut Ctrl+N (Win) / Command+N (Mac). Either way brings up Photoshop's New Document dialog box. We want to create a new document that's twice as wide and twice as high as the two photos we just cropped, so since mine were cropped to 50x50 pixels, I'm going to enter 100 pixels for my document's width and 100 pixels for my document's height:
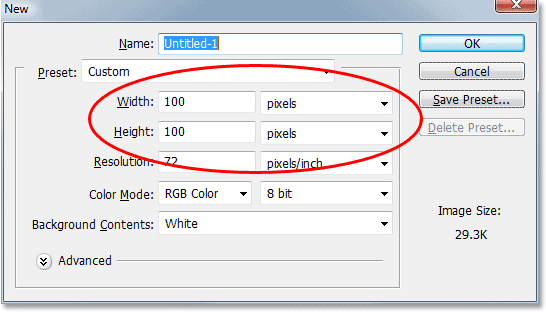
Also, make sure the Resolution for your new document is the same at it is for your photos. Select one of your photos and go up to the Image menu at the top of the screen, then select Image Size, which will bring up the Image Size dialog box. Check the value listed beside "Resolution". It will most likely say either 72, 240 or 300. Make sure your new Photoshop document is set to that same resolution value, which is located directly beneath the "Height" value.
Click OK in the top right corner of the New Document dialog box to exit out of it and have Photoshop create your new document.
Step 4: Drag Your Two Small Images Into The New Document
Grab your Move Tool from the Tools palette or by pressing V on your keyboard:
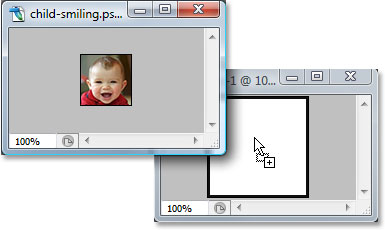
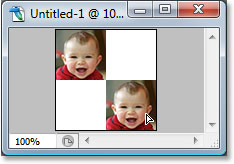
Then click inside the first photo with the Move Tool and drag it into the new document.
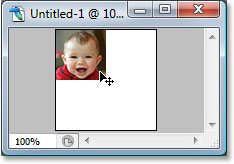
Click inside the new document and drag the image into the top left corner. It should snap into place:
Click inside the new document once again, and this time hold down your Alt (Win) / Option (Mac) key and drag the image into the bottom right corner. By holding down Alt/Option, rather than moving the original image, you'll be creating a copy of it as you drag and you'll end up with two copies of the image, one in the top left corner and one in the bottom right corner:
Now let's do the same thing with the second image. First, click inside of it with the Move Tool and drag it into the new document:
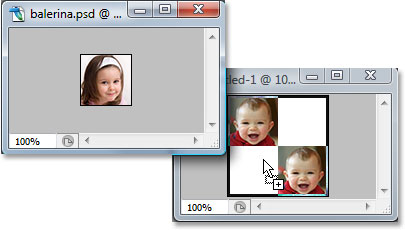
Then click inside the new document and drag the image into the top right corner:
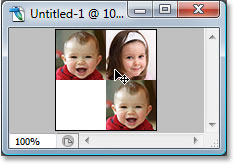
Finally, hold down your Alt (Win) / Option (Mac) key once again and drag the image into the bottom left corner, making a copy of it as you drag thanks to the Alt/Option key:
Step 5: Flatten The Image
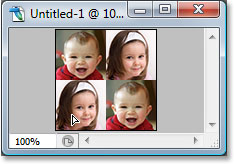
If you look in the Layers palette of your new document, you should now have five layers:
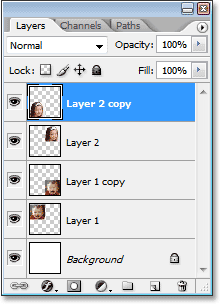
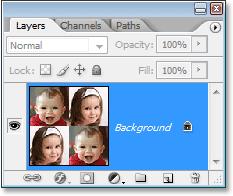
Let's flatten the image by going up to the Layer menu at the top of the screen and selecting Flatten Image. Nothing will seem to have happened in your document, but if you look in the Layers palette, you'll see that everything has now been flattened onto one layer:
Step 6: Desaturate The Image
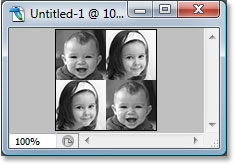
Go up to the Image menu at the top of the screen, choose Adjustments, and then choose Desaturate, or use the keyboard shortcut Shift+Ctrl+U (Win) / Shift+Command+U (Mac). This will remove the colors from the image, leaving it in black and white:
Step 7: Define A Pattern With The Image
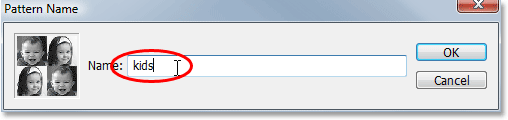
Now we're ready to create out pattern, or as Photoshop calls it, "define" our pattern. Go up to the Edit menu at the top of the screen and choose Define Pattern. This brings up the Pattern Name dialog box. I'm going to name my pattern "kids". You can name yours whatever you like of course. Then click OK to exit out of the dialog box and your pattern is now defined:
You can close out of that document window at this point, since we don't need it anymore.
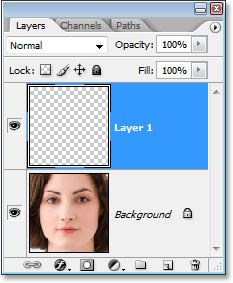
Step 8: Create A New Layer In The Main Photo
We're done with the smaller photos at this point, so switch back to your main photo and click on the New Layer icon at the bottom of the Layers palette to add a new blank layer to the document, which we're going to use to fill the photo with the pattern we just created:
Photoshop will go ahead and add a new blank layer above the Background layer:
Step 9: Fill The New Layer With The Pattern You Created
We're going to fill the layer with our pattern. To do that, go up to the Edit menu and choose Fill, or use the keyboard shortcut Shift+F5. This brings up the Fill dialog box. Set the Use option to Pattern by clicking the down-pointing arrow and selecting "Pattern" from the list. Then, to select your pattern, click on either the small pattern preview thumbnail or the down-pointing arrow beside it and then click on your pattern inside the selection box that appears. Your pattern will be the last one on the bottom row.
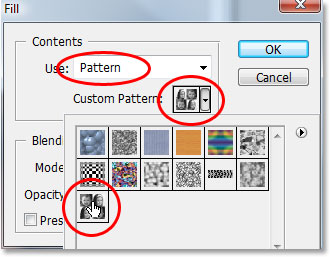
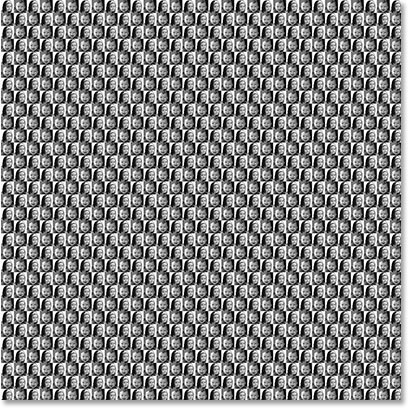
For the options at the bottom of the Fill dialog box, make sure Blending Mode is set to Normal and Opacity is set to 100%. Then click OK to exit out of the dialog box, and Photoshop will fill the layer, and your image, with the pattern:
Step 10: Change The Blend Mode Of The Layer To "Overlay"
To blend our pattern in with the image behind it, go up to the blend mode options in the top left corner of the Layers palette, click on the down-pointing arrow to the right of the word "Normal", and change the blend mode to Overlay:
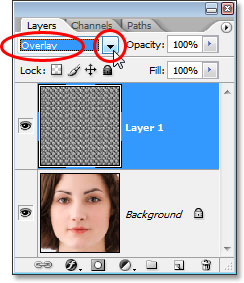
After changing the blend mode to Overlay, the pattern becomes blended in with the image below it, creating our "optical illusion" effect. If you find your pattern looks a little too intense, try changing the blend mode of the layer to Soft Light rather than "Overlay" for a more subtle effect. You can also try lowering the Opacity of the layer in the top right corner of the Layers palette.
And there we have it! That's how to fill a photo with more photos in Photoshop! Check out our Photo Effects section for more Photoshop effects tutorials!