
Painterly Glow Effect With Smart Filters In Photoshop
In this Photoshop Effects tutorial, we're going to learn how to give a photo a "painterly glow" effect using several instances of the Motion Blur filter. I call it a "painterly glow" because the final result looks sort of like a combination of a painting and glow effect. This is a very easy effect to create, but to help make it even easier, we'll be using Smart Filters, first introduced in Photoshop CS3, which means you'll need Photoshop CS3 or higher to follow along.
It is possible to create this same photo effect in Photoshop CS2 or earlier without using Smart Filters, but as with all of our Photoshop tutorials, the main purpose here is not to memorize steps but to learn how Photoshop really works, and this effect gives us a great opportunity to get some hands-on experience with one of the best new features Adobe has added to Photoshop in years.
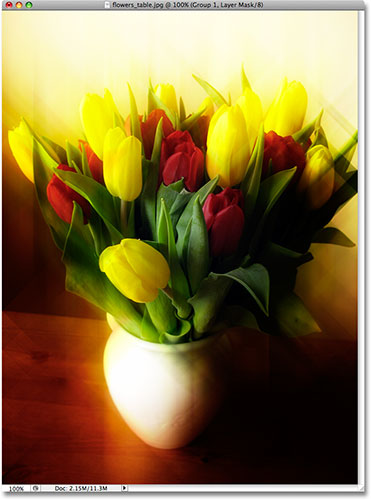
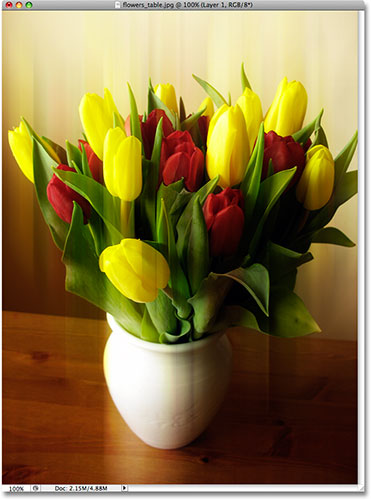
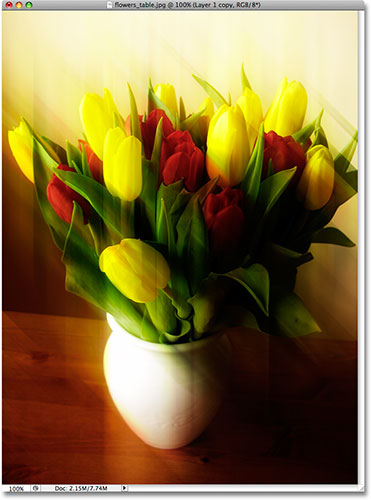
Here's the image I'll be using for this tutorial:

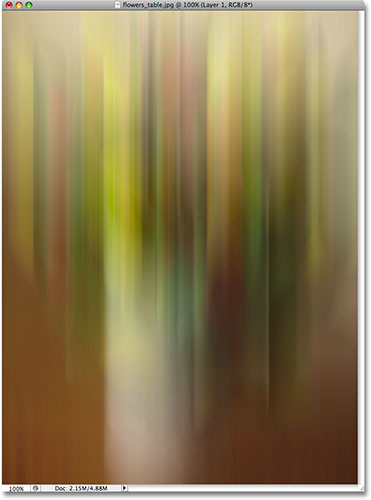
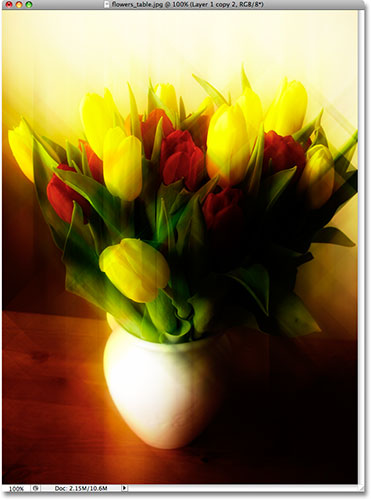
Here's how it will look when we're done:
How To Create A Painterly Glow Effect
Step 1: Duplicate The Background Layer
The first step in creating our "painterly glow" effect is to duplicate the Background layer so that we'll still have access to the original, unedited image when we're done. To duplicate the Background layer, go up to the Layer menu at the top of the screen, choose New, and then choose Layer via Copy:
Or, for a much faster way to duplicate a layer, simply press the keyboard shortcut Ctrl+J (Win) / Command+J (Mac). Either way duplicates the Background layer, and if we look at our Layers palette, we can see that we now have two layers. The Background layer, which contains the original image, is sitting safely on the bottom, and a copy of the image, which Photoshop has automatically named "Layer 1", is sitting above it. We can see what's on the layer by looking at the preview thumbnail on the left of each layer. In this case, both layers are showing exactly the same image:
Step 2: Convert For Smart Filters
To use Smart Filters on a layer, we first need to convert the layer into a Smart Object. Smart Objects were first introduced in Photoshop CS2 and Smart Filters are essentially an extension of them. You can't work with Smart Filters without first converting a layer into a Smart Object, so to do that, with "Layer 1" selected in the Layers palette (selected layers are highlighted in blue), go up to the Filter menu at the top of the screen and choose Convert for Smart Filters:
Photoshop will pop up a warning box telling us what we already know, which is that we're converting the layer into a Smart Object:
Click OK to close the warning box. Nothing will appear to have happened to the image in the document window, but if we look again at the Layers palette, we can see that the preview thumbnail on "Layer 1" now shows a small icon in the bottom right corner. This icon tells us that the layer is now a Smart Object:
Step 3: Apply The Motion Blur Filter
Applying a Smart Filter to a Smart Object in Photoshop is no different from applying a normal filter to a normal layer, except that when you apply a filter to a Smart Object, Photoshop automatically converts the filter into a Smart Filter. To see what I mean, let's apply our first Motion Blur filter. With "Layer 1" still selected, go up to the Filter menu, choose Blur, and then choose Motion Blur:
This brings up the Motion Blur filter dialog box, which allows us to control both the angle and distance of the motion blur. For this first blur, I'm going to set the Angle to 90°, which gives me vertical blur streaks. Then, to adjust the distance of the blur, I'll click and drag the Distance slider at the bottom of the dialog box. Dragging the slider towards the right increases the length of the blur streaks, while dragging to the left decreases their length. There's no specific value to enter here since it will depend on your image and the intensity of the effect you want to achieve, so keep an eye on your image for a preview of the results as you drag the slider. I'm going to set my distance to a value of around 452 pixels, which gives me nice, long streaks. Since we're using Smart Filters, there's no need to worry about getting things right at this point since we can go back and change the filter settings as often as we like without harming the image in any way:
Click OK when you're done to exit out of the dialog box and apply the filter effect. My image now appears as a series of vertical color streaks:
Step 4: Change The Blend Mode To Hard Light
Currently, the blur streaks on "Layer 1" are completely blocking the original image on the Background layer from view. What we need is for the streaks to blend in with the original image. For that, all we need to do is change the layer's blend mode. You'll find the blend mode option in the top left corner of the Layers palette. By default, it's set to "Normal". Click either on the word "Normal" or on the arrows to the right of the word, which brings up a list of additional blend modes. Choose Hard Light from the list:
If you recall from our Five Essential Blend Modes For Photo Editing tutorial, the Hard Light blend mode is part of the Contrast group of blend modes, meaning that not only does it blend the layers together, it increases image contrast at the same time. It also happens to boost color saturation. Here's my image after changing the blend mode to Hard Light:
You can also try the Overlay blend mode for a slightly more subtle effect, but for the image I'm using here, Hard Light gives me better results.
So far, everything that we've done with our Smart Filter seems no different from a normal filter, but here's the big difference. With normal filters, once we've applied them to a layer, we've made physical and permanent changes to the pixels on that layer. There's no way to edit the filter settings once the filter has been applied, other than undoing your steps and re-applying the filter again. With Smart Filters, that's not the case. We can easily go back and make changes to the filter settings any time we want, as often as we want! If we look below "Layer 1" in the Layers palette, we can see the Motion Blur Smart Filter that we just applied. To bring its dialog box back up at any time, simply double-click on the filter's name:
The dialog box will instantly pop open, allowing you to make any changes you like to the settings. Click OK when you're done to exit out of the dialog box and apply the new settings to the layer. With Smart Filters, we're free to experiment with different filters and settings without worrying that anything we're doing is permanent. Even when we're done creating our effect here, you can always go back and try different Angle and Distance settings for the Motion Blurs to compare different results!
We'll apply additional motion blur streaks to the image next!
Step 5: Duplicate "Layer 1"
Just as we did with the Background layer, let's create a copy of "Layer 1". Again, you can go up to the Layer menu, choose New, and then choose Layer via Copy, but you'll find that the keyboard shortcut for duplicating a layer, Ctrl+J (Win) / Command+J (Mac), is much faster and is one of the shortcuts in Photoshop you'll definitely want to memorize. We can see in the Layers palette that we now have a copy of "Layer 1" sitting above the original:
Step 6: Edit The Motion Blur Smart Filter Settings
There's two things to note with the copy of "Layer 1" that we just created. First, if you look at the blend mode option in the top left corner of the Layers palette, you'll see that it's already set to Hard Light for us, since that's what "Layer 1" was set to. More importantly though, if we look below the layer, we can see that our Motion Blur Smart Filter has also been copied! Currently, the filter is using the exact same settings we applied to "Layer 1", but as we learned a moment ago, to edit the settings for a Smart Filter, simply double-click on the filter's name:

The Motion Blur dialog box pops open and this time, I'm going to set the Angle to -45° which gives me diagonal blur streaks running from the top left to the bottom right. I'm going to reduce the length of the streaks this time by dragging the Distance slider a little to the left, but feel free to experiment on your own by keeping an eye on the image in the document window as you drag the slider:
Click OK when you're done to exit out of the dialog box and apply the second Motion Blur settings. Here's my image now with two Motion Blurs applied, each set to a different angle:
Again, if at any time you want to try different settings for either Motion Blur filter, simply double-click on its name in the Layers palette to bring its dialog box back up and make your changes.
Step 7: Create Another Copy Of The Layer
Let's add one more Motion Blur to the effect. First, press Ctrl+J (Win) / Command+J (Mac) to create a copy of, well, the copy we created back in Step 5. You should now have four layers in the Layers palette, with the newest layer ("Layer 1 copy 2") sitting at the top. Normally, I would recommend renaming the layers to something more descriptive, but in this case, since we're only working with a few layers, it's not really necessary.
Just as we saw back in Step 6, both the blend mode and the Motion Blur Smart Filter have been copied with the layer:

Step 8: Edit The Motion Blur Smart Filter Settings
Double-click on the latest Motion Blur filter in the Layers palette to bring up its dialog box:
For this third Motion Blur, I'll set my Angle to 45° which gives me diagonal streaks once again but this time running from the bottom left to the top right. I'll also reduce the length of the blur streaks a bit further by dragging the Distance slider towards the right, but again, feel free to choose the settings that work best for your image:
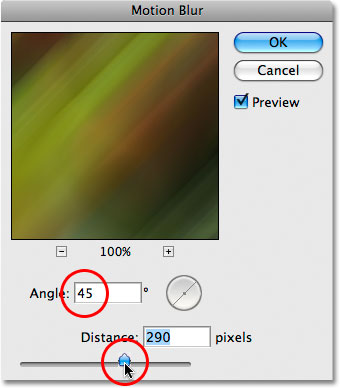
Click OK when you're done to exit out of the dialog box. Here's my image after applying the third Motion Blur:
Next, we'll finish things off by grouping layers together and masking away some of the blur effect!
Step 9: Group The Top Three Layers Together
I'm going to finish off my "painterly glow" effect by masking part of it away to reveal the original photo underneath. Since the effect is spread across three layers, the easiest thing to do is group the three layers together and then add a layer mask to the entire group. First, we'll need to select all three layers at once, so click on the top layer in the Layers palette to select it if it isn't selected already. Then hold down your Shift key and click on "Layer 1" directly above the Background layer. This will select both layers as well as the layer in between. You should see all three layers above the Background layer highlighted in blue:
With all three layers selected, go up to the Layer menu and choose Group Layers:
Nothing will seem to have happened to the image in the document window, but we can see in the Layers palette that we now have a layer group named "Group 1". Layer groups are represented by a folder icon, and all three of the layers we selected a moment ago are now inside the folder (the group):
Step 10: Add A Layer Mask To The Group
With the layer group selected, click on the Layer Mask icon at the bottom of the Layers palette. It's the icon that looks like a rectangle with a circle cut out of the middle:
This adds a layer mask to the group. Even though we can't actually see the mask in the document window, we know that the mask has been added because we can see a layer mask preview thumbnail between the folder icon and the group's name in the Layers palette:
Step 11: Select The Gradient Tool
Grab the Gradient Tool from the Tools palette, or simply press the letter G to select it with the keyboard shortcut:
Step 12: Select A Black To White Radial Gradient
With the Gradient Tool selected, the Options Bar at the top of the screen will change to show options for working with gradients. Click on the small down-pointing arrow to the right of the gradient preview area, which opens a gradient selection box, and select the black to white gradient, third gradient from the left, top row:
To the right of the gradient preview area is a series of icons that allow us to choose between different gradient shapes. Click on the Radial Gradient icon, second from the left, to select it:
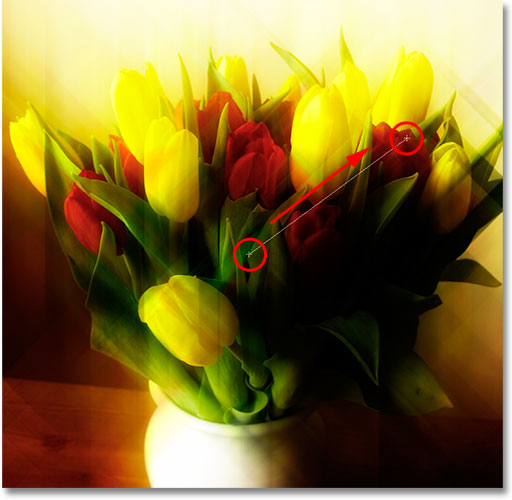
Step 13: Draw A Radial Gradient On The Layer Mask
Make sure the layer mask preview thumbnail is selected in the Layers palette. You should see a white highlight border around it, indicating that it's selected. If not, click on the thumbnail to select it. Then click and drag out a black to white radial gradient on the layer mask. The spot where you first click will become the center point of the gradient. At this spot, the "painterly glow" effect will be completely hidden from view, allowing the original image on the Background layer below it to show through. As you move away from the center point in all directions, more and more of the glow effect will be visible, becoming 100% visible at the outer edge of the gradient.
In my case, I'm going to click near the center of the image, which will become the center point for the gradient, then I'll drag towards the edge of the flowers to set the gradient's size:
When I release my mouse button, Photoshop draws the gradient on the layer mask. If we look at the mask's preview thumbnail in the Layers palette, we can see the radial gradient that was created:
And here, after masking away part of the effect to allow some of the original image to show through, is my final "painterly glow" effect: