
Painted Edges Photo Border Effect
In this Photoshop Effects tutorial, we're going to combine a couple of different effects. First, we'll give a photo easy-to-create painted edges, and then we'll make it look as if it was printed on canvas. We'll be loading in and using a couple of Photoshop's brushes for the painted edges effect, adding a layer mask to paint on, and finally using the Texturizer filter for the canvas effect. When we're done, we'll see how we can use our Photoshop file as a template to quickly and easily give other photos the exact same look!
This version of the tutorial is for Photoshop CS5 and earlier. For Photoshop CS6 and CC (Creative Cloud), check out our fully updated version.
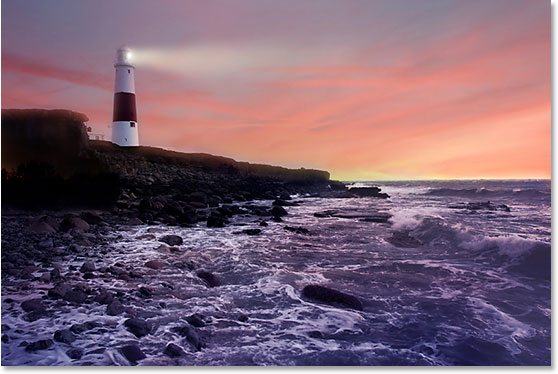
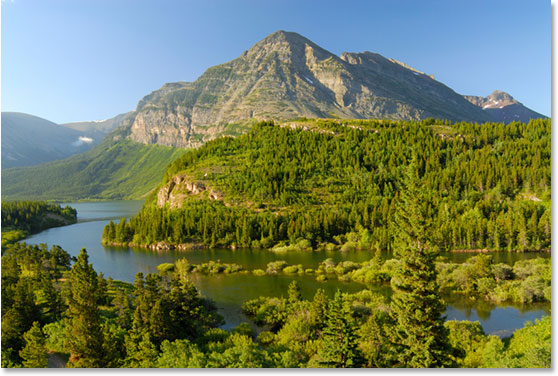
Here's the original image I'll be using for this tutorial:
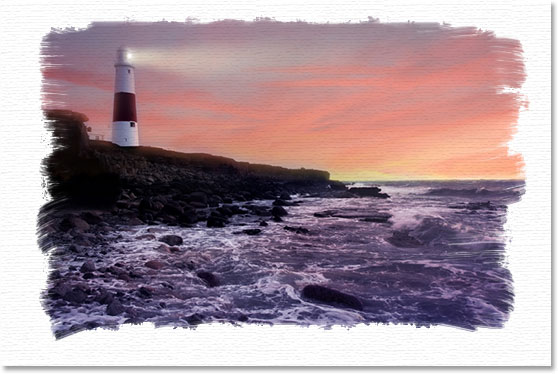
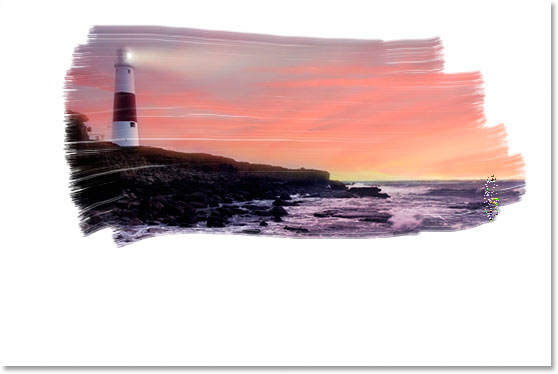
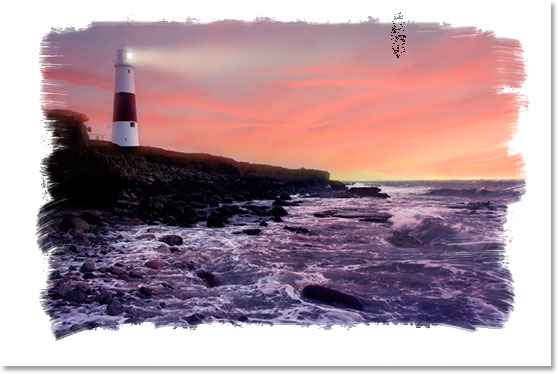
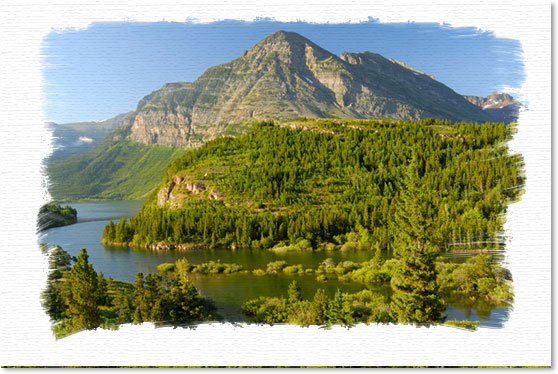
And here's the "painted edges on canvas" effect we're going for:
This tutorial is from our Photo Effects series. Let's get started!
Step 1: Add A New Layer
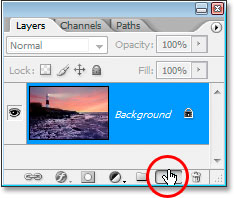
With my photo open in Photoshop, my Layers panel is showing me that I have one layer, the Background layer which Photoshop adds by default and contains my original image:

The first thing I want to do for this effect is add a new blank layer above my Background layer, so I'll click the New Layer icon at the bottom of the Layers panel:
This gives me a new layer above the Background layer, which Photoshop automatically names "Layer 1":
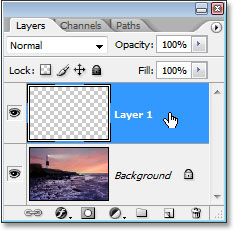
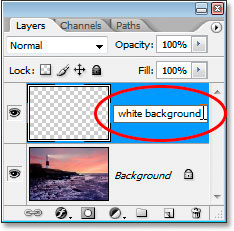
I'm going to double-click directly on the name of the layer and rename it from "Layer 1" to something more descriptive, like "white background", since we'll be filling it with white in the next step and it will eventually appear to be the background on which the photo sits:
Step 2: Fill The New Layer With White
Next, because I want my photo to look like it was painted onto a white background, I need to fill this new layer with white. I could use Photoshop's Fill command for this, but there's an even easier way. First, press the letter D on your keyboard to reset your foreground and background colors to their defaults of black and white, respectively, if they're not set to that already. You'll see them switch back to black and white in Photoshop's Tools palette:

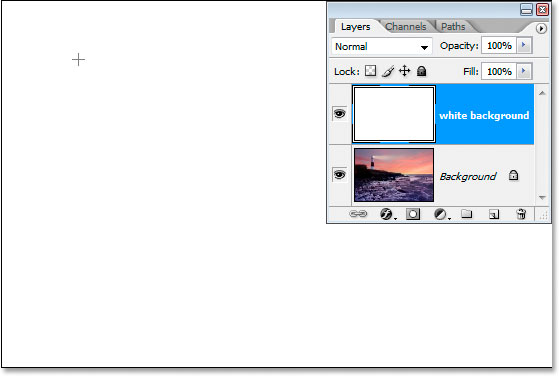
With white now as your background color and the "white background" layer selected in the Layers panel, use the keyboard shortcut Ctrl+Backspace (Win) / Command+Delete (Mac) to fill the layer with white. The image will now be hidden from view temporarily by the solid white layer above it:
Step 3: Load The "Thick Heavy Brushes" Brush Set
To create our painted edges effect, we need a couple of Photoshop's brushes which install with Photoshop but aren't loaded in by default, so we need to load them ourselves, which is very easy to do. First, select the Brush tool by grabbing it from the Tools palette or by pressing the letter B on your keyboard:
With the Brush tool selected, right-click (Win) / Command-click (Mac) anywhere inside the document window to bring up the Brush tool options dialog box, and then click on the little right-pointing arrow in the top right corner of it:
Then select the Thick Heavy Brushes brush set from the list that appears:
A dialog box will pop up asking you if you want to replace your current brush set with this new one. Choose Append rather than OK, so the new brush set gets added in with the default brushes and doesn't replace them altogether:
Step 4:Choose The "Flat Bristle" 111-Pixel Brush
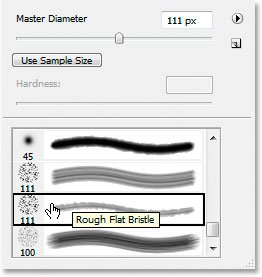
With the Thick Heavy Brushes brush set loaded, scroll down the list of your available brushes until you get near the bottom of the list, and that's where you'll find the Flat Bristle 111-pixel brush. If you have Photoshop's Preferences set up to show tool tips, the name of the brush will appear when you hover your mouse over the brush:
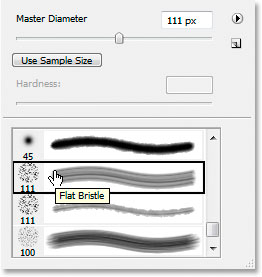
You'll find two 111-pixels brushes down near the bottom. The one we want first is the one on top, but we'll also be using the one below it in a few moments. Now that we have our brush loaded and selected, it's time to start creating our painted edges effect. First, we'll need a layer mask, and we'll add that next.
Step 5: Add A Layer Mask To The "White Background" Layer
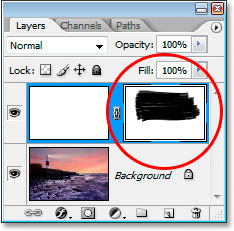
We're going to start painting with our brush to create our painted edges effect, but we're not going to paint directly on the image itself. We're going to paint on a layer mask, and before we can paint on it, we need to create it, so let's do that. Make sure the "white background" layer is selected in the Layers panel, then click on the Add Layer Mask icon at the bottom of the palette:
This will add a layer mask to the "white background" layer. You can see it in the Layers panel directly to the right of the layer's thumbnail preview area:
Using our 111-pixel Flat Bristle brush that we've already selected, and with black already set as our foreground color from when we reset the foreground and background colors to their defaults a moment ago, we're going to paint with black on this layer mask, and as we paint, the photo on the Background layer will begin to re-appear through this solid white layer.
Step 6: Begin Painting From Side To Side On The Layer Mask
Make sure that the layer mask is selected and not the layer itself. You can see the highlight box around the layer mask thumbnail in the screenshot above, which means it's selected. Click on it to select it if it isn't selected for some reason. Then, with the mask selected, begin painting strokes from left to right inside the document window. Because we're painting on the layer mask with black, any areas we paint over will become transparent, revealing the layer below, which in this case is our Background layer containing our photo. You can see the painted edges effect beginning to take shape as you paint with the brush:
The Flat Bristle brush we're using does a nice job of giving us a painted look and feel, not only around the edges but also inside the area we're painting, since it leaves occasional white gaps in the brush stroke which add to the illusion that we really are painting this photo with a dry brush.
You can see in the Layers panel that the areas we're painting over in the document window are showing up as black in the layer mask thumbnail preview area:
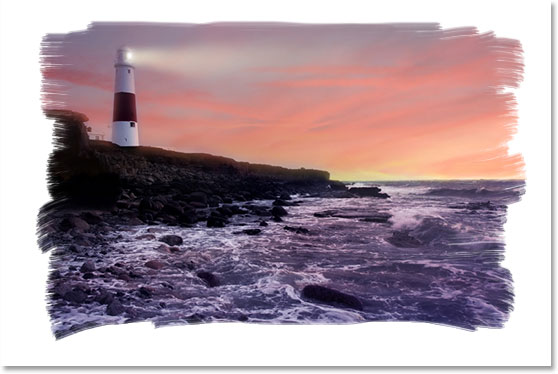
Continue painting with your brush until you're happy with how it looks. If you paint a stroke and it doesn't look right to you, simply undo it with Ctrl+Z (Win) / Command+Z (Mac) and then re-paint the stroke. Here's my result:
We're going to switch to the other 111-pixel brush we loaded and touch up the edges next.
Step 7: Select The 111-pixel "Rough Flat Bristle" Brush
We're going to switch brushes now and touch up the edges to enhance the painted look. Once again, right-click (Win) / Command-click (Mac) anywhere inside the image to bring up the Brush options dialog box, scroll down to near the bottom of the list of available brushes, and this time, click on the 111-pixel brush directly below the one we just used, the Rough Flat Bristle brush:
Step 8: Paint Small Strokes Around The Edges To Enhance The Effect
With the new brush selected, and making sure the layer mask, not the layer itself, is still selected in the Layers panel, go around the edges and paint small strokes to add some specks and paint splatters, enhancing the effect. The trick here is to keep most of the brush inside the already painted area so only a small percentage of it is extending out beyond the edges. You don't want to overdo it here. Allow only a tiny bit of the brush to extend into the white area and paint with very short strokes. Even simply clicking an area once with the brush can be enough. Again, if you feel you made a mistake, press Ctrl+Z (Win) / Command+Z (Mac) to undo and try again. There's no pressure to get it right the first time, so feel free to experiment:
Our painted edges effect is complete! You could stop here if you wanted, but I'm going to take things further and make it look as if the photo was printed on canvas, and we're going to do it in a way that allows us to re-use this Photoshop file as a template for other photos with no repeat steps. We'll do that next.
Step 9: Add A New Layer Above The "White Background" Layer
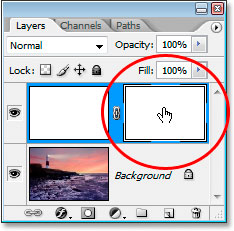
With the "white background" layer selected (it doesn't matter here if the layer or the layer mask is selected, either one will do), add a new layer. This time, let's use the keyboard shortcut, Shift+Ctrl+N (Win) / Shift+Command+N (Mac), which brings up Photoshop's New Layer dialog box:
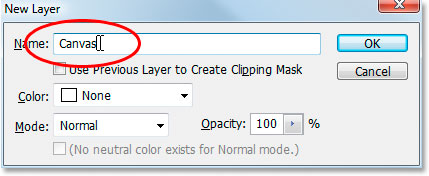
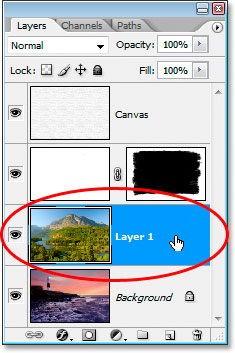
Inside the dialog box, rename the new layer we're creating to "Canvas", as I've circled in red above. Nothing else needs to be changed, then click OK and Photoshop will add the new layer above the "white background" layer and will name it "Canvas":
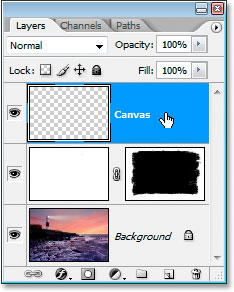
We named it "Canvas" because this layer is going to contain our canvas effect, as we'll see in a moment.
Step 10: Fill The "Canvas" Layer With White
Just as we did with the "white background" layer, use the keyboard shortcut Ctrl+Backspace (Win) / Command+Delete (Mac) to fill this layer with white, since white is still our background color:
Our image is once again hidden from view, but that's okay for the moment.
Step 11: Apply A Canvas Texture To The Layer With The Texturizer Filter
We're now going to apply a canvas texture to this layer. Go up to the Filter menu at the top of the screen, select Texture, and then select Texturizer, which brings up the massive Filter Gallery dialog box showing us the options for the Texturizer filter over on the far right:
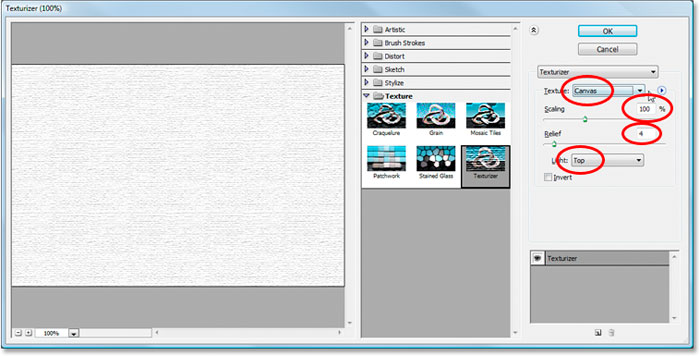
I've circled the options we're interested in with red above. Make sure Texture is set to Canvas, Scaling is set to 100%, Relief is set to 4, and the Light direction is set to Top. Click OK and Photoshop will apply the texture to the "Canvas" layer:
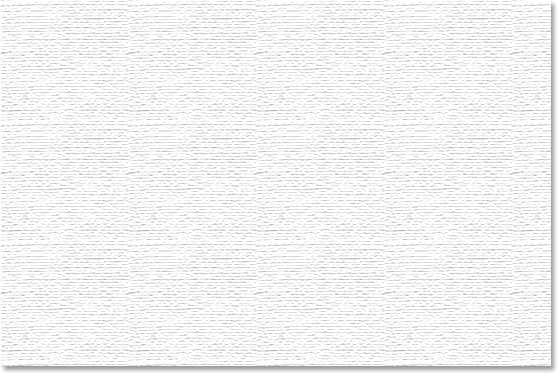
We can see the canvas texture but we can't see our image. We're going to fix that next.
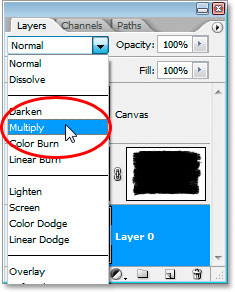
Step 12: Change The Blend Mode Of The "Canvas" Layer To "Multiply"
We're almost done. Just a couple more quick steps to go. In order to see our image through the canvas texture, we're going to change the blend mode of the "Canvas" layer. Go up to the blend mode options at the top of the Layers panel, click on the down-pointing arrow to the right of the word "Normal", and select Multiply from the list:
As soon as we do that, our image becomes visible behind the texture:

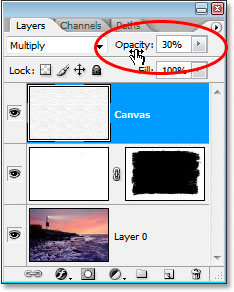
Step 13: Lower The Opacity Of The "Canvas" Layer
The texture effect is too intense though, so let's reduce it, and we can do that by lowering the opacity value of the layer. Go up to the Opacity value in the top right corner of the Layers panel, click your mouse directly on the word "Opacity" to bring up Photoshop's "scrubby sliders", then drag your mouse to the left to lower the opacity. I'm going to lower mine quite a bit, down to 30%:
And there we go, here's my final result with the painted edges effect and the canvas texture lowered to an opacity value of 30%:
The effect is complete. Save your Photoshop .PSD file at this point, since we can now use it as a template to quickly add this same effect to other photos, as we'll see in the final section of this tutorial.
Our "Painted Edges On Canvas" effect is done, and our Photoshop .PSD document is saved. So what if we have another photo that we want to apply this same effect to? Do we have to go through all these steps again? Nope, we sure don't.
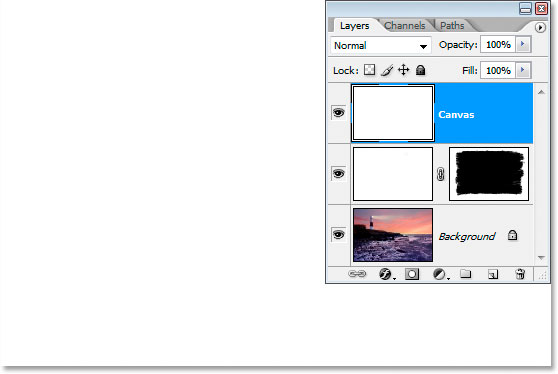
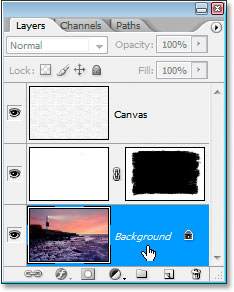
Let's take a look at what we have in our Layers panel now that we've gone through all the steps to create the effect:

We have three layers in total. First, at the bottom is our original Background layer containing the photo. Above that is our "white background" layer containing our painted edges effect. Finally, at the top is our canvas texture layer. Now let's say I have a different photo that I want to use this effect with. I'll use this photo below:
I want to apply the exact same effect to this photo without having to repeat any of the steps. How do I do it? Easy.
Step 1: Select The Background Layer In The Painted Edges Photoshop File
Going back to my "Painted Edges On Canvas" .PSD file, I'm going to click on my Background layer in the Layers panel to select it:
Step 2: Select The Move Tool
Grab the Move tool from the Tools palette, or press the letter M:
Step 3: Drag The New Photo Into The Painted Edges Effect Document
With the Move tool selected and the Background layer selected in the "Painted Edges" Layers panel, click anywhere inside the new photo's document window and drag it into the "Painted Edges" effect document window:
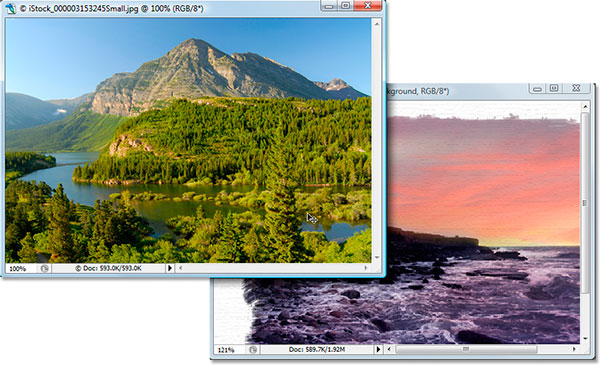
Hold down the Shift key before releasing your mouse after dragging the new image into the effects document, and that will automatically center it in the document.
Let's look at the "Painted Edges On Canvas" document's Layers panel now that I've dragged in my new photo:
Because I selected the Background layer here before dragging the new photo into the document, Photoshop automatically placed the new photo on a new layer directly above the Background layer, effectively blocking the original photo from view, while keeping the two effects layers above it so they remain visible, and the new photo has now replaced the original photo in the effect, without having to redo any of the steps:
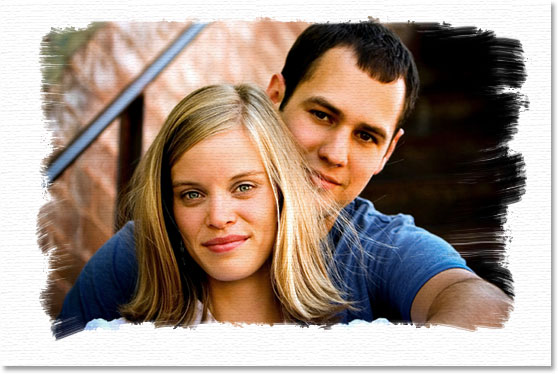
Works great with portrait shots as well:
And there we have it! That's how to create a painted edges photo border with Photoshop! Check out our Photo Effects section for more Photoshop effects tutorials!