
Gritty, Overprocessed Photo Effect With Photoshop
In this Photoshop Effects tutorial, we're going to look at how to give a photo a gritty, overprocessed look to it with extreme levels of contrast and sharpening, noise and washed out colors. Part of the effect will be created with a technique normally used as an advanced way of sharpening an image, but in this case, we'll be taking things well beyond the boundaries of common sense.
This is the sort of thing that would probably get you fired if you were supposed to be doing serious photo editing and retouching work, but I've seen this photo effect used time and time again in advertising, and while the final result looks rather harsh, Photoshop makes creating the effect quick and painless, as we'll see!
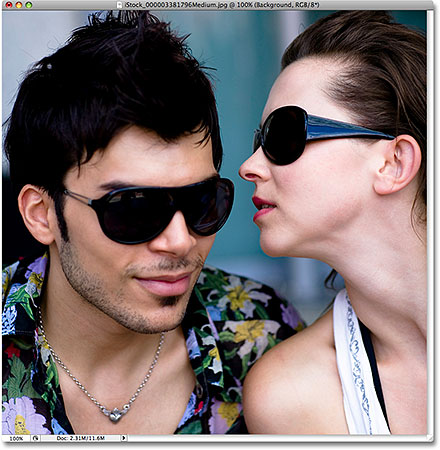
Here's the photo I'll be using for this tutorial:
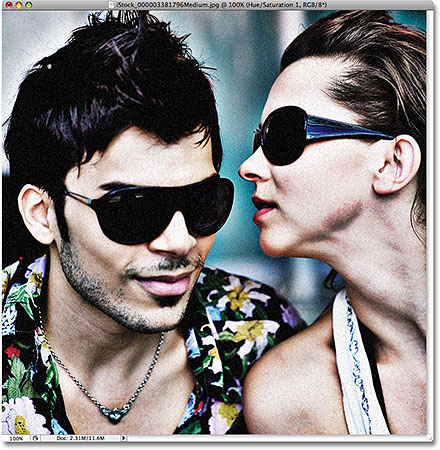
And here's how it will look when we're done:
How To Create A Gritty, Overprocessed Effect
Step 1: Duplicate The Background Layer
With our photo newly opened in Photoshop, let's begin the way we normally do with our photo effects tutorials, and that's by duplicating the Background layer so we'll be free to do whatever we like to our image without harming the original pixel information. If we look in our Layers palette, we can see our photo sitting on the Background layer, which is currently the only layer we have:

To duplicate the layer, go up to the Layer menu at the top of the screen, choose New, and then choose Layer via Copy, or for a much faster way, simply use the keyboard shortcut Ctrl+J (Win) / Command+J (Mac). Either way creates a copy of the Background layer, and if we look again in the Layers palette, we can see the newly created copy, named "Layer 1", sitting above the Background layer:

Step 2: Apply The High Pass Filter
I mentioned at the beginning that part of this effect will be created using a technique normally used for advanced image sharpening, and this is it. With "Layer 1" selected in the Layers palette, go up to the Filter menu at the top of the screen, choose Other, and then choose High Pass:

This brings up the High Pass filter dialog box, and you'll see your photo in the document window become filled with gray. If you want to learn more about how to use the High Pass filter for image sharpening, be sure to check out our Sharpen Images With The High Pass Filter tutorial in our Photo Editing section, but just to quickly summarize, if you look down at the bottom of the dialog box, you'll see the Radius option. If we were using the High Pass filter to apply a normal amount of sharpening to our image, we'd want to keep the Radius value very low, usually somewhere between 1-2 pixels. At this low setting, only the edges of objects in the photo become visible, while the rest of the photo remains solid gray. This allows us to sharpen only the edges of objects, leaving the rest of the photo unsharpened, which usually gives us great results.
For this effect though, we don't want to limit our sharpening to just the edges of objects. We want our sharpening to extend out across most of the image. To do that, we need to increase our Radius value quite a bit. How high you set your Radius value will depend on the size of the image you're working on, but generally speaking, somewhere between 30-35 pixels seems to work well. If you're working on a small image for the web, you'll need to use a much lower setting, possibly around 9-10 pixels. The idea is to keep an eye on your image in the document window and drag the Radius slider to the right until there's very little of the solid gray color remaining and you can clearly see your photo underneath it. I'm going to drag my Radius slider to a value of around 33 pixels:

Click OK when you're done to exit out of the dialog box. Here's my image after applying the High Pass filter:

Step 3: Change The Blend Mode Of The Layer To "Hard Light"
To actually create the sharpening effect, we need to change the blend mode of our layer. Normally, if we were doing serious photo editing work, we'd be changing the blend mode to Overlay, which is one of the blend modes in Photoshop that boosts contrast in an image. Since we're taking things to extreme levels here, we want something that's going to give us even more of a contrast boost than what the Overlay blend mode can offer, so go up to the blend mode option at the top of the Layers palette, which by default is set to "Normal", and change the blend mode to Hard Light:

The Hard Light blend mode also boosts image contrast but to an even greater degree than Overlay does. Here's my image after changing the blend mode of "Layer 1" to Hard Light. Notice how the contrast in the image has increased:

Step 4: Duplicate "Layer 1"
Let's bump up the contrast even further. We can do that simply by duplicating our layer, just like we did when we duplicated the Background layer a moment ago. With "Layer 1" still selected in the Layers palette, go up to the Layer menu at the top of the screen, choose New, and then choose Layer via Copy, or use the keyboard shortcut Ctrl+J (Win) / Command+J (Mac). Either method will duplicate "Layer 1", and if we look in our Layers palette, we can see that we now have a new layer named "Layer 1 copy" sitting above "Layer 1". Notice how the copy of "Layer 1" is already set to the same blend mode (Hard Light) that "Layer 1" was set to:

If we look at our image after duplicating the layer, we can see that the contrast has definitely been increased. Certain areas of the photo, especially skin tones, are starting to look rather harsh and gritty, and we're seeing halo effects around some objects thanks to the high Radius value we set with the High Pass filter. The term "halo effect" refers to a noticeable white glow around objects caused by over sharpening an image. In my photo, the white glow is very noticeable now around the man's hair as well as the side of the woman's sunglasses:

Step 5: Duplicate The Layer Again (Optional)
Depending on your image, you may want to increase the contrast even further. If that's the case, simply press Ctrl+J (Win) / Command+J (Mac) to create another copy of the layer. Our Layers palette now shows a second copy, this one named "Layer 1 copy 2", sitting above the other layers:

If, after duplicating the layer a second time, you find that the contrast is too intense even for this effect, simply lower the opacity of the new layer to tone things down a little. You'll find the Opacity option at the top of the Layers palette directly across from the blend mode option. I'm going to lower the opacity of my layer down to about 50%:

Here's my image after duplicating "Layer 1" a second time and then lowering the opacity of the layer to fine-tune the result. I think it's safe to say that the contrast has now reached extreme levels:

Step 6: Add A New Layer Set To "Hard Light" And Filled With 50% Gray
At this point, we're done with the sharpness and contrast part of the effect. Let's add some noise. For that, we'll need a new layer. We also need to set the blend mode of the new layer to Hard Light and we need to fill the layer with the same solid gray color we saw when we were working with the High Pass filter. Fortunately, we can do all three things at once! Hold down your Alt (Win) / Option (Mac) key and click on the New Layer icon at the bottom of the Layers palette:
Holding down the Alt (Win) / Option (Mac) key tells Photoshop to pop up the New Layer dialog box for us before adding the layer. This gives us the chance to set some options first. At the top of the dialog box is a spot for us to name the new layer if we want to. This isn't absolutely necessary but since I'm getting a bit of a headache seeing layer names like "Layer 1 copy 2", I'm going to name this new layer "Noise". The really important options are down at the bottom of the dialog box. The Mode option allows us to set the blend mode for the new layer. Set the blend mode to Hard Light. As soon as you select Hard Light, you'll see a new option become available directly below it, called Fill with Hard-Light-neutral color (50% gray). This option will fill the new layer with gray. Click inside the checkbox to select it:

Click OK when you're done to exit out of the dialog box, and we can see in the Layers palette that we now have a new layer named "Noise" (assuming you named your new layer). The layer's blend mode has been set to Hard Light for us, and we can see in the layer preview area to the left of the layer's name that it's been filled with 50% gray, which is the shade of gray halfway between black and white:

Step 7: Apply The "Noise" Filter
Go up to the Filter menu at the top of the screen, choose Noise, and then choose Add Noise:

This brings up the Add Noise dialog box. We're going to add some noise to give the effect more of a grainy look to it. First, set the Distribution option at the bottom of the dialog box to Gaussian, then check the Monochromatic option at the very bottom so that our noise appears as black and white dots instead of as little red, green and blue dots. The Amount option determines how much noise is added to the image. In our case, we just want to add a little noise, so I'm going to set my amount to around 4%. You may want to set your Amount value a little higher or lower depending on your image, but you definitely don't want to add too much noise, otherwise it will look like someone spilled salt and pepper all over your photo, which isn't exactly the effect we're going for:

Click OK when you're done to exit out of the dialog box. Here's my image with the noise applied:

Step 8: Add A "Hue/Saturation" Adjustment Layer
We're almost done. All that's left to do is to desaturate the colors in the image. Click on the New Adjustment Layer icon at the bottom of the Layers palette and choose a Hue/Saturation adjustment layer from the list that appears:

Step 9: Desaturate The Color
This brings up the Hue/Saturation dialog box. To give the color in the image more of a muted, washed-out appearance, simply click on the Saturation slider in the middle of the dialog box and drag it towards the left. The further you drag the slider, the more you remove the color from the image. Dragging the slider all the way to the left would completely remove the color, giving you a black and white photo. We don't want to take things quite that far, but I'm going to drag my Saturation slider towards the left until the input box is showing a value of around -40 or so:

Click OK to exit out of the dialog box, and we're done! Here, after desaturating the colors, is my final "overprocessed" result: