
Instant Photo To Oil Painting Action In Photoshop
In this Photo Effects tutorial, we're going to take a photo and make it look like an oil painting, which is a popular and fun thing to do with Photoshop. Problem is, creating the effect requires the use of a few different filters and memorizing the settings for each one, which isn't fun, and it's also a little time consuming, meaning it takes more than five seconds.
To get around that problem, we're going to save our steps as an action. When we're done, not only will we have converted our photo into an oil painting, we'll have a handy "Instant Photo To Oil Painting" action that we can apply to any photo from then on, letting Photoshop do all the work for us! Not only is this a great effect to add to any photo, amateur or professional, but if you happen to be a pro photographer, once you've saved the action, you can charge future clients big time bucks for an effect that you created in the time it took you to press a keyboard shortcut. Not that you would do that, of course. That would just be wrong.
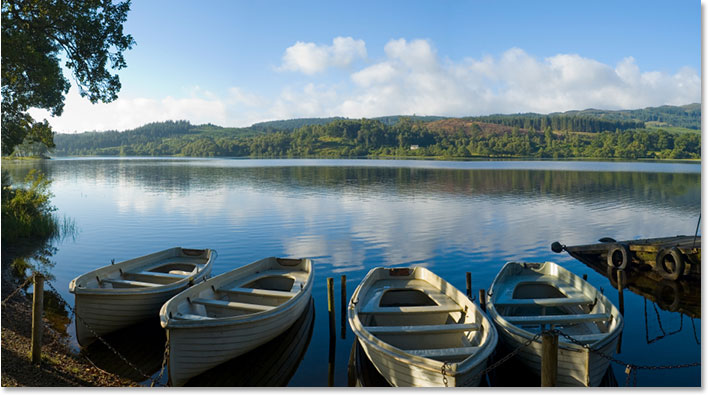
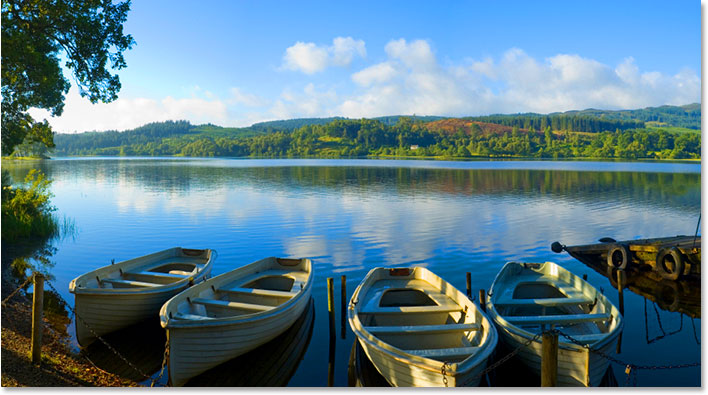
Anyway, here's the original image I'll be using for this tutorial:
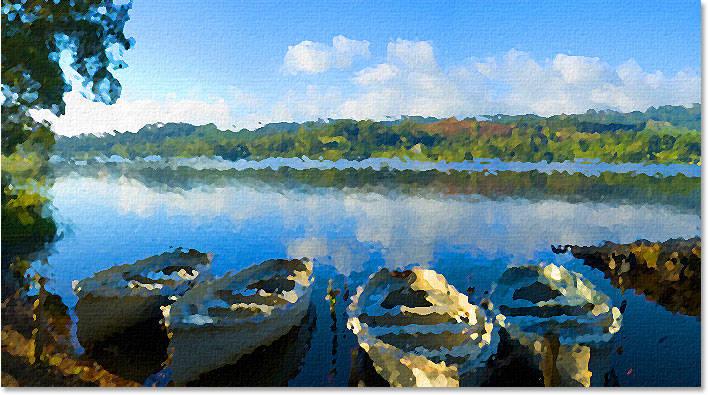
And here's the "oil painting" version. It may look complicated, but as I said, once we're done with this tutorial, you'll be able to instantly convert any photo into an oil painting without having to redo any of the steps we're about to go through.

This tutorial is from our Photo Effects series. Let's get started!
Step 1: Create A New Action
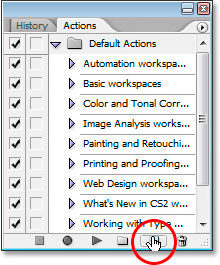
Since we only want to have to go through these steps once, we're going to record them all as an action. But before we can do that, we need to create one. Go to your Actions palette (it's grouped in with the History palette) and click on the Create New Action button at the bottom of the palette:
This will bring up the New Action dialog box:
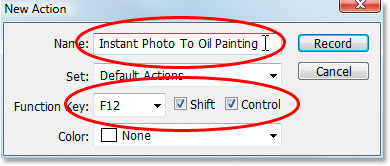
Name the new action "Instant Photo To Oil Painting", or a name of your choosing, as I've circled in red above. To be able to quickly access this action when we're done, I'm giving mine a keyboard shortcut of Shift+Ctrl+F12, again as I've circled above. That would be Shift+Command+F12 on a Mac. You can assign whichever function key you like, and if you want to include the Shift and/or Ctrl key (again, Command on a Mac), click inside the checkbox to the left of their names.
When you're ready, click the Record button and Photoshop will begin recording our steps.
Step 2: Increase The Saturation Of The Image With Hue/Saturation
We want our oil painting to have rich, striking colors, so let's increase the saturation of our image using a Hue/Saturation adjustment. Go up to the Image menu at the top of the screen, select Adjustments, and then select Hue/Saturation, or use the keyboard shortcut Ctrl+U (Win) / Command+U (Mac). This brings up the Hue/Saturation dialog box:
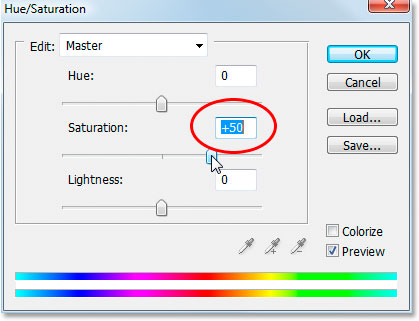
Click and drag the middle slider bar directly below the word "Saturation" to increase the saturation of the photo around 40-50%. I'm setting mine to 50% as I've circled above. The idea is to increase the color saturation until it looks like you've gone a bit too far. 40-50% should do the trick.
Here's my image so far after increasing the saturation:
We're going to head off into the world of Photoshop's Filter Gallery next.
Step 3: Apply The "Glass" Distort Filter
We're going to use Photoshop's Filter Gallery in these next few steps to stack several filter effects on top of each other. If you've never played around in the Filter Gallery, you should definitely take some time and check it out on your own. We could access the Filter Gallery directly from the Filter menu, but instead, let's just bring up our first filter, which will automatically launch the Gallery anyway. Go up to the Filter menu at the top of the screen, select Distort, and then select Glass. As I mentioned, this will launch the Filter Gallery, set to the Glass filter options:
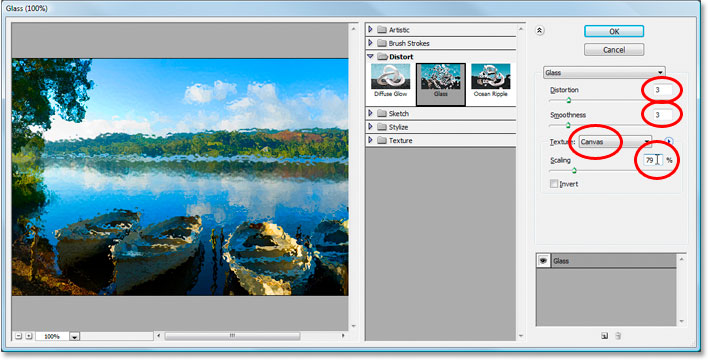
It's a little hard to see in the screenshot above, thanks to the Filter Gallery being so massively huge, but I've circled the settings we want to change. Set Distortion to 3, Smoothness also to 3, select Canvas from the Texture drop-down menu, and set the Scaling value to 79%. Don't click OK yet, we have a few more filters to add.
Step 4: Add A New Effect Layer
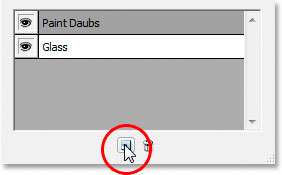
The cool thing about Photoshop's Filter Gallery is that it's almost like a Layers palette for filter effects, meaning that we can stack filters on top of each other, just as we stack layers in the Layers palette, effectively combining the filters together to create effects that just wouldn't be possible otherwise. Currently, we have only the Glass filter loaded into the Gallery, as you can see in the bottom right corner of the screenshot above. We want to add a new "effect layer" above it, and to do that, click on the New Effect Layer icon in the bottom right of the Filter Gallery (directly to the left of the trash bin icon):
This will add a new effect layer above the Glass layer.
Step 5: Select The "Paint Daubs" Filter From The "Artistic" Set
With our new effect layer created above the Glass layer, open up the Artistic filters set in the center column of the Filter Gallery and choose the Paint Daubs filter:
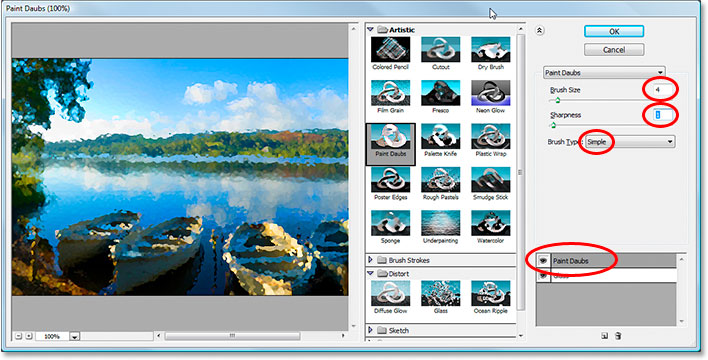
Again it's a little hard to see in the screenshot, but I've circled the settings we want to change here. Set Brush Size to 4, Sharpness to 1, and from the Brush Type drop-down list, choose Simple. Notice at the bottom of the dialog box that it's now showing the Paint Daubs effect layer above the Glass layer (again circled in red).
Step 6: Add Another New Effect Layer
Two more filters to go. We need another effect layer, so once again, click on the New Effect Layer icon to add a new effect layer, this time above the Paint Daubs layer.
Step 7: Select The "Angled Strokes" Filter From The "Brush Strokes" Set
Two effects down, two to go. With our new effects layer created above the Paint Daubs layer, open up the Brush Strokes set in the center of the Filter Gallery and choose Angled Strokes:
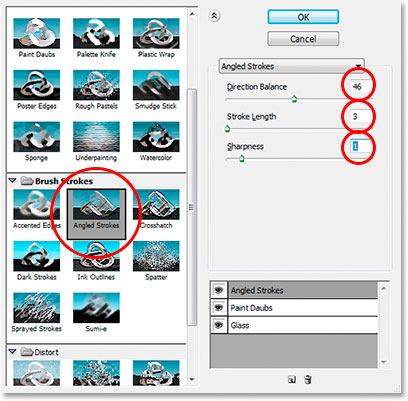
I won't bother showing the large preview area in the left of the Filter Gallery this time so we have more room to see the settings we're concerned with in the options. Set Direction Balance to 46, Stroke Length to 3, and Sharpness to 1. Again notice at the bottom of the dialog box that it's now showing three effect layers stacked on top of each other. One more to go!
Step 8: Add A Fourth And Final Effect Layer
Last time, click the New Effect Layer icon to add a fourth and final effect layer, this time above "Angled Strokes":
Step 9: Select The "Texturizer" Filter From The "Texture" Set
Finally, open up the Texture set in the center of the Filter Gallery and choose Texturizer:
Again, I won't bother showing the large preview area on the left in the Filter Gallery since it takes up too much space in the screenshot. From the Texture drop-down list, choose Canvas, then set Scaling to 65% and Relief to 2. Last but not least, select Top Left from the Light drop-down menu to set the light direction.
When you're done all that, click OK to apply all four filters at once to the photo. Here's what mine looks like at this point:
Step 10: Duplicate The Background Layer
Now that we've saturated the colors in the photo and applied all four filter effects to it, we need to duplicate the Background layer, and the easiest way to do that is to use the keyboard shortcut Ctrl+J (Win) / Command+J (Mac), which gives us a copy of our Background layer in the Layers palette:
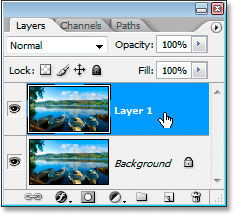
Normally, I'd be renaming this new layer to something more descriptive than what Photoshop calls it by default, "Layer 1", but since all of these steps are being recorded into an action and we'll never be doing this again manually, there's no point. "Layer 1" will do just fine.
Step 11: Desaturate The Layer
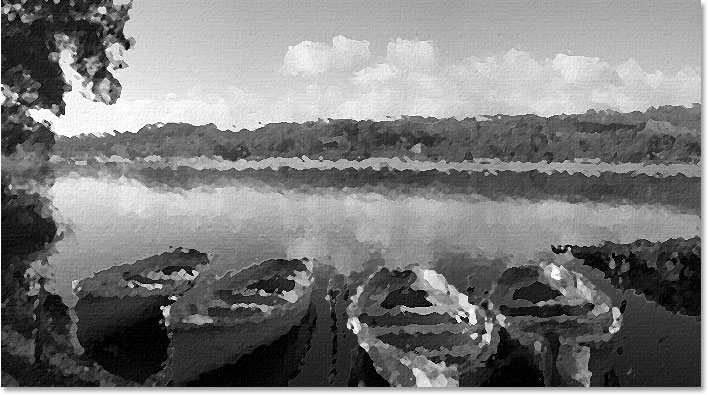
We need to quickly desaturate the colors from this layer, leaving it black and white. We could do this the "getting paid by the hour" way by going up to the Image menu at the top of the screen, selecting Adjustments, and then selecting Desaturate, but that takes too long. Let's use the faster keyboard shortcut Shift+Ctrl+U (Win) / Shift+Command+U (Mac). Here's my image with "Layer 1" desaturated:
Step 12: Change The Blend Mode Of The New Layer To "Overlay"
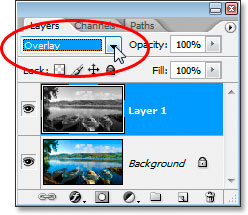
We need to change the blend mode of this desaturated layer from it's default of "Normal" to "Overlay". To do that, with "Layer 1" selected, go up to the top of the Layers palette and click on the down-pointing arrow directly to the right of the word "Normal", which brings up a drop-down list of available blend modes. Choose Overlay from the list:
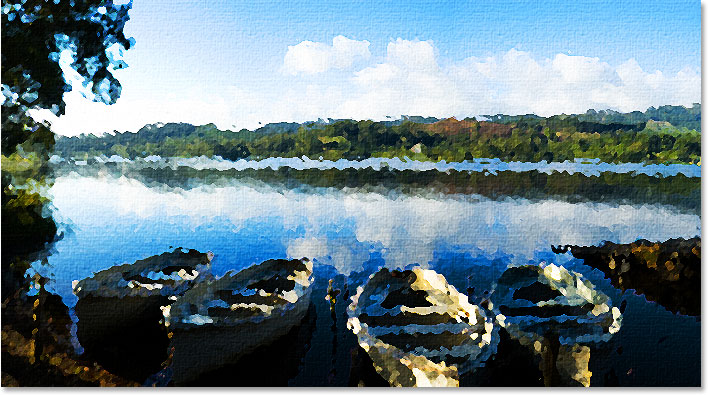
And here's how the image looks now:
Step 13: Apply The Emboss Filter
We have one last filter effect to apply. Go back up to the Filter menu, and this time select Stylize and then Emboss to bring up the Emboss filter's dialog box:
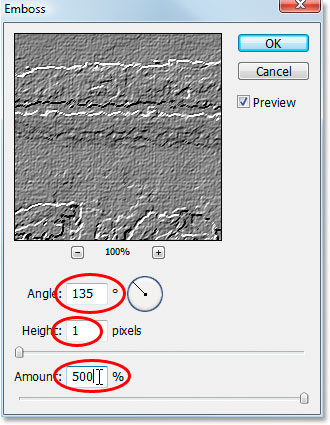
As I've circled above, set the Angle of the effect to 135%, the Height to 1 pixel, and drag the slider bar at the bottom all the way to the right to set the Amount to 500%. Click OK when you're done.
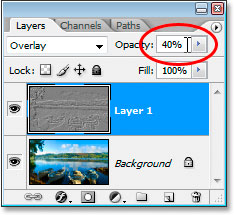
Step 14: Lower The Opacity Of The Layer
Finally, to finish off the effect, with "Layer 1" still selected, go up to the Opacity option in the top right of the Layers palette and lower it from 100% down to 40%:
Step 15: Click "Stop" To Finish The Action
Our "Instant Photo To Oil Painting" effect is now complete, which means we can tell Photoshop to stop recording the action. To do that, click the Stop icon at the bottom of the Actions palette:
And there we go, all done! Not only have we converted this photo into what looks like an oil painting, but we now have all of our steps saved as an action, which if you remember from when we started, I assigned a keyboard shortcut of Shift+Ctrl+F12 to, which would be Shift+Command+F12 on a Mac. So now, the next time I want to apply this effect to another photo, I can just use the keyboard shortcut, then sit back and let Photoshop do all the work.
Just one thing to point out, depending on how powerful your computer is, it could take a few seconds (or more) for Photoshop to go through all the steps in the action, so don't worry if you press your keyboard shortcut and things seem to be moving a little slow. Just sit back and let Photoshop do its thing.
Having said that, we're done! Here's my original photo once again for comparison:
And here's my "Photo To Oil Painting" result:
And there we have it! That's how to turn a photo into an oil painting and save it as an action in Photoshop! Check out our Photo Effects section for more Photoshop effects tutorials!