
Add Light Streaks To A Photo With Photoshop
In this Photoshop Effects tutorial, we're going to look at how to add colorful streaks of light to a photo. You've probably seen these light streaks used in ads for everything from shampoo to cellphones, and in fact they were used most recently in a cool ad for a new cellphone from Sprint and Samsung. Creating them is as easy as drawing a path with Photoshop's Pen Tool and then stroking the path with a brush, with a couple of simple layer styles used to add the actual color and light effect. It's all fairly easy, but if you've never used the Pen Tool before or you're not sure how to draw paths, you might want to check out our Making Selections With The Pen Tool tutorial first, where I cover everything you need to know about drawing and editing paths with the Pen.
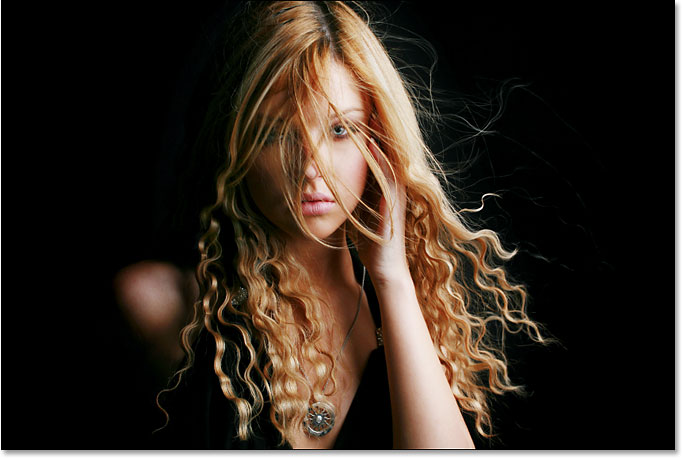
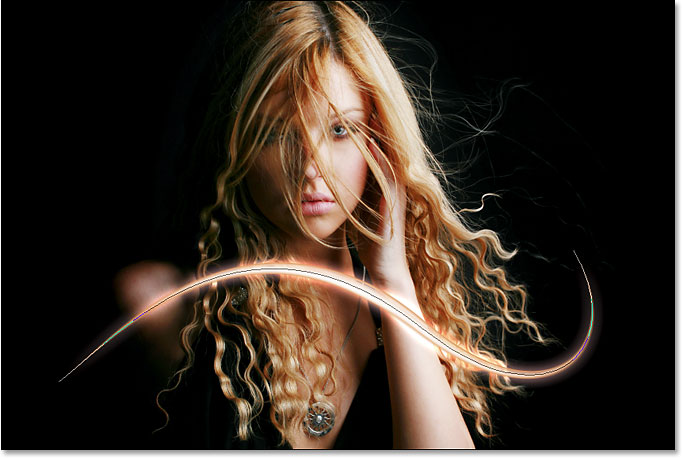
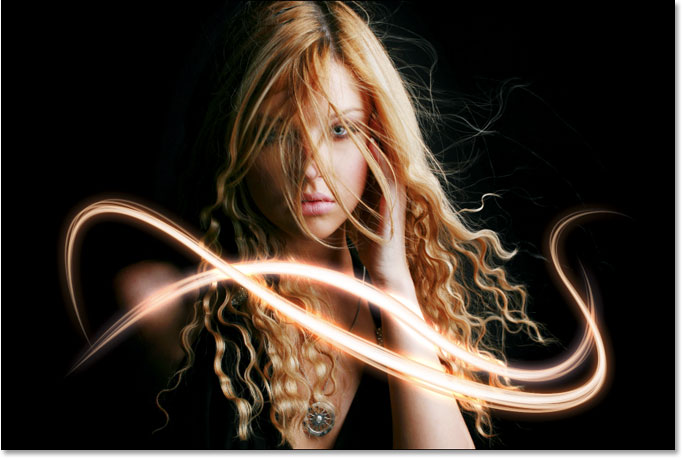
Here's the image I'll be working with in this tutorial:
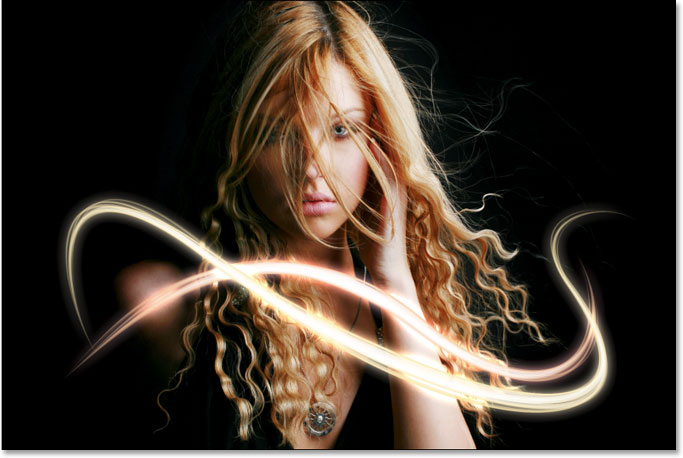
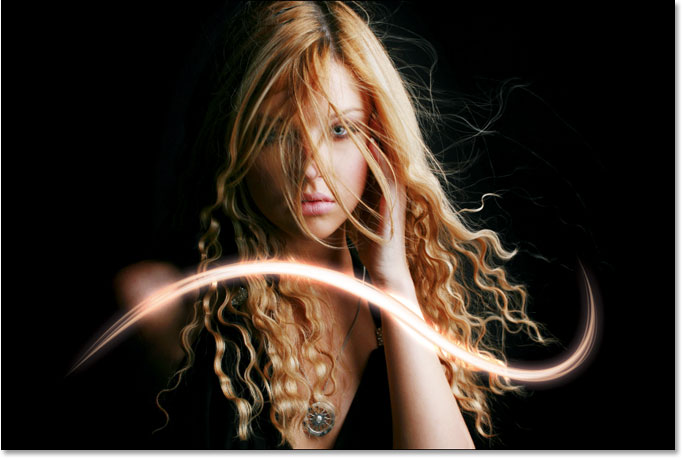
And here's how it will look after adding our light streaks:
Step 1: Add A New Blank Layer
We're going to be adding our light streaks on their own separate layer, so the first thing we need to do is add a new blank layer to our document. To do that, click on the New Layer icon at the bottom of the Layers palette:
This adds a new blank layer, which Photoshop names "Layer 1", above our Background layer:
Step 2: Select The Pen Tool
As I mentioned at the beginning, we're going to create our light streaks by drawing paths and then stroking the paths with a brush. To draw paths, we need the Pen Tool, so select it from the Tools palette. You can also press the letter P to select it with the keyboard shortcut:
Step 3: Select The "Paths" Option In The Options Bar
Photoshop gives us three different things that we can do with the Pen Tool. We can use it to draw vector-based shapes, we can draw paths with it (which is what we want to do), and we can draw pixel-based shapes. We select between these three options by clicking on their icons up in the Options Bar at the top of the screen. You'll see three little square icons grouped together on the left side of the Options Bar. Click on the icon in the middle, which is the Paths option:
Step 4: Draw A Path Where You Want The First Light Streak To Appear
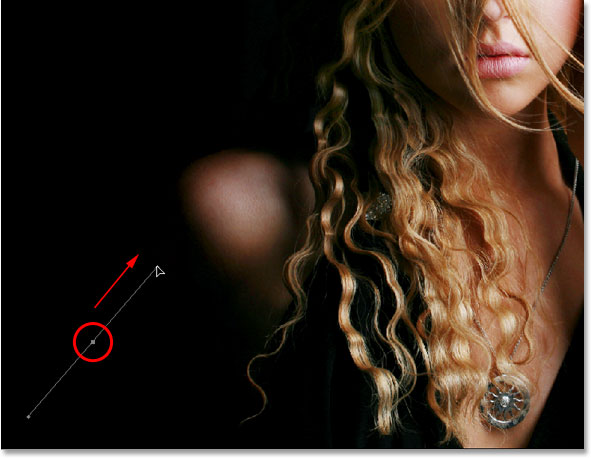
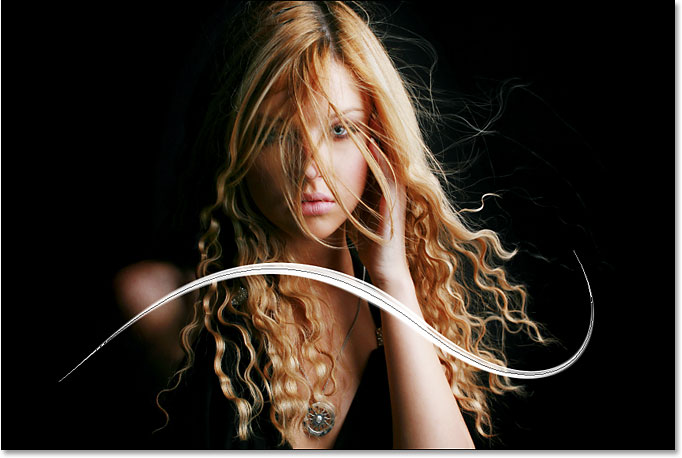
With the Pen Tool selected and the Paths option chosen in the Options Bar, we're ready to draw our first path. I want my light streaks to appear in the bottom half of the photo, somewhere around the woman's shoulders and neck area, so that's where I'll draw my first path. You'll want to add several curves to your path to make the light streak more interesting. I'll start by clicking somewhere in the bottom left corner of the image to add my first anchor point, then I'll drag out direction handles in the direction that I want my path to follow. Again, be sure to check out our Making Selections With The Pen Tool tutorial first if what I just said made no sense to you:
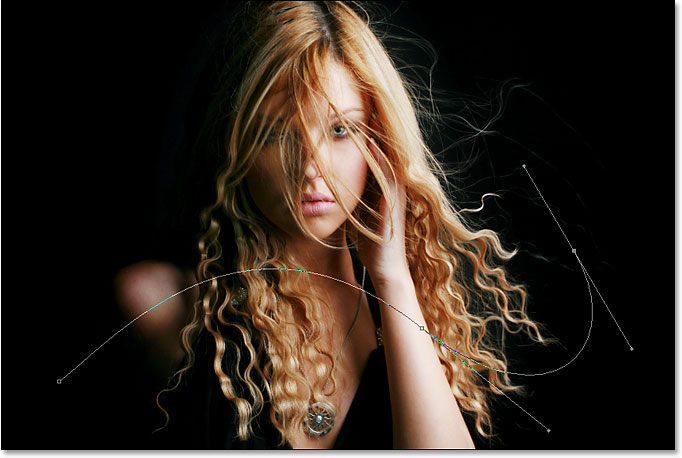
I'll continue drawing the rest of my first path by clicking and dragging a couple more times with the Pen Tool to add the rest of my path segments. I now have my first path running from left to right across the woman's shoulders and neck area:
Step 5: Select The Brush Tool
Now that we've drawn our first path, the next step is to stroke it with a brush. For that, we'll need Photoshop's Brush Tool, so select it from the Tools palette, or simply press the letter B on your keyboard:
Step 6: Select The "40 Sampled Tip" Brush
Photoshop comes with several brushes that would work well for our light streak effect, but after trying a few of them out, I've found one I like the best. To select it, we'll need to bring up the Brushes palette. There's a few different ways to bring up the Brushes palette, and one of them is to click on the Brushes palette toggle icon in the Options Bar at the top of the screen:

When the Brushes palette appears, click on the words Brush Tip Shape in the top left corner of the palette. Then, in the Brush tip selection area on the right, scroll down near the bottom of the list and select the 40 Sampled Tip brush. It just says "40" in the preview area, but if you have Tool Tips enabled in Photoshop's Preferences, you'll see the words "Sampled Tip" appear when you hover your mouse over the brush:
Step 7: Lower The "Spacing" Amount To 1%
Down at the bottom of the Brushes palette, directly above the brush preview area, you'll see the Spacing option. Whenever you paint with a brush in Photoshop, even though it usually appears as though you're painting one continuous stroke, what Photoshop is really doing is "stamping" the image over and over again with the brush tip. If the "stamps" are close enough together, they appear as a continuous stroke.
The Spacing option determines how far apart the stamps will appear, and by default, the option is set to 30% for our "40 Sampled Tip" brush. That's too much of a space for our effect. Use the slider bar to lower the Spacing amount all the way down to 1%. If you look at the brush preview area after lowering the Spacing amount to 1%, you'll see that the brush now appears as one continuous stroke:
Step 8: Set The Brush Size Control To "Pen Pressure"
If we were to stroke the path with our brush right now, the light streak effect wouldn't look very good because the brush would appear at the exact same size all along the path. We need the brush to taper off at both ends to create the illusion that the light streak is actually beginning at one end and ending at the other. For that, we'll need to tell Photoshop to simulate pen pressure for us, as if we were drawing with a pen tablet.
Click directly on the words Shape Dynamics on the left of the Brushes palette, directly below "Brush Tip Shape". Make sure you click directly on the words, not just in the checkbox to the left of the words. Clicking inside the checkbox will enable the Shape Dynamics options but won't allow us to change any of them. We need to click on the words themselves to get access to the options. Once you've clicked on the words, you'll see the Shape Dynamics options appear on the right of the palette. At the very top, you'll see the words "Size Jitter" with a slider bar, and directly below the slider bar is the Control option. This is where we get to decide how to control the size of our brush. We want Photoshop to simulate pen pressure, so select Pen Pressure from the Control drop-down menu:
Now, at the moment, all we've done is told Photoshop that we want to control the size of our brush according to pen pressure, but what if you don't actually have a pen tablet? If you don't have one connected to your computer, you'll see a little warning icon appear to the left of the word "Control" telling you that a pen tablet is required, but don't worry about it. In a moment, we're going to be telling Photoshop to simulate pen pressure for us, so for this effect, it makes no difference whether you have a pen tablet or not.
Step 9: Set Your Foreground Color To White
We have our brush ready to go. Now all we need to do is choose the color we want to paint with. We're going to want to paint with white, which means we need our Foreground color to be white. Press the letter D on your keyboard to make sure your Foreground and Background colors are reset to their defaults, with black as your Foreground color and white as your Background color. Then press the letter X to swap them, making white your Foreground color:
Step 10: Save Your Path
We have our path, we have our brush, and we've set our Foreground color to white. We're ready to create our first light streak! Switch over to Photoshop's Paths palette, which you'll find grouped in with the Layers and Channels palettes. You'll see your path listed, which is currently named "Work Path", along with a preview of the path on the left, similar to how layers are shown in the Layers palette with their name on the right and a preview area on the left. Whenever you create a new path, Photoshop automatically names it "Work Path", which means it's temporary. If you don't save the path before drawing a new one, the new path will replace the previous one and you'll have lost it. In many cases, this isn't a problem, but let's save our path just in case we want to go back to it later.
To save a path, all we need to do is rename it. Simply double-click on the name "Work Path" and Photoshop will pop up the Save Path dialog box, with the suggested name of "Path 1" already entered for you. Click OK to exit out of the dialog box and Photoshop will rename the path "Path 1". The path is now saved:
Step 11: Stroke The Path With The Brush
Let's create our first light streak. Click on the small, right-pointing arrow in the top right corner of the Paths palette, which brings up the Paths palette's fly-out menu, then select Stroke Path from the list of options:
This brings up the Stroke Path dialog box. We want to stroke the path with our brush, so make sure the Tool option is set to Brush. Then, to tell Photoshop to simulate pen pressure for us, click inside the checkbox to the left of the words Simulate Pressure:
Click OK to exit out of the dialog box and Photoshop will stroke the path with the brush, creating our first light streak. Notice how the brush stroke tapers off at both ends thanks to that "Simulate Pressure" option:
If you think your brush stroke is either too thick or too narrow, simply press Ctrl-Z (Win) / Command-Z (Mac) to undo the stroke, then make your brush larger or smaller by pressing either the left or right bracket keys on your keyboard. The left bracket key makes the brush smaller, and the right bracket key makes it larger. Try again once you've resized your brush.
We've added our first light streak, but it doesn't look much like a light streak at the moment. It looks like a fancy white brush stroke, which is exactly what it is. To make it look more like a light streak, we need to add some color and some glow effects, and for that, we'll use a couple of simple layer styles.
Step 12: Add An "Outer Glow" Layer Style
Switch back over to your Layers palette. You'll see your white brush stroke in the preview area of "Layer 1". Click on the Layer Styles icon at the bottom of the Layers palette and select Outer Glow from the list of layer styles that appears:
This brings up Photoshop's Layer Style dialog box set to the Outer Glow options in the middle column. Change the Blend Mode option at the top to Linear Light, which will give us a much more intense glow than what we'd normally get. Then choose a color for your glow by clicking on the small color swatch directly below the word "Noise". This will bring up Photoshop's Color Picker. You can either choose your color from the Color Picker, or if you prefer, you can sample a color directly from the image. To sample a color, simply move your mouse cursor over the image. You'll see your mouse icon turn into the Eyedropper icon. Move the eyedropper over the color you want to sample, then click to sample it. I'm going to sample a light area of the woman's skin to use as my outer glow color:

Once you've chosen your color, click OK to exit out of the Color Picker. Lastly, increase the Size of the outer glow to somewhere around 30 pixels. You may need to raise or lower that amount depending on the size and resolution of your image:
Don't exit out of the Layer Style dialog box just yet because we still have one more layer style to add. Here's how my light streak looks so far after adding my outer glow:

Step 13: Add An "Inner Glow" Layer Style
We've added an outer glow layer style to our light streak. Now let's add an inner glow style. With the Layer Style dialog box still open, click on the words Inner Glow on the left of the dialog box, directly below "Outer Glow":
You'll see the Inner Glow options appear in the middle column of the dialog box. Once again change the Blend Mode option at the top to Linear Light. Then click on the color swatch below the word "Noise" and either choose a color from the Color Picker or, as I did with the outer glow, sample a color directly from the image. I'm going to sample a darker area of the woman's skin for my inner glow color:
Once you've chosen the color for your inner glow, click OK to exit out of the Color Picker. Finally, increase the Size of your inner glow to around 10 pixels. As with the outer glow, you may need to play around with this value a bit depending on the size and resolution of your image:
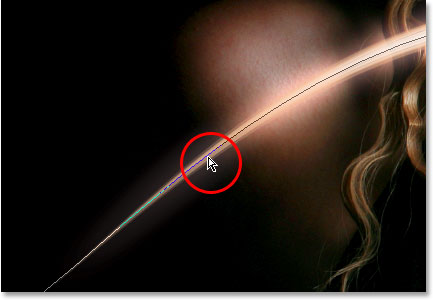
Click OK when you're done to exit out of the Layer Style dialog box. Your light streak should now have an intense glow to it:
That thin dark line we're seeing through the middle of our light streak is the path. Don't worry, it won't be there when we're done.
Step 14: Edit The Path To Create A Slight Variation Of It
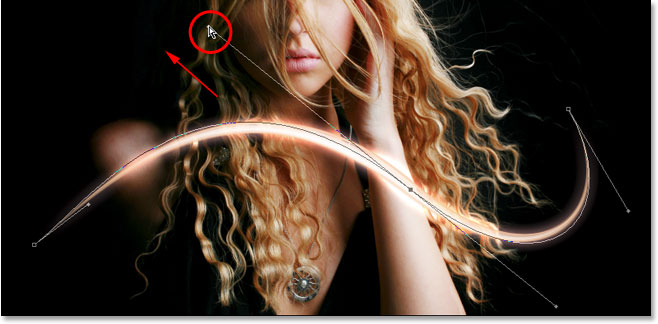
Let's make our light streak a bit more interesting by adding a couple more streaks to it. We can do that easily by simply editing our path to create some slight variations of it and then stroking each variation with our brush. Switch back to your Paths palette so we can edit our path. Then, hold down your Ctrl (Win) / Command (Mac) key and move your mouse cursor directly over any part of the path. As soon as it's over the path, you'll see the cursor turn into a white pointer, which means you now have temporary access to Photoshop's Direct Selection Tool, which is the tool we need to edit our path:
Click on the path with the Direct Selection Tool to select it, then make some minor adjustments to the path to create a slightly different path. You can drag an anchor point to a slightly different spot, or move direction handles to adjust the curves of the path, or even drag a path segment to a slightly different position. Just don't touch the anchor points at either end of the path because we want each variation we create to begin and end at the exact same spot. So other than those two anchor points, the rest of the path can be edited any way you like. We're not looking for major changes to the path. Small, subtle changes are all we need.
Here, I've changed the two main curves of my path slightly by dragging the two direction handles extending out from my middle anchor point. You can see how the curves of the path no longer exactly match the curve of the first light streak:
We can now stroke this variation of the path with our brush. But before we do, we'll probably want to use a slightly smaller brush this time, so press the left bracket key on your keyboard a couple of times to make the brush a bit smaller.
To stroke the variation of our path, there's no need to go through the hassle of selecting "Stroke Path" from the Paths palette's fly-out menu like we did last time. Simply click on the Stroke Path icon at the bottom of the Paths palette:
Photoshop strokes the new path we created with our brush. Since we're still working on the same layer in the Layers palette, the Outer Glow and Inner Glow layer styles are automatically applied to our new light streak:
Step 15: Create A Couple More Path Variations And Stroke Them With The Brush
Repeat the previous step one or two more times to create more variations of the path and stroke each one with the brush. Try changing the size of the brush each time using the left and right bracket keys to add even more interest to the light streak. If you don't like the brush stroke you just added, simply press Ctrl+Z (Win) / Command+Z (Mac) to undo it, then re-edit the path and try again.
If you want to see what your light streak looks like without the path blocking your view, simply click anywhere in the empty area below the path in the Paths palette. This will deselect the path and hide it from view. To see the path again, click on it in the Paths palette. You'll need to have your path visible any time you want to stroke it with your brush. If the path is not visible, the icons at the bottom of the Paths palette become grayed out and unavailable.
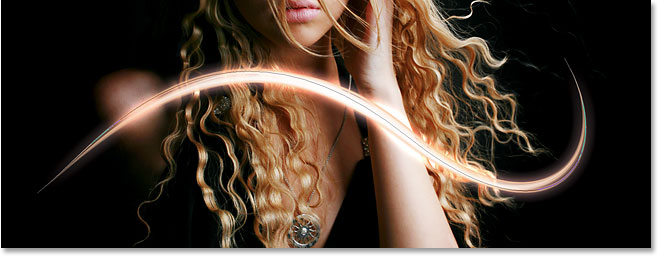
Here's my image after editing my path a couple more times and stroking each new path variation with the brush. Again, since we're still working on the same layer, "Layer 1", in the Layers palette, the Outer Glow and Inner Glow layer styles are automatically applied to each new brush stroke. I've hidden my path from view so we can see more easily what the light streak now looks like with all its different variations:
Step 16: Copy The Layer Styles On "Layer 1"
And with that, we've created our first light streak! You're probably going to want to add at least one more to your photo, and it's a good idea to place each light streak on its own layer, but we can cut down on some of the work we'll need to do by copying the layer styles we've already applied to our first light streak and simply pasting them onto each new layer we create. Switch back over to your Layers palette. You should still have "Layer 1" selected. Go up to the Layer menu at the top of the screen, choose Layer Style, and then choose Copy Layer Style:
Step 17: Add A New Blank Layer
Click on the New Layer icon at the bottom of the Layers palette to add another blank layer. Photoshop will add the new layer above "Layer 1" and automatically name it "Layer 2":
Step 18: Paste The Layer Styles Onto The New Layer
With the new layer selected, go back up to the Layer menu at the top of the screen, choose Layer Style once again, and this time, choose Paste Layer Style:
The Outer Glow and Inner Glow styles from "Layer 1" are now added to "Layer 2" and will automatically be applied to the next light streak we create!
Step 19: Add Another Light Streak
With a new layer added and the layer styles from "Layer 1" already applied to the new layer, we can easily create a second light streak. Simply draw a new path with the Pen Tool, save the path if you want by renaming it "Path 2" (or whatever you want to name it), then stroke the path with the brush. Once you've created the main light streak, hold down Ctrl (Win) / Command (Mac) to access the Direct Selection Tool and edit the path, moving anchor points, direction handles and/or path segments to create a few slight variations of it, and then stroke each variation with the brush, using a different brush size each time.
Here's my result after adding a second light streak to my photo:
If you don't want both light streaks to be the same color, you can easily change the colors simply by editing the layer styles. Let's say I want my second light streak to be a different color. To edit the layer styles, all I need to do is double-click on the Layer Style icon on the far right of "Layer 2":
This will pop open the Layer Style dialog box for me. All I'd need to do is click on the words Outer Glow on the left side of the dialog box, which brings up the Outer Glow options in the middle column, then click on the color swatch and choose a new color either from the Color Picker or by sampling a different color from the image. Click OK to exit out of the Color Picker, then click on the words Inner Glow on the left to access the Inner Glow options. Click the color swatch, choose a new color, click OK to exit out of the Color Picker, then click OK to exit out of the Layer Style dialog box. You can edit the colors of the light streaks any time you want simply by editing the layer styles.
Here's my final result after editing the layer styles on "Layer 2" and changing the color of my second light streak slightly, using colors I sampled from the woman's hair:
And there we have it! That's how to add colorful light streaks to an image with Photoshop! Visit our Photo Effects section for more Photoshop effects tutorials!