
Infrared Photo Effect With Photoshop
In this Photoshop Effects tutorial, we're going to learn how to simulate the look of infrared photography in Photoshop. We'll be taking a look at Photoshop's Channels palette and seeing how to isolate a color channel as well as how to apply filters to color channels, we'll be using adjustment layers, specifically the Channel Mixer adjustment layer to adjust how much impact each individual channel has on the image, we'll be using a few different layer blend modes, adding some noise, and at the end, seeing how to bring some of the color from the original image back into the effect.
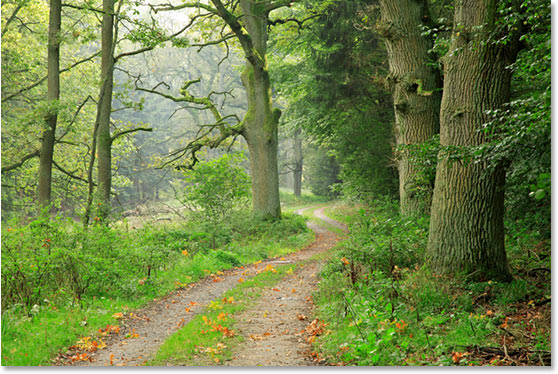
The term "infrared" literally means "below red", and without getting into science or color theory, that means we as human beings can't see it. Yet even though you and I can't see infrared light, most digital cameras can, and with the use of an infrared lens filter, infrared photography can bring that light within our visible range, capturing and creating images that have a truly unique, mysterious and otherworldly look to them. Fortunately, this same look can be created quite easily in Photoshop, as we'll see in this tutorial. Since different objects in the world reflect different amounts of infrared light, the results you get with this effect will depend a lot on which type of photo you're using it with. Outdoor scenes with lots of green trees and foilage tend to work best, and that's what I'll be using for this tutorial, but try it out with other types of photos as well to see what you get.
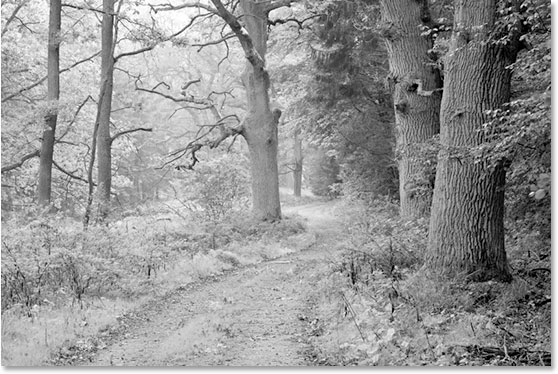
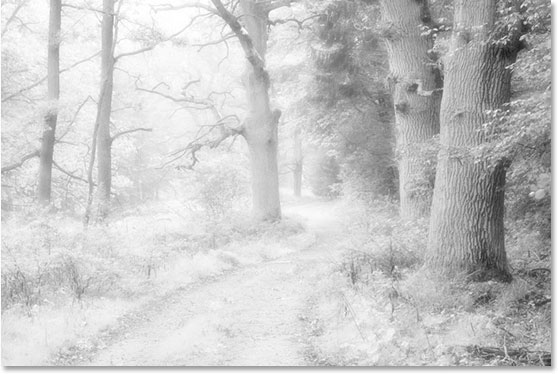
Here's the original image I'll be using for this tutorial:
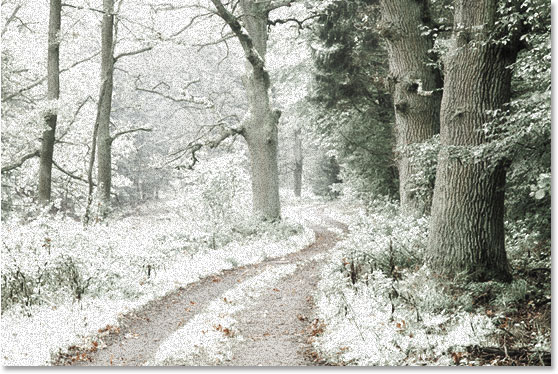
And here's the finished effect:
This tutorial is from our Photo Effects series. Let's get started!
Step 1: Duplicate The Background Layer
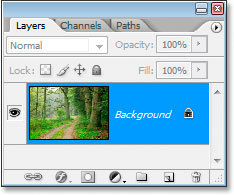
With my photo open in Photoshop, I currently have one layer in my Layers palette, the "Background" layer, which contains my original image:
The first thing I need to do in creating this effect is to duplicate this layer, and I'll do that with the keyboard shortcut, Ctrl+J (Win) / Command+J (Mac), which tells Photoshop to give me a copy of this layer directly above it:
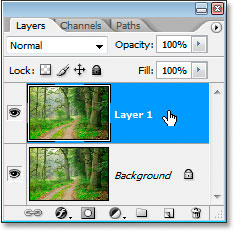
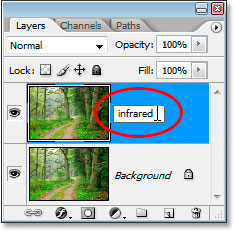
Photoshop automatically names the layer "Layer 1", which tells me nothing about it, so I'm going to double-click directly on the name of the layer and rename it to "infrared":
Step 2: Select The Green Channel In The Channels Palette
Go to your Channels palette (it's grouped in beside the Layers palette) and click on the Green channel to select it:

This will turn your image temporarily black and white:
If you don't understand yet how channels in Photoshop work, it may seem odd that when you selected the green color channel in the Channels palette, the image turned black and white instead of, well, green. We won't get into the details here of how channels work, since that would take an entire tutorial on its own, but what you're seeing here is in fact the green color information in the image, not as you and I see it but as Photoshop sees it, since Photoshop sees everything as either black, white, or some shade of gray in between. If that makes little sense to you, don't worry, you don't need to understand it to create this effect. Simply knowing to click on the green channel in the Channels palette to select it is enough.
We're going to blur this green channel next.
Step 3: Apply The Gaussian Blur Filter To The Green Channel
With the Green channel selected in the Channels palette, go up to the Filter menu at the top of the screen, select Blur, and then select Gaussian Blur to bring up Photoshop's Gaussian Blur dialog box:
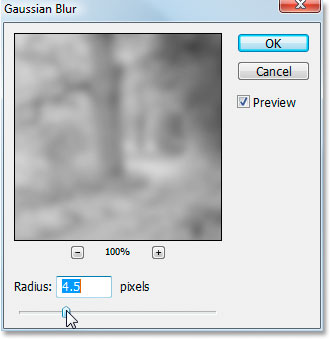
Drag the slider bar at the bottom of the Gaussian Blur dialog box left or right to increase or decrease the amount of blur you'll be applying. I'm using a low-resolution image for this tutorial since it's for the web, and for me, a Radius value of about 4.5 pixels gives me a nice soft blur effect. Your image will most likely be much higher resolution, especially if it came from a fairly recent digital camera, so you'll need to use a higher Radius value. Add a good amount of blurring while still being able to make out the basic details of the image, as I've done here:

Click OK when you're done to exit out of the Gaussian Blur filter.
Step 4: Change The Blend Mode Of The Infrared Layer To "Screen"
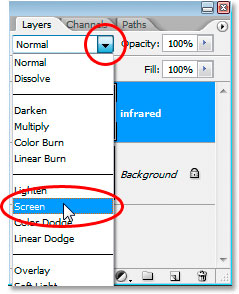
Now that we've applied the Gaussian Blur filter to the Green channel, switch back to the Layers palette and, with the "infrared" layer still selected, change the blend mode of the layer from Normal to Screen. To do that, go up to the top of the Layers palette and click on the down-pointing arrow directly to the right of the word "Normal", which brings up a list of available layer blend modes. Click on "Screen" to select it:
Here's my image after changing the "infrared" layer blend mode to "Screen":
Already at this stage, the image is looking pretty cool, but we're not quite done yet. We're going to be using a Channel Mixer adjustment layer next.
Step 5: Add A Channel Mixer Adjustment Layer
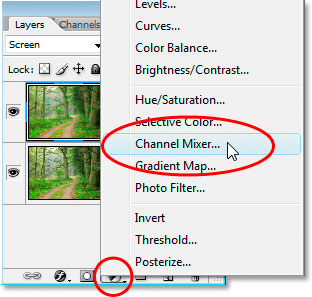
We need to bring up a Channel Mixer adjustment layer at this point, and we can do that by clicking on the New Adjustment Layer icon at the bottom of the Layers palette and selecting Channel Mixer from the list:
This brings up the Channel Mixer dialog box:
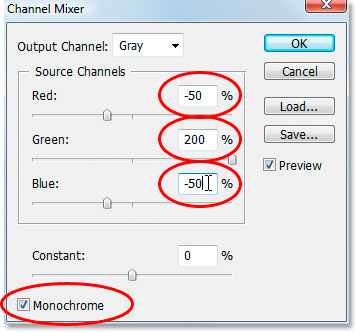
I've circled in red the options we need to change. In the "Source Channels" section, set Red to -50%, Green to 200%, and Blue to the same as red, -50%. The general rule with these values in the Channel Mixer is that you want to keep the total value of all three channels at 100%, otherwise you'll either be losing contrast in the image or losing detail in the highlights, which is why, in order to set the Green value to 200%, we lowered both the Red and Blue values to -50%, giving us our 100%. Again, not something you need to know. I just like to toss these things out there.
Finally, click the Monochrome checkbox in the bottom left corner of the dialog box to keep the image in grayscale mode. Click OK when you're done.
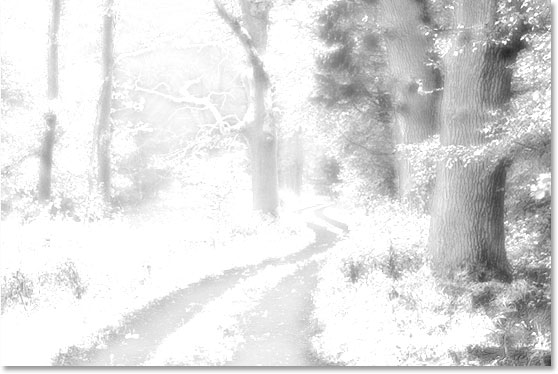
Here's my image with the Channel Mixer adjustment layer applied:
Step 6: Lower The Opacity Of The "Infrared" Layer
At this point, the infrared effect is too intense. Let's reduce it by lowering the opacity of the "infrared" layer. First, click on the "infrared" layer in the Layers palette to select it, then go up to the Opacity option in the top right corner of the Layers palette, hover your mouse directly over the word "Opacity" to turn your mouse cursor into the "scrubby slider" icon, then click and drag to the left to lower the opacity value:
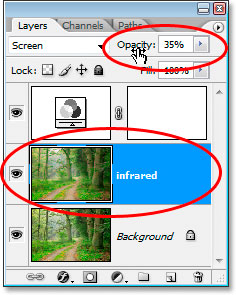
You'll probably have to reduce the opacity quite a bit. I've reduced mine to 35% in the screenshot above.
Here's my result:

The effect is pretty much complete at this point, but it's too clean. Infrared photos typically have a lot of grain in them, so to finish off the effect, we're going to add some noise.
Step 7: Add A New Layer Above The Channel Mixer Adjustment Layer
Click on the Channel Mixer adjustment layer in the Layers palette to select it, then use the keyboard shortcut Shift+Ctrl+N (Win) / Shift+Command+N (Mac) to bring up Photoshop's New Layer dialog box:
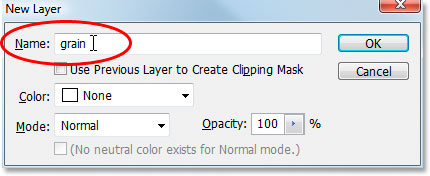
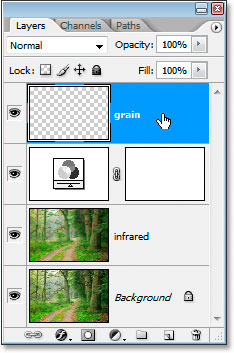
Name the new layer "grain" as I've done in the screenshot above, and then click OK. Photoshop will add a new blank layer named "grain" above the Channel Mixer in the Layers palette:
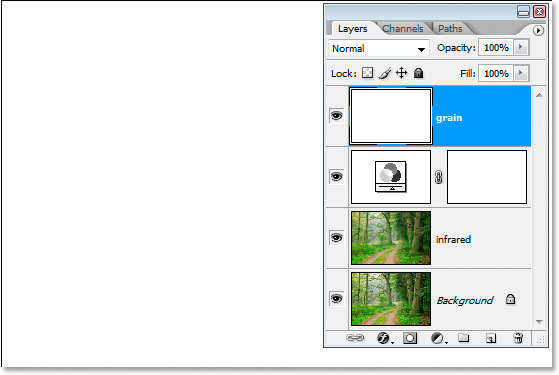
Step 8: Fill The "Grain" Layer With White
Press the letter D on your keyboard to reset Photoshop's foreground and background colors to their defaults of black and white, respectively. Then, with the "grain" layer selected in the Layers palette, use the keyboard shortcut Ctrl+Backspace (Win) / Command+Delete (Mac) to quickly fill this layer with solid white. The image in the document window will temporarily be hidden from view:
Step 9: Add Noise To This Layer
With the "grain" layer still selected, go up to the Filter menu at the top of the screen, select Noise, and then select Add Noise to bring up the "Add Noise" filter dialog box:
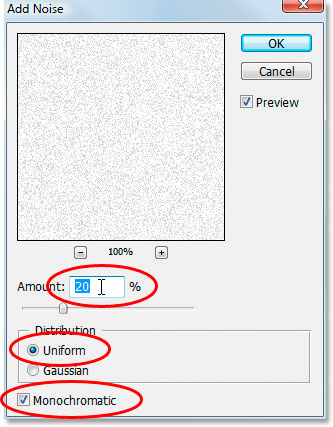
As circled in red above, set the Amount to 20%, set Distribution to Uniform, and make sure Monochromatic at the bottom is checked.
This adds our grain to the image, but problem is, we still can't see the image below the grain. We'll fix that next:

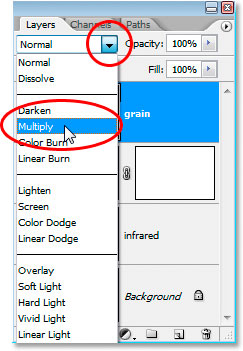
Step 10: Change The Blend Mode Of The "Grain" Layer To "Multiply"
Just as we did for the "infrared" layer, we're going to change the blend mode of this "grain" layer, except this time, instead of changing it to "Screen", we're going to change it to "Multiply". With the "grain" layer selected, go back up to the blend mode options at the top of the Layers palette and this time choose Multiply from the list:
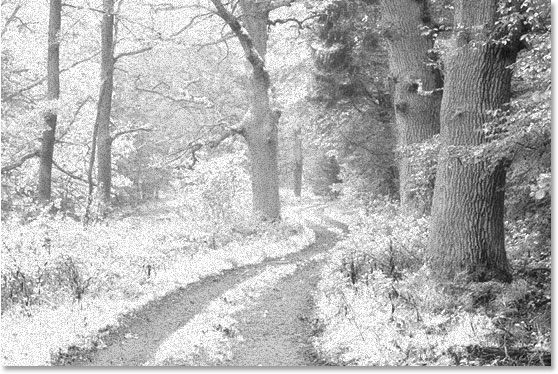
As soon as we change the blend mode to Multiply, the image becomes visible once again through the grain, giving us our final effect:
If you find you've added too much grain to the image, simply lower the opacity of the grain layer to reduce the amount.
There's one more thing we could do here with our image, and that's to bring back some of the original color. You can of course leave it as is if you want, but if you want to bring back some color, here's how.
Step 11: Duplicate The Background Layer Once Again
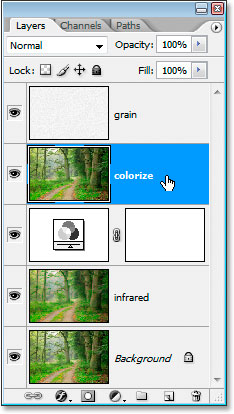
Click on the Background layer in the Layers palette to select it, then once again use the keyboard shortcut Ctrl+J (Win) / Command+J (Mac) to duplicate it. Since you should always be in the habit of naming your layers, I'll rename this layer to "colorize":
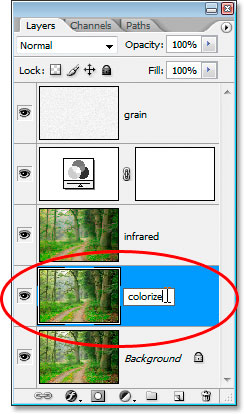
Step 12: Drag The "Colorize" Layer Up Between The Channel Mixer and Grain Layers
Next, click on the "colorize" layer and drag it up between the Channel Mixer adjustment layer and the "grain" layer. You'll see the line dividing the two layers highlight as you get close to it. Release your mouse at that point to drop the layer into place:
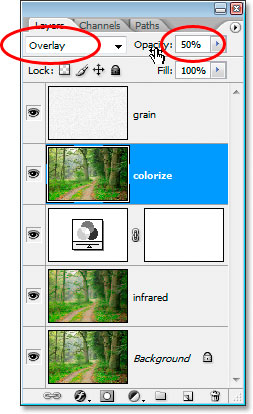
Step 13: Change The Blend Mode To "Overlay" And Lower The Opacity To 50%
Finally, change the blend mode of the "colorize" layer from Normal to Overlay and then lower the opacity of the layer to 50%:
And we're done! We've brought some of the original color back into the effect. Here's the image as it was back before we started:
And here's the final result:
And there we have it! That's how to create an infrared photo effect with Photoshop! Check out our Photo Effects section for more Photoshop effects tutorials!