
High Key Glow Effect With Photoshop
In this Photoshop tutorial, we'll learn how to create a high key glow effect, which is a fancy way of saying we'll be applying a glow only to the highlights in an image. This effect works especially well with wedding portraits since it's great for adding a romantic, magical look to your photos, and wedding portraits usually contain lots of bright white areas to work with.
We'll see how to easily select just the highlights in an image using Photoshop's Color Range command, then we'll copy the highlights to their own layer and create the glow effect using a blur filter and one of Photoshop's layer blend modes designed for lightening images. Finally, we'll combine layers into a layer group and use a layer mask to limit the areas where the glow effect is visibile. It may sound like a lot of work, but once you know how to do it, the entire effect can be completed in just a few minutes! I'm using Photoshop CS4 here, but any recent version of Photoshop will work.
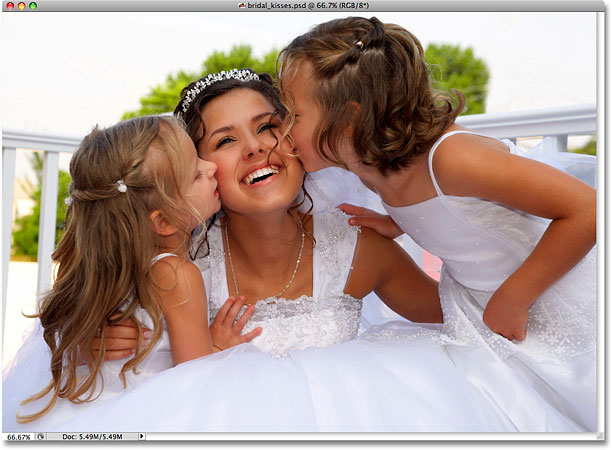
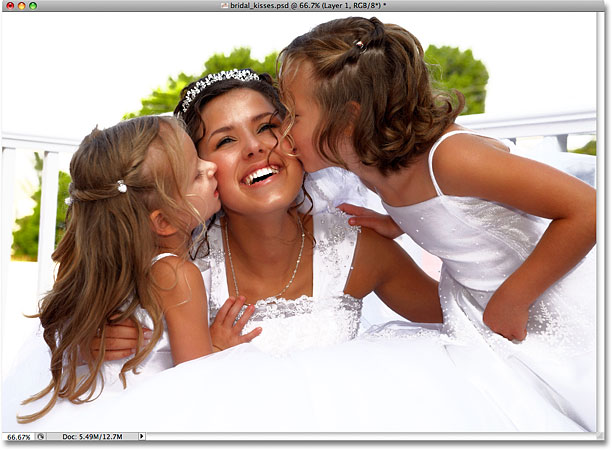
Here's the image I'll be using for this tutorial:
Here's how it will look after adding our high key glow effect:

How To Create A High Key Glow Effect In Photoshop
Step 1: Select The Highlights With The Color Range Command
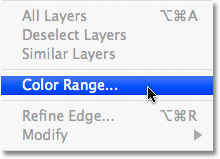
With our image newly opened in Photoshop, our first step is to select only the highlights (the brightest areas) in the image. Photoshop gives us an easy way to select the highlights using the Color Range command, which, like the Magic Wand tool, allows us to select a range of colors or brightness values in an image, although the Color Range command is much more powerful. Go up to the Select menu in the Menu Bar at the top of the screen and choose Color Range:
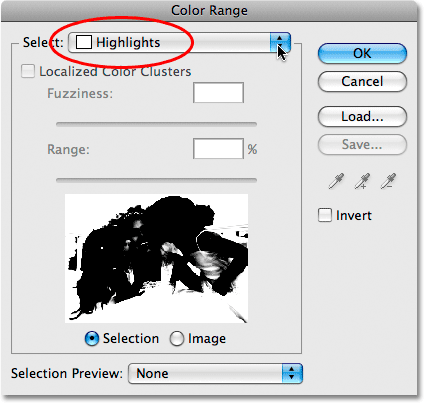
When the Color Range dialog box appears, simply select Highlights from the Select drop-down list at the top of the dialog box:
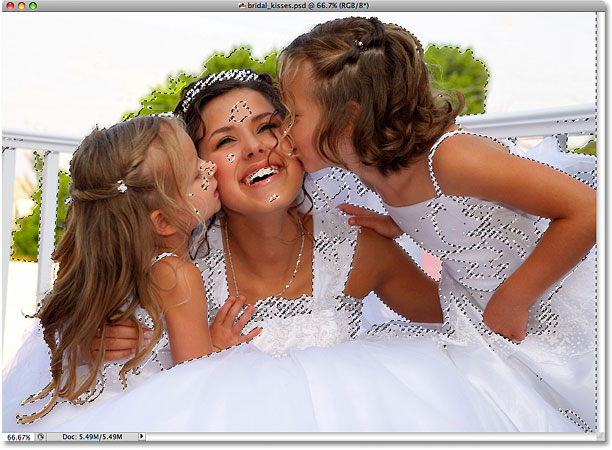
Click OK to exit out of the dialog box, and if we look at the image in the document window, we can now see selection outlines appearing around all the highlight areas:
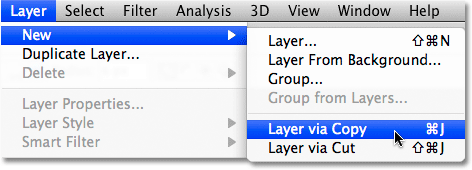
Step 2: Copy The Highlights To A New Layer
With the highlights selected, go up to the Layer menu in the Menu Bar, choose New, and then choose Layer via Copy:
You can also press the keyboard shortcut Ctrl+J (Win) / Command+J (Mac) which is a much faster way to copy a layer. Normally, this would create a copy of the entire layer, but any time we have something on the layer selected, only the area inside the selection is copied. In this case, we have the highlights selected, so only the highlights are copied to the new layer.
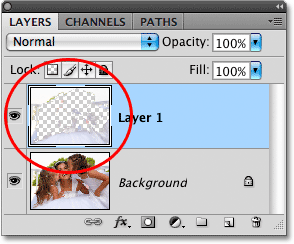
It won't look like anything has happened yet in the document window, but if we look in the Layers panel (panels are called "palettes" in earlier versions of Photoshop), we can see that we now have a new layer named "Layer 1" sitting above the Background layer, which is the layer that contains our original image. And if we look in the preview thumbnail to the left of the layer's name, we can see that the layer contains only the highlights from the image. The gray and white checkerboard pattern that fills up the rest of the thumbnail indicates transparency, which means that those areas on the layer are blank:
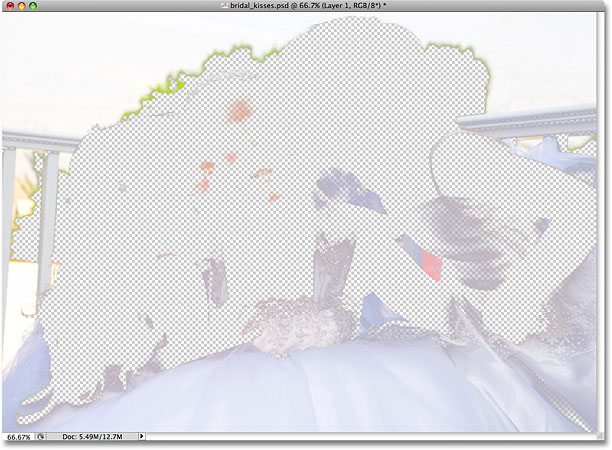
If you want a better view of exactly what's on "Layer 1", click on the Layer Visibility icon (the eyeball) on the left of the Background layer in the Layers panel:
This will temporarily hide the original image on the Background layer from view, allowing us to see only the highlights on "Layer 1", along with the checkerboard pattern showing us the areas on the layer that are blank:
Click once again on the Layer Visibility icon for the Background layer to turn it back on. We'll now use the highlights to create our glow effect!
Step 3: Change The Blend Mode Of "Layer 1" To Screen
You should now be seeing the entire image once again in the document window. Make sure "Layer 1" is selected in the Layers panel. The currently selected layer is always highlighted in blue, so if "Layer 1" is not highlighted in blue, click on it in the Layers panel to select it. We're going to make the highlights appear much brighter in the image, and we'll do that by changing the layer's blend mode. You'll find the blend mode options at the top of the Layers panel. By default, layers are set to the Normal blend mode, which basically means "boring". Click on the word "Normal", then select Screen from the list of blend modes that appears:
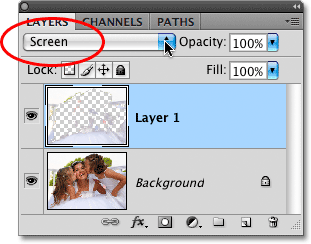
The Screen blend mode is one of a group of blend modes in Photoshop that lighten the image, and we can see in the document window that the highlight areas now appear much brighter, although they also appear rather harsh and blotchy at the moment, but we'll fix that in the next step:
Step 4: Apply The Gaussian Blur Filter
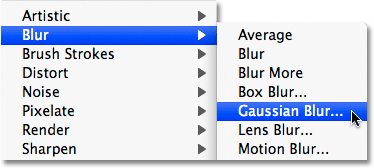
To create the glow effect, we need to soften the highlights, and we'll do that by applying a small amount of blurring to them. Go up to the Filter menu in the Menu Bar, choose Blur, and then choose Gaussian Blur:
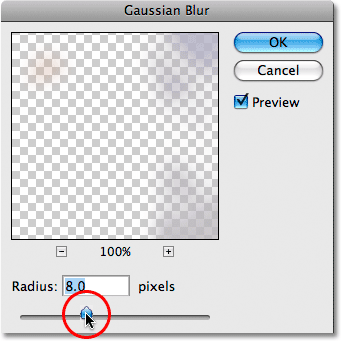
This brings up Photoshop's Gaussian Blur dialog box. Adjust the amount of blurring that's applied to the highlights by clicking and dragging the Radius slider at the bottom of the dialog box. Drag the slider towards the right to apply more blurring, or towards the left to reduce the blur amount. You'll want to keep an eye on your image in the document window as you drag the slider since the amount you choose will depend both on your own personal taste and on the size of your image, but keep the amount fairly low, otherwise you'll wash out the highlights completely. I'm going to set my Radius value to around 8 pixels:
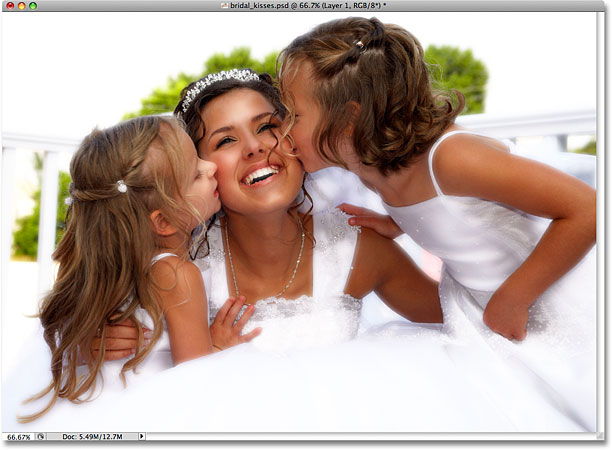
Click OK when you're done to exit out of the dialog box, at which point Photoshop applies the blurring to the layer. The highlights now appear much softer:
Step 5: Duplicate "Layer 1"
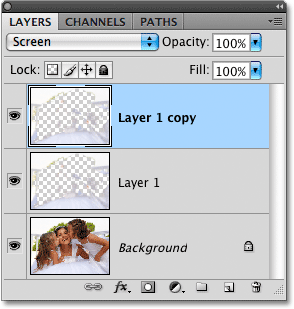
To make the glow effect even more intense, let's duplicate "Layer 1". Once again either go up to the Layer menu, choose New, and then choose Layer via Copy, or simply press the keyboard shortcut Ctrl+J (Win) / Command+J (Mac). We can see in the Layers panel that we now have a copy of "Layer 1, which Photoshop has creatively named "Layer 1 copy", sitting directly above the original. Notice that the new layer's blend mode has also been copied and is already set to Screen for us:
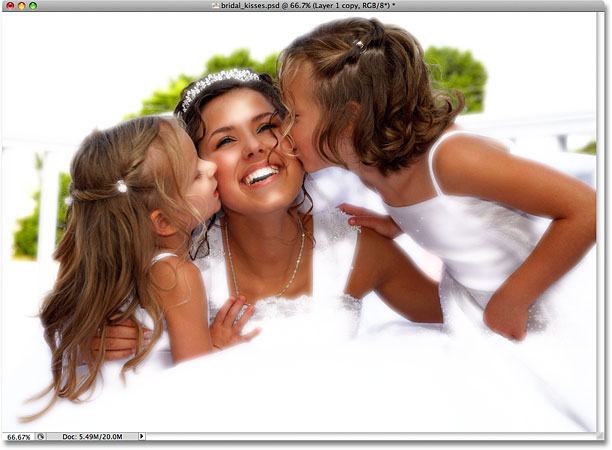
And if we look in the document window, we can see that the glow now appears even brighter, although in my case at least, it's becoming too bright in some areas:
Step 6: Combine The Two Highlights Layers Into A Layer Group
To control exactly which parts of the image are affected by the glow effect, as well as the intensity of the effect in different areas, we can use a layer mask. Since my document contains two separate layers for the highlights ("Layer 1" and "Layer 1 copy"), I'm going to control both of them at once by combining the two layers into a layer group and then adding a layer mask directly to the group.
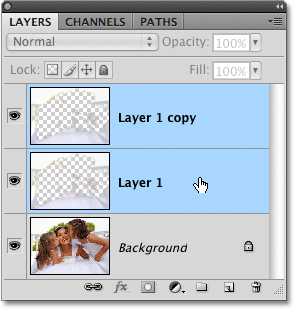
First, we need to select the layers that we want to group together. At the moment, I have the top layer, "Layer 1 copy", selected. To select "Layer 1" below it as well, I'll hold down my Shift key and click on "Layer 1" in the Layers panel. This will select both layers at once. We can see in the Layers panel that both layers are now highlighted in blue, which means they're both selected:
To group them together, go up to the Layer menu in the Menu Bar and choose Group Layers:
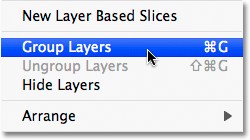
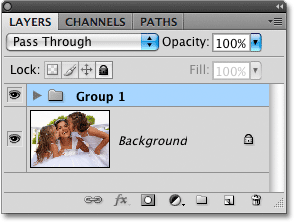
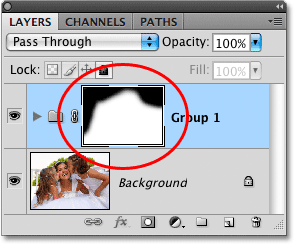
You can also use the faster keyboard shortcut for grouping layers, Ctrl+G (Win) / Command+G (Mac). Either way tells Photoshop to combine the two layers into a layer group, and we can see in the Layers panel that a layer group named "Group 1" appears. Both highlights layers are now inside the group:
Step 7: Add A Layer Mask To The Layer Group
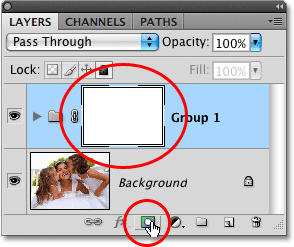
Now that both layers are inside the layer group, let's add a layer mask to the group by clicking on the Layer Mask icon at the bottom of the Layers panel. You'll see a white-filled layer mask thumbnail appear to the left of the group's name:
Step 8: Select The Brush Tool
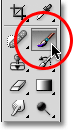
We're going to paint with black on the layer mask to hide the glow effect from certain areas of the image, which means we'll need Photoshop's Brush Tool to paint with. Select the Brush Tool from the Tools panel, or press the letter B on your keyboard to select it with the shortcut:
Step 9: Set Your Foreground Color To Black
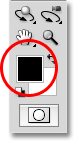
Photoshop paints using whichever color you currently have selected as your Foreground color. You can see what your current Foreground color is by looking at the Foreground color swatch near the bottom of the Tools panel. We want to paint with black, so if your color swatch is set to anything other than black, press the letter D on your keyboard, which will set your Foreground color to white (the default Foreground color whenever a layer mask is selected), then press the letter X to switch it to black:
Step 10: Paint Over Areas To Hide The Glow Effect
With the Brush Tool selected and black set as your Foreground color, paint over any areas in the image where you want to hide the glow effect. Since we're painting on the layer mask, not the image itself, you won't see any black appearing as you paint. Instead, you'll see the glow effect disappearing from view in those areas.
You can control the size of the brush as you paint using handy keyboard shortcuts. Press the left bracket key ( [ ) to make the brush smaller, or the right bracket key ( ] ) to make it larger. You'll want to use a soft edge brush as you paint, and you can control the hardness of the brush edges by adding the Shift key to the shortcuts I just mentioned. Press Shift+left bracket ( [ ) to make the brush edges softer, or Shift+right bracket ( ] ) to make them harder.
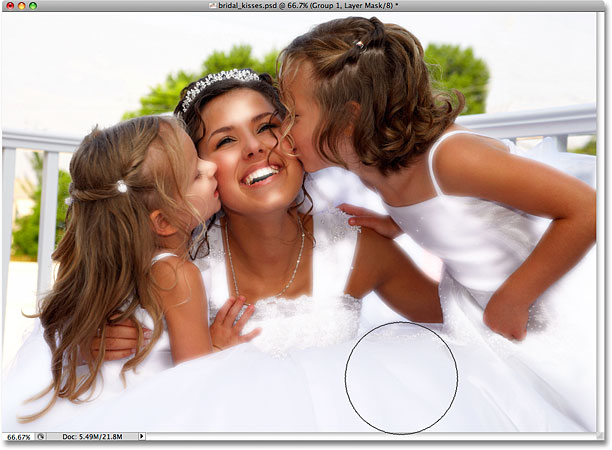
I'm going to paint along the top and sides of my image to hide the glow effect from those areas and bring back the detail in the background:
If we look at the layer mask thumbnail in the Layers panel, we can see exactly where we've painted with black:
For areas where you simply want to reduce the intensity of the glow, not remove it completely, paint with your brush set to a lower opacity. You'll find the Opacity option in the Options Bar at the top of the screen. I'm going to lower my brush opacity down to 50%:

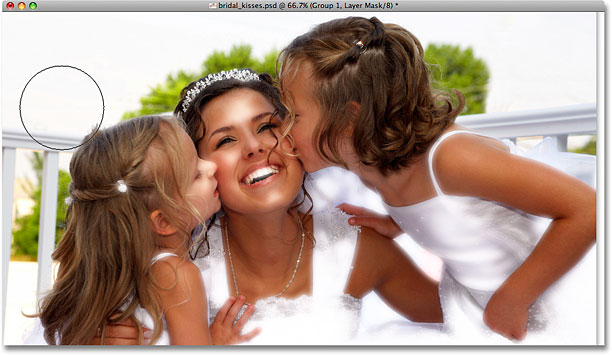
I want to bring back a subtle amount of detail in the bride's dress along the bottom of the photo, so I'll paint over it with my brush set to 50% opacity. This blends the effect in with the original image rather than removing it entirely:
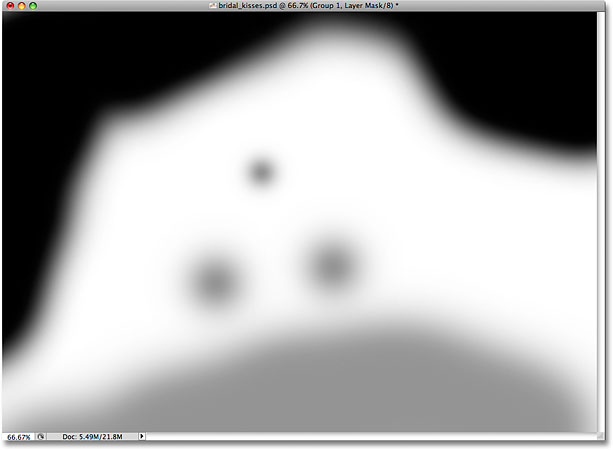
I also want to reduce the glow effect in the straps of the bride's dress, and I think her teeth are starting to look too much like a toothpaste commercial, so I'll paint over those areas with my 50% opacity brush as well. If you want a better view of exactly where you've painted on the layer mask, hold down your Alt (Win) / Option (Mac) key and click directly on the layer mask thumbnail in the Layers panel. This will allow you to view the layer mask itself in the document window. Here, we can see the areas along the top of the photo where I painted with black. The lighter gray areas are where I painted with my brush opacity set to 50%:
Switch back to the normal document view mode by once again holding down Alt (Win) / Option (Mac) and clicking on the layer mask thumbnail in the Layers panel. And with that, we're done! Here is my final "high key glow effect" result: