
Gallery Style Photo Frame Layout With Photoshop
In this Photoshop Effects tutorial, we'll learn how to create a simple gallery-style photo frame layout, complete with a text caption below it, as if the photo was on display in an art gallery. This can be a very classy and elegant way to present your work, and creating the layout is easy.
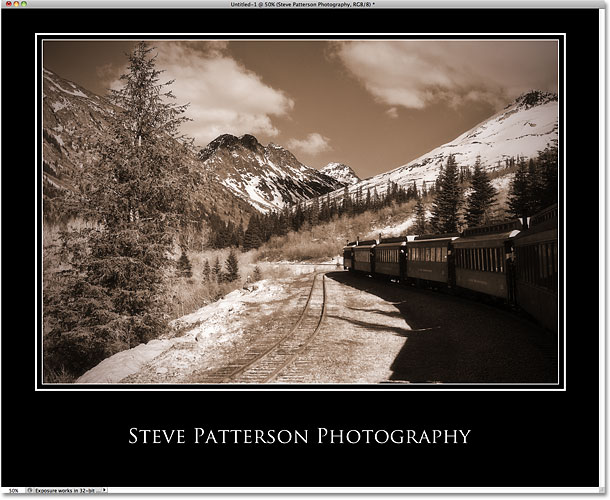
Here's what the final result will look like (of course, your photo and text caption will be different):
How To Create A Gallery Style Photo Frame
Step 1: Create A New Document
Let's begin by creating a new document. Go up to the File menu in the Menu Bar along the top of the screen and choose New:
This opens Photoshop's New Document dialog box. I'm going to want my final layout to print as an 8x10 in landscape orientation, so I'll enter a value of 10 inches for the Width and 8 inches for the Height (make sure you set the measurement type to inches, not pixels). The dimensions you'll need for your layout may be different. Since I'll want it to print in high quality, I'll enter a Resolution value of 240 pixels/inch. Finally, set the Background Contents to White, which will fill the background of the new document with white, even though we'll be changing it in a moment (this just keeps us on the same page):

Click OK to close out of the dialog box. A new document filled with white will appear on your screen.
Step 2: Fill The New Document With Black
With our new document created, let's fill it with black, which will become the background color of the layout. Go up to the Edit menu at the top of the screen and choose Fill:

This brings up the Fill dialog box. Set the Use option at the top of the dialog box to Black:

Click OK to exit out of the dialog box, and Photoshop fills the document with solid black:

Step 3: Add A New Blank Layer And Name It "Photo Area"
Let's add a new blank layer to our document by clicking on the New Layer icon at the bottom of the Layers panel:
This adds a new blank layer, which Photoshop automatically names "Layer 1", above the Background layer in the Layers panel. Double-click directly on the name "Layer 1" and change the name to photo area. Press Enter (Win) / Return (Mac) when you're done to accept the name change:

Step 4: Drag A Selection Around The Main Photo Area
We need to draw a selection around the area the photo will be displayed in. Select the Rectangular Marquee Tool from the Tools panel:

With the Rectangular Marquee Tool selected, the Options Bar along the top of the screen will change to show options specifically for this tool. I'm going to design my layout to display a photo with a standard 4x6 aspect ratio, in landscape orientation. To do that, I'll first change the Style option in the Options Bar to Fixed Ratio, then I'll enter 6 for the Width and 4 for the Height (the aspect ratio you'll want for your photo area may be different):

Then, I'll click about an inch or so away from the top left corner of the document and drag out a selection which will become the area where the photo is displayed. As I drag, Photoshop locks the selection to the aspect ratio I set in the Options Bar:

Step 5: Fill The Selection With Gray
With the selection in place, go up to the Edit menu and choose Fill once again. This time, when the Fill dialog box appears, set the Use option to 50% Gray:

Click OK, and Photoshop fills the photo area with gray. Press Ctrl+D (Win) / Command+D (Mac) to remove the selection outline:

Step 6: Align The Photo Area Horizontally With The Document
Before we continue, let's make sure our photo area is aligned horizontally with the document. Press Ctrl+A (Win) / Command+A (Mac) on your keyboard, which will instantly select the entire document (a selection outline will appear around the edges of the document window). Press the letter V on your keyboard to quickly select Photoshop's Move Tool. Then, with the Move Tool selected, click on the Align Horizontal Centers option in the Options Bar:

If your photo area was a little off-center horizontally, Photoshop will snap it into perfect alignment with the document. Press Ctrl+D (Win) / Command+D (Mac) when you're done to deselect the document.
Step 7: Add A Thin White Border
Let's add a thin white border around the photo area. For that, we'll use one of Photoshop's layer styles. Click on the Layer Styles icon at the bottom of the Layers panel:
Then choose Stroke from the bottom of the list:

This opens Photoshop's Layer Style dialog box set to the Stroke options in the middle column. First, click on the color swatch to the right of the word Color, which will open the Color Picker, and choose white as the color for the stroke. Click OK to close out of the Color Picker when you're done. Then, change the Position of the stroke to Inside. Finally, adjust the Size of the stroke by dragging the Size slider towards the right. You can see a live preview of the stroke size in the document window as you drag the slider. Since we want a thin border, I'm going to set my stroke's size to 4 px:

Click OK to exit out of the Layer Style dialog box. A thin white stroke now appears around the photo area in the document window (the reason we filled the photo area with gray and not white earlier was so we'd be able to see the white border around it):

Step 8: Make A Copy Of The Photo Area Layer
With the photo area layer selected in the Layers panel (selected layers are highlighted in blue), press Ctrl+J (Win) / Command+J (Mac) on your keyboard to make a copy of the layer, which Photoshop will place above the original. Notice that the stroke layer style is also copied:

Step 9: Rename The Layer And Drag It Between The Original Two Layers
Double-click directly on the name "photo area copy" and change the layer's name to border, since we'll be using it to add an outer border to the photo area in a moment. Press Enter (Win) / Return (Mac) to accept the name change. Then click on the border layer in the Layers panel and, while still holding down your mouse button, drag it between the Background layer and the photo area layer. Release your mouse button to drop it into place when a highlight bar appears between the two layers:

Step 10: Lower The Fill Of The Border Layer To 0%
We're going to use the gray-filled area on the border layer to add a second, thicker stroke around the photo. Problem is, we don't actually want the gray area to be visible on this layer. All we want to be able to see is the white stroke around it. To hide the gray and keep only the stroke visible, simply lower the Fill for the border layer down to 0%. Fill hides the contents of a layer but keeps any layer styles visible. You'll find the Fill option directly below the Opacity option at the top of the Layers panel. Nothing will seem to have changed in the document window just yet, though, since the photo area layer is blocking the border layer from view:

Step 11: Use Free Transform To Add Space Around The Photo Area
With Fill set to 0%, press Ctrl+T (Win) / Command+T (Mac) to bring up Photoshop's Free Transform box and handles around the gray area on the border layer. Hold down your Alt (Win) / Option (Mac) key, then click on either the left or right handle (the little square) and, while still holding your mouse button down, drag it outward to add a little space on either side between the second stroke and the gray photo area. Notice that only the white stroke itself is visible. The gray on the border layer is hidden from view, leaving us with an area of black (which is showing through from the Background layer) between this second white stroke and the original.
Keep Alt / Option held down and drag either the top or bottom handle outward to add an equal amount of space between the second stroke and the top and bottom of the gray photo area:

Press Enter (Win) / Return (Mac) when you're done to accept the transformation.
Step 12: Increase The Thickness Of The Outer Border
Double-click on the word Stroke below the border layer in the Layers panel:

This re-opens the Layer Style dialog box, once again set to the Stroke options in the middle column. Let's make the outer border a bit thicker than the original one by dragging the Size slider further towards the right. Again, you can see a live preview of the stroke in the document window as you drag the slider. I'm going to increase my outer stroke size to 12 px. Leave all of the other options the same:

Click OK to again exit out of the Layer Style dialog box. We now have a thin border directly around the photo area and a thicker border around the outside of it, completing our basic frame:

Step 13: Open The Photo You Want To Display
It's time to add our photo to the photo area! Open the photo you want to display, which will appear in a separate document window. Here's the image I'll be using:

Step 14: Select And Copy The Image
Press Ctrl+A (Win) / Command+A (Mac) to quickly select the entire photo. Then press Ctrl+C (Win) / Command+C (Mac) to copy it to the clipboard.
Step 15: Select The Photo Area Layer
With the photo copied to the clipboard, switch back over to the original document window (the gallery photo frame layout) and click on the photo area layer in the Layers panel to select it:

Step 16: Paste The Photo Into The Document
Press Ctrl+V (Win) / Command+V (Mac) to paste the photo we copied to the clipboard a moment ago into the document. Photoshop will automatically place the photo on its own layer directly above whatever layer was selected at the time (which is why we selected the photo area layer first), as we can see by looking in the Layers panel. Photoshop named the photo layer "Layer 1", which is fine. No need to rename it:

If we look in the document window, though, we see that the image is currently too big to fit inside the photo area and is blocking it from view:

Step 17: Create A Clipping Mask
We need a way to make the image fit inside the photo area, and we can do that using a clipping mask. First, click on the layer that contains the photo ("Layer 1") in the Layers panel to select it. Then go up to the Layer menu at the top of the screen and choose Create Clipping Mask:

The photo layer will indent to the right in the Layers panel, letting us know that it's now "clipped" to the layer below it:

Thanks to the clipping mask, only the area of the image that falls directly above the gray photo area below it is now visible in the document window. Areas outside the boundaries of the photo area are hidden from view:

Step 18: Resize And Reposition The Photo With Free Transform
So far so good, but my image is still too big to fit entirely within the smaller boundaries of the photo area, and it also needs to be repositioned. We can do both of those things with Free Transform. Once again press Ctrl+T (Win) / Command+T (Mac) to bring up the Free Transform box and handles, this time around the photo. Hold down your Shift key and drag any of the corner handles to resize the photo as needed until it fits inside the photo area. To move the photo, click anywhere inside the Free Transform box and drag the image into position. If your image uses the same aspect ratio as your photo area (as mine does), you should be able to fit the entire image inside of it. If not, simply resize the image until as much of it as possible is visible. Press Enter (Win) / Return (Mac) when you're done to accept the transformation:

Step 19: Add Your Text Below The Image
At this point, all that's left to do is add a text caption below the image. Select the Horizontal Type Tool from the Tools panel:

With the Type Tool selected, choose your font and font size from the Options Bar. I'm going to use Trajan Pro at 24 pt:
Click on the color swatch in the Options Bar and choose white as your text color from the Color Picker. Finally, click on the Center Text option to the left of the color swatch, which will make it a bit easier to center our text in the document as we're typing:

Then, simply click in the black area below the center of the photo with the Type Tool and add your text. I'm going to type "Steve Patterson Photography". You'll probably want to add something different, unless of course you'd like to give me credit for your work. Notice that the spot you clicked on with the Type Tool becomes the center point for the text as you type thanks to the Center Text option we selected in the Options Bar:

When you're done, click the checkmark in the Options Bar to accept the text:

Step 20: Align The Text Horizontally If Needed
To make sure the text is aligned horizontally with the document, follow the same method we used in Step 6. With the text layer selected in the Layers panel, press Ctrl+A (Win) / Command+A (Mac) to select the entire document. Press the letter V to quickly select the Move Tool, then click on the Align Horizontal Centers option in the Options Bar. Photoshop will align the text perfectly in the horizontal center of the document. Press Ctrl+D (Win) / Command+D (Mac) when you're done to deselect the document. Once deselected, you can press the Up and Down arrow keys on your keyboard if you need to nudge the text a little higher or lower:
And with that, we're done! Here is my final "gallery style photo frame" layout: