
Adding Fireworks To A Photo With Photoshop
In this Photoshop Effects tutorial, we're going to learn how to add fireworks to a photo. What you'll need is a photo of fireworks and the photo you want to add the fireworks to (preferably a nighttime shot, since fireworks tend not to look very impressive in the middle of the afternoon).
Blending the two images together is easy. If you can paint with a brush and change a layer blend mode, you have all the Photoshop skills you need.
Here's the photo of fireworks I'll be using:

Here's the image I want to add the fireworks to:

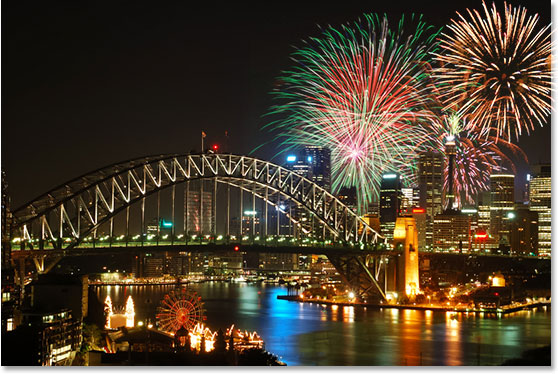
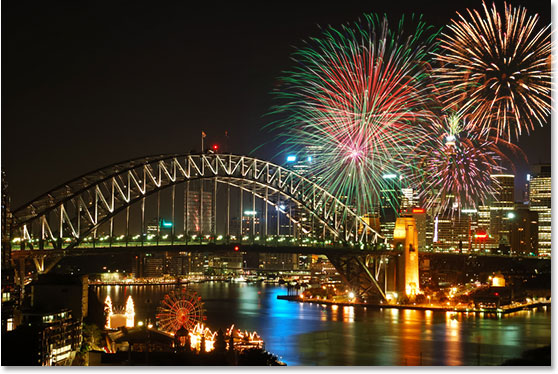
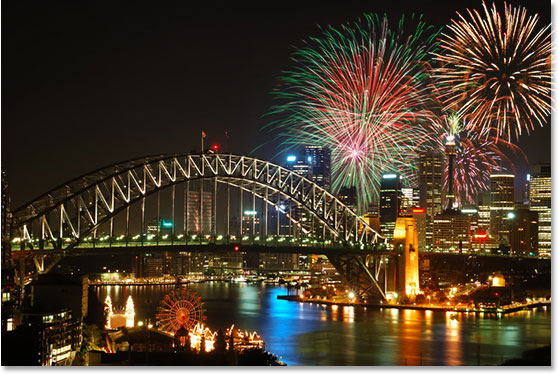
And here's what the final image will look like:
This tutorial is from our Photo Effects series. Let's get started!
Step 1: Drag The Fireworks Photo Into The Other Photo
Open both images in Photoshop so that each one is in its own separate document window on the screen. We need to get the fireworks photo into the other photo, and with both images open in their own document window, all we need to do is drag the fireworks photo into the other photo's document window. To do that, we need the Move Tool, so select it from the Tools palette or press the letter V on your keyboard to quickly access it with the keyboard shortcut:
Then with the Move Tool selected, click inside the fireworks photo and drag it over into the other photo:
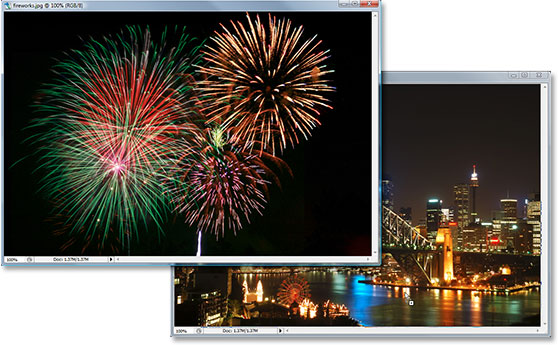
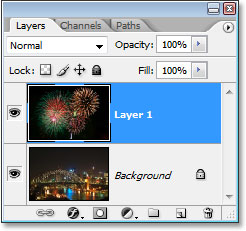
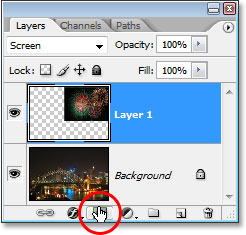
When you release the mouse button, the fireworks photo will appear above the second photo in the same document window, and if we look in the Layers palette, we can see that it's been placed on its own separate layer, with the fireworks photo on "Layer 1" at the top:
You can close out of the document window containing the fireworks photo by itself at this point, since we no longer need it.
Step 2: Resize And Reposition The Fireworks With Free Transform
Now that we have the fireworks photo in the same document as the photo we want to add the fireworks to, we can move the fireworks where we want them and resize them if needed, and we can do both of these things at once with Photoshop's Free Transform command. With "Layer 1" selected in the Layers palette, use the keyboard shortcut Ctrl+T (Win) / Command+T (Mac) to bring up the Free Transform box and handles around the fireworks image. If you can't see the corner handles because part of your image is outside the viewable area, press Ctrl+0 (Win) / Command+0 (Mac) to fit everything on the screen. Then, to resize the image, hold down the Shift key, which will prevent you from accidentally distorting the width or height as you're resizing it, and then click and drag any of the four corner handles. To move the image around on the screen, simply click on the image and drag it with your mouse.
I'm going to reduce the size of my fireworks image and move it into the top right corner so the fireworks appear above the main part of the city:
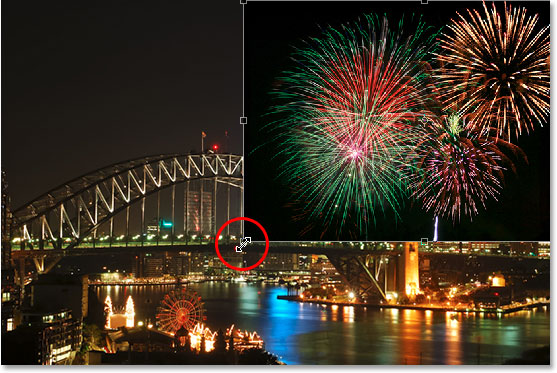
Press Enter (Win) / Return (Mac) when you're done to accept the transformation.
Step 3: Change The Blend Mode Of The Fireworks Layer To "Screen"
To blend the fireworks in with the photo behind it and remove the black background behind the fireworks, all we need to do is change the blend mode of the fireworks layer to Screen. To do that, go up to the blend mode options in the top left corner of the Layers palette, click on the down-pointing arrow to the right of the word "Normal", and select "Screen" from the list:
Here's my image after changing the blend mode:
Step 4: Add A Layer Mask
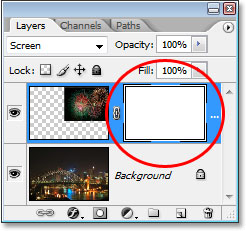
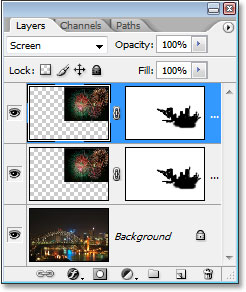
With "Layer 1" still selected, click on the Add A Layer Mask icon at the bottom of the Layers palette:
This adds a layer mask thumbnail to "Layer 1", and we can see that the layer mask, not the contents of the layer (the fireworks photo), is selected by the white highlight border around the thumbnail:
Step 5: Lower The Opacity Of The Fireworks Layer
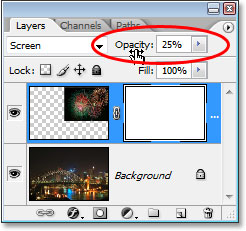
With the layer mask added, we're going to use it to hide the fireworks in any areas where we don't want them to appear. Currently, the fireworks in my image are appearing in front of the buildings, and I want them to appear to be behind the buildings, which means I need to hide any areas of the fireworks that are in front of them. To do that, all I need to do is paint with black over the buildings, and because I'm painting on the layer mask, not the image itself, I'll be hiding the fireworks in any areas I paint over. Problem is, the fireworks are making it difficult for me to see where the buildings actually are, so to solve that problem, I'm simply going to lower the opacity of the fireworks layer in the top right corner of the Layers palette. I'm going to lower it all the way down to about 25% so I have no trouble seeing the buildings behind them:
Step 6: Paint With Black To Hide The Fireworks As Needed
Now that I can see the image easily behind the fireworks, I can paint with black over the buildings. Press the letter D on your keyboard to reset your Foreground and Background colors. Normally when you do this, you end up with black as your Foreground color and white as your Background color, but when you have a layer mask selected in the Layers palette, as we do, and you reset the colors, you actually end up with the exact opposite. White becomes your Foreground color and black becomes your Background color. We want black as our Foreground color, so to fix that, simply press X on your keyboard to swap your Foreground and Background colors.
Then, grab your Brush Tool from the Tools palette or press B to access it with the keyboard shortcut:
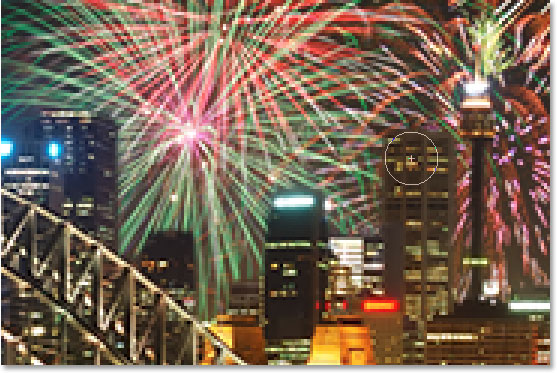
Then, using a hard-edged brush and with black as your Foreground color, paint over any areas in the image where you want to hide the fireworks. You can zoom in on the image to make things easier by holding down Ctrl+Spacebar (Win) / Command+Spacebar (Mac) and dragging a selection around the area you want to zoom in on, then hold down the spacebar by itself to access the Hand Tool and drag the image around on the screen as needed:
If you make a mistake and accidentally paint over an area you didn't mean to paint over, just press X on your keyboard once again to swap your Foreground and Background colors, which will make white your Foreground color, and paint over the area to bring back the fireworks. Then press X to set black as your Foreground color again and continue painting.
When you're done, if you've zoomed in on the image, press Ctrl+0 (Win) / Command+0 (Mac) to quickly zoom back out. Also, set the opacity of the fireworks layer back to 100%.
Here's my image after painting on the layer mask. The fireworks now appear to be behind the buildings:
Step 7: Duplicate The Fireworks Layer To Brighten Them (Optional)
Finally, if you want your fireworks to be even brighter, with "Layer 1" still selected, press Ctrl+J (Win) / Command+J (Mac) to duplicate the layer:
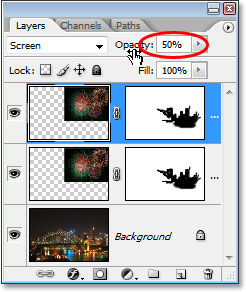
If, after duplicating the layer, you find your fireworks are a little too intense, simply lower the opacity of the duplicated layer. I'm going to lower mine to about 50%:
Once you've fine-tuned the brightness of your fireworks, you're done! Here, after duplicating my fireworks layer and then lowering the opacity of the duplicate layer to 50%, is my final result:
And there we have it! That's how to add fireworks to an image with Photoshop! Visit our Photo Effects section for more Photoshop effects tutorials!