
Easy Selective Color Effect With Photoshop
Learn how to easily add a selective color (or "splash of color") effect to an image with Photoshop! We'll convert the overall photo to black and white, and then we'll bring back the color in our main subject!
Even though effects like this are very easy to achieve in Photoshop, many people shy away from them because they don't feel comfortable enough with Photoshop's various selection tools, or they're never sure which selection tool to use. So in this tutorial, we'll see how to create this effect without any selection tools at all! That's right, none! Instead, we'll be using nothing more than a simple Black & White adjustment layer, a layer mask and a brush! If you can drag a few sliders and paint with a brush, you have all the skills you need.
I'll be using Photoshop CC here, but this tutorial is also fully compatible with Photoshop CS6. If you're using Photoshop CS5 or earlier, you can also follow along, or you may want to check out our original Selective Coloring Effect tutorial. Note, though, that the original version does require the use of a selection tool, so while the end result is the same, the steps are a bit different from what we'll be covering in this version.
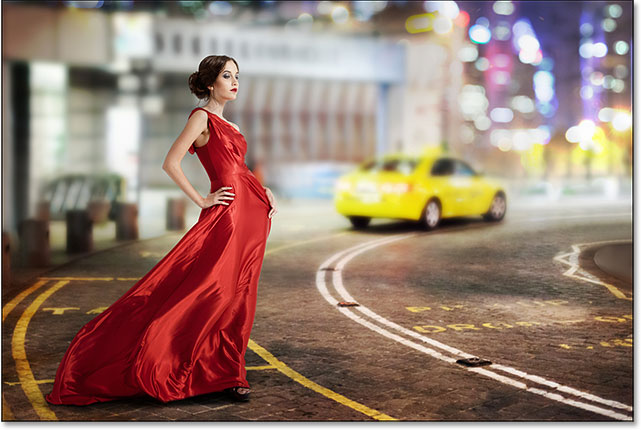
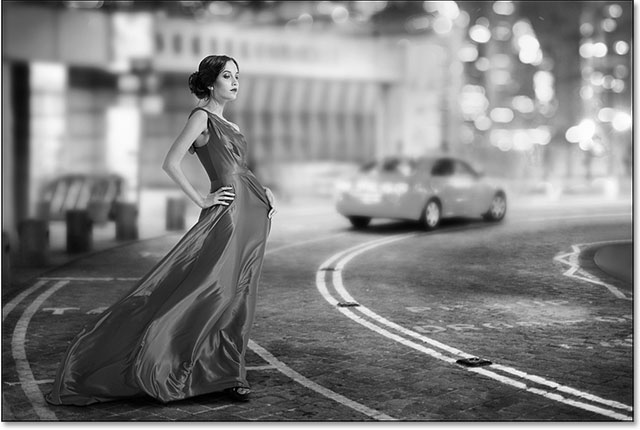
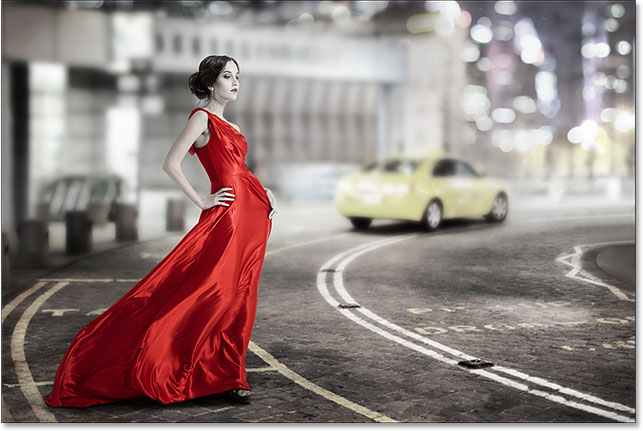
Here's the image I'll be starting with. You can follow along using your own image. Simply choose any photo with an object that will remain in color, whether it's a dress, a flower, a phone booth, or whatever the case may be (woman in red dress photo from Shutterstock):
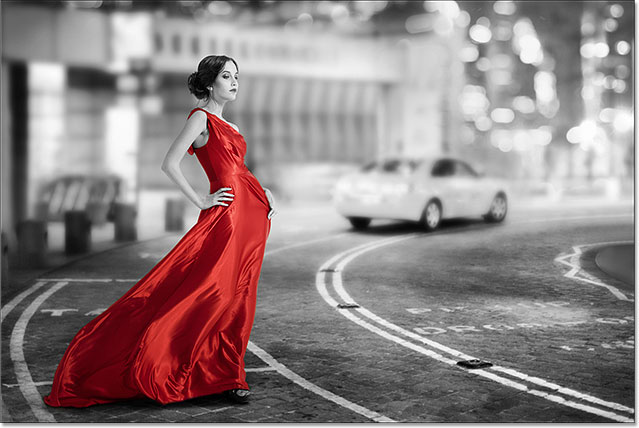
And here's what the selective color effect will look like with the overall image converted to black and white, leaving only the woman's red dress in color. Again, we'll be creating this effect without any selection tools:
This tutorial is from our Photo Effects series. Let's get started!
How To Create A Selective Color Effect
Step 1: Add A Black & White Adjustment Layer
With your image newly opened in Photoshop, you'll see in your Layers panel that the document currently contains a single layer - the Background layer - which holds your image:
We'll create this effect non-destructively, meaning we'll leave the original image untouched and add the selective color effect using a separate adjustment layer. Click on the New Fill or Adjustment Layer icon at the bottom of the Layers panel:
Choose a Black & White adjustment layer from the list that appears:
As the name implies, Photoshop's Black & White adjustment is specifically designed for converting color images to black and white. If we look again in the Layers panel, we see the adjustment layer (named "Black & White 1") sitting above the Background layer:
And we see in our document that Photoshop has already gone ahead and converted the image to black and white for us using its default settings. We'll customize the black and white version ourselves in a moment:
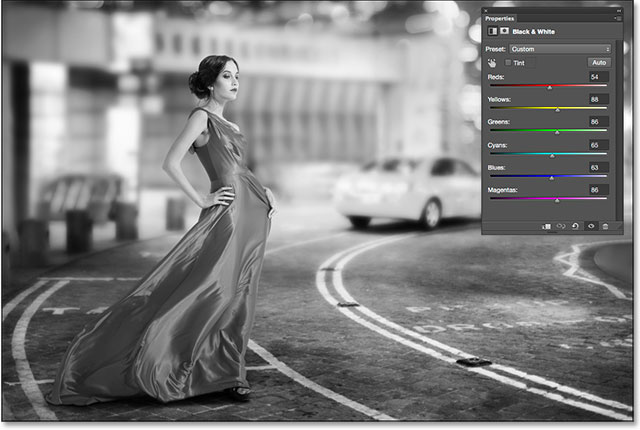
Step 2: Fine-Tune Your Black & White Conversion
The controls for the Black & White adjustment layer are found in the Properties panel. Here, you'll find six sliders, one for each of the three primary colors (Reds, Greens and Blues) and one for each of the three secondary colors (Yellows, Cyans and Magentas). Drag any of the sliders either left or right to darken (left) or lighten (right) any areas in the image that contain that particular color in the full color version. For example, dragging the Reds slider towards the right will lighten any areas that have red in them (in the full color version), while dragging the Blues slider towards the left will darken any areas that were blue. Don't worry about remembering which areas contained which colors. It's easier to just drag the sliders and judge the results. If you like the result, great. If not, simply drag the slider back and try a different slider until you're happy with the way the black and white version looks:
There's also an Auto button above the sliders. Clicking the Auto button tells Photoshop to take its best guess at what the black and white version should look like. Sometimes it works well, sometimes it doesn't, but you can always use the individual sliders to adjust and fine-tune things after giving the Auto button a try:
If you want to compare your black and white version with the original full color version of the image, click the adjustment layer's visibility icon (the "eyeball" icon) in the Layers panel to toggle the adjustment layer on and off. With it off, you'll see your full color version. Click the icon again to toggle the adjustment layer back on and you'll see your black and white version:
Here's my adjusted black and white conversion. There's no need to get things perfect at this point. As we'll see near the end of the tutorial, you can easily come back and make changes to the sliders later:
Step 3: Select The Brush Tool
One of the great features of Photoshop's adjustment layers is that each one comes with a built-in layer mask. I won't get into detail here about how layer masks work, but if you want to learn more about them, be sure to check out our full Understanding Layer Masks tutorial. Even though we can't actually see the mask in the document, we know it's there because we see its layer mask thumbnail in the Layers panel. Note that the thumbnail is currently filled with white, which means the Black & White adjustment layer is affecting the entire image below it:

We can reveal part of the original full color image through the adjustment layer simply by painting with black on the layer mask. Select the Brush Tool from the Tools panel:
Step 4: Choose A Soft Round Brush
Right-click (Win) / Control-click (Mac) anywhere inside your document to open the Brush Preset Picker and click on the soft round brush in the upper left of the thumbnail area. Press Enter (Win) / Return (Mac) on your keyboard when you're done to close out of the Brush Preset Picker:
Step 5: Set Your Foreground Color To Black
Photoshop uses our current Foreground color as the brush color. We need to paint with black on the layer mask, which means we need to set our Foreground color to black. To quickly do that, press the letter D on your keyboard. This will instantly set the Foreground and Background colors to their defaults, making the Foreground color white and the Background color black (these are the default colors whenever we have a layer mask selected). To swap them, press the letter X on your keyboard. Your Foreground color should now be black.
We can see the current Foreground and Background colors in the color swatches near the bottom of the Tools panel. The Foreground color is the swatch in the upper left. It should be showing black:
Step 6: Paint With A Larger Brush Over The Inside Of The Object
To bring back the color in an object, start by painting over as much of its inner area as possible, avoiding the edges for now. Depending on the size of the object, it may help to use a larger brush for this part. You can change the size of your brush directly from the keyboard. Pressing the right bracket key ( ] ) repeatedly will make the brush larger, while pressing the left bracket key ( [ ) will make it smaller. To adjust the hardness of the brush edge from your keyboard, press and hold your Shift key while pressing the right bracket key ( ] ) repeatedly to make the edge harder or the left bracket key ( [ ) to make it softer.
In my case, I want to bring back the color in the woman's dress, so I'll use a larger brush to paint over as much of it as I can, again avoiding the edges for now. I'll start with the lower part of the dress since it's the easiest:
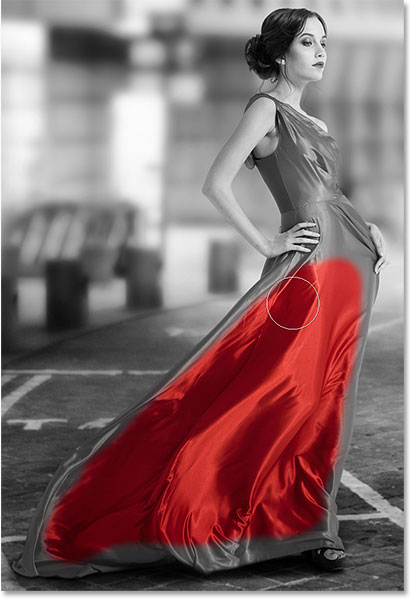
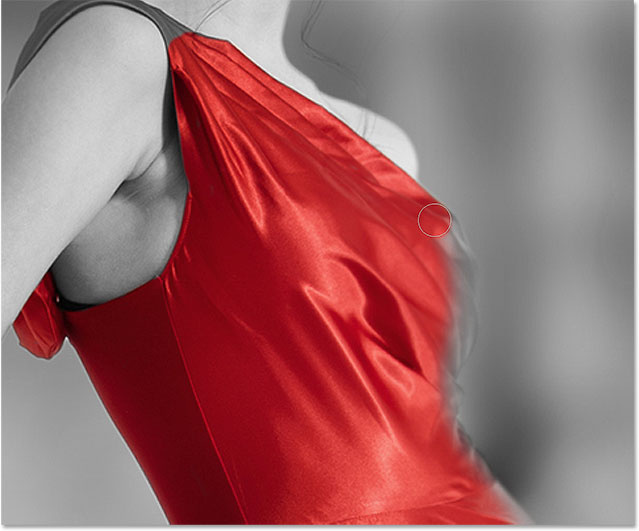
Then, I'll switch to a slightly smaller brush (by pressing my left bracket key a few times) and paint over as much as I can of the upper part of the dress, still avoiding the edges:
Notice, if we look at the layer mask thumbnail in the Layers panel, that the areas we're painting over appear black. That's how layer masks work. White represents areas where the effect of the adjustment layer is visible in the image below it. Black represents areas where the effect is hidden. By painting over our object with black, we hide the black and white effect and reveal its original, full color version:
Step 7: Paint With A Smaller Brush Around The Edges
To paint around the edges of the object, it often helps to zoom in closer. Here's some handy keyboard navigation tricks to make things easier. To zoom in on an area, press and hold Ctrl+spacebar (Win) / Command+spacebar (Mac) on your keyboard to temporarily access Photoshop's Zoom Tool and click on the area with your mouse. Click repeatedly to zoom in closer. To zoom out, press and hold Alt+spacebar (Win) / Option+spacebar (Mac) and click. To pan around the image while you're zoomed in, press and hold the spacebar on its own to temporarily access the Hand Tool, then click and drag the image around with your mouse.
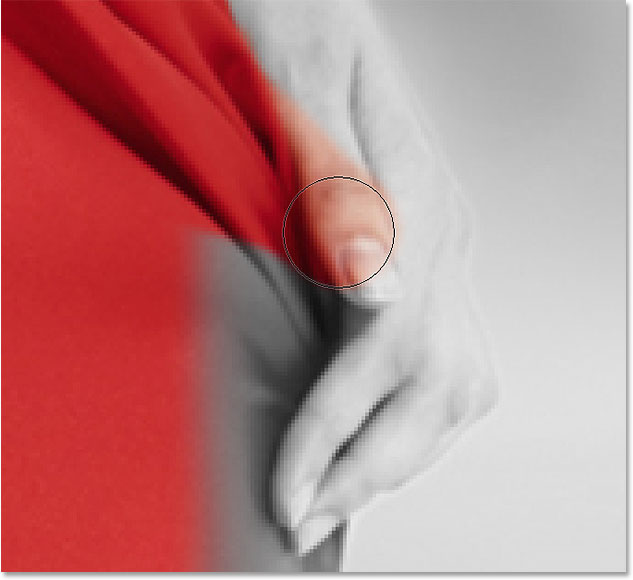
You'll most likely want to use a smaller brush for the edges since they require more precision, so I'll press the left bracket key a few times to make my brush nice and small. You may also need a harder edge. Again, to change the hardness of the brush edge from the keyboard, press and hold your Shift key while pressing the right bracket key to make the edge harder (or the left bracket key to make it softer). Here, I'm using a small, harder edge brush to slowly make my way along the edges in the upper part of the dress:
If you make a mistake and accidentally paint across the edge into an area you didn't mean to, not to worry. Here, I've painted over part of the woman's thumb:
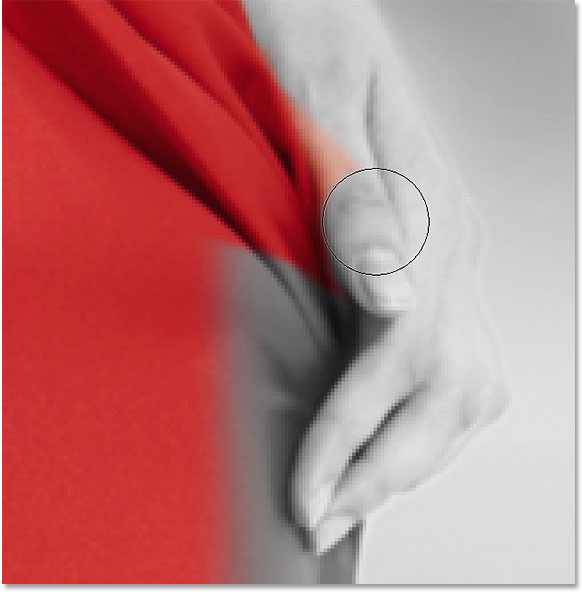
To easily fix a mistake like this, simply press the letter X on your keyboard to swap your Foreground and Background colors, making white your Foreground color. Then, paint over the mistake with white to remove the color from that area. When you're done, press the letter X again to set your Foreground color back to black and continue on:
I'll keep making my way around the edges of the dress, zooming, panning and changing my brush size as needed to reveal its color:
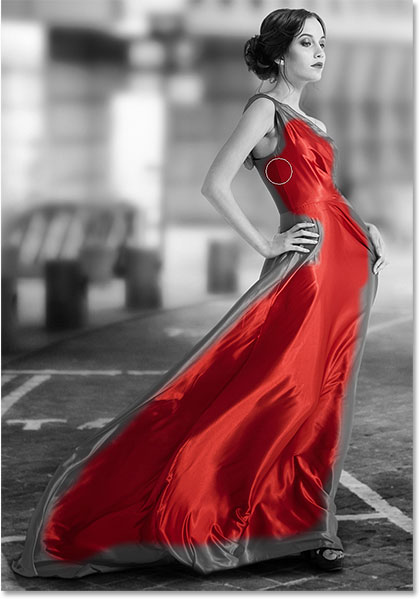
Here's my final result:
Step 8: Re-Adjust The Black & White Sliders If Needed
At this point, you may want to adjust and fine-tune your black and white conversion. To do that, simply go back to your Properties panel and drag the individual color sliders left or right until you're happy with the results. Since we're working with an adjustment layer, we can make as many changes here as we need without over-editing and damaging the image:
Bonus Step: Bring Back Some Of The Original Color
This final step is optional, but since we've created our selective color effect using nothing more than a single Black & White adjustment layer, we can easily restore a hint of the photo's original color. To do that, simply lower the opacity of the adjustment layer. You'll find the Opacity option in the upper right of the Layers panel. I'll lower mine down to around 75%:
This allows a subtle amount of the original color to show through the adjustment layer. Here's the original image once again for comparison:
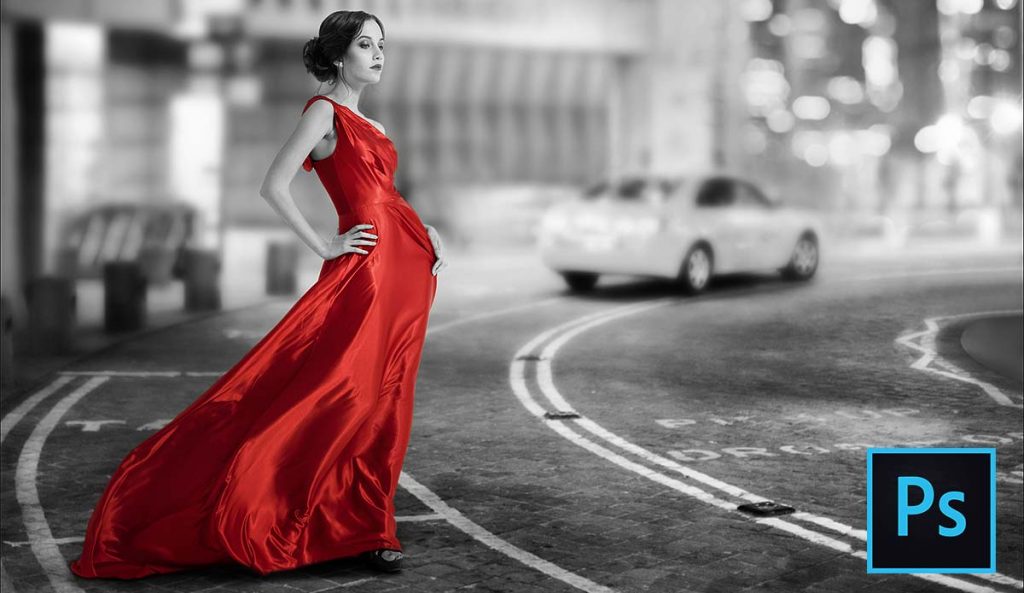
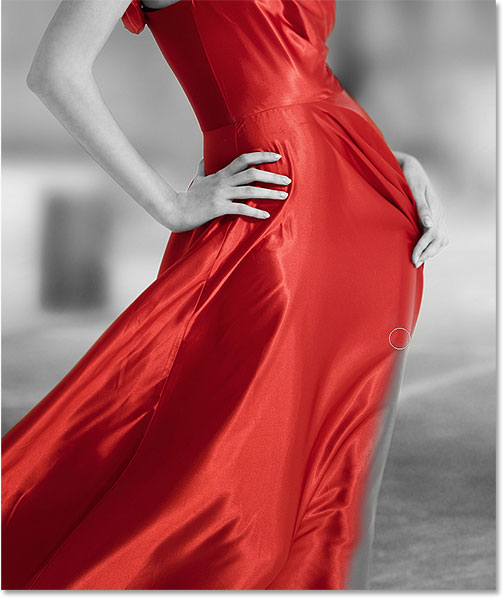
And here's the result with the red dress in full color and just a hint of color throughout the rest of the image:
And there we have it! That's how to create a selective color, or splash of color, effect with no selection tools needed thanks to the power of adjustment layers and layer masks in Photoshop! Visit our Photo Effects section for more Photoshop effects tutorials!