
Photo Realistic Drop Shadows in Photoshop
Let's face it, Photoshop's built-in drop shadow effect has it's limitations. It's fine for basic shadow effects, like making text appear to be raised slightly off the background on a web page, but if you're after something more photo realistic, the drop shadow on its own doesn't cut it. With a little help though, we can turn those plain, uninteresting drop shadows into something much more realistic looking by "mapping" our shadows onto the image using what's called a displacement map. Displacement maps are what the pros use to add realism to images, but don't let that scare you away. You don't need to be a pro to use them. In fact, they're really quite simple.
As we'll see in this Photoshop tutorial, a displacement map is really nothing more than a separate, black and white version of your image which Photoshop uses to figure out how to reshape your shadows so that they appear to be following the natural textures and depths of the background behind them, just like what a real shadow would do. Think of a displacement map as Photoshop moving pixels from "dis place to dis place". If that sort of makes sense to you, great! If not, don't worry, it will by the time we're done this tutorial.
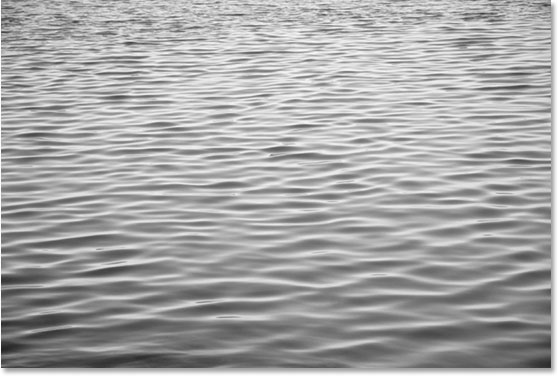
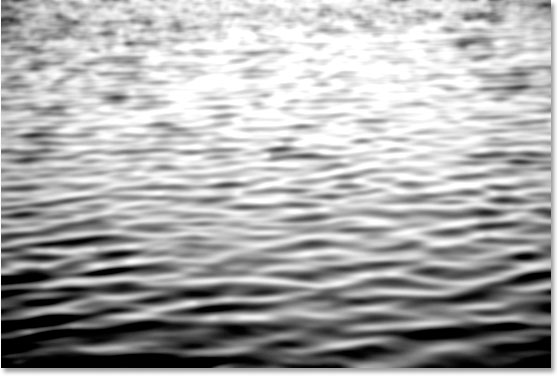
Here's my original image, a simple photo of some water:

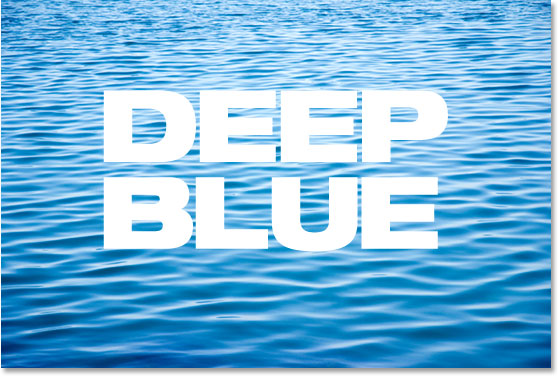
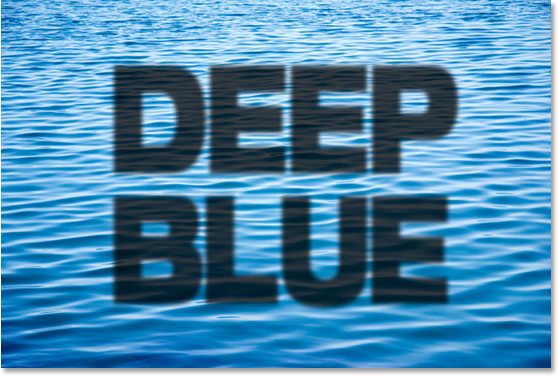
I'm going to be adding some type over it and then adding a drop shadow to the type. Normally, I'd get something that looks like this:

Not very realistic at all. The drop shadow appears to be following the shapes of the waves below it somewhat, but that's only because the opacity of the drop shadow is set to its default of 75%, so some of the waves are showing through it. The lowered opacity helps a little, but it's definitely not the best we could do. For the most part, the shadows look flat.
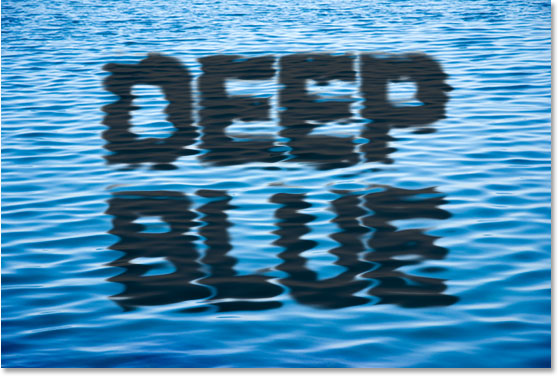
Thanks to the power of Photoshop and displacement maps, though, I can easily turn that simplistic drop shadow into something more like this:
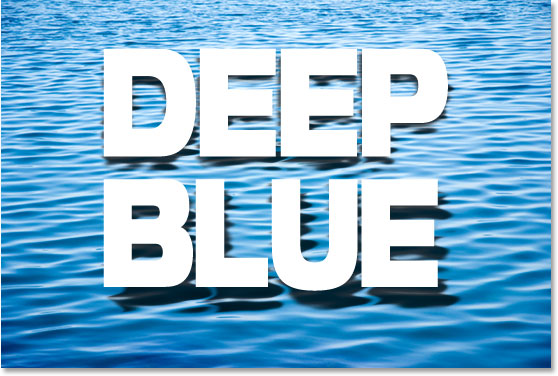
That looks a whole lot better, and creating that "mapped" shadow effect is what we'll be doing in this tutorial.
This tutorial is from our Photo Effects series. Let's get started!
Step 1: Add Some Type Above Your Image
My water photo is open in Photoshop, and in my Layers palette, I can see that I currently have one layer, the Background layer, which contains my image:
The first thing I'm going to do is add the type that I'll be using. Press T on your keyboard to quickly access the Type tool and add your text. I'm going to type "DEEP BLUE":
Here's my Layers palette now showing two layers - my original Background layer, and my newly added type layer above it:

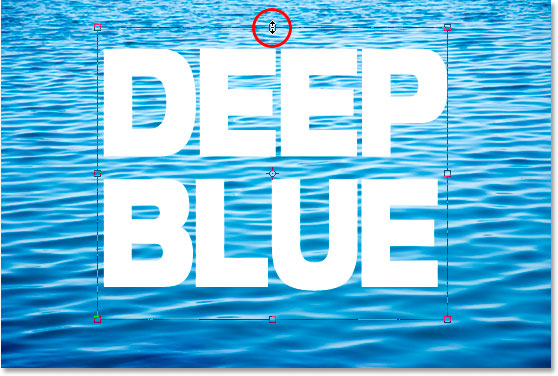
You don't have to do this next step if you don't want to, but I'm going to stretch my text and make it taller by pressing Ctrl+T (Win) / Command+T (Mac) to bring up Photoshop's Free Transform box and handles around my type, and then while holding down Alt (Win) / Option (Mac), I'm going to drag the Free Transform box upward from the top center handle (circled in red in the screenshot below). By holding down Alt/Option, this tells Photoshop to stretch the type from the center, extending both the top and bottom at the same time.
With the text in place, we're going to add our drop shadow next.
Step 2: Add A Drop Shadow To The Text
With the type layer selected, click on the Add Layer Style icon at the bottom of the Layers palette:
Select Drop Shadow from the list of layer styles that appears:

This will bring up the Layer Style dialog box showing us the Drop Shadow options:
I'm going to leave the Opacity set to its default of 75% and the Angle set to 120 degrees. The only option I'm going to change is Distance, which I'll set to 20 pixels, as shown above. When you're done, click OK to exit out of the options box.
Here's my image with the drop shadow applied:
Definitely not what you'd call realistic. Of course, I can't remember the last time I saw text hovering over water in real life, but if I did see it, I'm sure the shadow wouldn't look this fake. Fortunately, fixing that problem is what this tutorial is all about. We're going to be creating our displacement map next.
Step 3: Copy The Background Layer And Paste As A New Channel
In the Layers palette, click on the Background layer once again to select it:
With the Background layer selected, press Ctrl+A (Win) / Command+A (Mac) to select the contents of the layer, which in this case is the original water photo. You'll see a selection box appear around the image in the Document window. Then press Ctrl+C (Win) / Command+C (Mac) to copy the layer contents.
Now switch to your Channels palette, which is grouped in right beside the Layers palette, and click on the Create New Channel icon on the bottom of the Channels palette, as circled in red below:
A new channel filled with black, which Photoshop names "Alpha 1", will appear below the existing Red, Green and Blue channels:
With the "Alpha 1" channel selected, press Ctrl+V (Win) / Command+V (Mac) to paste the contents of the Background layer into this new channel. You'll see the image appear in black and white inside the thumbnail preview area of the "Alpha 1" channel:
And you'll see the same black and white version appear in your Document window:
Press Ctrl+D (Win) / Command+D (Mac) to deselect the image at this point. We're going to apply a Gaussian Blur filter to the new channel next.
Step 4: Apply The Gaussian Blur Filter To The New Channel
We're going to be using this new channel as our displacement map for our drop shadow, and one of the things we want to avoid is having any harsh or rough edges in the displacement map so that our shadow will flow smoothly and naturally with the ripples and waves in the water. To make sure everything is nice and smooth, I'm going to add a Gaussian Blur filter to this channel.
With the "Alpha 1" channel selected, go up to the Filter menu at the top of the screen, choose Blur, and then choose Gaussian Blur, which brings up the Gaussian Blur dialog box:
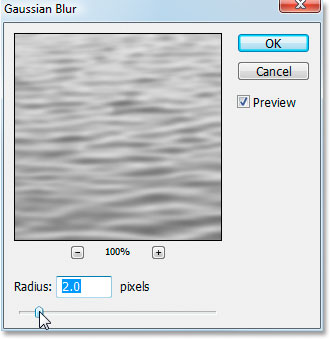
You want to add just a slight amount of blurring here. I'm using a low-resolution image for this tutorial, and for me, a Radius value of about 2 pixels does the trick. If you're using an image straight out of your digital camera, chances are it will be much higher resolution, and in that case, you'll probably find that a setting of around 5-6 pixels works well. Again, we only want a slight amount of blurring, just enough to smooth everything out.
Step 5: Boost The Contrast Of The Channel With Levels
The next thing we want to do is boost the contrast of this channel, since the higher the contrast, the more of an impact our displacement map will have. Again with the new channel still selected, use the keyboard shortcut Ctrl+L (Win) / Command+L (Mac) to bring up the Levels dialog box:
With the Levels dialog box open, drag the black point and white point Input Levels sliders (both circled in red above) in towards the center to boost the contrast of the channel. Don't worry about losing any detail in the highlights and shadows as you would if we were using Levels for a tonal correction on an image. Here, all we're concerned about is boosting the contrast.
Here's what my channel looks like now after increasing the contrast with Levels:
We're done working on the channel and it's ready to be used as a displacement map, but to use it, we have to create a new document out of it, and we'll do that next.
Step 6: Duplicate The Channel As A New Document
We're applied our Gaussian Blur filter to the channel to smooth everything out, and we've boosted the contrast with Levels. Our channel is ready to be used as a displacement map, but in order to use a displacement map, it has to be a separate file, and currently it's just a channel in our original file. We're going to save it as a new file though by duplicating the channel. Click on the small right-pointing arrow in the top right corner of the Channels palette to access the Channels palette options, and select Duplicate Channel from the drop-down list that appears:
This brings up the Duplicate Channel dialog box:
For Destination, click on the down-pointing arrow and select New to duplicate the channel as a completely separate document, and give your new document a name. I've named mine "water-displace". Click OK when you're done and your channel will appear as a new Photoshop document on your screen.
Step 7: Save The New Document
Save this new document to your desktop or wherever you'd like to save it on your computer, and remember where you're saving it to because we'll be accessing it in just a moment. Once you've saved the document, go ahead and close out of it, leaving only your original document open.
Step 8: Create A New Layer From The Drop Shadow Layer Style
Normally layer styles such as drop shadows are simply effects applied to other layers, but we can convert layer styles into their own layers, which is exactly what we need to do with our drop shadow effect in order to be able to use it with our displacement map. With the type layer selected, go up to the Layer menu at the top of the screen, select Layer Style, and then way down near the bottom of the list, select Create Layer:

When you select "Create Layer" from the Layer Style options, Photoshop takes the drop shadow, rasterizes it (converts it into pixels), and then places it on its own separate layer directly below the type layer:
We have our displacement map and we have our drop shadow on its own layer. We're ready to combine the two and create a much more realistic-looking shadow effect, and we'll do that next.
Step 9: Apply The Displacement Map To The Drop Shadow Layer Using The Displace Filter
We're ready to apply our displacement map. Click on the drop shadow layer in the Layers palette to select it. Then go up to the Filter menu at the top of the screen, select Distort, and then select Displace to bring up the Displace filter's dialog box:
There's two parts to using Photoshop's Displace filter. First, you set the options for how Photoshop will apply the displacement map, and then you select the displacement map you want to use. This first dialog box that appears is where you set the options. As I've circled above, set both the Horizontal Scale and Vertical Scale options to 10, if they're not already set to 10. For Displacement Map, select Stretch To Fit, and for Undefined Areas, choose Wrap Around. Click OK when you're done.
A second dialog box will open asking you to choose which file you want to use as your displacement map. Navigate to wherever you saved your displacement map from a few steps back and select it. Click Open to use the displacement map, and your drop shadow is instantly mapped to the background behind it!
To get a better idea of what's happening, I'm going to click on the eyeball icon on the far left of my type layer to temporarily hide my type from view so I can see just the drop shadow and the water behind it. Here's what my drop shadow looked like before applying the displacement map:
And here is my exact same drop shadow after applying my displacement map:
Thanks to the displacement map, the drop shadow is no longer sitting flat against the image behind it. It now curves and bends with the water, creating a much more realistic looking effect.
I'm going to click the eyeball icon for my type layer once again to bring my text back into view over top of the drop shadow, and here is my final result:
And there we have it! That's how you can create realistic drop shadows in Photoshop by mapping them to your image with displacement maps. Check out our Photo Effects section for more Photoshop effects tutorials!