
Collage Of Warped Photos With Photoshop
In this Photoshop effects tutorial, we're going to learn how to create a collage of "warped" photos. Now, don't go letting your imagination run wild here. When I say "warped", I don't mean "sick, twisted and shocking", unless of course those are the types of photos you want to use. What I'm talking about is photos that we'll be bending, curling, distorting and reshaping using Photoshop's Warp Tool.
I should point out here that the Warp Tool (not to be confused with the Text Warp tool) has only been around since Photoshop CS2, which means you'll need Photoshop CS2 or later if you want to follow along using the same techniques I'll be using in this tutorial. There are more complicated and time-consuming ways to create the same effect in older versions of Photoshop, but the Warp Tool makes things incredibly easy for us and is also really fun to use, as we'll see!
For this tutorial, I'll be using three photos in my collage, plus the image I'll be using as the background, for a grand total of four photos (who says math isn't easy?). You, of course, can use as many photos as you like. Since Halloween is fast approaching (at the time I'm writing this), I thought I'd go with a Halloween theme for my collage, but again you can use whichever photos you like.
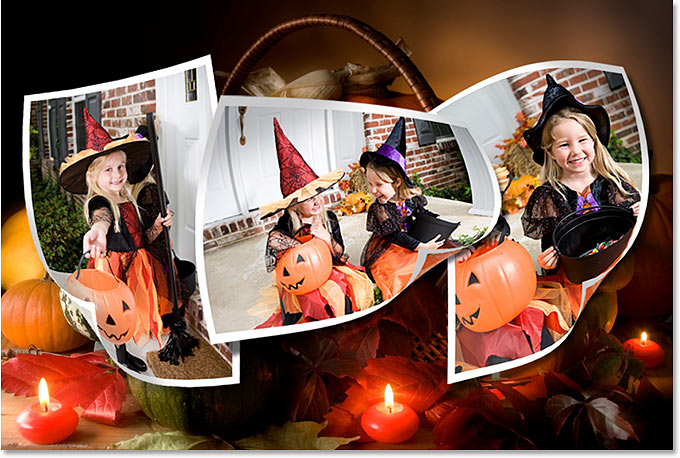
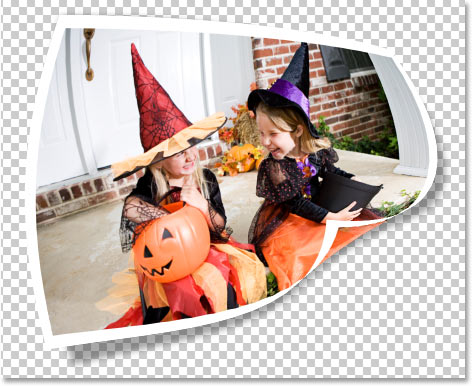
Here's the final effect we'll be working towards:
This tutorial is from our Photo Effects series. Let's get started!
Step 1: Open The First Photo You Want To Add To Your Collage
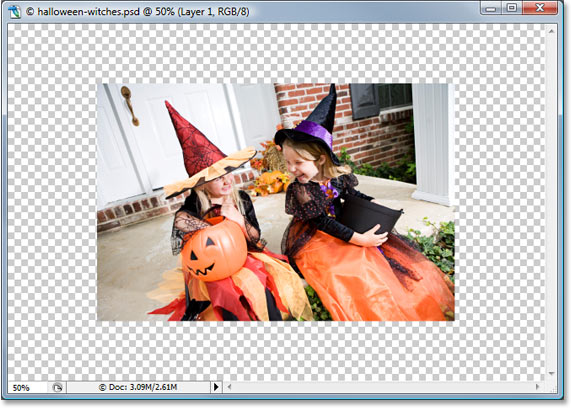
Open the first photo you want to add to your collage. We'll go through all the steps necessary to complete our work on this first photo, and then it's simply a matter of repeating the steps with each additional photo you want to add to your collage.
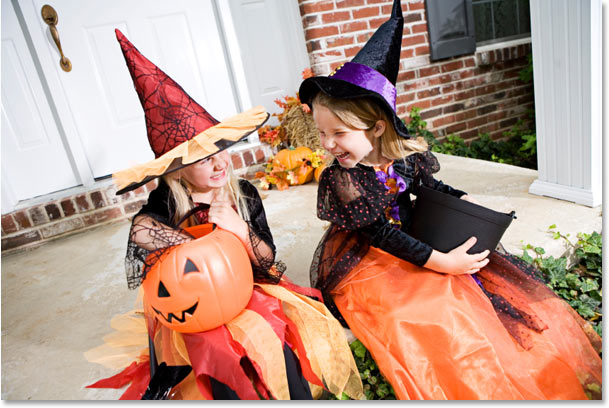
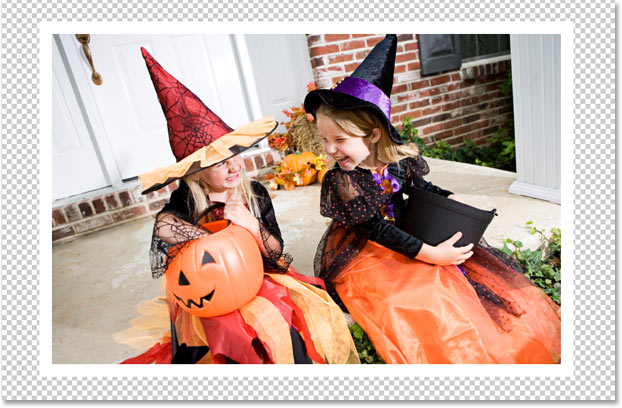
Here's the first photo I'll be using:
Step 2: Rename The Background Layer
With the photo newly opened inside Photoshop, if we look over in the Layers palette, we can see that we currently have one layer, named Background, which contains our image:
We need to add a new blank layer below this Background layer, but there's a small problem. Photoshop treats the Background layer differently from all other layers (which is why the name is written in italics). There's things we can do with other layers that we can't do with the Background layer. One of the things we can't do is add any layers below it. The Background layer must always remain the bottom layer in the Layers palette. Fortunately, there's an easy way around this problem. All we need to do is rename the layer to something other than "Background", and the easiest way to do that is by holding down your Alt (Win) / Option (Mac) key and double-clicking directly on the word "Background". Photoshop will automatically rename the layer "Layer 0":
Step 3: Add A New Blank Layer Below "Layer 0"
Now that our Background layer is no longer named "Background", we can add a layer below it. To do that, hold down your Ctrl (Win) / Command (Mac) key and click on the New Layer icon at the bottom of the Layers palette:
![]()
Clicking the "New Layer" icon adds a new blank layer, and by default, Photoshop places new layers above the layer we currently have selected in the Layers palette, but by holding down "Ctrl/Command" as we click on the icon, we tell Photoshop to place the new layer below the currently selected layer. As we can see now in our Layers palette, the new layer, which Photoshop has automatically named "Layer 1", appears below "Layer 0":
Step 4: Add Additional Canvas Space Around The Image
Since we're going to be bending and warping our image, we need to give ourselves a little extra room to work, which means we need to add some extra canvas space around the image. To do that, go up to the Image menu at the top of the screen and choose Canvas Size. This brings up the Canvas Size dialog box. Enter 150 for the Width and Height and change the measurement type for both to percent. Make sure the Relative option is not checked, and make sure the middle square is selected in the Anchor grid:
Click OK when you're done, and Photoshop will add the extra canvas space all around the image, giving us lots of room to work:
Step 5: Add A White Stroke To The Image
Click on "Layer 0" in the Layers palette to select the layer that contains the original image. Let's add a white photo border around the edge of the image. To do that, go up to the Edit menu at the top of the screen and choose Stroke. This brings up the Stroke dialog box. I'm going to enter a value of 20 px (pixels) for my Width, which works well with my image here. You may need to enter a different value depending on the size of the image you're using. I'm using a low resolution image for this tutorial, so if you're using a high resolution image, you'll need to try a higher width value. The goal here is to simply add what looks like a standard white photo border around the image, which means we also need to select white as our stroke color, so click on the color swatch to the right of the word Color, which brings up Photoshop's Color Picker and choose white.
Finally, set the Location option in the middle of the dialog box to Inside so the stroke appears inside the edge of the image:
Click OK to exit out of the dialog box and apply the white stroke:
Step 6: Warp The Image With Photoshop's Warp Tool
Here's where we get to the fun part. We're going to bend, twist and curl the image using Photoshop's Warp Tool. There's a couple of different ways to access the Warp Tool. One is to go up to the Edit menu at the top of the screen, choose Transform, and then choose Warp, but here's a faster way. Press Ctrl+T (Win) / Command+T (Mac) to bring up Photoshop's Free Transform box and handles around the image, then simply click on the Warp icon in the Options Bar at the top of the screen:

You can click on that icon again at any time to switch back and forth between Free Transform and the Warp Tool.
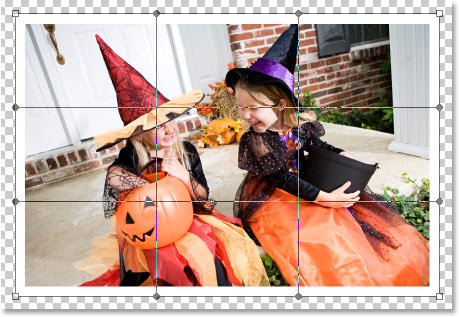
With the Warp Tool selected, you'll see a 3x3 grid appear over your image:
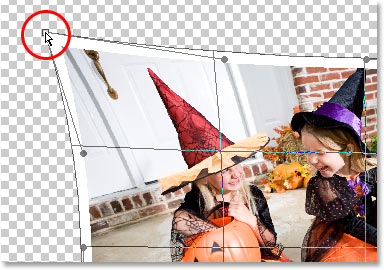
If you've never used the Warp Tool before, it may seem a little confusing at first, but the easiest thing to do is simply play around with it and see what it does, since nothing you do will actually be applied to the image as long as the Warp Tool remains active. In no time at all, you'll see just how easy and fun the tool really is. To warp the image from any of the corners, simply click on any of the square corner handles and drag it around with your mouse. Here I'm dragging the top left corner outward:
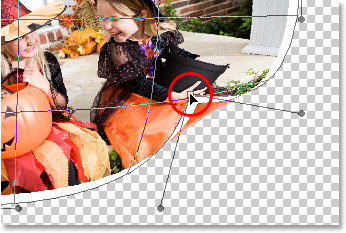
To create a page curl, which is where the Warp Tool really shines, drag any of the corner handles inward. If you drag the corner in far enough, you'll actually see what looks like the back of the photo appearing in the corner (it's actually a mirror image of the photo, but it still looks pretty cool):
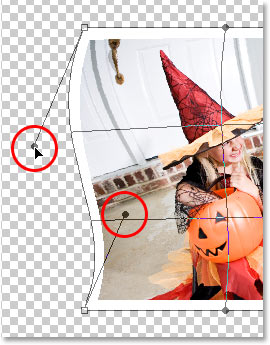
You can also warp the image by dragging the round handles that extend out from the corners:
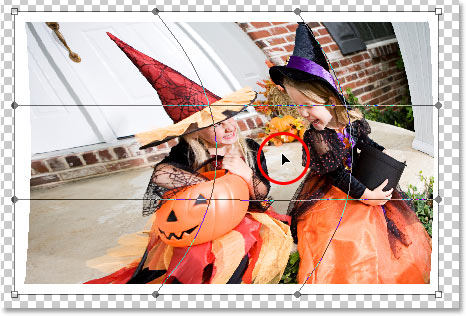
And yet another way to warp the image is by simply clicking anywhere inside of the image and dragging your mouse around to warp it from that spot:
As you can see, Photoshop's Warp Tool gives us lots of control and flexibility over how we bend and reshape the image, and for this collage effect we're creating, there's no right or wrong way to go about it. We're not trying to create any sort of realistic effect here, although we could if we wanted. All we're really going for is something that looks fun, so feel free to play around with your image, warping, stretching, bending, twisting, and curling it anyway you like. The only thing you should try to avoid is warping anyone's face, since they may not be too happy when they see what you've done, so try to limit your warp effects to the corners and edges of the photo as much as possible.
Unfortunately, there's no "undo" with the Warp Tool, so if you're not happy with what you've done and want to try again, you'll need to press your Esc key to cancel your changes and exit out of the Warp Tool, then go back and start over.
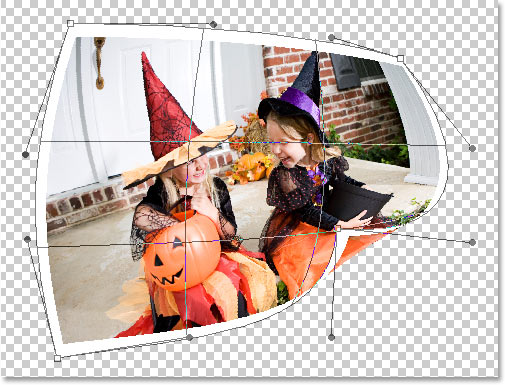
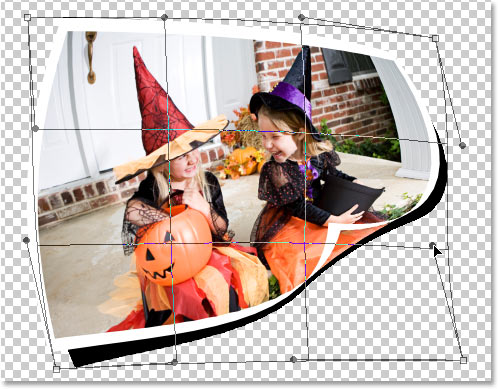
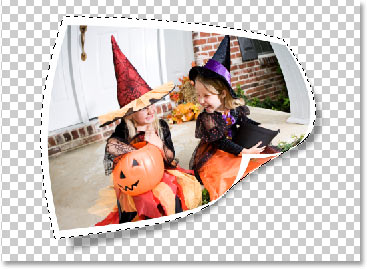
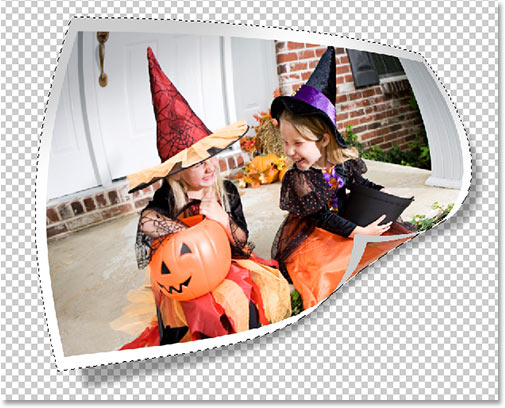
Here's what my image looks like, with the Warp Tool still active, after I've reshaped the image in a way that works for me (yours may look completely different):
When you're ready to accept your changes, press Enter (Win) / Return (Mac) to have Photoshop apply them to the image.
Step 7: Duplicate The Layer
Now that we've warped the image, we need to duplicate it. To do that, with "Layer 0" (the layer that contains our image) selected in the Layers palette, use the keyboard shortcut Ctrl+J (Win) / Command+J (Mac) to duplicate the layer. If we look in the Layers palette now, we can see the newly created copy of the layer, which Photoshop has named "Layer 0 copy", above the other two layers:
Step 8: Fill The Original Image On "Layer 0" With Black
Click back on "Layer 0" in the Layers palette to select it. Then, press the letter D on your keyboard if needed to reset your Foreground and Background colors so black becomes your Foreground color (white becomes your Background color). You can see your current Foreground and Background colors in the color swatches near the bottom of the Tools palette (the swatch in the top left is the Foreground color and the one in the bottom right is the Background color):
Then, with "Layer 0" selected, use the keyboard shortcut Shift+Alt+Backspace (Win) / Shift+Option+Delete (Mac) to fill the image on the layer with black. You won't see anything happen in your document window and that's because the image on "Layer 0 copy" is blocking what we've done on "Layer 0" below it from view, but if we look at the preview thumbnail for "Layer 0" in the Layers palette, we can see that the image has in fact been filled with black:
Step 9: Create A Drop Shadow With The Warp Tool
We're going to use the Warp Tool once again, this time to create a drop shadow effect for our image using the area we just filled with black. With "Layer 0" still selected, I'm going to access the Warp Tool the same way I did before, by pressing Ctrl+T (Win) / Command+T (Mac) to bring up the Free Transform handles and then clicking on the Warp Icon in the Options Bar. I want the light to appear to be coming from the top left, which means my shadow needs to appear along the bottom right of the image. So with my Warp Tool active, I'm going to bend and reshape the black-filled area so it sticks out from under the right and bottom of the image. Again, we're not going for absolute realism here, so feel free to exaggerate things a little:
Press Enter (Win) / Return when you're done to accept and apply the changes.
Step 10: Apply The Gaussian Blur Filter
We need to blur the edges of our shadow a little, so go up to the Filter menu at the top of the screen, choose Blur, and then choose Gaussian Blur. When the Gaussian Blur dialog box appears, I'm going to enter a Radius value of about 6 pixels to blur the edges of my shadow slightly. Again, you may need to enter a higher value if you're using a high resolution image:
Click OK to exit out of the dialog box when you're done.
Step 11: Lower The Opacity Of The Layer
We've warped our shadow into shape with the Warp Tool and blurred out the edges, but our shadow is much too intense at this point. To fix that, go up to the Opacity option in the top right of the Layers palette and lower the layer's opacity to around 60%:
Here's my image after lowering the opacity of the shadow:
Step 12: Add A New Blank Layer Above The Other Layers
We're almost done, but let's finish things off by adding some subtle highlights and shadows to our photo to enhance the illusion that it's really bending and twisting in 3D space. To do that, we first need to add a new layer above the other layers, so click on the top layer ("Layer 0 copy") to select it, then click on the New Layer icon at the bottom of the Layers palette to have Photoshop add a new blank layer at the top, which it automatically names "Layer 2":
Step 13: Change The Blend Mode Of The New Layer To "Hard Light"
We need to change the blend mode of our new layer. To do that, go up to the Blend Mode options in the top left corner of the Layers palette. By default, the layer is set to the "Normal" blend mode. Click on the down-pointing arrow to the right of the word "Normal" and select Hard Light from the list:
Step 14: Lower The Opacity Of The Layer
We're going to use this layer to paint in some highlights and shadows with Photoshop's Brush Tool, but before we do, we need to lower the opacity of this layer quite a bit. We want very subtle highlights and shadows, so go over to the Opacity option in the top right of the Layers palette and lower the opacity all the way down to about 20% to start with. You may need to raise or lower it slightly when you're done:

Step 15: Load A Selection Around The Image
Before we begin painting, let's make sure we paint "inside the lines" so-to-speak, so we're not painting over any of the transparent areas around the image. To do that, hold down your Ctrl (Win) / Command (Mac) key and click directly on the preview thumbnail for "Layer 0 copy" (the layer that contains our image) in the Layers palette:
This loads a selection around the image in the document window:
Step 16: Select The Brush Tool
Select Photoshop's Brush Tool from the Tools palette, or simply press B on your keyboard to select it with the shortcut:
Step 17: Paint With Black To Add Shadows To The Image
With the Brush Tool selected and black as your Foreground color, paint over a few areas in the image to add subtle shadows, giving the image a bit more of a 3D look to it. Resize your brush as needed by pressing the left bracket key on your keyboard to make the brush smaller or the right bracket key to make it larger. To control the hardness of the brush edges, hold down your Shift key and press the left bracket key a few times to soften the edges, or hold down Shift and press the right bracket key a few times to make the brush edges harder.
You can also Right-click (Win) / Control-click (Mac) anywhere inside the document to bring up the Brush Tool dialog box where you can adjust the brush diameter and hardness with slider controls at the top:
Then simply paint over parts of the image to add some shadows. Thanks to the selection we've loaded around the image, we don't have to worry about accidentally painting in the area outside of the photo. The only area we can paint over is the area inside the selection.
If you make a mistake or you're just not happy with how you painted over an area, either press Ctrl+Z (Win) / Command+Z (Mac) to undo your last brush stroke, or press E on your keyboard to switch to Photoshop's Eraser Tool, erase over the mistake, then press B to switch back to your Brush Tool and continue painting. Here's my image after painting in some shadows in the top left and right corners, as well as over the page curl in the bottom right corner:
Step 18: Paint With White To Add Highlights To The Image
Once you're done painting in some shadows, press the letter X on your keyboard to swap your Foreground and Background colors so white becomes your Foreground color.
Then just as you did for the shadows, simply paint over a few areas to add some highlights, changing your brush size and edge hardness as needed.
Here, I'm painting a very subtle white highlight area in the bottom left corner of the image:
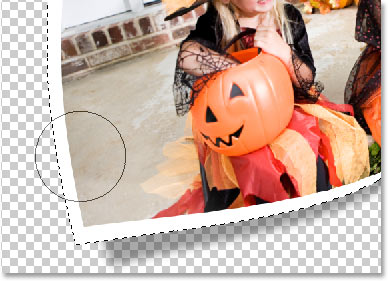
The highlights aren't as noticeable in my image since I'm painting over an area that is already fairly bright. They may be more noticeable in your image, but even a very subtle highlight still adds to the effect and keeps the image from looking flat.
When you're done painting your shadows and highlights, press Ctrl+D (Win) / Command+D (Mac) to deselect the selection around the image.
Step 19: Adjust The Layer Opacity If Needed
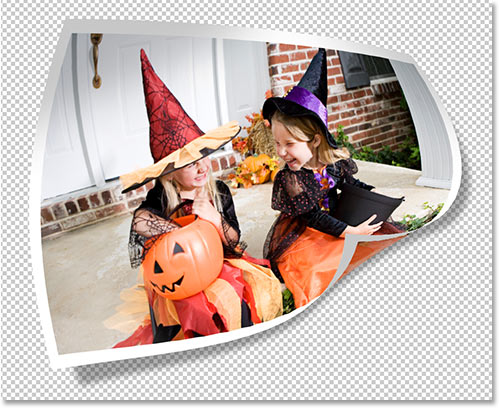
If you find that your shadows and highlights are a bit too subtle in your image, go back to the Opacity option in the top right corner of the Layers palette and increase the layer opacity until you're happy with how they look. Or if you think your shadows and highlights are too strong, lower the opacity slightly. Either way, you shouldn't need to adjust the opacity amount by much, since even small adjustments have a big impact with the layer set to the Hard Light blend mode. I'm going to fine-tune my shadows and highlights by increasing my layer opacity to 22%:
Here's my image now with my shadows and highlights added:
Step 20: Group The Three Layers That Make Up The Image
We've completed our work on our first photo! All we need to do now is add it to our main collage document (which we'll open in a moment). Right now, our image is made up of three separate layers - the main image on "Layer 0 copy", the main shadow below it on "Layer 0", and the highlights and shadows on "Layer 2" at the top. Rather than dragging three separate layers into the main collage document, let's make things easier by grouping the layers so all three of them will be placed inside a "folder" in the Layers palette. That way, we can simply drag the folder over to the collage document instead of dragging three separate layers. This will also make it easier to keep our main collage document organized when we start adding additional photos to it.
To create the layer group, since "Layer 2" is currently selected in the Layers palette, hold down Shift and click on "Layer 0". This will select both "Layer 0" and "Layer 0 copy" above it while keeping "Layer 2" at the top selected, so all three layer will then be selected (in previous versions of Photoshop, you would need to link the layers together rather than selecting them like this):
With all three layer selected, either go up to the Layer menu at the top of the screen and select Group Layers or simply use the keyboard shortcut Ctrl+G (Win) / Command+G (Mac). Whichever way you choose, Photoshop adds all three layers into a new group. If you look in your Layers palette, you'll see that the three layers seem to have disappeared, replaced by a folder icon with the name "Group 1" beside it. Double-click directly on the words "Group 1" and rename the group something more descriptive like "Photo 1":
If you look closely, you'll see a small, right-pointing triangle to the left of the folder icon. Click on it to twirl the folder open, and you'll see your three layers appear inside of it:
Click on the triangle once again to close group, leaving only the folder visible.
Step 21: Open The Image To Use As Your Collage Background
The work on our first photo is done and we've organized the three layers that make up the image into a layer group.
All we need to do now is drag the layer group over to our main collage document, so go ahead and open the image you want to use as your background.
Here's the image I'll be using:

Step 22: Drag The Layer Group Into The Main Collage Image
With both images open in their own separate document windows on your screen, click anywhere inside the document containing the photo we just finished working on so that its document window is selected. Then, simply click on the layer group in the Layers palette and drag the group into your background image document:
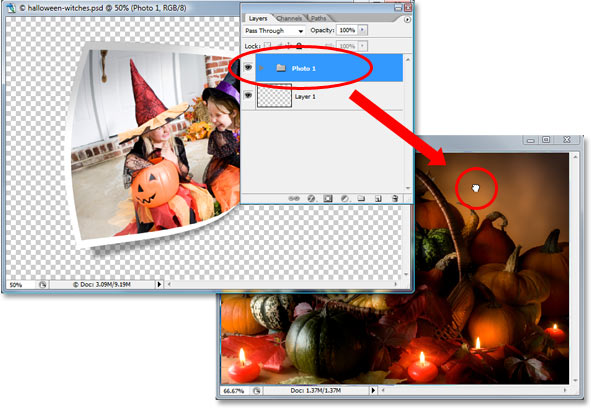
You'll see your photo appear in front of your background image in the new document, and if you look in the new document's Layers palette, you'll see that the layer group has been copied over to the new document and is now sitting above the Background layer:
Step 23: Resize And Reposition The Photo With Free Transform
Now that our first photo is in front of the background inside the document we'll be using for our collage, we can move and resize it as needed. To do that, press Ctrl+T (Win) / Command+T (Mac) to once again bring up the Free Transform box and handles around this image. To move the photo with Free Transform, simply click anywhere inside the photo (except for on the small target icon in the center) and drag the image into position with your mouse. To resize the image, hold down Shift and drag any of the corner handles. Holding down Shift as you drag constrains the the width and height proportions of the image, maintaining its original shape. To resize the image from its center, hold down Alt (Win) / Option (Mac) as you drag (you can hold Shift as well to constrain the proportions and resize from the center at the same time). You can also rotate the image if you want by moving your mouse cursor just outside the Free Transform box and then clicking and dragging your mouse.
Here, I've moved my photo into the center of the document and I'm resizing it by dragging the bottom corner handle inward:
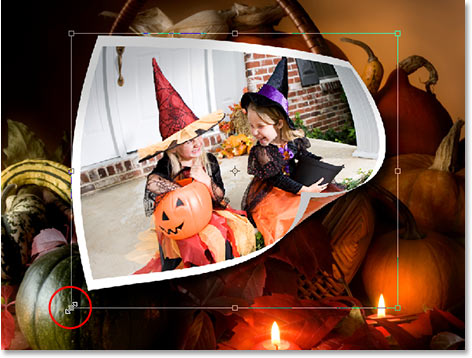
Press Enter (Win) / Return (Mac) to accept your changes when you're done.
Step 24: Repeat The Same Steps To Add Additional Photos Into The Collage
And with that, our first photo has successfully been warped into shape and added into our collage! To add more photos (it wouldn't be much of a collage if we didn't add more photos), simply repeat the steps we've just worked through for each additional photo, warping each one differently for variety. When you get to the part where you add the layers into a layer group, name your new groups with successive numbers ("Photo 2", "Photo 3", "Photo 4", etc.), then simply drag them into the main collage document, move them into place and resize them as needed with Free Transform.
I've added two more photos to my collage, and if I look in my Layers palette, I can see that I now have three layer groups, named "Photo 1", "Photo 2" and "Photo 3", above my Background layer which contains my background image:

If you want to move one photo on top of another in your collage, simply click on its layer group in the Layers palette and drag it above the other photo's group to change the "stacking order". Layers and layer groups that are higher in the Layers palette appear in front of layers and groups below them.
Here, after adding my two additional photos, is my final result:
And there we have it! That's how to create a collage of warped photos in Photoshop! Visit our Photo Effects section for more Photoshop effects tutorials!