
How To Use Face-Aware Liquify In Photoshop CC
In this tutorial, we'll learn all about the new Face-Aware Liquify feature in Photoshop CC, which brings powerful face-detection capabilities to the Liquify filter, allowing us to easily reshape or distort a person's eyes, nose, mouth, and other facial features!
Face-Aware Liquify was first added to Photoshop CC as part of the June 2016 Creative Cloud updates, which, if you're keeping score, brought Photoshop CC up to version 2015.5. To use it, you'll need to be running Photoshop CC, and you'll want to make sure that your copy is up to date.
There are two main parts to this new addition to the Liquify filter. First, we have new Face-Aware Liquify sliders which make reshaping a face both simple and intuitive. There's sliders for adjusting the size, angle and distance of the eyes. Other sliders for adjusting the height and width of the nose. Still more sliders for reshaping the mouth (including a person's smile), and even more for things like raising or lowering the forehead and chin, expanding or contracting the jawline, and adjusting the width of the face. As we'll see, all of these things can now be done simply by dragging sliders left or right.
The Liquify filter also gets a brand new Face Tool which allows us to control the sliders simply by clicking and dragging directly on the image itself. The Face Tool even lets us do things that we can't do with the sliders, like adjust the cheeks, reposition the nose, and even move a person's eyes in different directions!
Once we've covered all there is to know about using Face-Aware Liquify, we'll finish up the tutorial by learning how to use it not only with a photo of a single person, but also with group shots, and how we can easily switch between multiple faces in a photo to select just the one we need. There's a whole lot to cover, so let's get started!
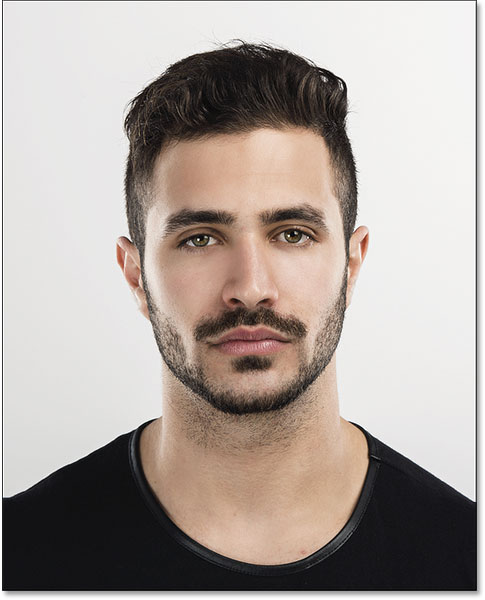
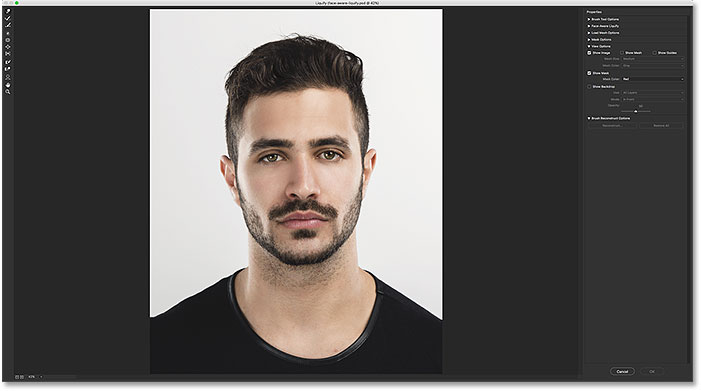
Here's an image I've opened on my screen. I downloaded it from Adobe Stock, but you can easily follow along with any portrait photo:
Applying Liquify As A Smart Filter
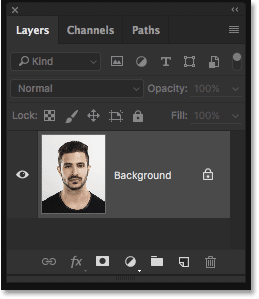
If we look in my Layers panel, we see the image sitting on the Background layer:
In a moment, I'm going to apply the Liquify filter to my image. But if we apply a filter directly to a normal layer in Photoshop, the filter will be applied as a static filter, which means we'll be making permanent changes to the image. A better way to work is to keep the filter settings fully editable, and we can do that simply by applying the filter not to a normal layer but to a Smart Object.
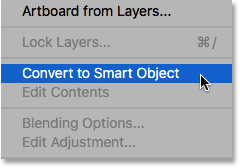
To convert the layer into a Smart Object, click on the small menu icon in the top right corner of the Layers panel:
Then choose Convert to Smart Object from the menu that appears:
Nothing will seem to have happened to the image, but if we look again in the Layers panel, we now see a Smart Object icon in the lower right of the preview thumbnail. This icon tells us that the layer has in fact been converted to a Smart Object:
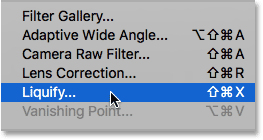
Now that we've converted the layer into a Smart Object, any filter we apply to it will automatically be converted into a non-destructive Smart Filter, which means that the effect will remain fully editable even after the filter is applied. To apply the Liquify filter, go up to the Filter menu in the Menu Bar along the top of the screen and choose Liquify:
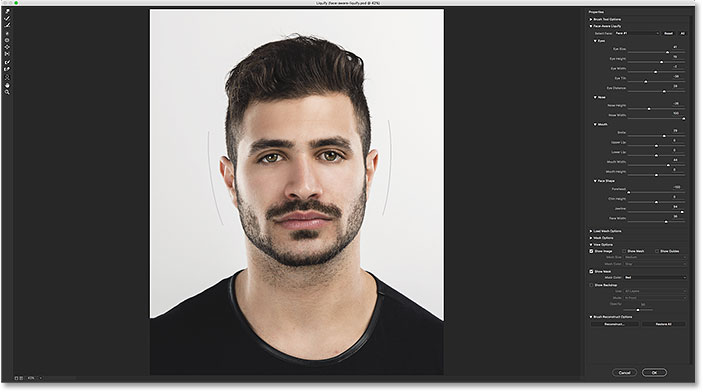
This opens the Liquify filter's dialog box, which is made up of the main image area in the center, a Toolbar along the left and a whole bunch of options in the Properties panel along the right. We won't be covering everything there is to know about the Liquify filter here. Instead, we'll focus specifically on the new Face-Aware Liquify features:
The Face-Aware Liquify Sliders
As I mentioned earlier, there are two new additions to the Liquify filter in Photoshop CC 2015.5; a new Face Tool located in the Toolbar, and a new set of sliders for controlling different areas of a person's face. We'll start with the sliders which are found in the new Face-Aware Liquify section of the Properties panel on the right:
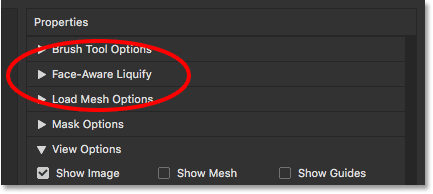
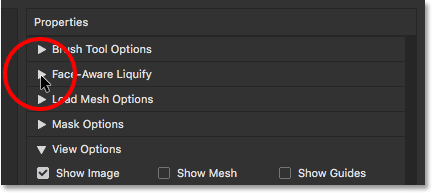
At the moment (at least for me), the section is closed. To twirl it open, click on the triangle to the left of its name:
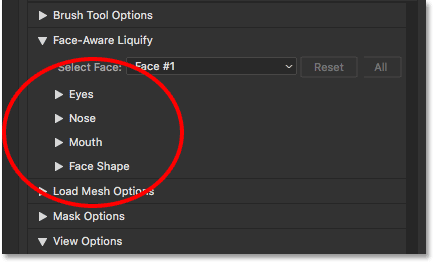
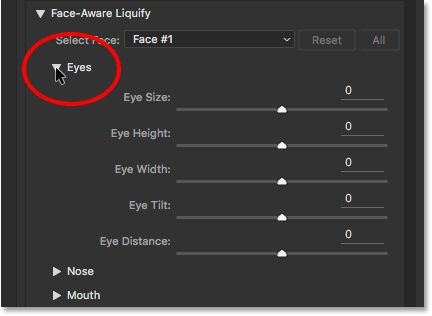
When the Face-Aware Liquify section opens, we find four main categories, each targeted to a different area of the face. Starting from the top, we have the Eyes, followed by the Nose, then the Mouth, and then the overall Face Shape:
Eyes
Let's start with the eyes. I'll twirl the Eyes category open by clicking on the triangle to the left of its name. You can click the same triangle again later on if you need to close a category to save space on your screen. Here we find a series of sliders, each controlling a different property of the eyes. Again from the top, we have Eye Size, Eye Height, Eye Width, Eye Tilt, and Eye Distance. By default, the sliders are all set to a value of 0 in the center, which means they're currently having no effect on the image:
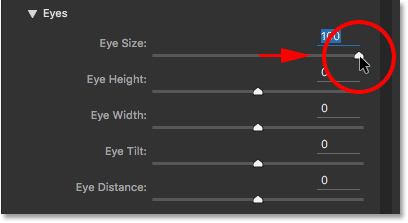
All of the sliders in the Face-Aware Liquify section, not just for the eyes but also for the nose, mouth, and face shape, share the same range of values. We can drag them toward the right to a maximum value of 100, or we can drag them toward the left to a maximum value of -100. Dragging a slider back to the center will reset it to 0. Of course, each slider controls a different aspect of the face, so let's see what each one does.
Eye Size
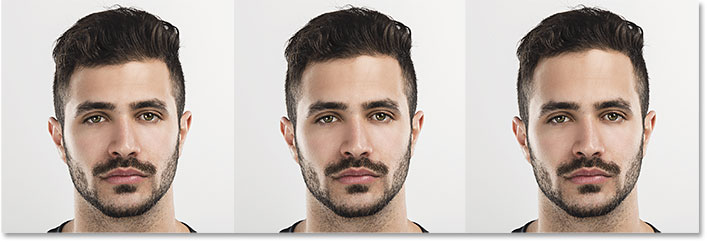
The Eye Size slider increases or decreases the overall size of the eyes. If we drag the slider to the right, we make the eyes larger:
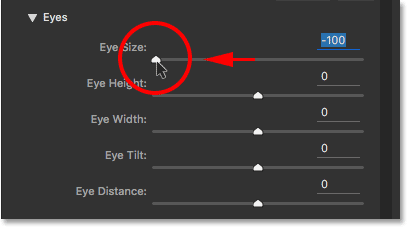
And if we drag the same slider toward the left, we make the eyes smaller:
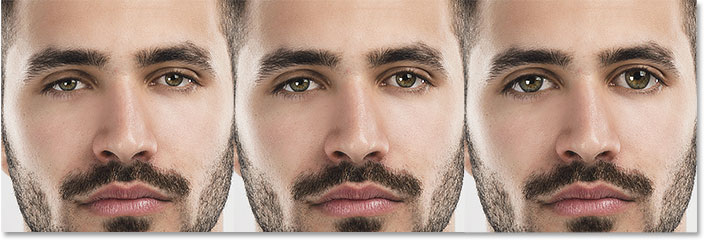
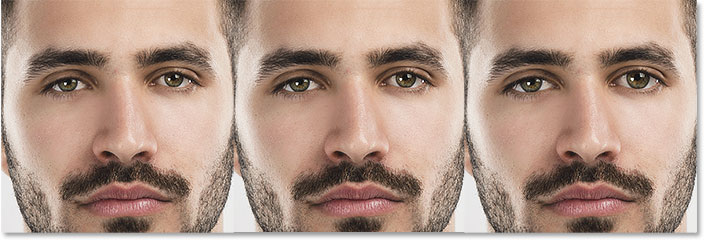
Here's a comparison showing the effect that each setting has on the image. I'll use a similar comparison for each of the sliders as we go along. The image in the center shows the slider in its default center position (with a value of 0, where it has no effect). The version on the left shows the result of the slider when dragged all the way to the left (to its maximum value of -100). The image on the right shows the effect with the slider dragged all the way to... you guessed it, the right (to its maximum value of +100). So, left image = slider left; center image = slider center; right image = slider right.
Of course, you don't need to drag the sliders all the way to their maximum values. Lower values will give you more subtle results. It's just easier for us to see the effect at the maximum settings, so that's what I'll use:
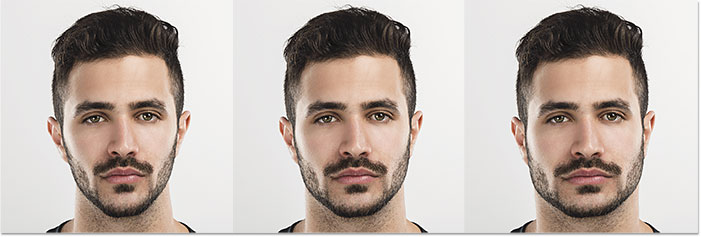
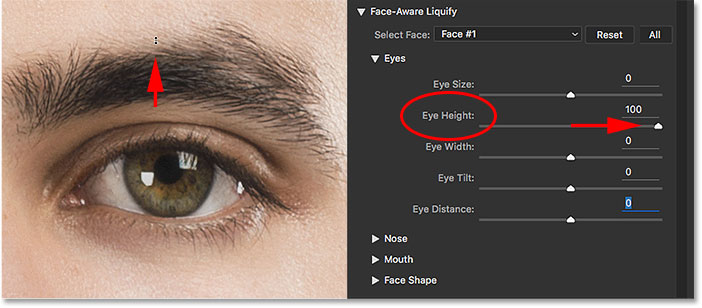
Eye Height
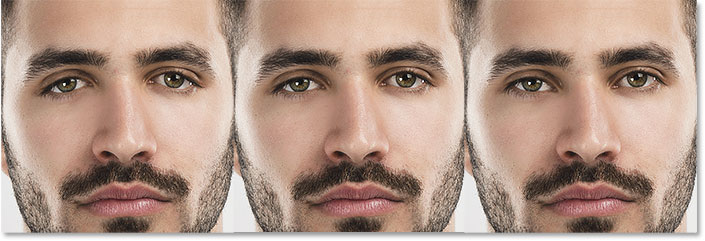
The Eye Height slider expands or contracts the eyes vertically. Drag the slider to the right to expand their height, or to the left to contract it. Again, here's a comparison of the effect, with the left image showing the result of the slider dragged all the way to the left at -100, the center image showing the slider in the center position at 0, and the right image showing what happens with the slider dragged all the way to the right at +100:

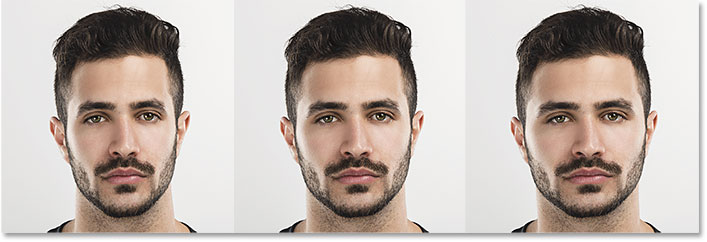
Eye Width
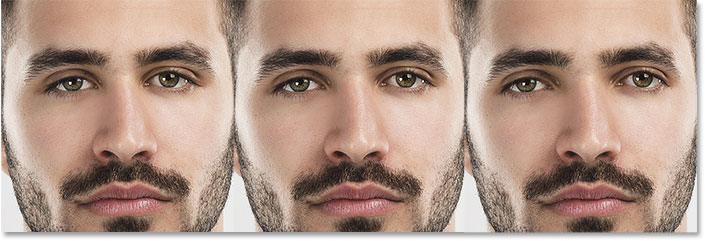
The Eye Width slider expands or contracts the eyes horizontally. Dragging to the right expands their width, while dragging to the left contracts it. You'll notice as we go along that some of the sliders give us more subtle results than others, even at their max settings:
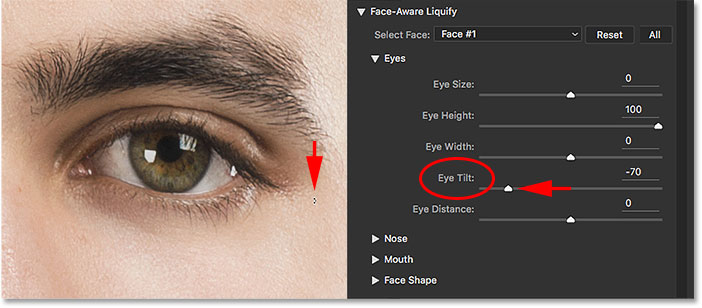
Eye Tilt
The Eye Tilt slider adjusts the angle of the eyes. Dragging to the right tilts the eyes down and inward, while dragging to the left tilts them in the opposite direction, making them look more "droopy":
Eye Distance
The Eye Distance slider adjusts the amount of space between the eyes. Drag to the right to push the eyes farther apart, or to the left to bring them closer together:
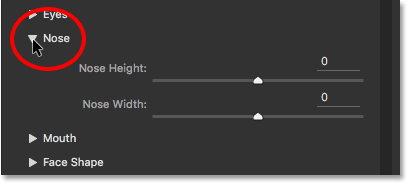
Nose
Next up, we have the Nose category with just two sliders, Nose Height and Nose Width:
Nose Height
Both of these sliders are pretty straightforward. The Nose Height slider adjusts the length of the nose. Drag the slider to the right to shorten it, or to the left to make it longer:
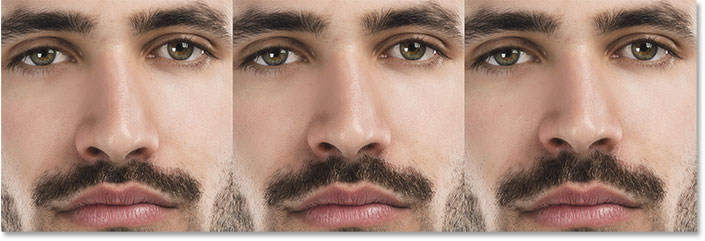
Nose Width
The Nose Width slider expands or contracts the width of the nose. Dragging to the right makes the nose thinner, while dragging to the left makes it thicker:
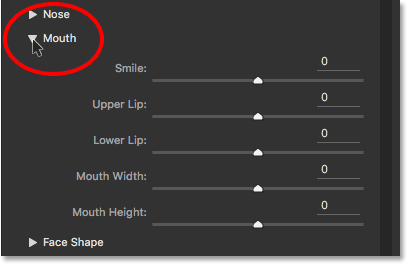
Mouth
Next, I'll twirl open the Mouth category, where we find sliders for adjusting the Smile (more on that in a moment), the Upper Lip, Lower Lip, the Mouth Height, and the Mouth Width:
Smile
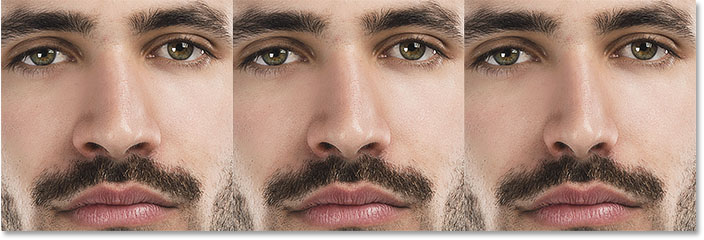
One of the more interesting sliders in the Face-Aware Liquify section is Smile, which increases or decreases the curve of the person's mouth. To increase it, bringing out more of a smile, drag the slider to the right. To decrease the curve and add more of a frown, drag to the left:
Upper Lip
Use the Upper Lip slider to adjust the thickness of the upper lip. Dragging to the right makes it thicker, while dragging to the left makes it thinner:
Lower Lip
The Lower Lip slider does the same thing but for the lower lip, and it works in the opposite direction. Dragging to the right will make the lower lip thinner. To make it thicker, drag to the left:
Mouth Width
The Mouth Width slider expands or contracts the mouth horizontally, making it appear wider (dragging to the right) or more narrow (dragging to the left):
Mouth Height
The Mouth Height slider will expand the mouth vertically by dragging to the right, and contract it vertically by dragging to the left. Keep an eye on this one, though, as dragging too far to the right can sometimes stretch the lips too far and cause weird patterns or artifacts:

Face Shape
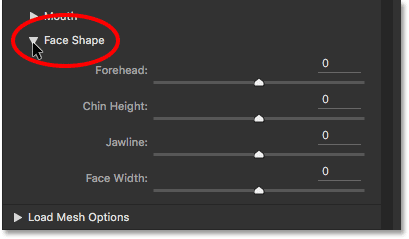
The last (but by no means the least) of the four Face-Aware Liquify categories is Face Shape, with sliders for adjusting the Forehead, the Chin Height, the Jawline, and the Face Width. Of all the sliders in the Face-Aware Liquify section, the Face Shape sliders give us some of the most dramatic results:
Forehead
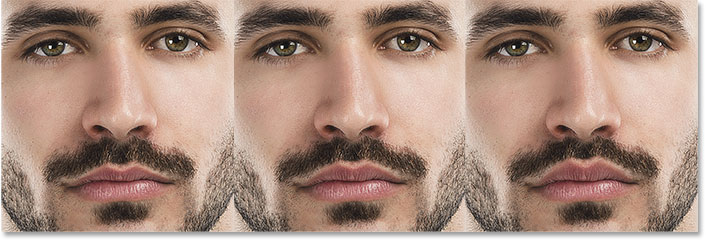
The Forehead slider raises or lowers the forehead. Drag to the right to bring out more of the forehead (and raise the person's IQ), or drag to the left to lower it but give them a more impressive hairline:
Chin Height
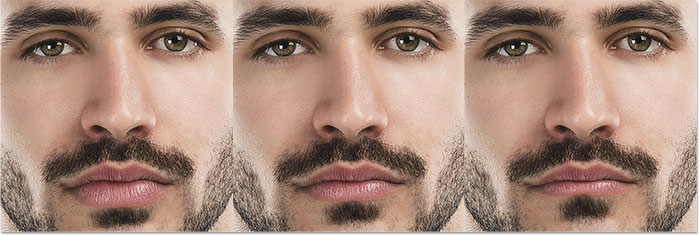
The Chin Height slider raises (drag to the right) or lowers (drag to the left) the chin:

Jawline
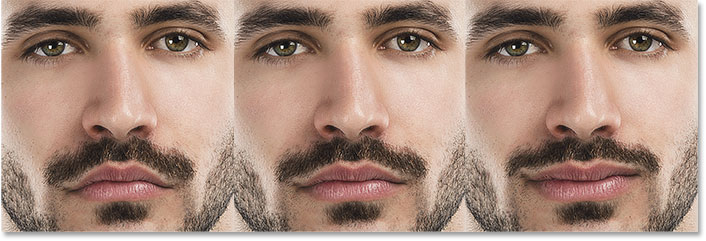
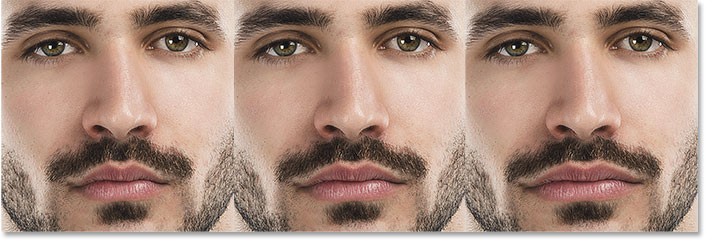
Use the Jawline slider to expand or contract the jawline. Dragging to the right makes it wider; dragging to the left makes it more narrow:
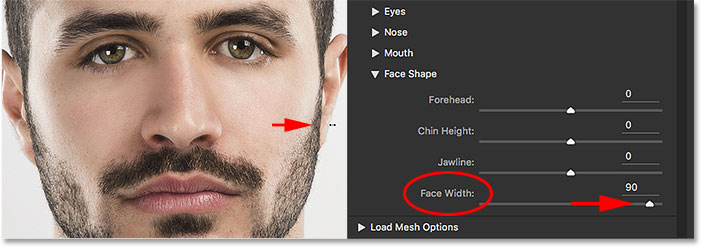
Face Width
And finally, the Face Width slider expands or contracts the overall width of the face. Drag to the right to widen the face, or to the left to squish it inward:
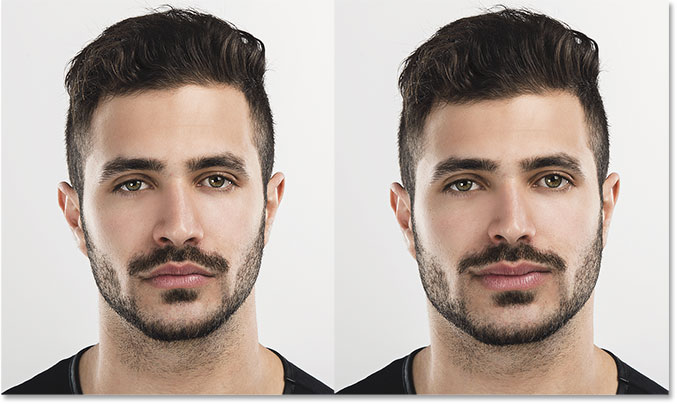
Before And After
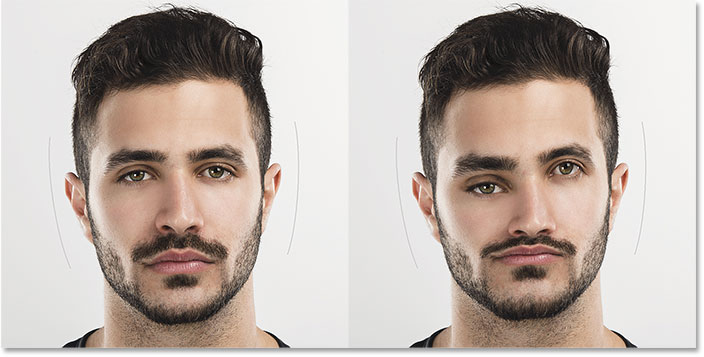
The main purpose of the Face-Aware Liquify sliders is to correct unwanted distortions in an image that are causing someone to look different from how they appear in real life. But the sliders can just as easily be used to make a person look like someone else entirely!
Here once again is my original image on the left. On the right is the same person (or at least, it was the same person) after having some fun with the sliders:
Resetting The Sliders
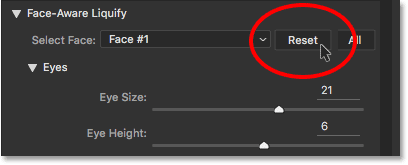
To quickly reset all of the sliders back to 0, click the Reset button. This will instantly restore the face to its original state:
The Face Tool
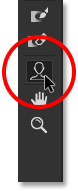
The other new Face-Aware Liquify feature is the Face Tool which is found in the Toolbar along the left of the dialog box. You can also select the Face Tool by pressing the letter A on your keyboard:
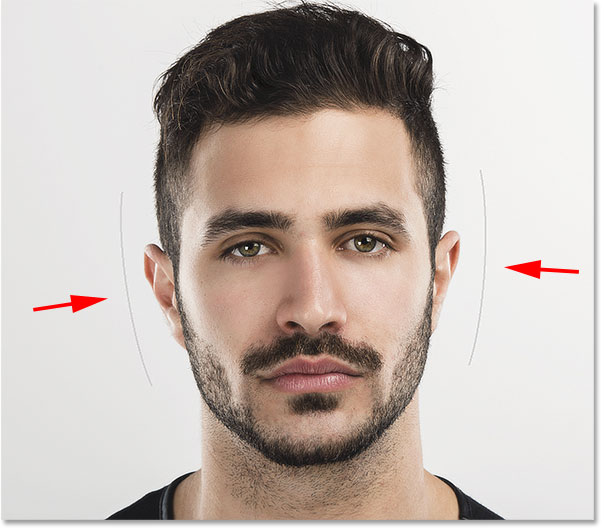
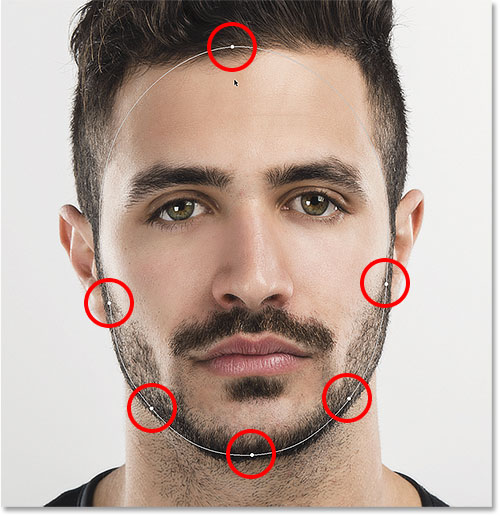
When we select the Face Tool, Photoshop draws a thin outline on either side of the face it detected. The outline appears even when there's only one person in the photo, but as we'll see later on, it's really more helpful when working on photos of multiple people, since the outlines tell us which faces Photoshop was able to detect (and which ones it missed):
The reason we learned about the sliders before looking at the Face Tool is that the Face Tool really just gives us another way to adjust the sliders. The difference is, rather than dragging the sliders themselves, the Face Tool lets us click and drag directly on the image.
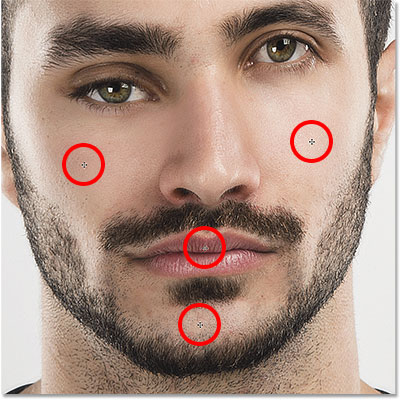
If I hover the Face Tool over one of the eyes, for example, different handles appear. There's a round one above and below the eye, another round one on the side, a diamond-shaped one in the upper corner, and a dotted curved line along the outer edge. Similar handles would appear if I hovered over the other eye:
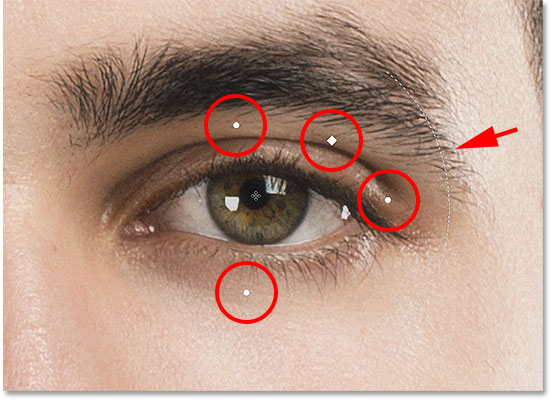
Each handle is linked to one of the sliders, and dragging a handle has the same effect as dragging the slider. The round handles above and below the eye are linked to the Eye Height slider. Dragging either one adjusts the height of the eyes (the eyes will be adjusted together regardless of which eye you choose), and you'll see the Eye Height slider in the Properties panel moving along with you as you drag. To make it easier to see what you're doing, the handles fade away as soon as you start dragging, which is why they're not visible in the screenshot:
The round handle on the side is linked to the Eye Width slider. The diamond-shaped handle in the upper corner controls the Eye Size slider. And if we click and drag on the curved dotted line along the outer edge, we move the Eye Tilt slider. If you have Tool Tips enabled in Photoshop's Preferences, you can hover your cursor over each handle and the name of its matching slider will appear. The only slider that does not have a handle associated with it is Eye Distance.
Here, I'm clicking and dragging downward on the Eye Tilt handle (the curved dotted line), and not only am I changing the angle of the eyes, but we can see that the Eye Tilt slider has moved along with me. If you accidentally click and drag the wrong handle, simply press Ctrl+Z (Win) / Command+Z (Mac) on your keyboard to undo it:
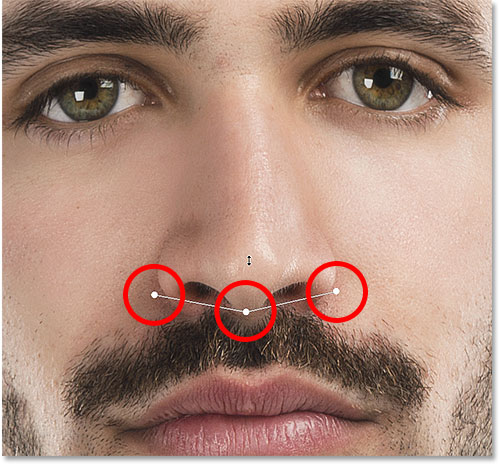
Similar handles will appear when we hover the Face Tool over the nose. The handle on the bottom is linked to the Nose Height slider, while the handles on either side control the Nose Width slider:
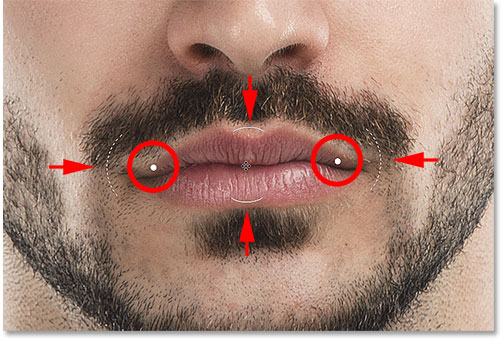
Hovering the Face Tool over the mouth displays handles for adjusting the various Mouth properties. Drag either of the round handles on the sides to adjust the Mouth Width. The curved dotted lines along the left and right edges control the angle of the Smile. Raise or lower the Upper Lip by dragging the curved line directly above it, or the Lower Lip by dragging the curved line below it. The Mouth Height slider does not have a matching handle, so for that one, you'll need to drag the slider itself:
Finally, when we hover the Face Tool closer to an edge of the face, we see various handles for adjusting the Face Shape properties. The handle at the top raises or lowers the Forehead, while the handle at the bottom raises or lowers the Chin Height. The two handles on either side expand or contract the Face Width, and the handles in the lower corners adjust the Jawline:
Here, I'm dragging the Face Width handle on the right to widen the face, and we see the Face Width slider in the Properties panel moving as well:
More Face Tool Adjustments
The real benefit of the Face Tool is that, along with being able to adjust the sliders by dragging directly on the image, it also opens up additional areas that we can adjust; areas that are not accessible with the sliders. But this is also where things can get weird pretty quickly.
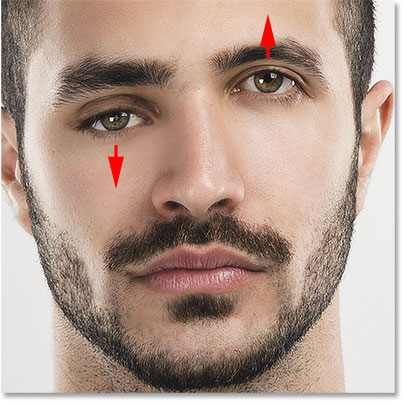
For example, if we hover the Face Tool directly over an eye, notice that the cursor changes into a four-point directional arrow:
Whenever we see this directional arrow, it means we can click on the area and drag it around freely in any direction. In this case, it means we can move the eye around. But unlike the sliders which adjust both eyes at once, the Face Tool actually lets us drag both eyes separately from each other, in any direction:
The same directional cursor appears when we hover the Face Tool over the nose, which means we can click and drag the nose in any direction. Here, I've dragged it down and to the right:
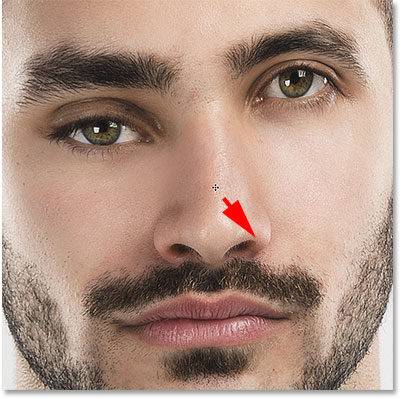
You'll also see the directional cursor when you hover over the left and right cheek, the mouth and the chin, each of which can be freely reshaped:
When used for subtle adjustments, the Face Tool can work wonders. But it can also get out of hand pretty quickly, as we see in this before (left) and after (right) comparison:
There's a few things you can do if things start to go wrong. To undo your last step, press Ctrl+Z (Win) / Command+Z (Mac) on your keyboard. To undo multiple steps one at a time, press Ctrl+Alt+Z (Win) / Command+Alt+Z (Mac) repeatedly. Or, as we learned earlier, you can instantly revert the face back to its original state by clicking the Reset button above the sliders in the Properties panel:

Applying Your Settings
When you're happy with the results, click OK to commit your settings and close out of the Liquify filter:

Editing Your Settings
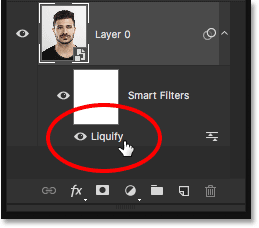
Way back at the beginning of the tutorial, before we even applied the Liquify filter, we first converted our image into a Smart Object. We did that so we could apply Liquify as an editable Smart Filter. Now that we've applied our settings and closed out of the Liquify dialog box, if we look in the Layers panel, we see Liquify listed as a Smart Filter below the image.
If we need to make further changes, all we need to do is double-click directly on the filter's name:
This re-opens the Liquify filter with all of your current settings, allowing you to easily make whatever changes you need:
Working With Group Shots
At this point, we've covered everything we need to know about using the new Face-Aware Liquify feature in Photoshop. We've learned how to adjust the eyes, nose, mouth and overall face shape using the various sliders in the Properties panel. We've also learned how to adjust the same sliders by clicking and dragging directly on the image with the Face Tool, and how we can use the Face Tool to freely move and reshape other areas as well.
Up until now, we've been using an image of just one person, but Face-Aware Liquify also works with photos of two or more people. Here's a group photo that I've downloaded from Adobe Stock:

As soon as we open a photo like this one in the Liquify filter, Photoshop analyzes it looking for faces. It then draws those thin outlines that we saw earlier around each face that it detects (you'll need to have the Face Tool selected to see the outlines). Note that if someone's head is turned too much to the side, or they're on some sort of weird angle, Photoshop may not be able to detect their face, in which case you won't see the outlines around it. With this image, though, it had no problem with anyone:

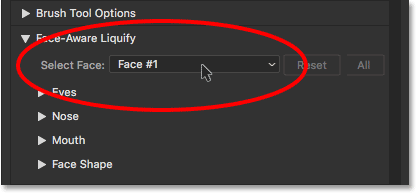
To switch between faces, use the Select Face drop-down menu above the sliders (directly to the left of the Reset button). Select Face is only available when more than one face is detected:
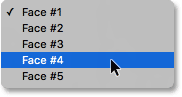
Photoshop lists the faces from left to right, so the person on the far left of the photo would be Face #1. The person directly to their right would be Face #2, and so on. In my case, there's five people in the photo, so I'm seeing five faces to choose from in the list:
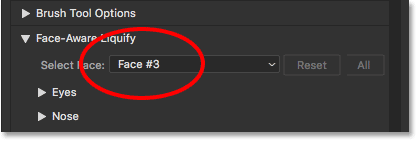
Or, an even faster way to select the face you need is to simply click on it with the Face Tool. To select the woman in the lower center of the photo, for example, all I would need to do is make sure I have the Face Tool selected, and then click on her face:

Since she's the third person from the left, the Select Face option automatically switches to Face #3. I could now make whatever changes I need without affecting anyone else's face in the image:
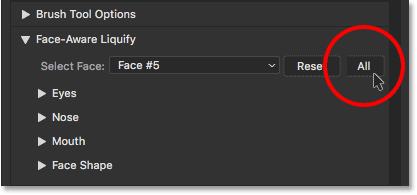
Finally, we already know that we can instantly revert a face back to its original state by clicking the Reset button above the sliders. But if you've made changes to multiple faces and need to quickly undo all of them at once, click the All button instead:
And there we have it! That's our complete look at how to use the brand new Face-Aware Liquify feature, part of the June 2016 Creative Cloud updates for Photoshop CC! Check out our Photo Retouching section for more image editing tutorials!