
Fix Tone and Color with Levels In Photoshop
When it comes to editing images in Photoshop, the first thing we always want to do is fix any overall tonal and/or color problems in the image (commonly referred to as "global" problems) before moving on to more specific problem areas ("local" problems), and the tool of choice for the task is the same today as it's been for years - Photoshop's Levels command, which not only handles the job like a pro, it makes overall tonal and color correction incredibly simple and easy. In this Photoshop tutorial on photo editing, we're going to see just how easy it is.
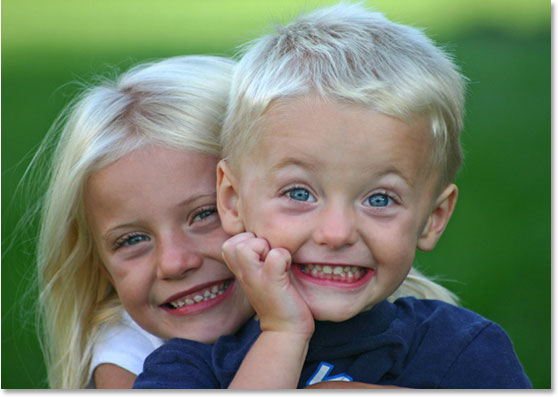
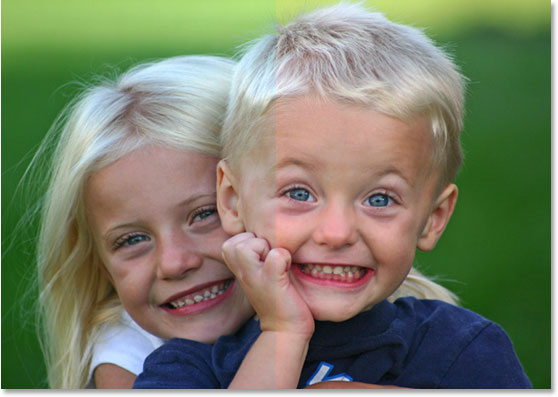
Here's the image I'll be using for this tutorial:
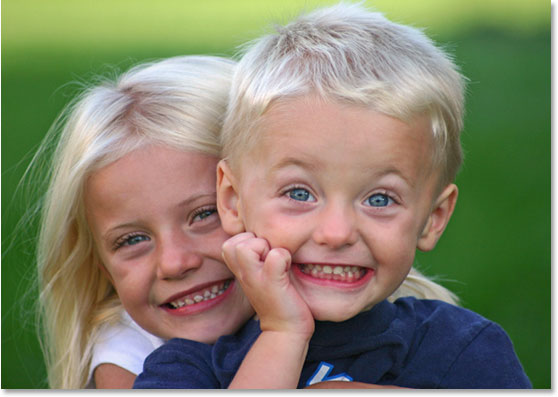
And here's how it will look after a quick overall tone and color correction with Levels:
Again, this is the step you always want to start with when editing your images, so having said that, let's get started!
Step 1: Set Up The Levels Defaults
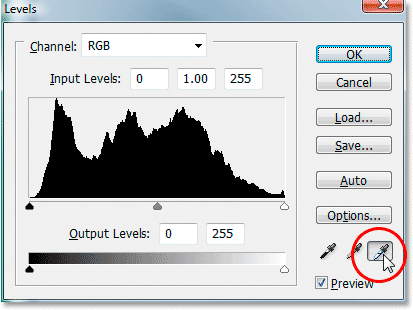
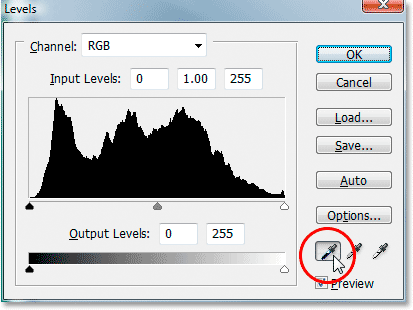
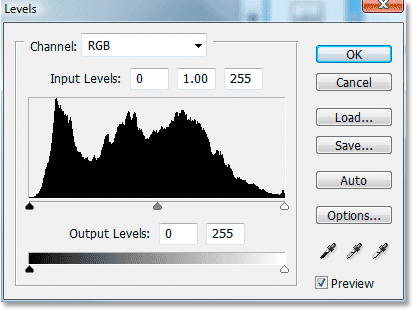
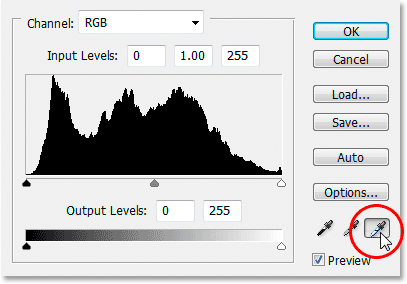
With our image open in Photoshop, let's first take a moment to set up our Levels command properly. Go up to the Image menu at the top of the screen, choose Adjustments, and then choose Levels, or use the keyboard shortcut Ctrl+L (Win) / Command+L (Mac). Either way brings up Photoshop's Levels dialog box. In the bottom right corner, you'll see three eyedropper icons. Double-click on the one on the left, which is the white point eyedropper:
This brings up Photoshop's Color Picker. If you look on the right side of the Color Picker, down near the bottom, you'll see the letters R, G and B, which stand for "Red", "Green", and "Blue", along with an input box to the right of each one. Type the value 245 into each of the three input boxes:
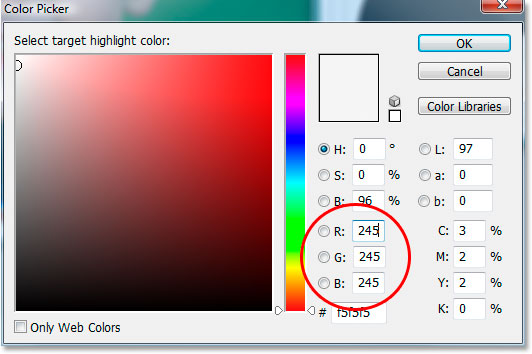
By default, the white point value is set to 255 for each of the "R", "G" and "B" options, which in Photoshop's world means pure white. By lowering the values a little to 245, this will help us maintain detail in the lightest parts of the image by preventing them from becoming 100% white and being printed as paper white. Click OK to exit out of the Color Picker when you're done, although we'll be seeing it again in a moment.
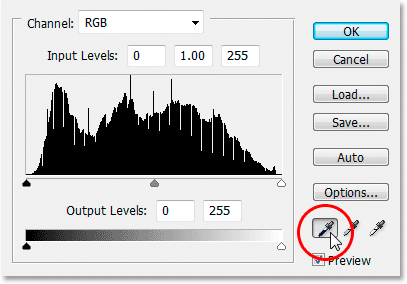
Now, back in the Levels dialog box, double-click on the eyedropper icon on the left, which is the black point eyedropper:
Once again, Photoshop's Color Picker will pop back up. This time, enter a value of 10 into the "R", "G", and "B" boxes:
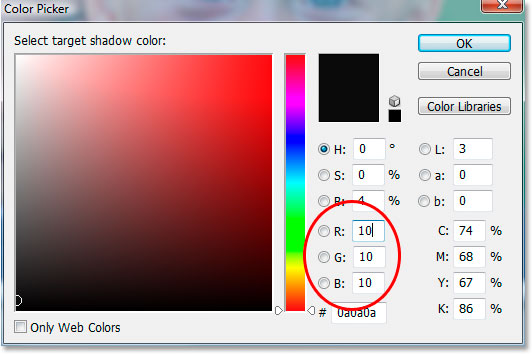
By setting this value to 10 rather than its default of 0, we'll prevent the darkest parts of our image from becoming pure black, allowing us to maintain detail in the shadows and also save us a little black ink when we go to print the image. Click OK to exit out of the Color Picker.
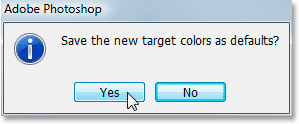
Now click OK to exit out of the Levels dialog box. Photoshop will ask you if you want to save the changes you just made as the new defaults. Click Yes, and you won't have to make these changes the next time you edit an image because they've been saved as the default values:
Now that we've set up our white and black point values to something a bit more useful to us, let's fix the global tonal and color problems in the image.
Step 2: Add A "Threshold" Adjustment Layer And Use It To Find The Lightest Areas In The Image
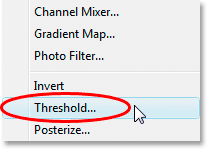
We're going to begin our tonal and color correction with the highlights (the lightest areas in the image). Before we can correct them though, we first need to find them. Fortunately, finding them is easy thanks to Photoshop's Threshold adjustment. Click on the New Adjustment Layer icon at the bottom of the Layers palette:
Then choose Threshold from the list of adjustment layers:
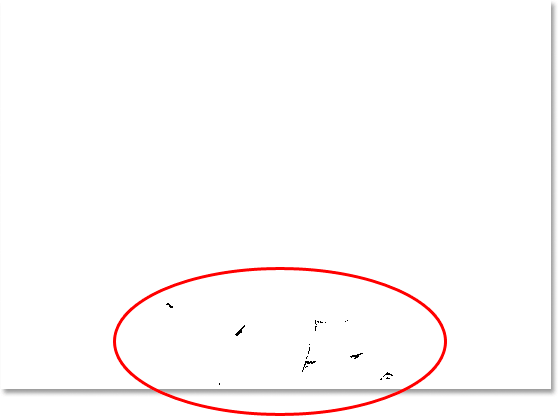
This brings up the Threshold dialog box. Click on the slider at the bottom of the dialog box and drag it all the way to the right. You'll see your image turn completely black. Then, begin slowly dragging the slider back towards the left until you start to see white areas appear in your image. Stop dragging once the white areas appear. These areas are the lightest areas in your image:
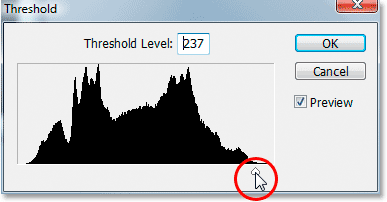
.
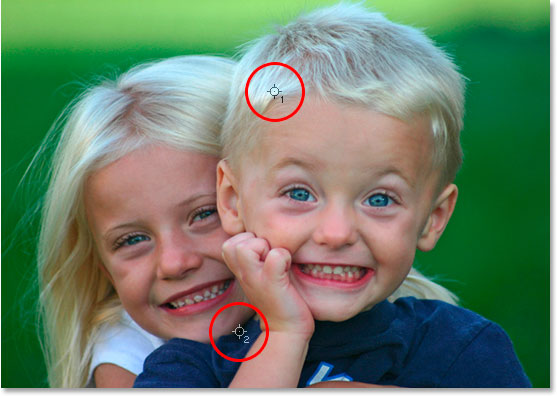
Step 3: Place A Target Marker Inside A White Area
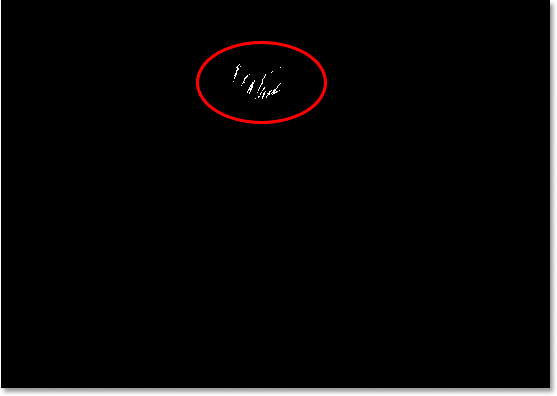
Move your mouse into one of the white areas in the image. As soon as you move your mouse over any part of the image, you'll see your mouse cursor turn into the Eyedropper icon. Once you have your cursor over a white area, hold down your Shift key and the Eyedropper icon will turn into the Color Sampler icon. Click inside the white area to place a target marker at that location. You'll see a tiny number 1 in the bottom right of the marker:
We're going to be using this target marker to correct the highlights in the image in just a moment.
Step 4: Find the Darkest Part Of The Image With The Same Threshold Adjustment Layer
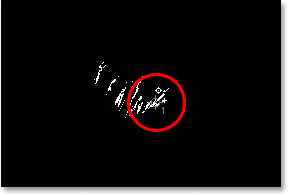
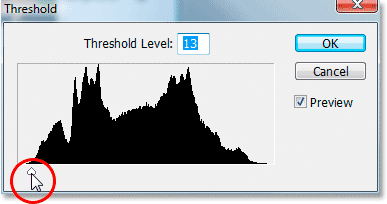
We've found the lightest area in the image and marked it. Now we need to find the darkest area, and it's just as easy as finding the lightest area. Back in the Threshold dialog box, click once again on the slider at the bottom and this time, drag it all the way to the left. You'll see your image turn completely white. Then, begin slowly dragging it back towards the right until you start seeing black areas in your image. Stop dragging once you see the black areas appear. These are the darkest parts of the image (the shadows):
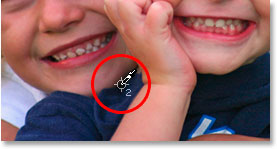
Step 5: Place A Target Marker Inside A Black Area
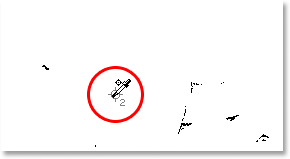
Just as we did with the white areas, move your mouse into one of the black areas in the image. Then, once you have your cursor over a black area, hold down your Shift key and click inside the black area to place a target marker at that location. You'll see a tiny number 2 in the bottom right of the marker:
Step 6: Remove The Threshold Adjustment Layer
We now have two target markers placed in our image. The first one, labeled "1" in its bottom right corner, is marking the lightest spot (or at least, one of the lightest spots) in the image, and the second one, labeled "2", is marking the darkest spot (or again, one of the darkest spots). We don't need our Threshold adjustment layer any longer, so click Cancel in the top right corner of the dialog box to cancel out of it. You'll see your two target markers disappear as well, but don't worry, they're just hiding. We're going to see them again as soon as we add our Levels adjustment layer, which we'll be doing next.
Step 7: Add A "Levels" Adjustment Layer
Click on the New Adjustment Layer icon at the bottom of the Layers palette once again:
This time, choose Levels from the list:
This brings up the Levels dialog box, just like we saw at the beginning of the tutorial when we made changes to the white and black point default values. Even though we're using an adjustment layer this time rather than selecting Levels from the Image menu, the dialog box is exactly the same:
If you look at your image, you'll see that your two target markers have come out of hiding now that we have our Levels dialog box on the screen:
Step 8: Click On The First Target Marker With The White Point Eyedropper
At this point, fixing the overall (global) tonal and color problems in the image is a snap. First, click on the white point eyedropper in the bottom right of the Levels dialog box to select it:
With the white point eyedropper selected, all we need to to in order to fix any tonal and color problems in the highlights is click on the first target marker (the one labeled "1"):
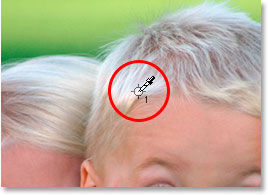
If you're having trouble lining up the eyedropper icon with the center of the target marker, press the Caps Lock key on your keyboard, which will turn the eyedropper icon into a target marker icon itself. You'll know you have the two target markers lined up perfectly when they both disappear from the screen, at which point you can click your mouse to correct the highlights.
Step 9: Click On The Second Target Marker With The Black Point Eyedropper
We've corrected the highlights, now we just have to correct the shadows (the dark areas). Click on the black point eyedropper in the Levels dialog box to select it:
Then, with the black point eyedropper selected, simply click on the second target marker to correct any tonal and color problems in the shadows:
And with just two clicks of the mouse, we've managed to fix any overall tonal and color problems in the highlight and shadow areas of the image. Here's a "before and after" comparison to see how much the image has improved already. The original, uncorrected version is on the left, and the corrected version is on the right. I've temporarily hidden the target markers using the keyboard shortcut Ctrl+H (Win) / Command+H (Mac). I can bring them back again using the same keyboard shortcut:
Step 10: Adjust The Center Slider To Brighten The Midtones If Needed
Often times, after you've corrected the highlights and shadows, you'll find that your image is looking a bit too dark. To brighten it up, in the Levels dialog box, click on the Midtone slider (circled in red below) and drag it a little to the left:
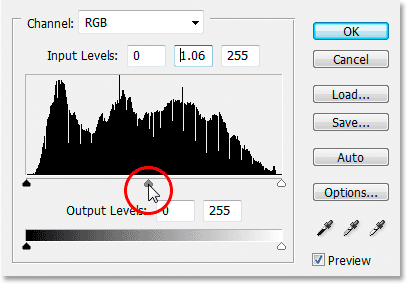
Keep an eye on your image as you drag the Midtone slider. The further you drag to the left, the more you'll brighten the midtones (dragging to the right darkens the midtones), but you usually don't need to drag the slider very far in order to get good results. If you do drag it too far, your image will start to look washed out. How far you drag the midtone slider is strictly a visual call on your part and depends entirely on your image.
Once you've brightened your image with the Midtone slider (if your image needed it), click OK in the Levels dialog box to exit out of it and accept all the corrections you've made.
To cycle between the corrected and uncorrected versions of your image to see how much of an improvement you've made, simply click on the Layer Visibility icon (also known as the "eyeball icon") to the left of the Levels adjustment layer in the Layers palette to turn the layer on and off:
Step 11: Remove The Target Markers
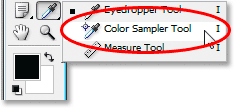
Finally, now that we're done with our target markers, we can remove them. To do that, select the Color Sampler Tool from the Tools palette. It's hiding by default behind the Eyedropper Tool, so click and hold your mouse down on the Eyedropper Tool for a second or two and then select the Color Sampler Tool from the fly-out menu that appears:
With the Color Sampler Tool selected, if you look up in the Options Bar at the top of the screen, you'll see a button that says Clear on it. Click on the button to clear the target markers from the image:

It's not vitally important that you remove the target markers, since they won't print if you forget to remove them, but they do get saved along with the image so it's a good idea to remove them once you no longer need them.
And with that, the overall tonal and color correction on the image is done! Don't worry if the first couple of times you go through these steps, you feel like you're stumbling through them and it seems to be taking longer than it should. Once you've gone through this process a few times with different images, it will start to seem like second nature to you and the whole thing shouldn't take you more than a minute.
Here's my original, uncorrected image once again for comparison:
And here is the image after completing the overall tonal and color correction using the Levels adjustment layer:
The only thing we didn't look at in this tutorial was color correcting the midtones. We brightened them using the Midtone slider, but we could have also tried to color correct them using the gray point eyedropper in the Levels dialog box (the eyedropper between the white and black point eyedroppers). There's a couple of reason why we didn't. The first reason is because often times, color correcting the highlights and shadows takes care of any color problems in the midtones as well. The second reason is because it's not as straightforward as correcting the highlights and shadows. In fact, it usually involves simply guessing where the neutral gray point in the image is supposed to be, and several "trial and error" attempts at it usually follow. Plus, not every image even has an area that's supposed to be gray, so trying to find what's not there is a bit pointless.
However, there is a trick to finding the neutral gray area in an image (if one exists) and color correcting the midtones, and we have a complete tutorial on it, An Easy Way To Find Neutral Gray, which you can access here. Or, check out our Photo Retouching section for more Photoshop image editing tutorials!