
How To Straighten Crooked Photos In Photoshop
In this Photoshop tutorial, we're going to learn a quick and easy way to straighten crooked photos. Let's face it, unless you take all your photos with your camera mounted on a tripod, some of your photos are going to turn out a bit crooked. Fortunately, Photoshop makes it incredibly easy to straighten them in just a few simple steps and without any guess work!
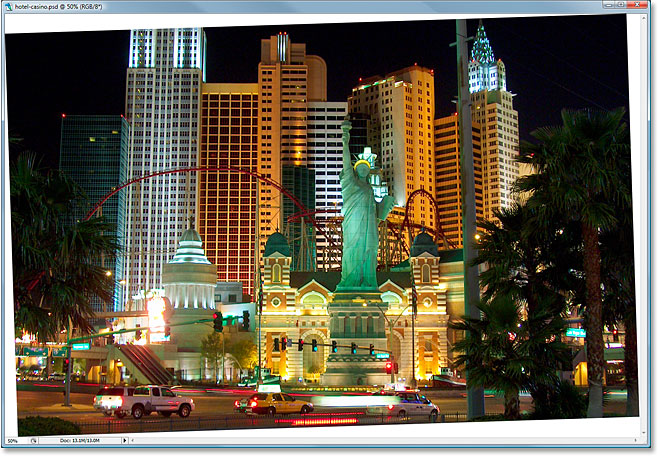
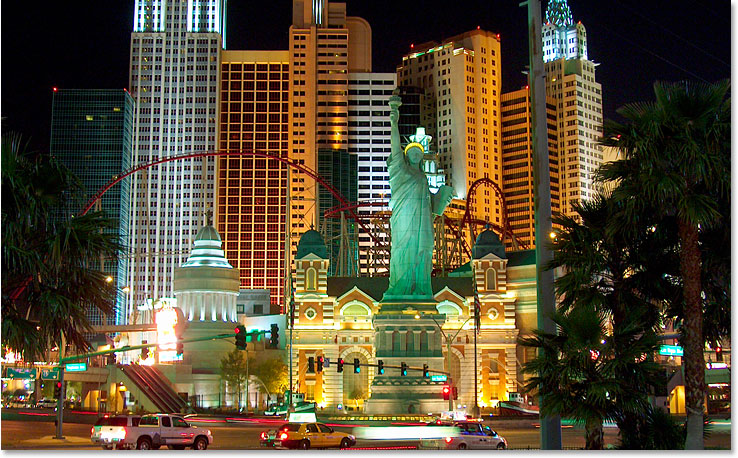
Here's a photo I took recently outside the New York, New York Hotel & Casino in Las Vegas:
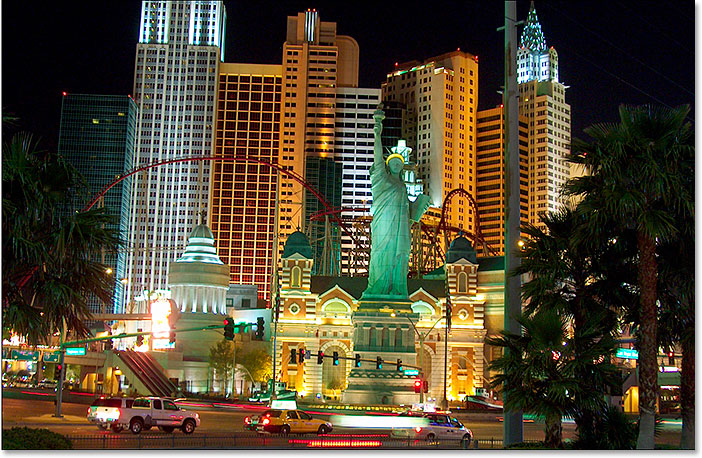
Typical tourist-quality photo. It was taken with a small compact camera while walking down the street, as and we can see, it turned out a little crooked. The Statue of Liberty looks like she's leaning a little to the right. No worries though. We'll have her straightened out in no time. Let's get started!
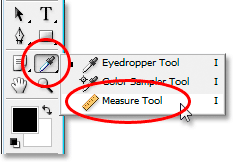
Step 1: Select The "Measure Tool"
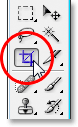
To best way to straighten images in Photoshop is by using the Measure Tool, which takes all the guess work out of it. As we'll see in a moment, as long as there's something in the image that should be straight, Photoshop will do most of the work for us! The Measure Tool, by default, is hiding behind the Eyedropper Tool in the Tools palette, so to select it, you'll need to click and hold your mouse button down on the Eyedropper Tool for a second or two. A fly-out menu will appear showing you the other tools hiding behind it. Click on the Measure Tool to select it:
Step 2: Click And Drag Along Something That Should Be Straight
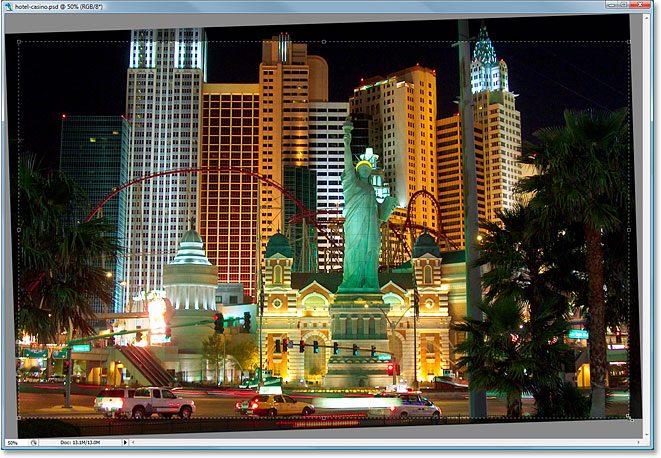
Look for something in your image that should be straight, either horizontally or vertically. We're going to drag along its edge with the Measure Tool so Photoshop has something to work with when trying to figure out how crooked the photo actually is. In my case, I'm going to click and drag horizontally along the roof of the building directly behind Ms. Liberty. Obviously the roof should be perfectly horizontal, yet it clearly isn't at the moment. I'll simply click once on the left side of the roof, then hold my mouse button down and drag over to the right side of the roof. This draws a thin line between where I first clicked on the left and where I finished dragging on the right, and Photoshop uses the angle of this line to determine how far the image will need to be rotated in order to straighten it:
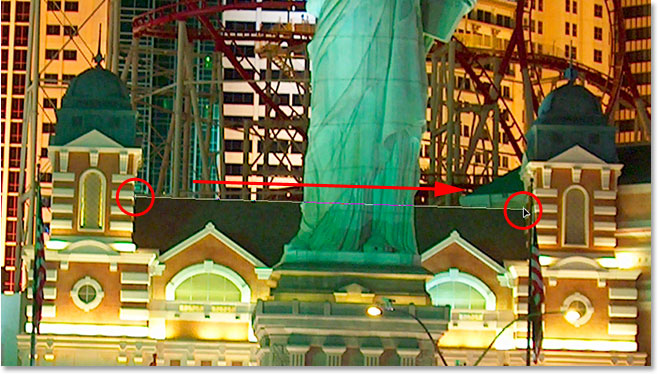
If you look up in the Options Bar at the top of the screen, you can see the angle of the line you've just drawn (it's the number listed to the right of the letter "A"). In my case, we can see that my line is on an angle of 1.9 degrees:
Photoshop can now use this angle to determine how far to rotate the image in order to straighten it.
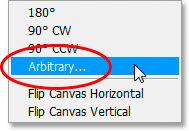
Step 3: Choose The "Rotate Canvas - Arbitrary" Command
Go up to the Image menu at the top of the screen, choose Rotate Canvas, and then choose Arbitrary:
I have to laugh every time I do this because the word "arbitrary" actually means "random or by chance", yet that's exactly the opposite of what we're doing here. We're not randomly rotating our image or leaving anything to chance. We've used the Measure Tool to find out exactly how much of an angle our image needs to be rotated by, and now Photoshop can use the information we've given it to straighten our image without any guess work. As I've said before, much of the problem with learning Photoshop comes from getting around the terminology, and in this case, I don't know what Adobe was thinking.
However, life goes on. Once you select "Arbitrary", Photoshop pops up the Rotate Canvas dialog box, and as we can see, all the work has already been done for us. In my case, Photoshop has already entered a value of 1.85° for the Angle option, and it even knew that the image will need to be rotated counter-clockwise, which is why the CCW option is also selected:
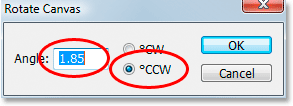
You may be wondering why Photoshop entered an angle of 1.85° when the Options Bar showed an angle of 1.9° a moment ago. The reason is because Photoshop rounds off the angles in the Options Bar to 1 decimal place, so it showed 1.9° even though the angle of the line we drew with the Measure Tool was actually 1.85°. The angle shown in the Rotate Canvas dialog box is the correct angle.
Step 4: Click OK To Rotate And Straighten The Image
At this point, all we need to do is click OK in the Rotate Canvas dialog box to exit out of it and have Photoshop rotate and straighten our image for us:
Everything looks good, and the Statue of Liberty is no longer leaning to the right. We were able to straighten the image perfectly without any guess work thanks to the Measure Tool and the Rotate Canvas command.
Step 5: Crop The Image With The "Crop Tool"
Of course, there is a small problem. By rotating the image inside the document window, we've added some white canvas areas around the outside of the photo. We'll need to finish things off by cropping away those areas, and for that, we can use Photoshop's Crop Tool. Select the Crop Tool from the Tools palette, or simply press the letter C on your keyboard to select it with the shortcut:
Then, with the Crop Tool selected, simply click near the top left corner of your image and drag down towards the bottom right to create a border around the area you want to keep. Fine-tune your selection by dragging any of corner handles or by dragging the top, bottom, left or right sides of the selection:
Once you've dragged out your cropping border, press Enter (Win) / Return (Mac) to have Photoshop crop the image:
And there we have it! That's how to straighten crooked images in Photoshop! Check out our Photo Retouching section for more Photoshop image editing tutorials!