
Raw vs JPEG For Photo Editing
Download PDF: CS6 Camera Raw - Raw vs JPEG For Photo Editing
In this tutorial, the first in a series on editing and retouching images with Adobe Camera Raw, we'll take a quick look at the main difference between the two most popular file formats used by digital cameras today - raw and JPEG - and learn why one of them has a major advantage over the other when it comes to image editing and retouching.
Many digital cameras today, including both DSLRs and higher end compact cameras, give us the option of saving our images as either raw files or JPEG files. The JPEG format has been around for over 20 years and remains to this day the most widely used file format for saving and sharing digital photos. The raw format, on the other hand, is a much more recent development, but if you're thinking "Well, obviously newer is better, right?", it's not quite that simple. While JPEG is an industry standard file format, it may surprise you to learn that raw isn't really a file format at all. At least, not in the traditional sense.
You may have noticed that I've been writing "raw" in small letters and "JPEG" in caps, and there's a reason for it. With most file formats, the letters in the format's name actually stand for something. In this case, the term "JPEG" is short for Joint Photographic Experts Group, the name of the organization that created the standard (just like "GIF" stands for Graphics Interchange Format and "TIFF" is the Tagged Image File Format). "Raw", on the other hand, doesn't stand for anything. It's just a normal word, and what it means (in the case of digital images at least) is that the file contains the raw image information that was captured by your camera's sensor when you pressed the shutter button.
What does that mean, and how is that different from JPEG? In many ways, shooting your photos as JPEGs is like sending a roll of film off to a photo lab to develop your images for you, and what you end up with is, well, whatever you end up with. When shooting JPEGs, your camera becomes the photo lab, processing the image in a series of steps that include setting the white balance, adjusting the contrast and color saturation, applying sharpening, and then compressing the image to reduce its file size (a process known as "lossy compression" because it results in a loss of image quality). Yes, you can edit and retouch the photo yourself afterwards in Photoshop, but you're starting with an image that's already been processed, with permanent changes already made to its pixels (and a lot of the original image information already discarded). Wouldn't it be better if you could somehow grab the image information straight from the camera's sensor before your camera's little internal photo lab gets its high tech hands on it and makes decisions on what it thinks your photo should look like?
That's where raw comes in. A raw file is like taking the original film negative into the dark room and developing the photo yourself, with complete control and creative freedom over the final result. In fact, raw files are often referred to as digital negatives, and we use a program like Adobe's Camera Raw as a digital darkroom to process the raw files (many people use the terms "raw" and "Camera Raw" as if they're the same thing, but "raw" refers specifically to the file type itself, while Camera Raw is an application created by Adobe that we can use to process raw files). Every bit of image information captured by your camera's sensor is saved and stored in the raw file, with no processing of any kind. In fact, the files are so "raw" that we can't even open them normally on a computer like we can with JPEGs and other file types. They can only be opened in a program like Camera Raw where we can then process the photos in any way we choose before opening them in Photoshop for further refinement or saving them out as a JPEGs or some other traditional file type.
The main benefit to capturing our images as raw files as opposed to JPEGs is that we have a lot more image information to work with, including a much wider dynamic range (the number of brightness levels in the image) and a larger color space, and this means we can push the images a lot further than we could with JPEGs, bringing out and rescuing hidden detail in the darkest shadows and brightest highlights, detail that often gets tossed away and lost forever by a camera's JPEG conversion process.
Related: How to open JPEG files in Adobe Camera Raw
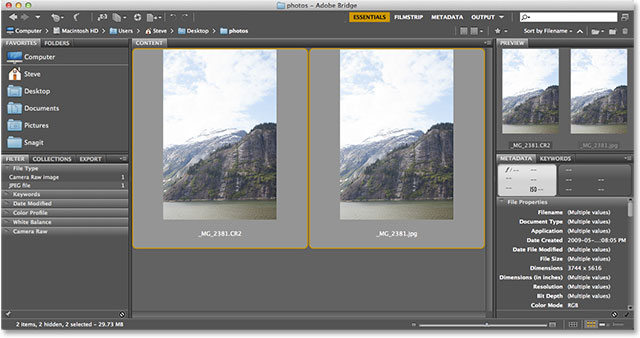
To show you what I mean, let's take a quick look at an example of how, just by working with raw files instead of JPEGs, we can get much better results with our images. Here, I've used Adobe Bridge (CS6, in this case) to navigate to a folder on my desktop containing two images. At first glance, just by looking at the thumbnails, it may seem like both images are the same, but there's one important difference. The version on the left is a raw file and the one on the right is a JPEG file. The raw file has a ".CR2" extension at the end of its name, which is Canon's raw file extension (other camera manufacturers use different extensions for their raw files) while the JPEG has a traditional ".jpg" extension:
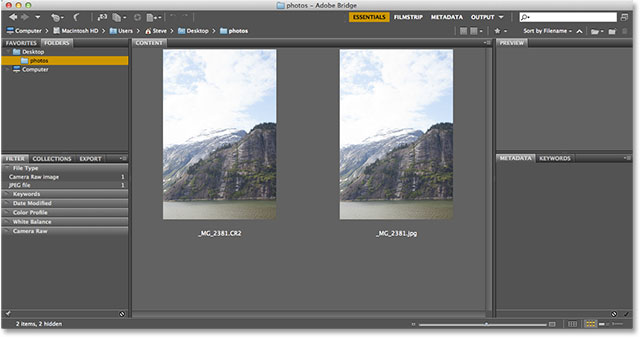
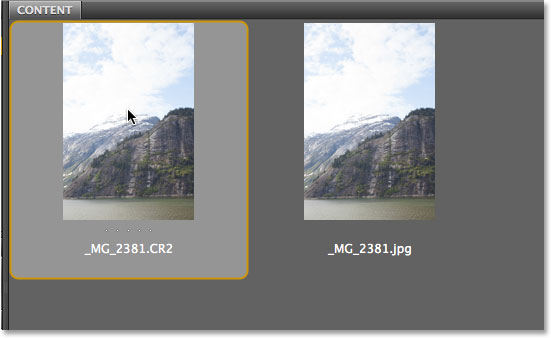
Before I open these images in Camera Raw, we should first look at another important difference between raw and JPEG files, and that's file size. All that extra image information packed into raw files comes at a price, meaning the files themselves are a lot bigger than what we normally see with JPEGs. I'll select the raw version of the image on the left by clicking on its thumbnail:
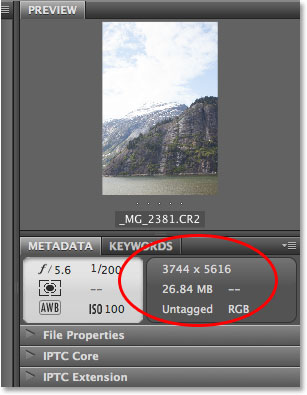
With the raw file selected, if we look at its metadata over in the Metadata panel in the right column of Bridge, we see that the pixel dimensions of the image are 3744 x 5616, and the file size is a whopping 26.84 MB. That may not seem "whopping" compared with, say, a 50 GB Blu-ray disc, but compared to a JPEG file as we'll see in a moment, it's huge:
Next, I'll click on the JPEG version of the photo to select it:
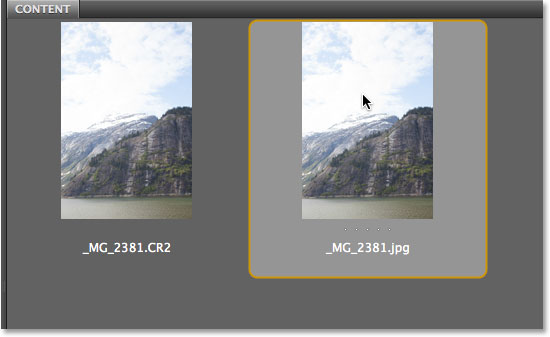
The Metadata panel in Bridge now shows us the same information but this time for the JPEG file, and here we see that the JPEG version has the exact same pixel dimensions (3744 x 5616) as the raw file. And yet, the size of the JPEG version on disc is only 2.88 MB, nearly a tenth the size of the raw file:
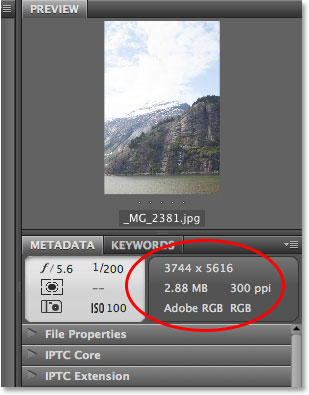
Of course, the file sizes of your own images may be different and will depend largely on the megapixel (MP) count of your camera, but one thing that won't change is that a raw file will always be significantly larger than the same image saved as a JPEG. Is this a big deal? Not so much when you're processing the image on your computer. These days, Photoshop can easily handle a 20-30 MB file, and computer hard drives are big enough and cheap enough now that running out of storage space usually isn't an issue. Where the extra size can pose a problem, though, is when you're out shooting your images. Raw files take up much more space on your camera's memory card, which means the card will hold fewer photos than if you were shooting in JPEG. Also, if you're an action or sports photographer needing to fire off as many shots per second as you can, shooting in raw can slow you down since it takes your camera longer to save these larger raw files to the memory card. For most of us, though, the increased image quality and editing potential of raw images far outweigh any concerns about the file size, so let's open these two images in Camera Raw and see how much of a difference there is.
Photoshop actually lets us open and edit not only raw files but also JPEG and TIFF files in Camera Raw, so I'll open both of these images by first clicking on the image on the left to select it, then holding down the Shift key on my keyboard and clicking the image on the right. This selects both images at once in Bridge (both are highlighted):
With both photos selected, I'll open them in Camera Raw by clicking the Open In Camera Raw icon at the top of the screen:

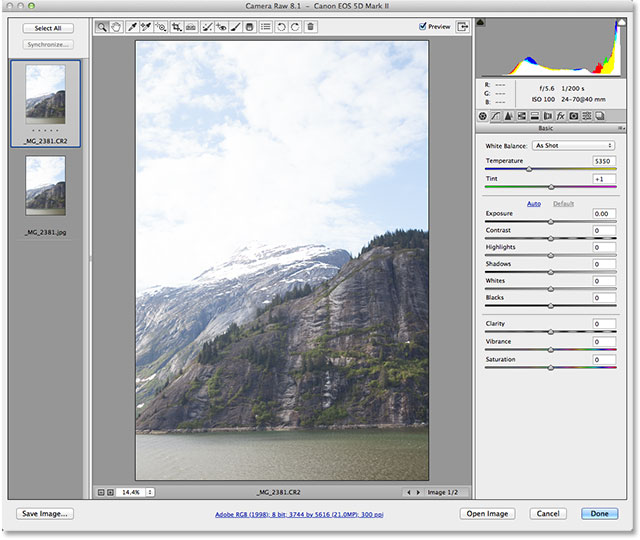
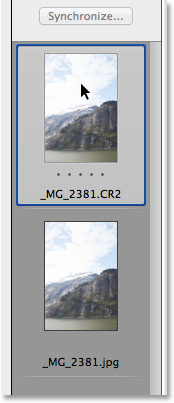
This launches the Camera Raw dialog box, with the raw version of the image open in the large preview area in the center. We can only view one image at a time in Camera Raw, but we can see both of the images I've opened displayed as thumbnails in a filmstrip view along the left. The highlighted image is the one that's currently active:
I'll click on the JPEG version's thumbnail on the left to switch to it, and now we can see the JPEG version of the image in the center preview area. So far, both the raw and JPEG versions look very similar. And by "similar", I mean they both look overexposed:
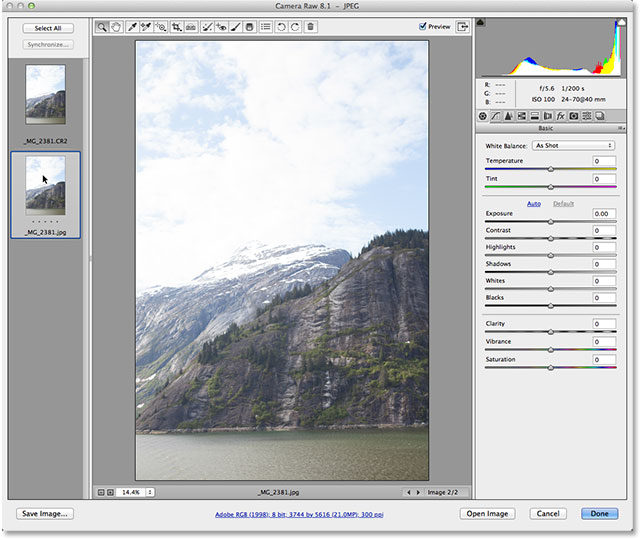
In the upper right corner of the Camera Raw dialog box is the histogram which shows us the current tonal range of our image, starting with pure black on the far left and gradually increasing in brightness to pure white on the far right. The higher the bars appear in a certain area of the histogram, the more information we have in that brightness region of the image. Here's what the current histograms look like, with the raw version's on the left and the JPEG's on the right. Just as with the images themselves, they look nearly identical, with most of the detail concentrated in the highlights as we'd expect to see with overexposed images:

From what we've seen so far, it would be hard to justify the increased size of the raw file when it looks no better than the JPEG, but that's about to change. I'm going to switch back over to the raw version of the image by clicking on its thumbnail on the left:
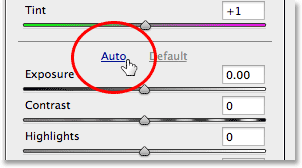
Now, this isn't meant to be a detailed tutorial on how to process images in Camera Raw, but a quick thing we can do is let Camera Raw itself take its best guess on how to improve an image. If you look below the histogram in the right column of the dialog box, you'll see that by default, Camera Raw opens the Basic panel which is where we find most of the controls we need for adjusting the white balance, exposure, contrast, and color saturation of the overall image. Rather than dragging sliders and making changes to these controls myself, I'm going to let Camera Raw try to correct the image for me by simply clicking the Auto button directly above the Exposure slider. Once again, I'm working on the raw version of the image:
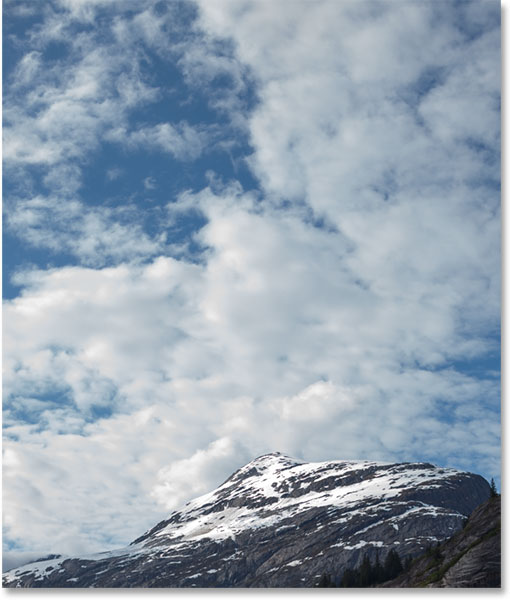
Here's what Camera Raw came up with. The important area to pay attention to here is the sky, as well as the snowy mountain top. A moment ago this area appeared washed out and uninteresting, yet now, with the raw version of the image, we see lots of great detail in the highlights. Raw files contain so much image information that often times, areas that appeared completely blown out at first actually contain plenty of detail we can rescue:
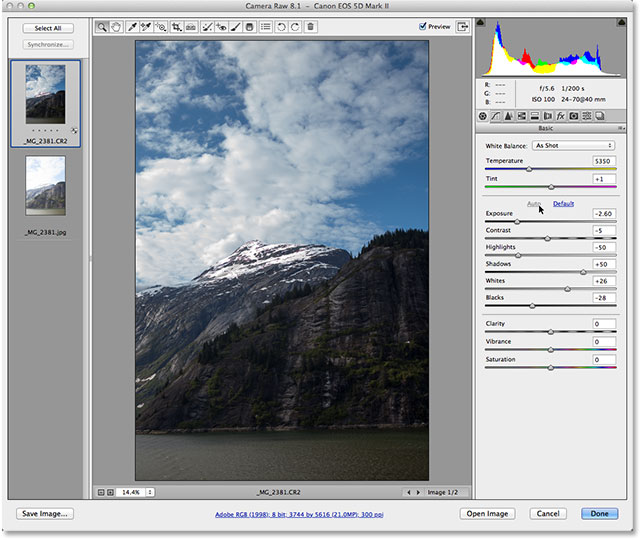
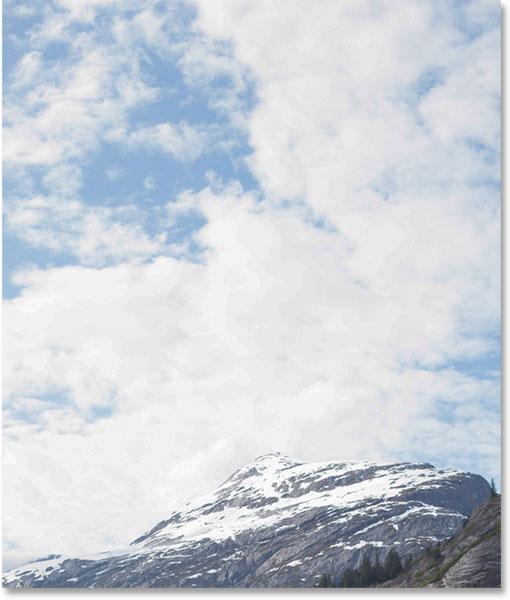
Of course, the shadows are now looking too dark but for our purposes here, I'm not going to worry about them. Let's jump over to the JPEG version. I'll click on its thumbnail on the left to select it, then just as I did with the raw file, I'll simply click the Auto button in the Basics panel on the right to let Camera Raw try to correct the image for me. This time, things don't work out nearly as well and the difference between JPEG and raw becomes more obvious. The highlights look a little better than they did originally, but not by much and not nearly as impressive as the raw version. The reason is because the JPEG file simply doesn't contain enough image information. Most of the detail in the highlights was lost in the JPEG conversion process, and once it's gone, it's gone:
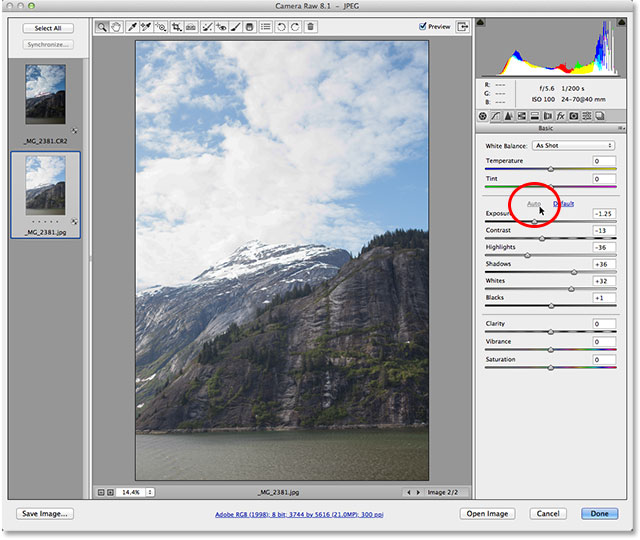
Let's take another look at the histograms, where we now see a difference between them. Notice that the raw version's histogram on the left still looks nice and smooth after the edit. That means we still have continuous tone throughout the image, with colors and brightness levels transitioning smoothly from darker to lighter. The JPEG version on the right, however, isn't holding up as well. See that "comb" pattern in the highlights on the right with gaps between brightness levels? The gaps mean we now have little detail remaining in those brightness regions of the image. In other words, by making the JPEG version look a bit better, we've actually made it worse at the same time:

We can see this more clearly by zooming into the sky area of each image. Here's a closeup of the sky in the raw version, with plenty of detail and smooth, continuous brightness transitions:
Compare that with a closeup of the same area in the JPEG version. Not only does it still look overexposed, but remember those gaps in the highlights in the histogram? If you look closely at the clouds, you can actually see the problem. The missing detail in the highlights has resulted in ugly, harsh transitions between brightness levels, commonly known as "posterization". If I darkened the exposure even more, the posterization would become even more apparent. No matter what I do with this JPEG version, I'll never get it to look as good as the raw version:
There are more advantages to working with raw files over JPEGs than what I covered here, and of course there's lots more to processing images in Camera Raw than simply clicking Auto. I'll be covering everything you need to know about working with Camera Raw in this series of tutorials, but I hope for now I at least gave you an idea of how much more potential there is for editing and retouching images when you make the switch from JPEG to capturing and editing your images in raw.
And there we have it! That's our look at the differences between JPEG and raw images! Check out our Photo Retouching section for more Photoshop image editing tutorials!