
Easy Digital Nose Job In Photoshop
In this Photo Retouching tutorial, we're going to learn how incredibly easy it is to give someone a digital nose job (not that anyone we know would need it, of course!). This photo editing technique is so simple and easy, you'll be tempted to use it on photos of people who honestly don't need it. Or at least, that's what you can tell them when they ask you why you made their nose smaller. You simply had to because it was so much fun and so easy to do!
Seriously though, let's face it, sometimes photos don't do people justice, and even though in real life their nose may be a textbook example of what a human nose is supposed to look like, a wrong focal length setting on the camera lens, bad lighting or an unflattering angle can distort reality and make things look bigger than they really are. Fortunately, Photoshop makes digital plastic surgery a breeze without the need for any fancy surgical tools or even a steady hand. In fact, all you need is the Lasso Tool, the Free Transform command, and the Healing Brush to clean up any rough spots.
Here's the image I'll be working with in this tutorial. Before we begin, I just want to make it clear that I am not saying this woman needs a nose job. She is simply the unfortunate victim of this tutorial:
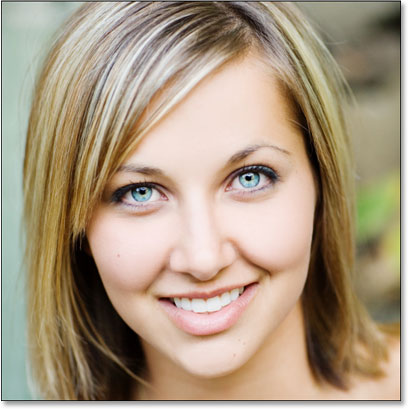
And here's what she's going to look like after we make her nose a little smaller (again, not that she needs it):

This tutorial is part of our Portrait Retouching collection. Let's get started!
Step 1: Draw A Rough Selection Around The Outside Of The Nose
Before we can start our digital nose job, we first need to isolate the person's nose from the rest of the image, which means we need to add a selection around it. Photoshop's Lasso Tool works perfectly in this case so select it from the Tools palette:

You can also quickly select it by pressing L on your keyboard. The reason the Lasso Tool works so well here is because if you've used it before, you already know that it's not exactly the most precise selection tool in all of Photoshop (that honor would go to the Pen Tool), yet for this technique, we purposely want to avoid making a precise selection of the nose. Instead, simply drag out a rough selection around the outside of the nose as I've done here:

It's definitely better to select too much of an area than not enough, since we'll be cleaning things up at the end.
Step 2: Feather The Selection
Next we need to make the edges of our selection softer, or "feather" them as Photoshop calls it. To do that, go up to the Select menu at the top of the screen and choose Feather. You can also use the keyboard shortcut Alt+Ctrl+D (Win) / Option+Command+D (Mac). Either way brings up Photoshop's Feather dialog box. Enter a Feather Radius value of somewhere between 20-30 pixels depending on the size and resolution of your image. You may need to experiment a little with the value. I'm going to enter 20 pixels for my Feather Radius:

Click OK to feather the selection and exit out of the dialog box.
Step 3: Copy The Selection To A New Layer
With our selection in place and the edges feathered, press Ctrl+J (Win) / Command+J (Mac) to copy the selection to a new layer. If we look in Photoshop's Layers palette now, we can see our original image on the Background layer and the nose now on a new layer above it, which Photoshop has automatically named "Layer 1":

Step 4: Resize The Nose With Photoshop's Free Transform Command
With the nose now on its own layer, we can go ahead and resize it, making it shorter, thinner, or both! To do that, we'll use Photoshop's Free Transform command, and we can quickly access it with the keyboard shortcut Ctrl+T (Win) / Command+T (Mac), which brings up the Free Transform box and handles around the nose, as shown below:

To make the nose thinner, all we need to do is drag the side handles (the little squares) in towards each other. To drag both sides in at the same time, hold down your Alt (Win) / Option key as you drag one of the handles and the handle on the opposite will drag in as well. The further in towards each other you drag the side handles, the thinner the nose becomes:

To shorten the length of the nose, simply drag the bottom handle up. The further you drag the handle, the shorter the nose becomes. You can also hold down your Alt (Win) / Option key as you drag the bottom handle to have Photoshop drag the top handle in at the same time:

Press Enter (Win) / Return (Mac) when you're done to accept the transformation and exit out of the Free Transform box.
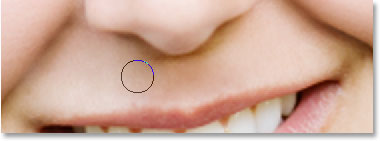
I've now made her nose a little thinner and a little shorter simply by dragging a couple of Free Transform handles. If we look closely at the image though, we can see that there's some problems. For one thing, the shadow lines under her cheeks no longer match up, especially the one on the left, as I've circled below:

To fix that, I'm going to bring up the Free Transform handles once again with "Ctrl+T" (Win) / "Command+T" (Mac) and this time, I'm going to hold down Shift+Ctrl+Alt (Win) / Shift+Command+Option (Mac) and drag either of the bottom corner handles out to the side. Holding all three keys down at once as I'm dragging the bottom corner handle tells Photoshop to drag the bottom corner handle on the opposite side as well while leaving the top two corner handles locked in place. Technically, this is what Photoshop calls transforming the selection in "perspective", and I'm simply using the keyboard shortcut to access this mode. I could also go up to the Edit menu at the top of the screen, choose Transform, and then choose Perspective and then drag either of the bottom corner handles outward, but I find the keyboard shortcut easier so I'm going to hold all three keys down at once and drag the bottom right corner handle outward, which is also going to drag the bottom left corner handle outward as well, and I'll continue dragging until the shadow lines under her cheeks no longer appear broken:

Once again I'll press "Enter" (Win) / "Return" (Mac) to apply the transformation and exit out of the Free Transform command.
Step 5: Add A New Layer
The only problem remaining with the image is the area under her nose where I made it smaller, which now looks a little messed up, as we can see below:

To clean that area up, I'll use Photoshop's Healing Brush, but before I do, I'm going to add a new layer above "Layer 1", since it's always good practice to do your "healing" on a separate layer. To add a new layer, I'll simply click on the New Layer icon at the bottom of the Layers palette:

Photoshop adds a new layer above the two existing layers and automatically names it "Layer 2":

Step 6: Clean Up The Area With The Healing Brush
With the new layer added, select the Healing Brush from the Tools palette. In Photoshop CS2 and CS3, you'll find the Healing Brush hiding behind the Spot Healing Brush, so you'll need to click on the Spot Healing Brush in the Tools palette and hold your mouse down for a second or two, then select the Healing Brush from the fly out menu that appears, as shown below:

With the Healing Brush selected, look up in the Options Bar at the top of the screen and make sure you have the Sample All Layers option selected:

You'll need this option selected whenever you're using the Healing Brush on a separate layer as we're doing here. The Healing Brush works by sampling the color, tone and texture from part of the image but since we're working on a new blank layer, there's nothing on the layer for the Healing Brush to sample. By selecting the "Sample All Layers" option, Photoshop is able to sample from not only the layer we're on but also from any layer(s) below it, which is exactly what we want.
The Healing Brush works best when you set the brush size to just slightly larger than the area you're trying to heal, and you can quickly change the size of the brush using the left and right bracket keys. The left bracket key makes the brush smaller, and the right bracket key makes it larger. It also works best if you click on individial spots with it rather than trying to paint over the entire problem area at once. One final thing to keep in mind with the Healing Brush is that you want to try to sample an area of skin that's close to the area you're healing, since different areas of a person's face have different skin texture, so you don't really want to sample an area from someone's forehead when trying to retouch part of their nose. With that in mind, I'm going to resize my brush with the bracket keys and then sample a good area of skin from below her nose by holding down Alt (Win) / Option (Mac) and clicking on an area just above the top left side of her mouth. You'll see your brush cursor turn into a target icon letting you know that you're sampling the image from directly under the icon:

Then, with my first area sampled, I'll release my "Alt/Option" key and begin clicking on areas under her nose that need to be cleaned up. You'll see your cursor change back into the brush cursor when you release "Alt/Option", letting you know that you're healing areas of the image at this point rather than sampling from them. Again, I'll click with my mouse rather than paint with it, since painting large areas with the Healing Brush tends to give Photoshop too much information to work on at once and usually gives you poor results, so it's best to click instead of paint. I'll click on a few spots to clean them up, and as I do, Photoshop replaces the texture from the area I clicked on with the texture from the area I sampled. It also tries to blend the color and tone from the area I sampled with the color and tone of the area I clicked on. This replacing textures and blending colors and tones is what Photoshop calls "healing".
If I continue clicking on areas to heal them using that exact same area I sampled from though, the area under her nose is going to end up looking like a repeating pattern, which is a dead giveaway that the image was retouched. To avoid turning her skin into wallpaper, I'm only going to click on a few spots to heal them and then I'll hold down "Alt" (Win) / "Option" (Mac) and click on a different area of good skin to sample it. Then, with the new area sampled, I'll release my "Alt/Option" key and click on a few more spots to heal them before sampling from a different area again, repeating this process of sampling and healing, sampling and healing, over and over until the area under her nose looks good.
Once you've cleaned up the problem areas with the Healing Brush, you're digital nose job is done! Here, for comparison, is my original image once again:
And here is our final result, with her nose now a little thinner and a little shorter:
Keep in mind that in most cases, you won't be after a Michael Jackson-sort of drastic nose job. You'll usually want to keep things more subtle, and if you're lucky, the person in the photo won't even realize what you've done. If they think they look great in the photo and have no idea what sort of work you put into it to make them look so good, then consider it a compliment to your Photoshop photo retouching skills and a job well done!
And there we have it! Check out our Photo Retouching section for more Photoshop image editing tutorials!