
The New Before And After Previews In Camera Raw – Photoshop CC
In this tutorial, we'll learn all about the new Before & After previews that Adobe recently added to Camera Raw in Photoshop CC (Creative Cloud) which make it much easier to preview our work and compare it with the original version as we're editing and retouching our images. I'll be using Camera Raw 8.5 here, the latest version at the time I'm writing this. To access these new preview features, you'll need to be running Photoshop CC, available with an Adobe Creative Cloud subscription.
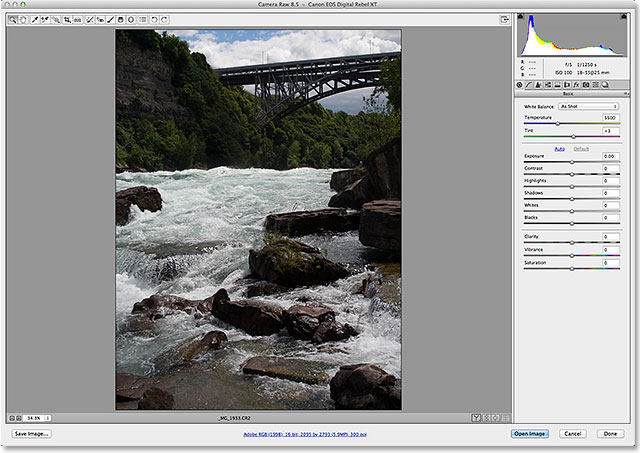
This tutorial isn't meant to be a detailed explanation of how to edit images in Camera Raw. We're going to keep things simple so we can focus specifically on the new preview options. Here's an image I have open in Camera Raw. I've done nothing to the image yet other than giving it an initial crop:
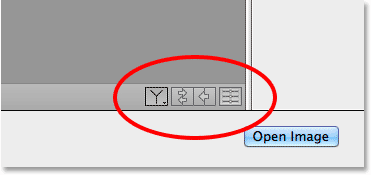
The new preview options (there's four of them in total) are found in the bottom right corner below the image:
To see how these new preview options work, I'll quickly make some edits to my overall image in the Basic panel. Again, I'm just going to glance over this quickly so we can focus in on the preview options themselves. The Basic panel lets us adjust the overall color temperature, exposure, contrast, color saturation, and so on. To really speed things up here, rather than adjusting each of these settings manually, I'll simply click the Auto button and let Photoshop take its best guess at what the image should look like:

Here's what Photoshop came up with. The image is already looking better:

Toggling The Preview For Individual Panels
Previous versions of Camera Raw included a Preview option at the top of the dialog box that we could toggle on and off to show and hide the adjustments made in individual panels, such as the Basic panel I'm currently working in. That same preview option has been moved down with the other preview options in the lower right below the image. We now toggle individual panel previews on and off by clicking the fourth icon in the row (the one on the far right). Clicking this icon will reset all of the settings in the currently open panel to their defaults:

After clicking the icon, my Basic panel is back to its default settings. This allows me to see what the image looked like before making the adjustments:

Clicking the same icon again will restore my settings in the panel:

And now I'm back to seeing the image with my Basic panel settings applied:
The Before And After Views
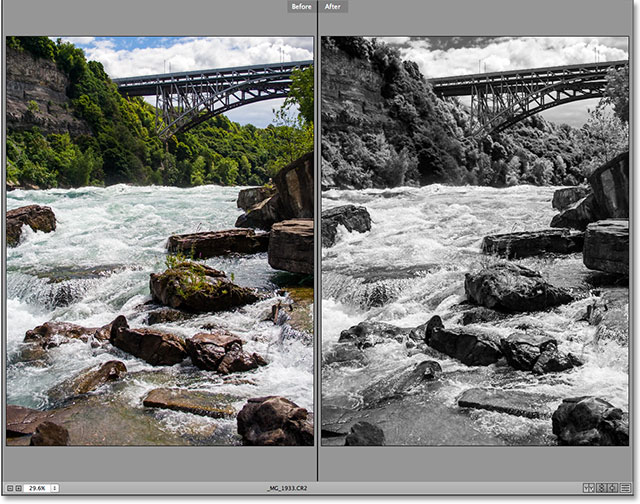
Being able to toggle individual panel previews on and off is nice, but wouldn't it be great if we could see an actual Before & After side-by-side comparison of the image? Well, now in the latest version of Camera Raw, we can! In fact, Adobe now gives us several different comparison views to choose from! To access and switch between them, all we need to do is click on the first icon in the row (the icon that looks like either a letter Y or a wine glass, depending on your mood):
Clicking the icon once will display both versions of the image beside each other, with the original version (the Before version) on the left and the adjusted version (After) on the right:

If you zoom in on either version of the image and scroll it around, the other version will zoom and scroll along with it, making it easy to compare the exact same area in both versions:

There's actually four different Before & After preview modes to choose from, and we can cycle through them by clicking that same icon repeatedly. If we click the icon a second time, we get a split view of the image, with the left half showing the original version and the right half showing the corrected version:

Clicking the icon a third time switches us from a left and right comparison to a top and bottom view, with Before on the top and After on the bottom:

Clicking the icon one more time gives us a top and bottom split view, with the top half of the image displaying the Before version and the bottom half showing the After version. If you're a keyboard shortcuts fan, rather than clicking the icon, you can simply press the letter Q repeatedly to cycle through these various views:

Clicking the icon (or pressing the letter Q on your keyboard) one last time will return you to the original, single view:

If you want to jump straight to a specific view, rather than cycling through the other views to get to it, just click and hold on the icon to bring up a menu showing all five preview modes and select the one you want from the list:

The Preview Preferences
We can also turn off any views we don't need. Let's say, for example, that you don't use either of the split views very often and don't want them showing up as you cycle through the preview modes. To turn them off, click and hold on the Before & After icon:
When the menu appears, choose Preview Preferences at the bottom:

This opens the Preview Preferences dialog box. Simply uncheck any of the views in the Cycle Preview Modes section that you want to skip over. Here, I've unchecked Left/Right split view and Top/Bottom split view. You can still select these modes at any time by clicking and holding on the Before & After icon and selecting them from the menu (as we saw a moment ago). They just won't appear anymore when you're cycling through the preview modes:

There's also a few options here that control the appearance of certain visual elements when viewing the previews. As I cycled through the preview modes earlier, you may have noticed that a solid black line divided the Before & After images in the side-by-side views, yet there was no line dividing them in the two split views. That's because in the Preview Preferences, the Divider in side-by-side views option is checked by default, while the Divider in split views option is unchecked. Personally, I don't like the divider lines at all (not a big fan of clutter) so I would turn them both off, but that's just me:

The third and final option here controls whether the actual "Before" and "After" labels are visible:

I like to keep them on so I leave the Pane labels option checked (as it is by default) but you can uncheck it to turn them off:

Swapping The Before And After Views
If you ever want to swap the Before and After previews so that your adjusted image becomes the Before version and your original, unedited image becomes the After version, click the second icon from the left:
My adjusted image is now displayed on the left as the Before version while the original becomes the After version on the right. Click the same icon again to swap them back:

Copying The Current Settings To The Before Version
The final new preview option in Camera Raw is, I think, the most useful and interesting of the bunch, and here's why. As you continue making adjustments to your image, you may get to the point where you know the adjusted version looks better and there's no longer any need to keep comparing it to the original unedited version. Instead, you may start thinking something along the lines of, "I really like how my adjusted version looks in color, but I wonder how it would look in black and white".
In cases like this, we can make the current version of the image the Before version, and we do that by clicking the third icon from the left:
This copies the current settings to the Before version, and now both the Before and After previews of my image look exactly the same:

I can now switch from the Basic panel to the HSL / Grayscale panel, select the Convert to Grayscale option, and drag the various color sliders to create my black and white version:

The Before & After previews now make it easy to compare my black and white image with the full color version to see which one I like better:
And there we have it! That's a quick look at the new Before & After preview options in the latest version of Adobe Camera Raw, available exclusively in Photoshop CC (Creative Cloud)! Check out our Photo Retouching section for more Photoshop image editing tutorials!