
How To Remove Wrinkles In Photoshop
In this tutorial, you'll learn how to use the Healing Brush in Photoshop to retouch skin and reduce the appearance of dark and distracting wrinkles in your portraits. Notice that I said reduce, not remove, wrinkles. That's because one of the most common skin retouching mistakes is to completely remove the wrinkles from a person's face, making someone in their 40's, 50's, 60's or later look like they've barely aged a day since they were a teenager.
That may sound flattering, and if you're doing work for a fashion magazine, it may be the result you want. But for those of us living in reality, wrinkles are a natural sign of aging, life experience and the wisdom that comes with it, not something to be shunned and removed through heavy-handed use of Photoshop. As the saying goes, just because you can do something doesn't mean you should.
Still, wrinkles that appear too dark and noticeable, whether from bad lighting or just lack of sleep, can ruin an otherwise great portrait. So in this tutorial, we'll learn how to reduce their impact through a combination of the Healing Brush, layer opacity, and one of Photoshop's layer blend modes. I'll be using Photoshop CS6 but this tutorial is also fully compatible with Photoshop CC. If you're using Photoshop CS5 or earlier, you can still follow along here, or you may wish to check out the original version of this tutorial.
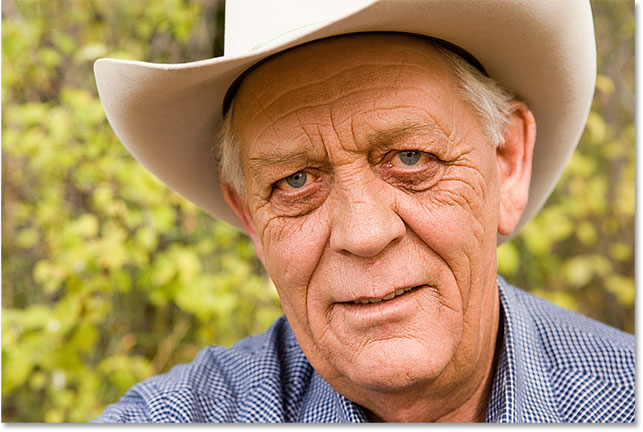
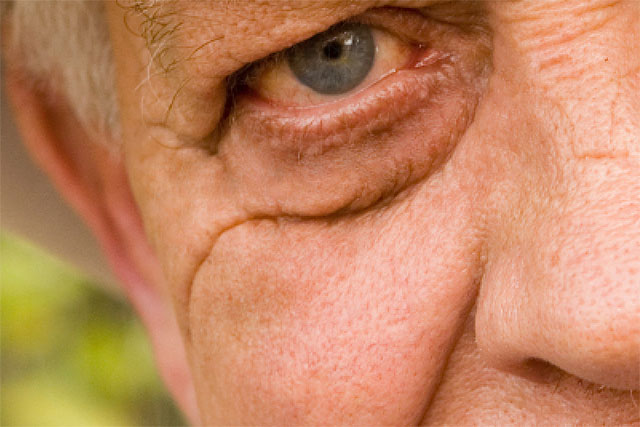
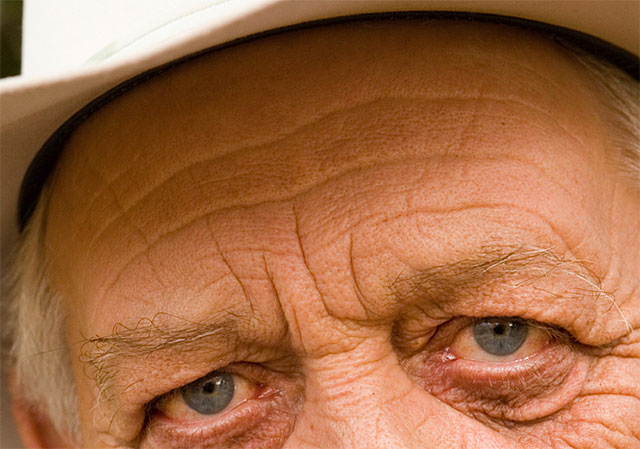
Here's the image I'll be working with. Overall, I think it's a great photo, but some of the wrinkles on the man's face, especially around his eyes, are too intense and distracting:
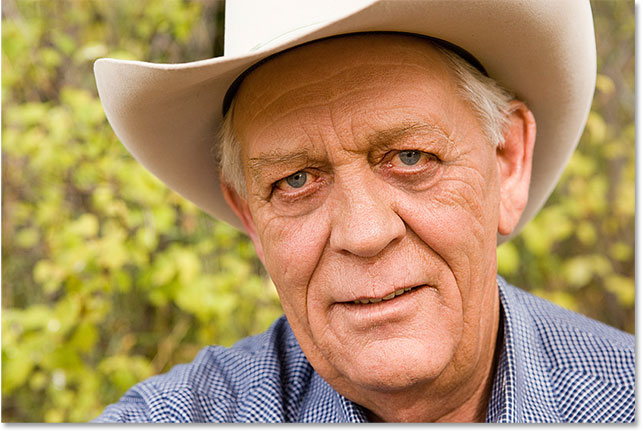
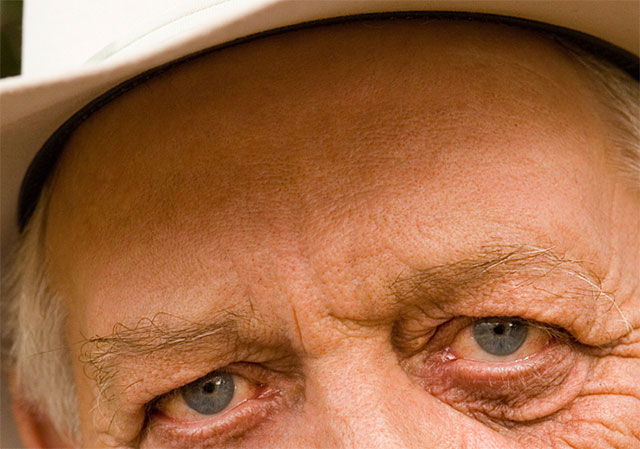
Here's how the same photo will look when we're done:
How To Remove Wrinkles With Photoshop
Step 1: Add A New Blank Layer
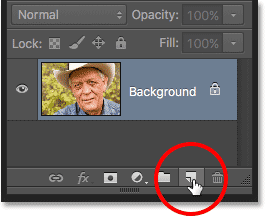
With the image newly-opened in Photoshop, if we look in the Layers panel, we see the image sitting on the Background layer which is currently the only layer in the document:

Let's begin by adding a new blank layer above the Background layer. That way, we can do our retouching work on this new layer and keep it separate from the original image. To add the new layer, press and hold your Alt (Win) / Option (Mac) key on your keyboard and click the New Layer icon at the bottom of the Layers panel:
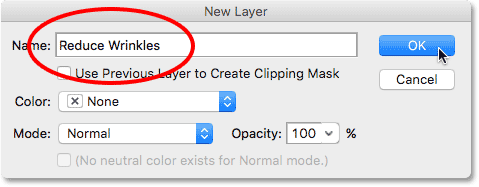
Normally, Photoshop would just go ahead and add the new blank layer. But by holding down the Alt / Option key while clicking the New Layer icon, we tell Photoshop to first open the New Layer dialog box where we can name the new layer before it's added. Name the layer "Reduce Wrinkles", then click OK to close out of the dialog box:
If we look again in our Layers panel, we see that we now have a new blank layer named "Reduce Wrinkles" above the image. The layer is highlighted in blue, which means it's now the currently active layer, and that means that anything we do next will be done to this layer, not the Background layer below it:

Step 2: Select The Healing Brush
Select the Healing Brush Tool from Photoshop's Tools panel. By default, the Healing Brush is hiding behind the Spot Healing Brush Tool. To get to it, right-click (Win) / Control-click (Mac) on the Spot Healing Brush, then choose the Healing Brush from the fly-out menu that appears:

Step 3: Change The Sample Option For The Healing Brush To "All Layers"
Tools like the Spot Healing Brush which we looked at in a separate tutorial, and the regular Healing Brush that we're learning about here, may leave you wondering what exactly Adobe means by the term "healing". How do we "heal" an image? Well, it's really a clever combination of two things. First, Photoshop takes the damaged or unwanted texture from the problem area and replaces it with good texture that it samples from a different area. Then, it blends the good texture in with the problem area's original tone and color to (hopefully) produce a seamless result.
The Spot Healing Brush chooses the area of good texture all on its own, which is what makes it so fast and perfect for things like removing pimples or other small blemishes. The regular Healing Brush, on the other hand, is great for larger or more complex problems (like wrinkles), but it does not choose the good texture on its own. Instead, we need to tell the Healing Brush which area of the image to sample the good texture from. As we'll see in a moment, we do that by clicking on the area to set the sample point.
By default though, the Healing Brush will only sample texture from the currently-selected layer. That's a problem because our currently-selected layer (the Reduce Wrinkles layer) is blank, which means we're not going to accomplish much. We need to tell Photoshop to sample texture not just from our selected layer but from the layer below it as well (the Background layer which holds our image).
We do that using the Sample option in the Options Bar along the top of the screen. By default, it's set to Current Layer. Click on the words "Current Layer" and choose All Layers from the list. There's a third choice as well, Current & Below, which tells the Healing Brush to sample from the current layer and the layer directly below it. Since we only have two layers in our document, Current & Below would give us the same result as choosing All Layers. But in most cases when working with larger, multi-layered documents, All Layers is the option you'll want:

Step 4: Leave "Aligned" Unchecked
Also, make sure the Aligned option directly to the left of the Sample option is unchecked, which it should be by default. With Aligned turned off (unchecked), each time you paint a new brush stroke with the Healing Brush, Photoshop will grab the good texture from the same sample point. And it will keep grabbing the good texture from that same sample point unless, or until, you click on a different area to set as your new sample point. This is usually the behavior you want with the Healing Brush because it gives you more control over exactly where the good texture is coming from.
If you turn Aligned on, then Photoshop will link, or align, the Healing Brush and the sample point so that, if you move the Healing Brush to a different area of the image, Photoshop will automatically move the sample point along with it. This can easily lead to the wrong type of texture being sampled if you're not careful. So in most cases, you'll want to leave Aligned unchecked:

Step 5: Click On An Area Of Good Texture To Sample It
Using the Healing Brush in Photoshop is a simple two-step process. First, we click on an area of good texture to sample it, and then we paint over the problem area to replace the bad texture with the good texture. But one important thing to keep in mind when reducing wrinkles is that skin texture appears different in different areas of a person's face. The skin around your eyes, for example, has a different texture to it than the skin on your cheeks or your forehead. If you want your retouching work to look as realistic as possible, try to sample good texture from an area close to the wrinkle to keep the skin looking consistent.
Also, as a person ages, wrinkles become longer, so we can often make someone look younger just by shortening the length of the wrinkle. Always start at the thin, narrow end of the wrinkle, which is the youngest part, and then work your way towards its origin.
I'm going to zoom in on one of the man's eyes so I can get a closer look at what I'm doing. I'll do that by pressing and holding Ctrl+spacebar (Win) / Command+spacebar (Mac) key on my keyboard, which temporarily switches me to Photoshop's Zoom Tool. Then I'll click a few times on his eye to zoom in. I'll start by removing some of the smaller wrinkles before removing the larger one under the eye.
For the moment, we're going to be completely removing the wrinkles. But of course, that's not really what we want to do. We want to reduce the wrinkles, not remove them. So when we're done, we'll learn how to reduce the appearance of our retouching work to help the result look more natural.
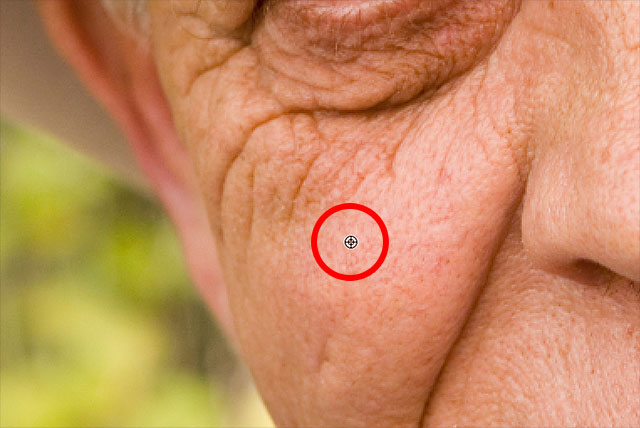
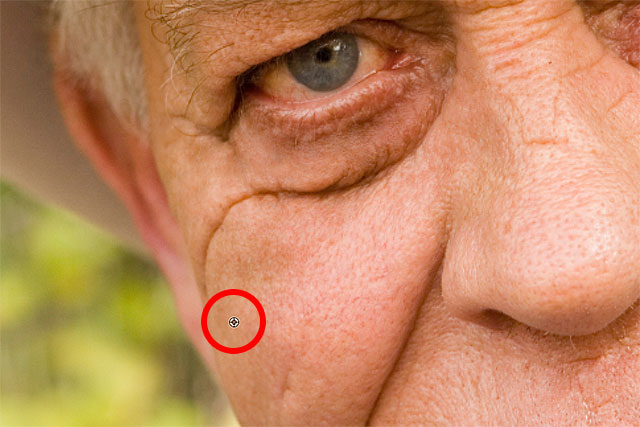
To sample an area of good texture, press and hold your Alt (Win) / Option (Mac) key on your keyboard. This temporarily turns your brush cursor into a small target symbol. Position the target symbol over the good texture, then click with your mouse to sample it. Remember that whenever possible, you'll want to choose an area close to the wrinkle so that you're sampling texture from the same part of the face:
Step 6: Paint Over The Wrinkle To Heal It
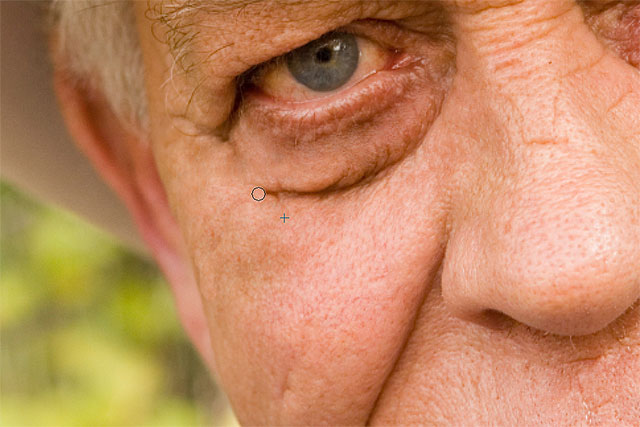
Once you've sampled your good texture, release your Alt (Win) / Option (Mac) key. Your cursor will switch from the target symbol back to the regular brush cursor. If you move your brush cursor away from the spot where you clicked and then look at the area inside the cursor, you'll see a live preview of the texture you've sampled.
Move the Healing Brush over the youngest end of the wrinkle. For best results, use a brush size that's slightly wider than the wrinkle itself. You can quickly adjust the size of your brush from the keyboard. Press the left bracket key ( [ ) repeatedly to make the brush smaller or the right bracket key ( ] ) to make it larger. Then, click on the wrinkle and, with your mouse button still held down, drag the Healing Brush along the path of the wrinkle towards its origin, as if you're painting over it.
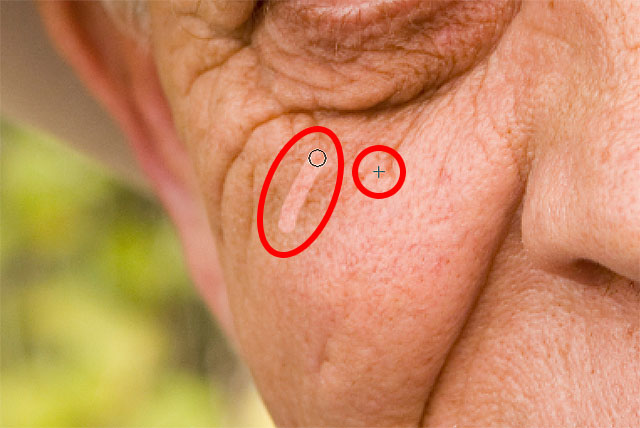
As you paint along the wrinkle, you'll notice two things. First, a small plus sign ( + ) appears over your initial sample point and begins to move along with you, mirroring the path of your brush cursor as you work your way along the wrinkle. The area directly under the plus sign is the good texture that's being sampled, making it easy to see exactly where the texture is coming from. Keep an eye on the plus sign as you drag to make sure it's staying over good texture and not wandering into another problem area.
Also, Photoshop doesn't actually blend the texture in with the original color and brightness values of the problem area until after you release your mouse button. So as you're painting, things may not look as good as you were expecting. Here, it looks more like I'm simply cloning pixels over the wrinkle with the Clone Stamp Tool:
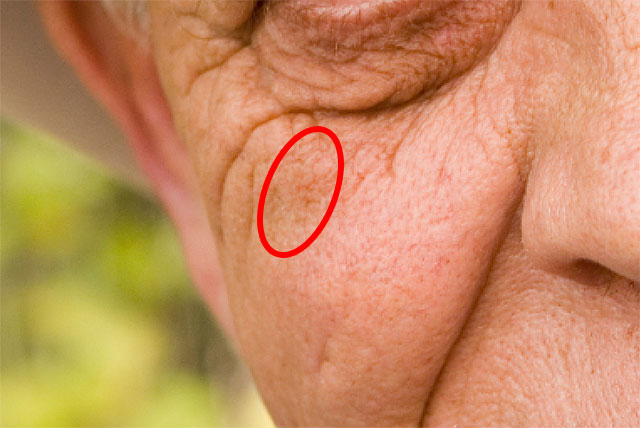
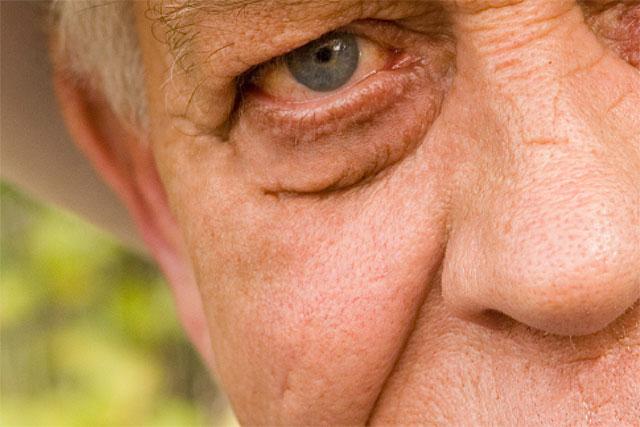
When I release my mouse button, though, Photoshop blends the new texture in with the area's original color and brightness, and the wrinkle disappears:
It's a good idea to sample your good texture from different areas as you make your way from one wrinkle to the next, as this will help to avoid any repeating patterns on the person's skin. Simply press and hold your Alt (Win) / Option (Mac) key to change the cursor back to the target symbol and then click on a different area to set it as your new sample point.
Depending on the length of the wrinkle and the amount of good texture available, you may not be able to cover the entire wrinkle with one continuous paint stroke. In those cases, use a series of shorter strokes, always starting from the youngest end of the wrinkle and working towards its origin. If you make a mistake, press Ctrl+Z (Win) / Command+Z (Mac) on your keyboard to undo the brush stroke, then try again.
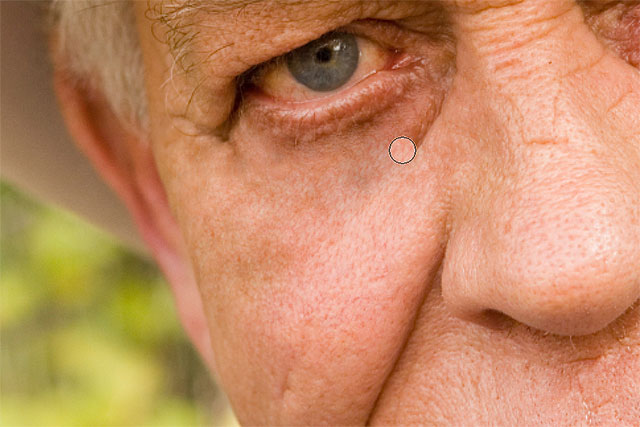
I'll continue removing more of the smaller wrinkles under his eye by painting over them with good texture, changing the size of my brush as needed with the left and right bracket keys so that I'm always keeping my cursor just a bit wider than the wrinkle itself. Here's the result so far:
Now that I've cleaned up the area around that one large wrinkle that runs under his eye, I'll have an easier time removing it (the wrinkle, not the eye). I'll tackle it in sections rather than trying to get it all with one continuous brush stroke. First, I'll press and hold Alt (Win) / Option (Mac) and click on an area of good texture nearby to set it as my sample point:
Then, I'll click at the wrinkle's youngest end and begin painting along its path, releasing my mouse button just as I get to a spot directly under his eye:
I'll release my mouse button, at which point Photoshop blends the good texture in with the original tone and color, and the first part of the wrinkle is now gone:
I'll continue my way along the wrinkle's path, sampling texture from different areas and cleaning up any small problem spots as I go:
Finally, after reaching the corner of his eye and touching up a few more minor problems, the wrinkle is gone:

Viewing A Before And After Comparison
I'll continue making my way around the image with the Healing Brush to remove more of the wrinkles. To view a before-and-after comparison of your retouching work so you can make sure you're on the right track, toggle the Reduce Wrinkles layer on and off by clicking its visibility icon (the eyeball icon) in the Layers panel:
With the layer turned off, you'll see your original, untouched image. Here, I'm viewing a close-up of his forehead as it appeared before removing any wrinkles:
Click the visibility icon once again (the empty square where the eyeball used to be) to turn the Reduce Wrinkles layer back on and see how the image looks with the wrinkles removed:
Using a pen tablet rather than a mouse can drastically speed up this type of retouching work because it allows us to control the size of the brush dynamically with pen pressure. But if you don't have access to a pen tablet, that's okay. You can still use the left and right bracket keys on your keyboard to change your brush size as needed.
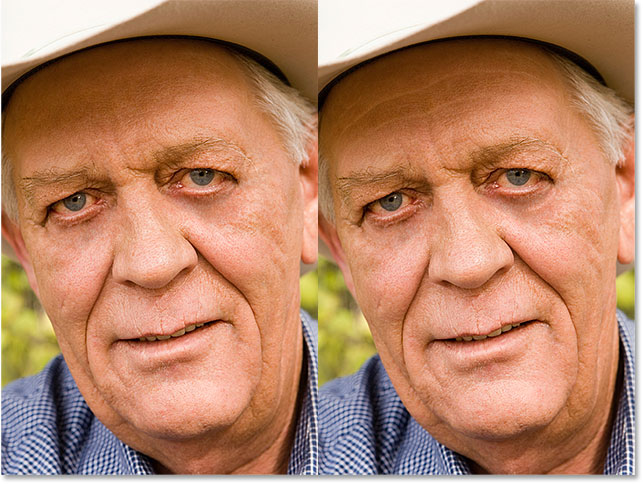
Here's a side-by-side comparison of how my image looked originally (left) and how it looks now after removing the rest of the wrinkles (right):

Step 7: Change The Layer Blend Mode To Lighten
Photoshop's Healing Brush, along with a little time, effort and patience on my part, did a great job of removing the man's wrinkles. But if I was to show him the image at this point, I'm not so sure that he would be impressed. He, and everyone who knows him, knows that he has very distinct wrinkles on his face, and those wrinkles are part of his character and personality. He'd probably be upset, and maybe even insulted, if they were suddenly gone. To make things look more natural, we need to reduce the impact of our retouching work by letting some of the original image show through.
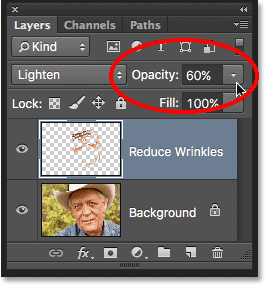
Fortunately, there's a couple of easy ways to do that. First, we can bring back more of the original skin texture around the wrinkles by changing the blend mode of the Reduce Wrinkles layer from Normal (the default mode) to Lighten. You'll find the Blend Mode option in the upper left corner of the Layers panel:
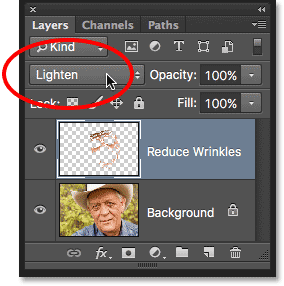
With the blend mode set to Lighten, the only pixels on the Reduce Wrinkles layer that will remain visible are the ones that are lighter than the pixels in the original image below it. Since wrinkles are usually darker due to the shadow they cast on the skin, they'll stay hidden. But any other pixels that are lighter in the original image than they are on the Reduce Wrinkles layer will show through.
On the left is the effect with the blend mode set to Normal. On the right is the result using the Lighten blend mode. The difference can be subtle depending on your image, but here it's especially noticeable in his forehead and around his eye on the right where some of the highlights along the wrinkles have returned:
Learn More: Photoshop's Five Essential Blend Modes For Photo Editing
Step 8: Lower The Layer Opacity
Finally, to bring back the wrinkles themselves, simply lower the opacity of the Reduce Wrinkles layer. You'll find the Opacity option directly across from the Blend Mode option in the Layers panel. The more you lower it from its default value of 100%, the more you'll reveal the wrinkles. Obviously we don't want to bring them back completely, but an opacity value of somewhere between 40% and 60% usually works well. For this image, I'll go with 60%:
And here we see that after lowering the opacity, the wrinkles are once again visible. Yet thanks to our retouching work with the Healing Brush, they're much lighter and far less distracting than they were before: