
Photoshop CS6 Blur Gallery – Iris Blur
In this tutorial, we'll learn all about Iris Blur, the second of three new blur filters found in the Blur Gallery in Photoshop CS6.
In the previous tutorial, we learned how to use Field Blur, which gives us the amazing ability to control the amount of blurring in different areas of an image without the need for layer masks (technically, these new blur filters in CS6 do use layer masks, but Photoshop creates them for us behind the scenes so we don't need to worry about them).
As we'll see in this tutorial, Iris Blur gives us everything that Field Blur has to offer, and then takes things further by giving us even more ways to control exactly how and where the blurring effect is applied.
This tutorial builds on what we learned in the Field Blur tutorial, so if you haven't already, I'd recommend reading it first before moving on.
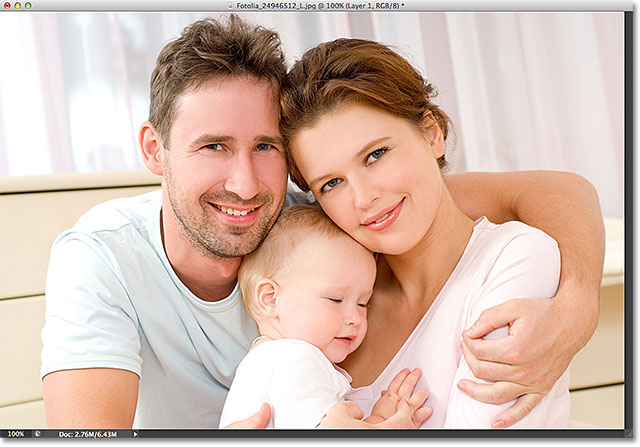
Here's the photo I'll be working with:
As always, I'm working on a copy of my image to avoid making any permanent changes to the original, as we can see in my Layers panel. The original photo is on the Background layer, and the copy is above it on Layer 1 (you can make a copy of a layer by pressing Ctrl+J (Win) / Command+J (Mac) on your keyboard):

Selecting The Iris Blur Filter
You'll find the new Iris Blur filter under the Filter menu in the Menu Bar along the top of the screen. Go up to the Filter menu, choose Blur, and then choose Iris Blur (second from the top):

As we saw when we chose Field Blur in the previous tutorial, this opens the new Blur Gallery, which temporarily replaces Photoshop's standard interface. Since we chose Iris Blur this time, the Blur Tools panel in the top right corner of the Blur Gallery opens to the Iris Blur options, which contains a single option - the same Blur slider that we saw with Field Blur:

Our photo appears in the large preview area which takes up most of the Blur Gallery, and just as with Field Blur, Photoshop goes ahead and adds an initial pin for us which we can use to control how and where the blurring effect is applied. This time, though, the pin looks more like a solar system, with planets orbiting the center:

Controlling The Blur Amount
Let's take a closer look at what we're seeing. First, as we learned in the Field Blur tutorial, this fancy looking icon is called a pin because we can "pin" additional copies of it to different spots in the image, allowing us to control the blur amount in those specific areas. In the center of the pin is the same familiar outer control ring, or dial, that we get with Field Blur, and we use it in exactly the same way to adjust the blur amount. Simply move your mouse cursor over the ring, then click and with your mouse button held down, drag either clockwise or counterclockwise around it to turn the dial. Dragging clockwise will increase the blur amount, while dragging counterclockwise will decrease it, just like turning the volume knob on a stereo or amplifier. Photoshop gives you a live preview of the results as you drag, and the HUD (Heads-Up Display) shows you what your current blur amount is, in pixels (here, mine is 36 pixels):

You can also control the blur amount using the Blur slider in the Blur Tools panel. Drag the slider towards the right to increase blurring, or drag to the left to decrease it. The slider and the pin are tied together so it makes no difference which one you use. Changing one will automatically change the other:

The 100% Blur Line
Surrounding the outer ring are four dots, and surrounding them are four smaller dots connected by a thin curved line. They make not look like much, but these dots allow us to control exactly how we want the blur effect to be applied to the image, and they're what give Iris Blur more fine-tuning power than what we get with Field Blur. Let's start with the four smaller dots joined together by the curved line (way out there at the edge of the solar system). These control the 100% point for the blur effect. In other words, everything outside of this line gets 100% of the blur amount applied to it. The area inside the line either gets an amount less than 100%, or no blurring at all, depending on how close the area is to the center of the pin. We'll learn how to control the blur amount inside the line in a moment.
There's a few ways to adjust this 100% line. First, if you hover your mouse cursor over any of the four dots that are connected by the line, you'll see your cursor change into a rotate icon (a small curved line with an arrow on either end). Click on the dot and, with your mouse button held down, drag it to reshape and / or rotate the line.

Or, if you're happy with the overall shape and rotation of the line and just want to make the 100% blur area larger or smaller, click and drag the line itself. This will constrain its shape and rotation angle:

If you look closely at the line, you'll also notice a single square icon (between the top and right dots). We can use this square to control the curve of the line, meaning that instead of it appearing as an ellipse, we can click and drag the square outward to create more of a rectangle with rounded corners. Dragging the square inward again will reshape the line back to an ellipse:

The Transition Area
What about those four larger dots between the center of the pin and the outer 100% blur line? These dots control where the transition area for the blur effect begins. The area between the center of the pin and these larger dots is completely protected from the blur effect, maintaining the same amount of sharpness and focus as the original image:

The blur effect then begins at these four dots and grows progressively stronger as we move outward until we get to the outer line where the blur effect reaches full strength:

We can move these transition points closer or further away from the pin's center point by clicking and dragging them. The closer we move them to the outer line, the more pronounced the transition area becomes. For a more subtle transition area, move the dots closer to the center point. By default, clicking and dragging any of the points moves all of them together, which in most cases is what you want, but you can also move them individually by pressing and holding the Alt (Win) / Option (Mac) key on your keyboard as you drag them:

Adjusting The Focus
By default, the area between the pin's center point and the four transition points is protected from the blur effect, remaining entirely in focus, but we can change that if we need to. If you look up in the Options Bar, you'll find the Focus option which is set (again, by default) to 100%. Lowering the Focus amount will add blurring to the normally protected area. I'll lower mine down to 75%

And now the area between the center and transition points appears slightly out of focus:

Moving Pins
As with Field Blur, we can move a pin to a different area of the image simply by clicking on its center point and dragging it to a different spot:

Adding Pins
To add a new pin to the image and gain even more control over the blur effect, move your mouse cursor over the spot where you want to add the pin, then click to add it. Here, I've added two more pins - one over the woman's face and one over the baby's face, allowing me to control the blur separately in those areas:

Switching Between Pins
As with Field Blur, only one pin can be active at a time, and only the currently active pin displays the controls around it, but we can easily switch between pins as needed simply by clicking on them, allowing us to make whatever changes we need. Here, I've re-selected the pin over the woman's face by clicking on it:

Hiding The Pins And Viewing The Original Image
We can temporarily hide the pins, making it easier to view and judge the blurring effect, by pressing and holding the letter H on the keyboard. With the key held down, the pins are hidden from view. Release the key to make the pins visible again.
We can also view the original image to compare it with blur effect by unchecking the Preview option in the Options Bar. With Preview unchecked, the original image appears in the Blur Gallery's preview area. Click inside the Preview checkbox again to switch back to your work-in-progress. Or, for a faster way to switch between the original and blurred image, press the P key repeatedly on your keyboard to cycle between them:

Removing Pins
If you need to remove a single pin from the image, click on the pin to make it active, then press Backspace (Win) / Delete (Mac) on your keyboard to delete it. Or, if you need to remove all the pins at once and start over, click on the Remove All Pins icon in the Options Bar:

Undo A Step
If you happen to make a mistake as you're working, the Iris Blur filter gives you one level of undo, meaning you can undo the very last thing you did. To undo your last step, press Ctrl+Z (Win) / Command+Z (Mac) on your keyboard.
Applying The Blur Effect
As long as you're working inside the Blur Gallery, you're not making any permanent changes to the image. Photoshop is simply giving you a live preview of what the blur effect will look like. When you're happy with the way things look, click on the OK button in the Options Bar, or press Enter (Win) / Return (Mac) on your keyboard, to apply the effect to the image and exit out of the Blur Gallery:

Here, once again, is my original image for comparison:
And here is my final result:

And there we have it! That's how to apply a custom blurring effect to an image using the new Iris Blur filter, part of the new Blur Gallery in Photoshop CS6! Check out our Photo Retouching section for more Photoshop image editing tutorials!