
Photoshop CS6 Blur Gallery – Field Blur
In this Photo Retouch tutorial, we look at Field Blur, the first of three brand new blur filters in Photoshop CS6! Field Blur, along with Iris Blur and Tilt-Shift (the other new blur filters) are found in the Blur Gallery, also new in CS6.
Each of these filters gives us a different way to add a blur effect to a photo, but as we'll see in these tutorials, Field Blur, Iris Blur and Tilt-Shift have one big advantage in common - they give us amazing control over the effect because they don't simply apply uniform blurring across the entire image. Instead, they allow us to easily adjust and fine-tune the blur amount in specific areas, and they do it without the need for layer masks!
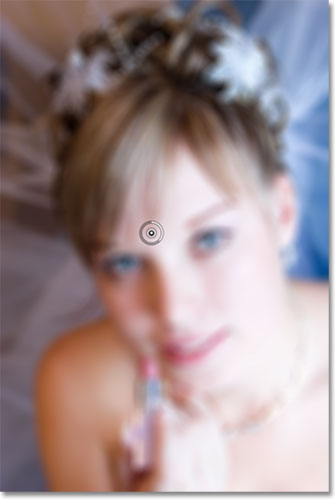
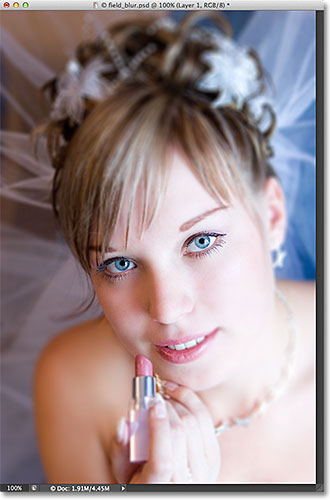
In this first tutorial, we'll learn all aboout Field Blur. Here's the photo I'll be working with:

Before we go any further, let's take a quick look at my Layers panel where we see that I'm currently working on a copy of my original image. I created the copy by pressing Crtl+J (Win) / Command+J (Mac) on my keyboard, which duplicated the Background layer. This way, the original photo, sitting safely on the Background layer, will remain untouched and unharmed while I apply the blur effect to the copy on Layer 1:
Selecting The Field Blur Filter
To access the Field Blur filter, go up to the Filter menu in the Menu Bar along the top of the screen, choose Blur from the list, and then choose Field Blur:
The Blur Gallery
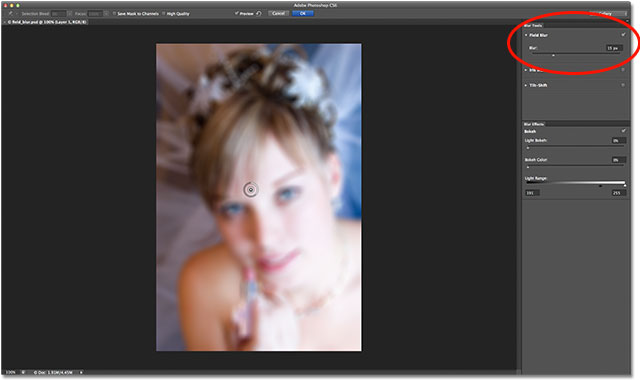
This opens the Blur Gallery which temporarily replaces the standard interface in Photoshop CS6. The Blur Gallery is made up mostly of a large preview area where we work on our image, and if you look along the right, you'll find a couple of panels. The top one is the main Blur Tools panel where we find the controls and options for the Field Blur, Iris Blur and Tilt-Shift filters. Below it is the Blur Effects panel which gives us a few extra options for adding bokeh effects to the blur. We're going to skip the Blur Effects panel for now because we don't need it to add our main blur effect.
Since I selected Field Blur from the Filter menu, the Blur Tools panel automatically opens to the Field Blur options:
Working With Pins
If we look at my image in the preview area, we notice two things. First, the entire photo has an initial blurring effect applied to it, and it's applied uniformly across the entire image, similar to what we'd get with one of Photoshop's more traditional blur filters like Gaussian Blur. The second and more interesting thing we notice is a strange looking circular icon. This icon is known as a pin. It's called a pin because we "pin" it to the image. Photoshop automatically adds an initial pin for us, but we can pin multiple copies of this icon to different areas of the image. Why would we do that? We'll get to that in a moment:
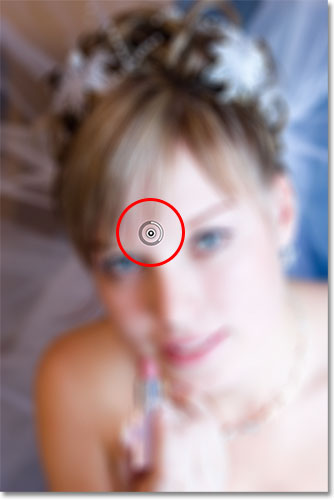
This initial pin that Photoshop adds is actually controlling the amount of blur that's being applied to the image. How does it work? Well, the outer ring of the pin acts very much like a volume dial on a stereo or amplifier. To increase the music's volume, we'd turn the dial clockwise, and to turn the music down, we'd turn the dial counterclockwise. In this case, instead of adjusting sound volume, we're controlling the amount of blurring, but it works the same way. We just need to turn the dial. Simply move your mouse cursor over the outer ring, then click and with your mouse button held down, drag your mouse either clockwise or counterclockwise to turn the dial. Dragging clockwise will increase the blur amount, while dragging counterclockwise will decrease it. Photoshop will show you a live preview of the result as you drag:
The Blur Slider
If the "volume dial" control doesn't appeal to you, you can also adjust the blur amount using the more traditional Blur slider in the Field Blur section of the Blur Tools panel. The Blur slider and the pin are tied to each other so adjusting one automatically adjusts the other. It makes no difference which one you use. As with the pin, Photoshop will give you a live preview of the result as you drag the Blur slider left or right:
Here's what my image looks like in the preview area with my blur amount set to 18px:
Moving Pins
So far, so good, except that all I've managed to do up to this point is apply the same amount of blurring to the entire photo. What if I want to change the blur amount in a specific area? For example, the woman's eyes should not be blurred. They need to remain sharp, so how do I reduce the blur amount over just her eyes? With the new Field Blur filter, it's easy. I just need to add another pin!
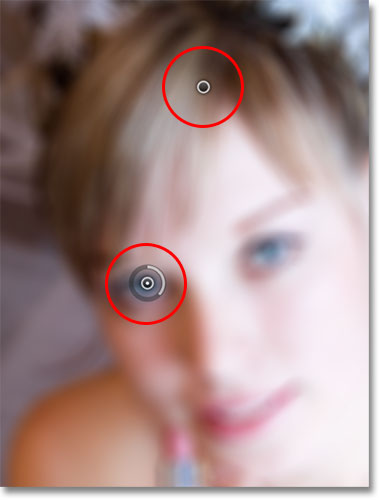
Before I do that, though, I'm first going to move my initial pin out of the way. We can move pins around simply by clicking on the center of them and, with the mouse button held down, dragging them to a different spot over the image. I'll drag the pin up higher so it's away from her eyes:

Adding More Pins
To add a new pin, move your mouse cursor over the spot where you want to place it. Your cursor will change into a pin icon with a plus sign ( + ) beside it, letting you know you're about to add a new pin. In my case, since I want to adjust the blur amount over the woman's eyes, I'll move my cursor over the eye on the left:
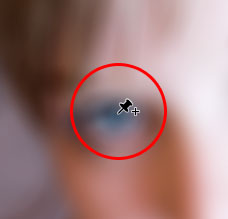
Then, simply click and the new pin appears! Notice that the initial pin is still there but is no longer displaying the outer ring around it. That's because even though both pins are having an effect on the image, we can only adjust one pin at a time, so only the pin that's currently active (the new pin I just added) displays the outer dial:
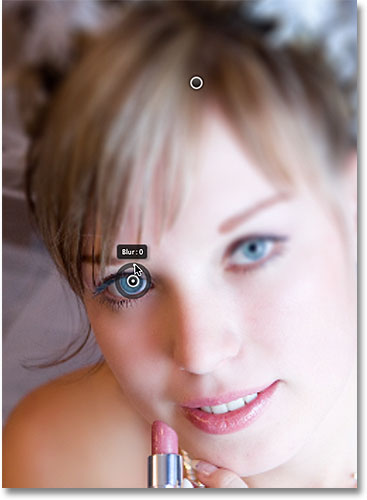
With my new pin over the woman's eye, I can remove the blurring in that area of the image either by dragging the pin's outer ring counterclockwise or by dragging the Blur slider in the Blur Tools panel to the left until the blur amount is at 0. Here, I'm dragging the pin's outer dial. The blurring effect under and around this second pin has now been removed, while the area closer to the initial pin higher up in the image still has the blur effect applied:
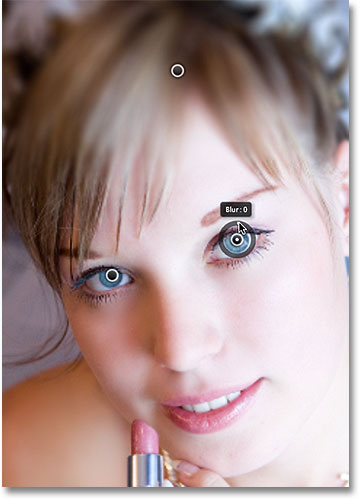
I'll do the same thing with the other eye, clicking on it to add a third pin to the image, then dragging the outer dial counterclockwise to set the blur amount to 0. Both eyes are now once again nice and sharp, just as they were originally, while the blur effect remains around the pin at the top of the image. With each new pin we add, we gain more control over the strength of the blur in different areas of the photo:
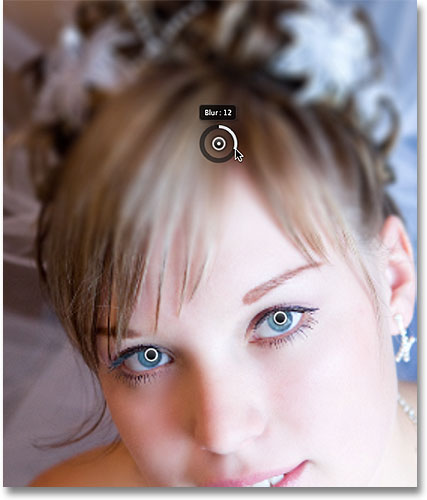
What if I want to go back and re-adjust the initial pin? No problem! I just need to click on it to re-activate it, which will once again display its outer control ring, and then I can drag the ring (or the Blur slider in the Blur Tools panel) to increase or decrease the blur amount in that part of the photo. It's important to note that at this point, we're not making any permanent, physical changes to the image. Photoshop is simply giving us a live preview of what the blur effect will look like:
Here, I'm adding a fourth pin just below her shoulder to add some blurring and softening in that area, rotating the outer dial clockwise to increase blurring. You can add as many pins as you like to gain as much fine-tune control over the blur effect as you need:
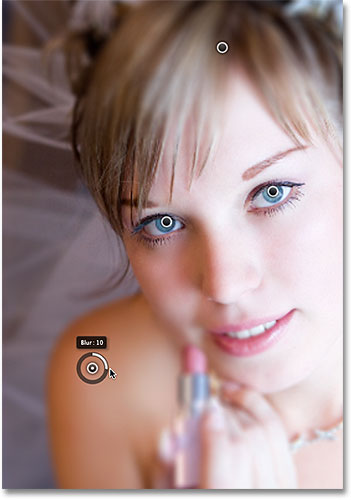
And as one more example, I'll click and add a fifth pin just above her mouth, then I'll rotate its outer ring counterclockwise to bring back some of the original sharpness in the lower part of her face:

Temporarily Hiding The Pins
The only problem with these pins is that they tend to clutter up the image, making it difficult to see the effect underneath. We can temporarily hide the pins by pressing and holding the H key on the keyboard (think "H' for "Hide"). With the key held down, the pins disappear. Release the key and they re-appear:

You can also compare your work-in-progress with the original un-blurred version at any time by unchecking the Preview option at the top of the Blur Gallery. With Preview unchecked, the original image appears. Click inside its checkbox again to turn Preview back on and switch back to the blurred version. Or, you can press the letter P on your keyboard to quickly cycle the Preview option on and off:

Removing Pins
To remove an unwanted pin, click on it to make it active, then press Backspace (Win) / Delete (Mac) on your keyboard. Or, if you want to clear away all the pins at once and start over, click the Remove All Pins icon at the top of the Blur Gallery (directly to the right of the Preview option):

Applying The Blur Effect To The Image
Finally, when you're done adding, adjusting and moving pins and you're happy with the results, either click the OK button at the top of the Blur Gallery or press Enter (Win) / Return (Mac) on your keyboard. This will apply the blur effect to the image and exit you out of the Blur Gallery:

And that's all there is to it! Here, for comparison, is my original photo once again:
And here, after adding a few more pins around the image, is my final result:
And there we have it! That's how to easily apply different amounts of blurring to specific areas of an image using the new Field Blur filter in Photoshop CS6! Check out our Photo Retouching section for more Photoshop image editing tutorials!