
The Color Replacement Tool In Photoshop
In this tutorial, we'll learn all about the Color Replacement Tool in Photoshop and how we can use it to easily change the color of objects in our photos!
Previously, we looked at the Background Eraser Tool and why it's one of the best tools in Photoshop for removing unwanted background areas of an image. You may be wondering why I mentioned it. I mean, what could a tool for erasing backgrounds possibly have to do with a tool for changing colors?
The answer is, a lot! The Background Eraser and the Color Replacement Tool both use the exact same methods for detecting pixels in the image that need to be changed. The only difference is that one of them erases pixels while the other simply changes their color. In fact, the tools are so similar that if you've already read through the Background Eraser tutorial and understand how it works, learning about the Color Replacement Tool will seem a lot like déjà vu.
Photoshop's Color Replacement Tool is not the most professional way to change colors in an image, and it won't always give you the results you need. But it usually works well for simple tasks and is such an easy tool to use that it's worth giving it a try before moving on to more advanced and time consuming methods.
This tutorial has been updated for Photoshop CS6 and is also fully compatible with Photoshop CC. If you're using Photoshop CS5 or earlier, you can still follow along here, or you can check out the original Color Replacement Tool tutorial.
How To Use The Color Replacement Tool In Photoshop
Selecting The Color Replacement Tool
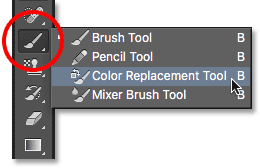
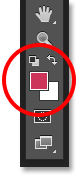
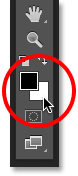
The Color Replacement Tool is nested behind Photoshop's regular Brush Tool in the Tools panel. To select it, right-click (Win) / Control-click (Mac) on the Brush Tool, then choose the Color Replacement Tool from the fly-out menu that appears:
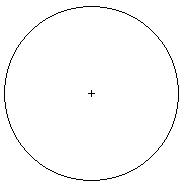
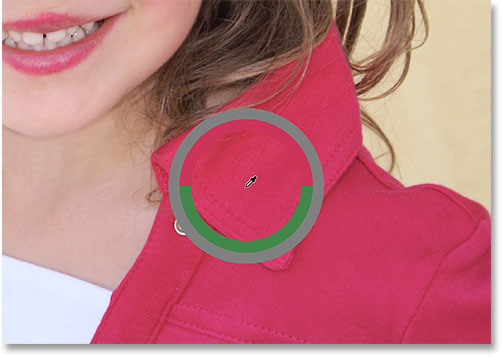
With the Color Replacement Tool selected, your mouse cursor will change into a circle with a small crosshair in the center of it. As I mentioned, if you're familiar with the Background Eraser, this will look very familiar to you since both tools use the exact same cursor:
Adjusting The Size Of The Brush
You can adjust the size of the cursor directly from your keyboard, just like you can with Photoshop's other Brush tools. Press the left bracket key ( [ ) repeatedly to make the cursor smaller or the right bracket key ( ] ) to make it larger. To change the hardness of the brush edges, add the Shift key. Press Shift+left bracket ( [ ) repeatedly to make the edges softer or Shift+right bracket ( ] ) to make them harder.
How The Color Replacement Tool Works
As you drag the Color Replacement Tool over your image, Photoshop continuously samples the color that's directly under the crosshair in the center of the cursor. This is the color that will be replaced, and it will be replaced with your current Foreground color. Any pixels that fall within the larger circle surrounding the crosshair that match the color being replaced will have their color changed.
For example, if you pass the crosshair over an area of blue in your photo and your Foreground color is set to red, any blue pixels that the larger circle passes over will be changed to red. There's some options we can set in the Options Bar to alter the behavior of the tool (which we'll look at shortly), but essentially, that's how it works.
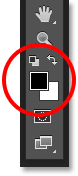
You can see what your Foreground color is currently set to by looking at the Foreground color swatch near the bottom of the Tools panel. By default, it's set to black:
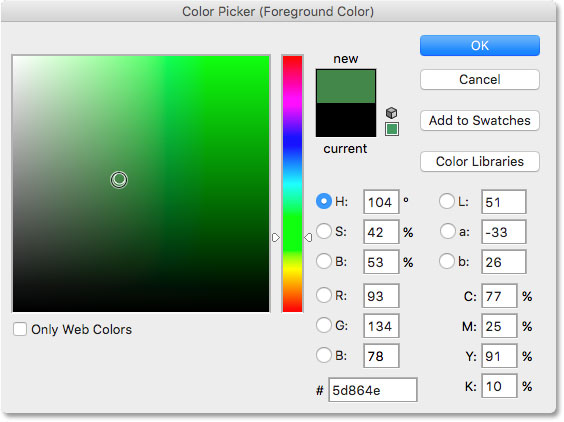
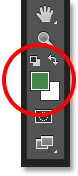
To change the Foreground color, simply click directly on the color swatch, then choose a new color from the Color Picker. I'll choose a green color, just for fun. Click OK to close out of the Color Picker when you're done:
If we look again in the Tools panel, we see that my Foreground color swatch is now showing the new color I selected. If I paint on an image with the Color Replacement Tool at this point, whichever color I drag the crosshair over will be replaced with green:
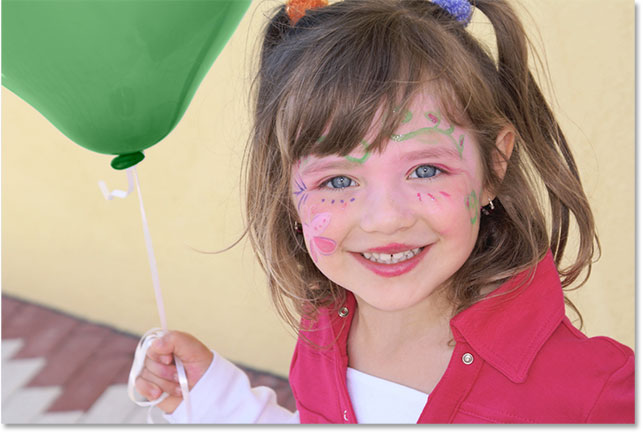
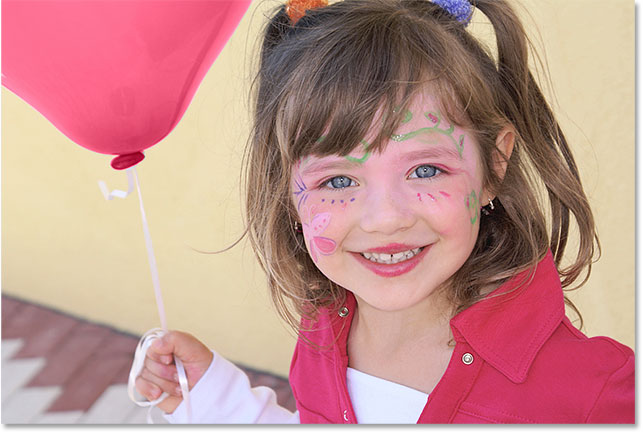
For example, here's a photo of a young girl holding a balloon:
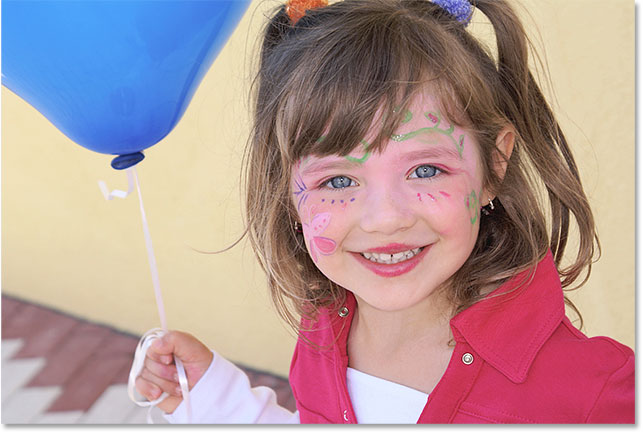
She may look happy with her blue balloon, but what she really wanted was a green balloon. As luck would have it, I just happen to have my Foreground color currently set to green, so let's see what we can do for her.
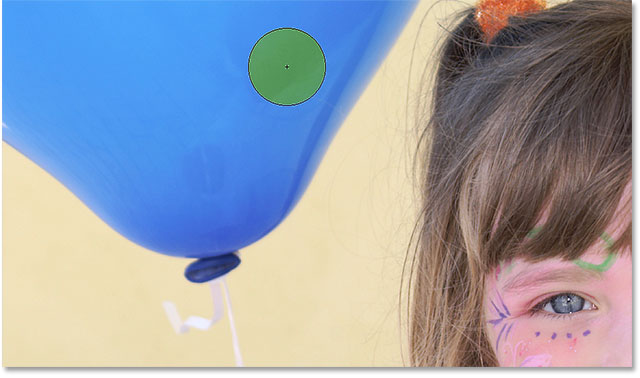
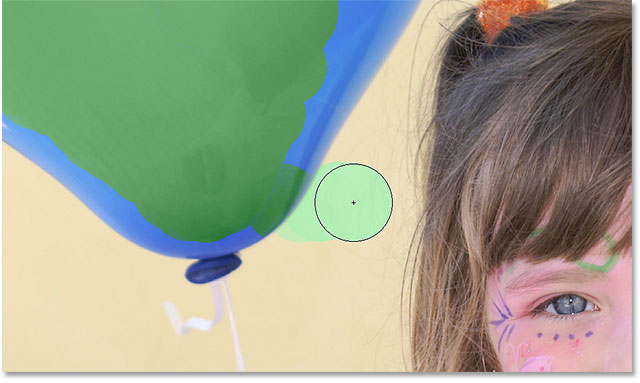
With the Color Replacement Tool selected, I'll move the crosshair over the blue balloon in the image and click my mouse button. As soon as I click, two things happen. First, Photoshop samples the blue color under the crosshair so it knows which color to replace. Then, any blue pixels that fall within the larger circle surrounding the crosshair immediately change to green, since green is now my Foreground color:
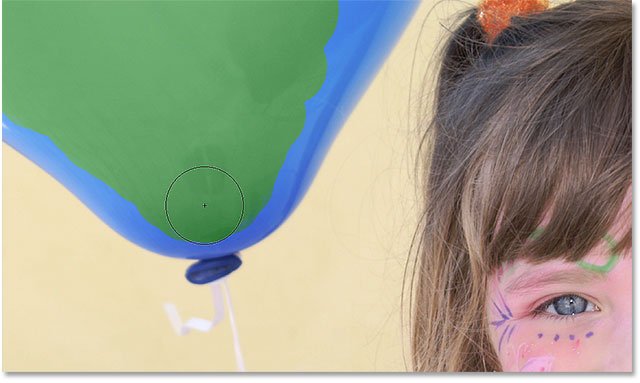
To change the rest of the balloon to green, I just need to keep my mouse button held down and continue dragging the Color Replacement Tool over the remaining blue areas. As long as I keep the crosshair over the blue balloon and don't stray off into other areas of the image (which would cause Photoshop to sample a different color), only the blue color will be replaced with green:
However, If I accidentally move the crosshair outside of the balloon and over the yellow wall behind it, Photoshop samples the color of the wall and begins changing it to green as well. When this happens, simply undo your last brush stroke by pressing Ctrl+Z (Win) / Command+Z (Mac) on your keyboard, or undo multiple brush strokes by pressing Ctrl+Alt+Z (Win) / Command+Option+Z (Mac) as many times as needed, then continue on:
Tolerance
Everything seems to be going smoothly as I paint over the balloon. That is, until I get to the edges. If you look closely, you can see some faint blue fringing that the Color Replacement Tool is having trouble with:
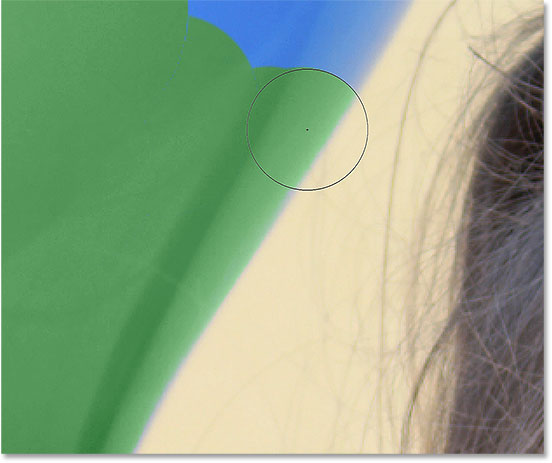
I mentioned a few moments ago that there are several options available to us in the Options Bar for altering the behavior of the Color Replacement Tool. One of these options is Tolerance. The Tolerance setting tells Photoshop how different a color can be from the sampled color for Photoshop to replace it with the Foreground color. The default value is 30% which is usually a good starting point. Unfortunately, it's not quite high enough in this case for Photoshop to be able to include the shade of blue right along the edges of the balloon.
I'll increase my Tolerance value to 50%, which will allow the Color Replacement Tool to affect a wider range of colors:

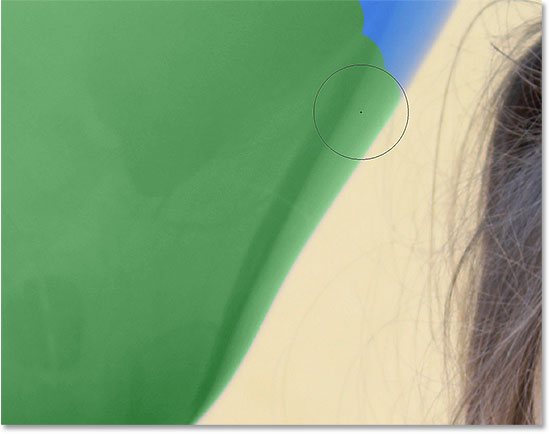
I'll undo my last step and try again. This time, thanks to my higher Tolerance setting, the Color Replacement Tool is able to do a better job of removing the blue fringing:
I'll finish painting over the remaining areas as our once-blue balloon is magically transformed into green thanks to the Color Replacement Tool and a little boost in the Tolerance value:
Sampling Colors From The Image
In the above example, I randomly chose a new color for the balloon from Photoshop's Color Picker. But I could just as easily have sampled a color directly from the photo itself. To do that, with the Color Replacement Tool active, press and hold the Alt (Win) / Option (Mac) key on your keyboard. This temporarily switches you to the Eyedropper Tool (you'll see your cursor change into an eyedropper). Click on an area of the photo that contains the color you want to use. Photoshop will sample that color and make it your new Foreground color. I'll click on the pinkish-red top she's wearing:
Release the Alt (Win) / Option (Mac) key when you're done to switch back to the Color Replacement Tool. If we look at the Foreground color swatch in the Tools panel, we see that the color I clicked on has become my new Foreground color:
With the color sampled directly from the image, I can paint over the balloon to change its color once again:
The Blend Modes
Notice that even though we've essentially painted over the balloon with a new color, the balloon retained its shiny, reflective appearance. If we had simply grabbed the regular Brush Tool and painted over it, the balloon would look like nothing more than a flat surface with no life to it. So how was the Color Replacement Tool able to keep the balloon's texture and reflections?
The answer is that the Color Replacement Tool uses blend modes to blend the new color in with the object. There's four blend modes to choose from—Hue, Saturation, Color, and Luminosity—all of which can be selected from the Mode option in the Options Bar. The default blend mode is Color. It's the one we've been using so far:

What most of us think of as the color of an object is really a combination of three things—Hue (the actual color itself), Saturation (the intensity of the color) and Brightness (how light or dark it appears). Each of the four blend modes we can choose from for the Color Replacement Tool affects one or more of these properties.
Hue: The Hue blend mode will change only the basic color itself. It will not change the saturation or brightness of the original color. This mode is useful for images where the colors are not very intense and will usually produce very subtle changes.
Saturation: The Saturation blend mode changes only the saturation of the original color. The hue and brightness are not affected. This is useful for reducing the intensity of a color, or even removing color completely.
Color: Color is the default blend mode and will change both the hue and saturation. The brightness will remain unchanged. This is the blend mode you'll use most often.
Luminosity: Finally, the Luminosity blend mode will simply match the brightness of the original color to the brightness of the new color. Hue and saturation are unaffected.
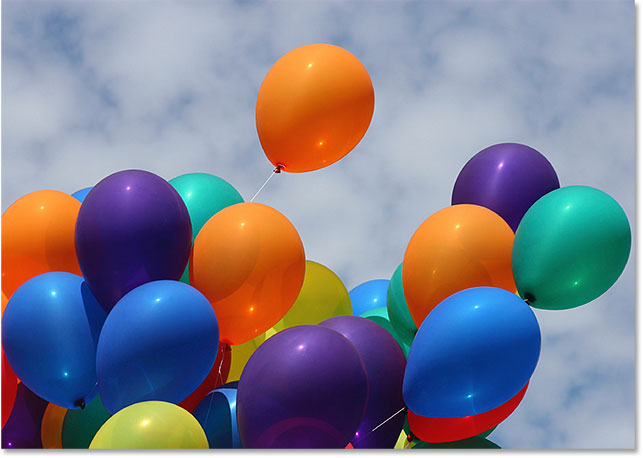
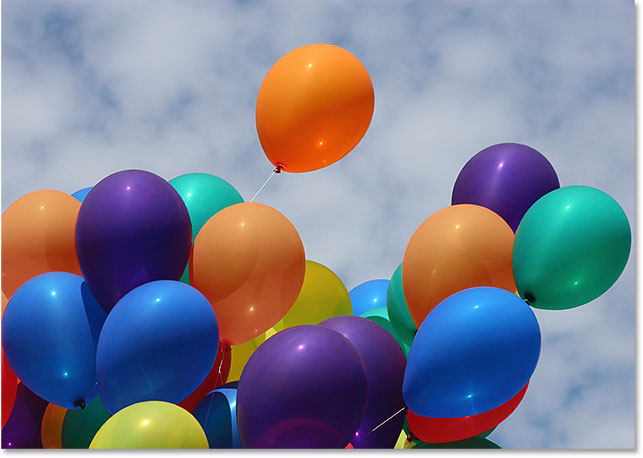
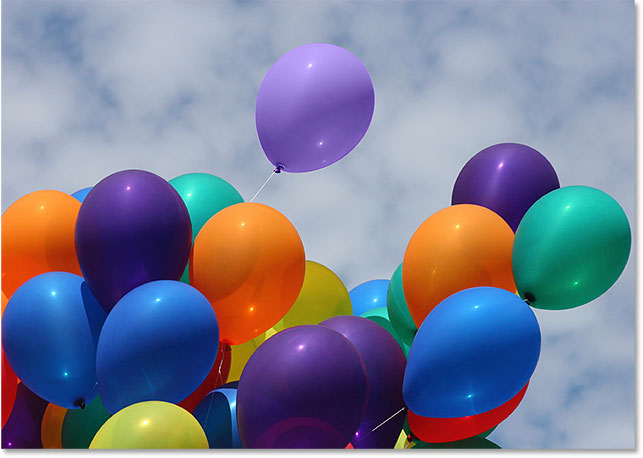
In this photo below, an orange balloon at the top seems ready to split from the group and fly off on its own adventure into the sky:
One way to make the balloon stand out even more from the others might be to reduce the saturation of some of the other balloons below it. I don't want to change the actual color of the balloons, just the intensity of them. To do that, I'll change my blend mode option in the Options Bar to Saturation:

If I wanted to completely desaturate the balloons, removing their color entirely, I'd set my Foreground color to either black, white or any shade of gray in between. But since I want a more subtle effect, I'll just sample one of the less-saturated colors in the image. To do that, I'll once again press and hold my Alt (Win) / Option (Mac) key to temporarily switch to the Eyedropper Tool. Then, I'll click on a color. I'll choose a less-saturated yellow. The color itself makes no difference since the Saturation blend mode won't change any of the original colors. It will only affect the saturation:
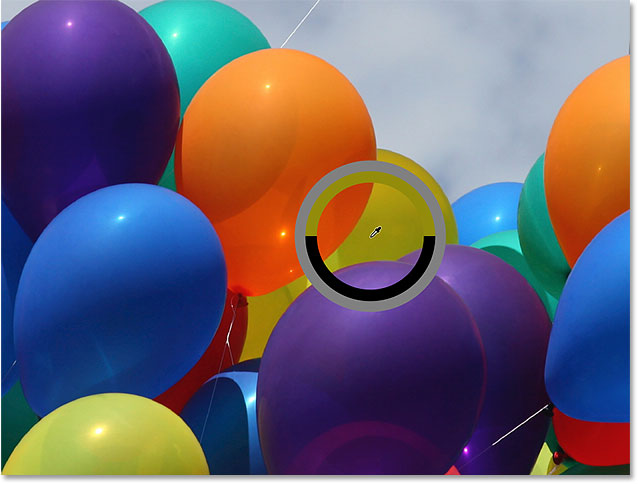
With a less-saturated color now set as my Foreground color and my blend mode set to Saturation, I'll paint over any balloons that need their saturation level reduced, adjusting my brush size with the left and right bracket keys on the keyboard and changing the Tolerance value in the Options Bar as needed. Here, we see the difference in saturation as I paint over one of the other orange balloons. The top part of the balloon (where I've painted) shows the reduced saturation. The bottom part (where I haven't painted yet) still shows the original saturation:
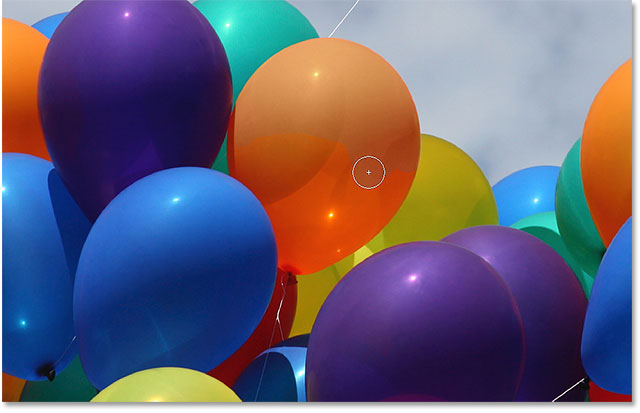
I'll continue painting over any other balloons that need their saturation reduced. Here's the finished result:
The Brightness Problem
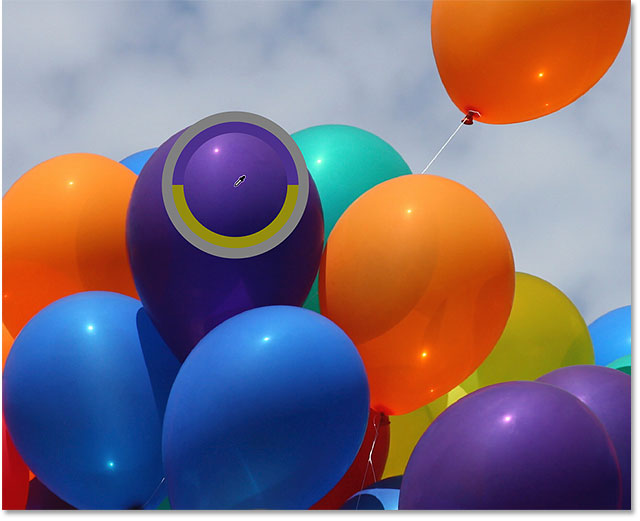
Unfortunately, there's one situation where the Color Replacement Tool tends to fail miserably, and that's when there's a big difference in brightness between the original color in the image and the color you want to replace it with. Let's say I wanted to replace the orange in that one balloon we've been focusing on with a dark purple color from one of the other balloons. From everything we've seen so far, it should be simple enough.
First, I'll set the colors in the image back to what they were originally by going up to the File menu at the top of the screen and choosing the Revert command. Then, with the Color Replacement Tool selected, I'll hold down my Alt (Win) / Option (Mac) key and click on one of the purple balloons to sample its color:
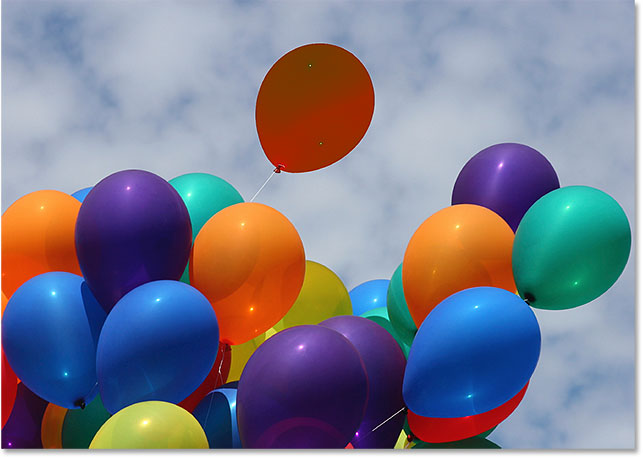
I'll set my blend mode in the Options Bar back to Color, the default setting. Then, I'll paint over the orange balloon to change its color to dark purple. Here's the result:
Hmm. It's definitely purple, but it doesn't quite look like the other purple balloons, does it? The problem is that it's much lighter than the other purple balloons, and that's because the original color of the balloon was much lighter than the dark purple color I sampled. The Color blend mode had no effect on the brightness. In fact, the only blend mode that does change the brightness is Luminosity, so let's try that one. I'll change my blend mode in the Options Bar to Luminosity:

I'll undo my steps to return the balloon back to its original orange color. Then, with my blend mode set to Luminosity this time, I'll try replacing the orange with dark purple:
I think it's safe to say that things did not go well. The Luminosity blend mode definitely made the balloon darker, but it's still orange, and now most of the texture detail is gone. It barely looks like a balloon at all at this point, and this is the problem we face with the Color Replacement Tool. It works great for simple tasks where you only need to change the hue and/or saturation of a color. But if there's too much of a difference in brightness values between the original and the new color, you'll probably want to try something else.
Sampling Options
Directly to the right of the blend mode option in the Options Bar is a set of three small icons. Each of these icons represents a different sampling option for the Color Replacement Tool, and they work exactly the same here as they do for Photoshop's Background Eraser Tool. From left to right, we have Continuous (the default setting), Once and Background Swatch. Simply click on the icons to switch between them as needed:

These sampling options control how Photoshop samples colors in the image as you move the crosshair over them, or if it samples them at all. With Continuous selected (left icon), Photoshop keeps looking for new colors to replace as you drag the Color Replacement Tool around. Any new color the crosshair passes over becomes the new color to replace. This is the setting you'll use most often and works best when there's a lot of variation in the color of the object.
With Once selected (middle icon), Photoshop will only sample the color you initially click on regardless of how many other colors you drag over (as long as you keep your mouse button held down). This option works best if you're replacing a large area of solid color. You can also try the Once option if you find that Continuous is causing the Color Replacement Tool to bleed into other nearby areas and the Tolerance option doesn't seem to help.
Finally, you won't use it very often, but the Background Swatch sampling option (right icon) will replace whatever color is currently set as your Background color. This option may prove useful if neither of the other two sampling options is working for you. Click on the Background color swatch in the Tools panel and select a color from the Color Picker that matches, as close as possible, the color in the image you want to replace. Try adjusting the Tolerance value if the color you chose wasn't quite close enough.
Limits
Another option that works exactly the same with the Color Replacement Tool as it does with the Background Eraser is Limits, which controls where Photoshop can look for colors to replace. The three choices are Contiguous, Discontiguous and Find Edges. The first two (Contiguous and Discontiguous) are the ones you'll use the most:
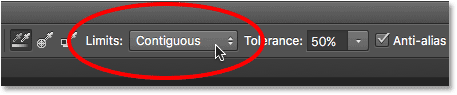
Contiguous is the default setting, and it means that the Color Replacement Tool can only change pixels that are in the same area that the crosshair in the center of the cursor is touching. It won't affect pixels that match the sampled color but are blocked from the crosshair by an area of different color, not unless you physically move the crosshair into the separate area.
The opposite of this is Discontiguous, which allows the Color Replacement Tool to replace the color of any pixels that match the sampled color and fall within the boundaries of the cursor, whether those pixels are in the same area as the crosshair or not.
The third option, Find Edges, is similar to Contiguous in that it can only change the color of pixels that are in the same area as the crosshair. But it's more precise than Contiguous and better at detecting edges. If the Color Replacement Tool is being a little too messy around an object with sharp, well-defined edges, and raising or lowering the Tolerance value doesn’t improve things, give the Find Edges sampling option a try.
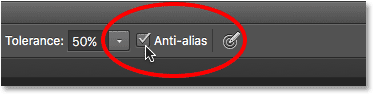
Anti-Alias
The final option for the Color Replacement Tool is Anti-alias, which is selected by default. Keep this option turned on to smooth out the edges around the areas the Color Replacement Tool is affecting:
And there we have it! That's how to easily change the color of objects in your images using the Color Replacement Tool in Photoshop! Check out our Photo Retouching section for more Photoshop image editing tutorials!