How To Use The Custom Shape Tool In Photoshop
Version Note: This Custom Shape Tool tutorial is for Photoshop CS6. For newer versions including Photoshop 2022, please see my updated How To Draw Custom Shapes in Photoshop tutorial.
In the previous tutorial, How To Draw Vector Shapes In Photoshop CS6, we learned how to use the five basic shape tools in Photoshop (the Rectangle Tool, the Rounded Rectangle Tool, the Ellipse Tool, the Polygon Tool, and the Line Tool) to add simple geometric shapes like rectangles, squares and circles, as well as stars, starbursts and direction arrows, to our documents.
While circles and squares do have their uses, what about more complex and interesting shapes? What if you wanted, say, a heart shape to use as a border for a wedding or engagement photo? Or the shape of a dog or cat to add to a pet store logo? How about shapes of flowers or leaves, snowflakes, music notes, or even a copyright symbol to add to your images? Photoshop actually includes all of these shapes and more, and we can add them to our designs and layouts just as easily as adding circles and squares.
Adobe calls these more complex shapes custom shapes, and we draw them using the Custom Shape Tool. The only problem is that, by default, only a handful of these custom shapes are available to us. Most of them are hidden. So in this tutorial, we'll learn everything we need to know about drawing shapes with the Custom Shape Tool, including how to access every custom shape that Photoshop has to offer!
If you're not yet familiar with the basics of drawing vector shapes in Photoshop, I highly recommend reading the previous tutorial before you continue.
How To Draw Custom Shapes In Photoshop
Selecting The Custom Shape Tool
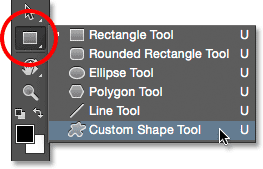
The Custom Shape Tool is nested in with Photoshop's other shape tools in the Tools panel. To select it, click and hold on the icon for whichever shape tool is currently visible (which will either be the Rectangle Tool (the default) or whichever shape tool you used last). When you click and hold on the icon, a fly-out menu appears showing the other shape tools that are available. Select the Custom Shape Tool from the bottom of the list:
Drawing Vector Shapes
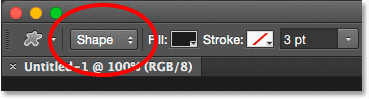
With the Custom Shape Tool selected, the next thing we want to do is make sure we're drawing vector shapes, not paths or pixel-based shapes. We learned the important difference between vector shapes and pixel shapes in the Drawing Vector vs Pixel Shapes tutorial, but in short, vector shapes are flexible, editable, and resolution-independent, meaning we can edit and scale them as much as we want, and even print them any size we need, and the edges of vector shapes will always remain crisp and sharp.
To make sure you're working with vector shapes, set the Tool Mode option in the Options Bar along the top of the screen to Shape (short for "Vector Shape"):
Choosing A Custom Shape
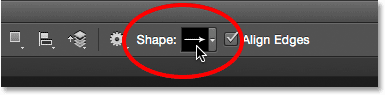
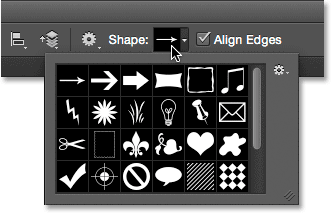
Next, we need to tell Photoshop which custom shape we want to draw, and we do that by clicking on the shape thumbnail in the Options Bar. The thumbnail shows us the shape that's currently selected:
Clicking the thumbnail opens the Custom Shape Picker, with thumbnail previews of each shape that we can choose from. Use the scroll bar along the right to scroll through the thumbnails.
Loading More Shapes
As I mentioned at the beginning of the tutorial, only a handful of shapes are available initially, but there's many more that we can choose from. All we need to do is load them in. To do that, click on the gear icon in the upper right:
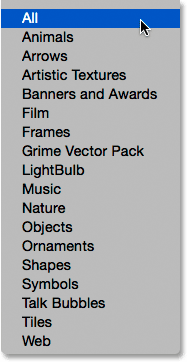
In the bottom half of the menu that appears, you'll see a list of all the custom shape sets that Adobe includes with Photoshop. The shapes that are displayed initially are the default set, but looking through the list, we see that we have lots of other interesting sets, like Animals, Music, Nature, and so on. To load one of these sets, simply choose it from the list.
The only problem is that unless you've been using Photoshop for a while (and spent much of that time working with custom shapes), it's hard to know which shapes you'll find in each set. So, rather than choosing the sets individually, what I'd recommend is selecting All at the top of the list, which will load the shapes from every set all at once:
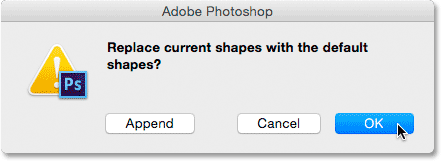
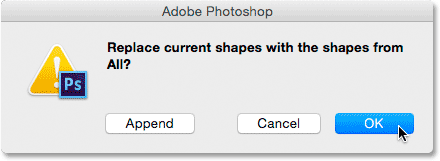
Photoshop will ask if you want to replace the current shapes with the new ones. If you click the Append button, rather than replacing the current shapes with the new shapes, it tells Photoshop to keep the existing shapes and simply add the new ones below them. That may be a good choice if you were selecting an individual shape set from the list and you just wanted to add it to the default shapes.
In this case, because I'm choosing All (which includes the default shapes as part of the collection), I'm going to click OK. At the end of the tutorial, we'll learn how to reset the shapes back to the defaults:
Resizing The Custom Shape Picker
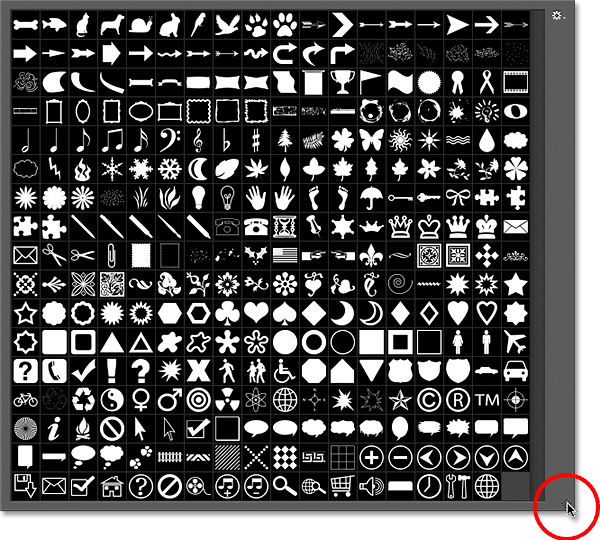
With all of the shapes now loaded in, we have far more to choose from. You can resize the Custom Shape Picker to see more shapes at a time by clicking and dragging its bottom right corner. In fact, you can make the Custom Shape Picker large enough to see every shape at once:
Personally, I find that a bit too big, so I'll once again click and drag the bottom right corner of the Custom Shape Picker, this time to make it smaller. Then, I'll use the scroll bar along the right of the thumbnails to scroll through the shapes. To choose a shape, double-click on its thumbnail. This will select the shape and close out of the Custom Shape Picker. I'll choose the heart shape by double-clicking on it:

Choosing A Color For The Shape
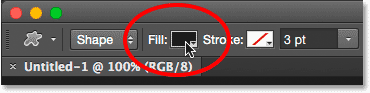
Once you've selected a custom shape, choose a color for it by clicking the Fill color swatch in the Options Bar:
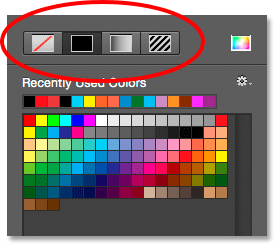
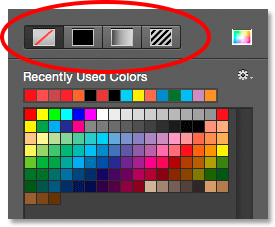
This opens a box that lets us choose from four different ways to fill the custom shape, each represented by one of four icons along the top. Starting from the left, we have the No Color icon, the Solid Color icon, the Gradient icon, and the Pattern icon. We covered the Fill (and Stroke) color options in detail in the previous tutorial (How To Draw Vector Shapes In Photoshop CS6) but I'll cover them again here as a refresher:
Selecting the No Color option on the left will leave your custom shape blank, which may be what you want if you need your shape to contain only a stroke outline. We'll see how to add a stroke in a moment.
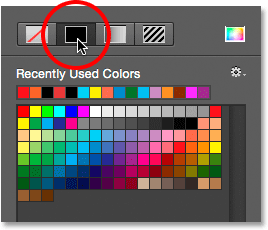
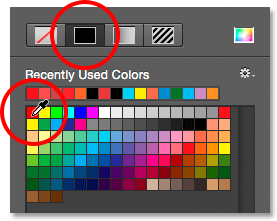
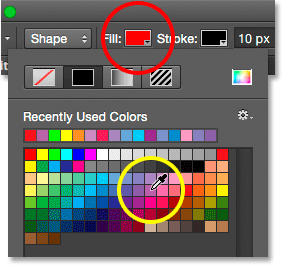
The Solid Color option (second from left) lets us fill the custom shape with a single color. Choose a color by clicking on one of the color swatches. Colors you've used recently appear in the Recently Used Colors row above the main swatches:
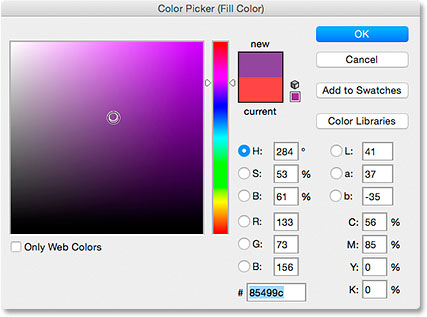
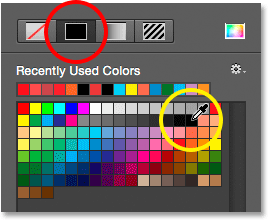
If the color you need is not found in any of the swatches, click on the Color Picker icon in the upper right:
Then, choose your color manually from the Color Picker. Click OK when you're done to close out of the Color Picker:
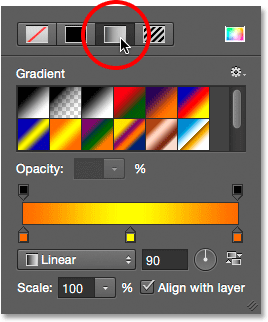
The Gradient option lets us fill the shape with a gradient. You can choose one of the preset gradients by clicking on its thumbnail (use the scroll bar along the right to scroll through the thumbnails) or use the options below the thumbnails to create or edit your own gradient. We'll be covering gradients in a separate tutorial:
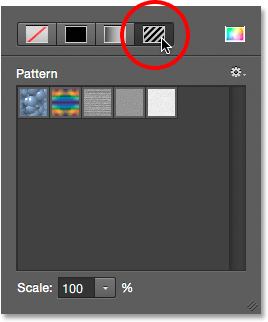
Finally, choose the Pattern option if you want to fill your custom shape with a pattern. Photoshop doesn't give us many patterns to choose from on its own, but if you've created or downloaded other patterns, you can load them in by clicking on the small gear icon (directly below the Custom Shape icon) and choosing Load Patterns from the menu:
Since I chose a heart shape, I'll select the Solid Color option and choose red for my fill color by clicking on the red swatch. To close out of the color options box when you're done, press Enter (Win) / Return (Mac) on your keyboard, or just click on an empty area of the Options Bar:
Drawing Your Custom Shape
To draw the shape, click inside your document to set a starting point. Then, keep your mouse button held down and drag away from the starting point. As you drag, you'll see only an outline (known as the path) of what the shape will look like:
When you release your mouse button, Photoshop completes the shape and fills it with your chosen color:

Drawing A Shape With The Correct Proportions
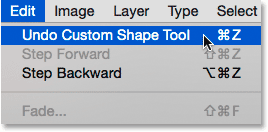
Notice, though, that my heart shape looks a bit distorted. It's wider and shorter than I was expecting. That's because, by default, Photoshop lets us freely draw custom shapes to any size or proportions we like. I'll undo my shape by going up to the Edit menu in the Menu Bar along the top of the screen and choosing Undo Custom Shape Tool. I could also just press Ctrl+Z (Win) / Command+Z (Mac) on my keyboard. This removes the shape from the document:
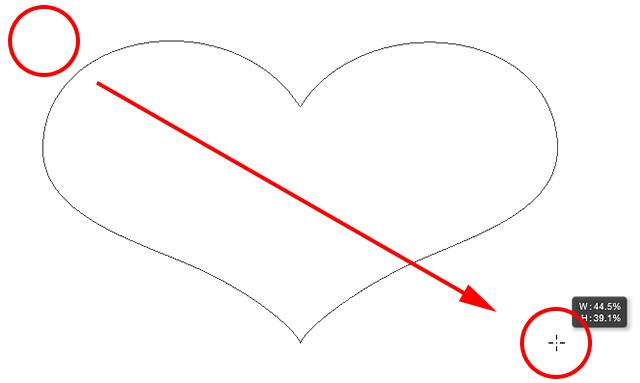
To draw a custom shape with the correct proportions, begin the same way as before by clicking inside the document to set your starting point, then keeping your mouse button held down and dragging away from the point. As you're dragging, press and hold the Shift key on your keyboard. This will snap the shape to its correct proportions and lock them in place:
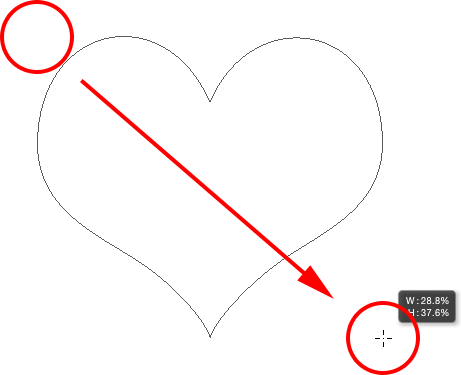
When you're happy with the size of the shape, release your mouse button, then release your Shift key. It's very important that you release the Shift key only after you've released your mouse button or it won't work. Also, make sure you wait until after you've started dragging before pressing and holding the Shift key or you may get unexpected results.
I'll release my mouse button, then my Shift key, at which point Photoshop fills the shape with my chosen red color. This time, the heart looks much better:

Other Handy Keyboard Shortcuts
Along with pressing and holding Shift while dragging to draw the shape with the correct proportions, you can press and hold your Alt (Win) / Option (Mac) key while dragging to draw the shape out from its center rather than from a corner. Pressing and holding Shift+Alt (Win) / Shift+Option (Mac) while dragging will draw it with the correct proportions and draw it out from the center. Just remember to always release the keys after releasing your mouse button.
Resizing The Shape
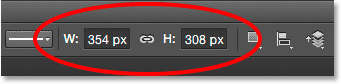
Once you've drawn your shape, you'll see its current width and height in the Width (W) and Height (H) boxes in the Options Bar. Here, we see that my shape was drawn 354 px wide and 308 px tall:
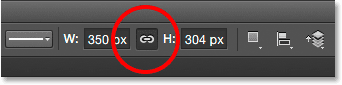
If you need to resize the shape, simply highlight the current values with your mouse and enter new values (press Enter (Win) / Return (Mac) on your keyboard to accept them). To resize the shape and keep it locked to the correct proportions, first click on the small link icon between the width and height fields, then enter a new width or height. With the link icon selected, Photoshop will automatically change the other value for you:
Letting Photoshop Draw The Shape For You
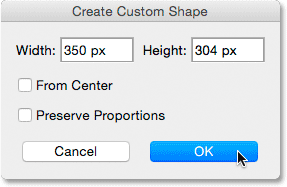
If you haven't yet drawn your shape and you know the exact size you need, you can save time by letting Photoshop draw it for you. Simply click once inside your document. Photoshop will pop open the Create Custom Shape dialog box where you can enter in your width and height values. Click OK to close out of it and Photoshop will draw your shape with your chosen dimensions:
Adding A Stroke
To add a stroke around the shape, click on the Stroke color swatch in the Options Bar. You can choose your stroke color (and other stroke options which we'll look at in a moment) either before or after you draw the shape:
The options for choosing a stroke color are exactly the same as the fill color options. Along the top, we have the same four icons giving us a choice between No Color, Solid Color, Gradient, and Pattern:
The No Color option is selected by default (which is why the stroke isn't visible). I'll select the Solid Color option, then I'll set my stroke color to black by clicking on the swatch. Just as with the fill color, if the color you need isn't found in any of the swatches, click the Color Picker icon to choose it manually:
Just like that, Photoshop adds the black stroke around the shape:

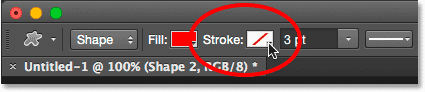
The Stroke Width
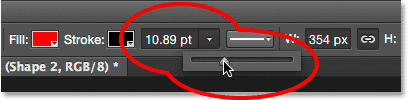
We can change the width of the stroke in the Options Bar. You'll find the current width displayed to the right of the Stroke color swatch. The default width is 3 pt. If you know the exact width you need, you can enter it directly into the width field (press Enter (Win) / Return (Mac) when you're done to accept it) or simply click on the small arrow to the right of the value and drag the slider:
Align Edges
If you look further to the right in the Options Bar, you'll see an option called Align Edges. By default, this option is turned on (checked) and you'll usually want to leave it on because it tells Photoshop to line up the edges of your shape with the pixel grid, which keeps them looking crisp and sharp:
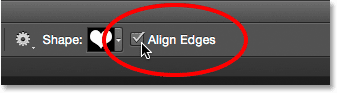
However, for the Align Edges option to work, not only does it need to be selected, but you also need to specify the width of your stroke in pixels (px), not points (pt). Since the default measurement type for the stroke width is points, I'll go back and enter a new width of 10 px:
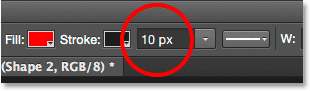
Photoshop instantly updates the shape with the new stroke width:

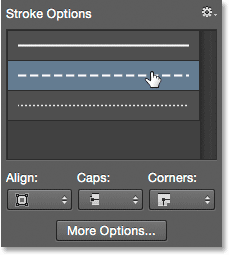
More Stroke Options
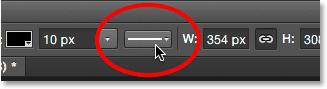
There are other stroke options we can change as well by clicking the Stroke Options button in the Options Bar:
This opens the Stroke Options box. At the top, we can switch between having the stroke displayed as a solid line (the default), a dashed line or a dotted line. The Align option lets us choose whether the stroke should appear along the inside edges of the shape, the outside edges or centered along the edges. We can set the Caps option to either Butt, Round or Square, and change the Corners to either Miter, Round or Bevel. Clicking More Options at the bottom will open a more detailed dialog box with additional options for customizing the look of your stroke and for saving your custom settings as a preset:
Changing The Fill And Stroke Of Existing Shapes
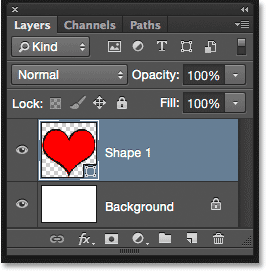
Just as it does with the geometric shape tools (Rectangle Tool, Ellipse Tool, etc.), Photoshop places each vector shape we draw with the Custom Shape Tool on its own Shape layer. If we look in my Layers panel, we see my heart shape sitting on a Shape layer named "Shape 1":
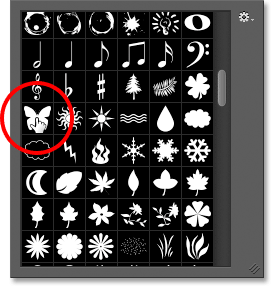
I'll add a second shape to my document. To do that, I'll re-open the Custom Shape Picker in the Options Bar, and this time, I'll choose the butterfly shape by double-clicking on its thumbnail:
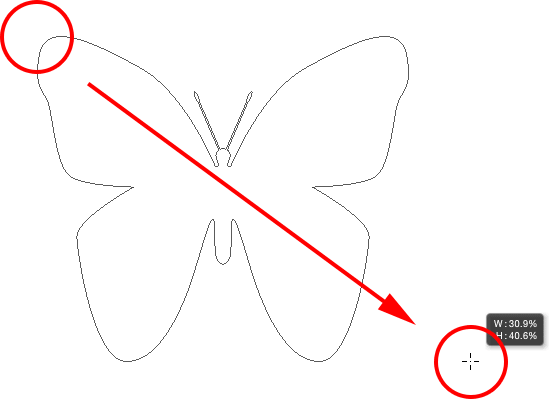
With the butterfly shape selected, I'll quickly draw it by clicking inside the document to set a starting point, then clicking and dragging away from that point. To draw the butterfly with the correct proportions, I'll wait until I've started dragging, then I'll press and hold my Shift key and continue dragging:
To complete the shape, I'll release my mouse button, then release my Shift key. Photoshop fills the shape with color, but look what's happened; it used the same fill color (red) that I chose for my previous shape. It also used the same stroke options as the previous shape, including the color (black) and the width (10 px):

Fortunately, because Shape layers in Photoshop remain fully editable, there's no need for me to undo and redraw the shape if I needed it to be a different color. As long as I have the Shape layer selected in the Layers panel (and the shape tool still selected from the Tools panel), I can easily go back and change the colors.
If we look again in my Layers panel, we see that the butterfly shape was placed on its own Shape layer named "Shape 2" above the heart shape:
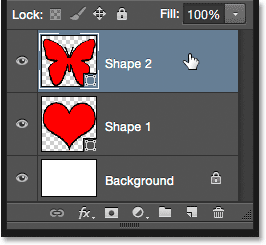
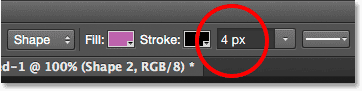
With the butterfly layer selected, I'll click on the Fill color swatch in the Options Bar and choose a different color from the swatches, maybe a nice magenta:
I'm also going to lower the width of the stroke in the Options Bar, since 10 px seems too thick. I'll lower it down to 4 px:
Photoshop instantly updates the butterfly shape with the new fill color and stroke width. The original heart shape remains untouched:

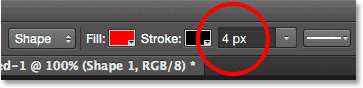
I think I want to lower the stroke width for the heart shape as well, so I'll click on the heart's Shape layer ("Shape 1") in the Layers panel to select it:
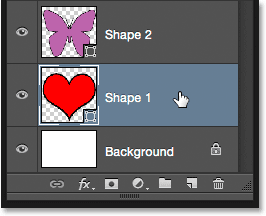
I'll leave the fill color set to red, but I'll lower the stroke width in the Options Bar down to the same value (4 px) as the butterfly shape:
And now, both shapes share the same stroke width. You can edit the other stroke options (color, line type, alignment, etc.) as well if needed. As long as you have the correct shape layer selected in the Layers panel, and the shape tool still active, you can make whatever changes you need:

Resetting The Custom Shapes Back To The Defaults
Earlier, we learned how to load other shape sets into the Custom Shape Picker. If you need to clear away those additional shapes and go back to viewing just the default shapes, click once again on the gear icon in the Custom Shape Picker:
Then choose Reset Shapes from the menu:
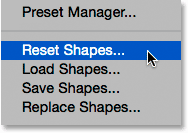
Photoshop will ask if you really want to replace the current shapes with the defaults. Click OK to say yes, and you'll be back to seeing only the original default shapes: