Colorful Overlapping Letters Text Effect in Photoshop
In this tutorial, I show you how to create an overlapping letters text effect in Photoshop, with colors that blend together where the letters overlap! As we'll see, not only is this a fun and colorful effect, but it's also very easy to create. We just add some text, convert the letters into shapes, change the color of each letter, and then move the letters closer together to overlap them. To blend the colors in the overlapping areas, we use one of Photoshop's layer blend modes. Let's see how it works!
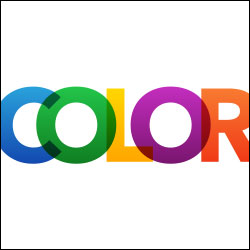
Here's what the final "overlapping letters" text effect will look like when we're done:

Let's get started!
How To Create Overlapping Text In Photoshop
I'm using Photoshop CC but every step is fully compatible with Photoshop CS6. You can get the latest Photoshop version here.
Step 1: Create a new document
Start by creating a new Photoshop document. Go up to the File menu in the Menu Bar and choose New:

In the New Document dialog box, set the Width to 1600 pixels, the Height to 800 pixels, the Resolution to 72 pixels/inch, and the Background Contents to White. Click Create or OK (depending on which version of Photoshop you're using) to close the dialog box and create the new document:

Step 2: Add your text
Select the Type Tool from the Toolbar:

Choose your font in the Options Bar. Thicker fonts generally work best for this effect. I'll use Avenir Next Bold. Set your type size to 72 pt. We'll resize the text once we've added it, but this will give us the largest preset size to start with:

Make sure your type color is set to black so we can see the text in front of the white background. If it's not set to black, press the letter D on your keyboard to reset it. We'll choose different colors for each letter after we've converted our text into shapes:

Click inside the document and add your text. I'll type the word "COLORFUL":

To accept your text, click the checkmark in the Options Bar:

Step 3: Resize and move the text with Free Transform
To resize the text, go up to the Edit menu and choose Free Transform:

Photoshop places the Free Transform box and handles around the text. To resize it, press and hold your Shift key as you click and drag any of the corner handles. Holding the Shift key as you drag locks in the original shapes of the letters so you don't distort them. Make sure that when you're done, you release your mouse button first, and then release the Shift key, or you'll get unexpected results.
To move the text into the center of the document, click and drag inside the Free Transform box. When you're happy with the size and position of the text, press Enter (Win) / Return (Mac) on your keyboard to exit out of Free Transform:

Step 4: Convert the text into shapes
In the Layers panel, the text appears on a new Type layer above the Background layer:

We need to convert our letters into shapes. With the Type layer selected, go up to the Type menu in the Menu Bar and choose Convert to Shape:

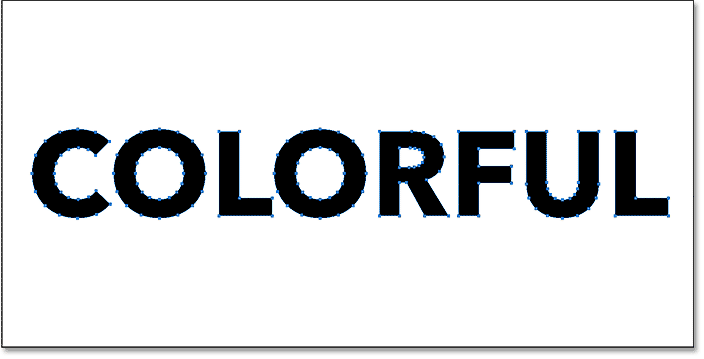
Back in the Layers panel, the Type layer is now a Shape layer, which means that our text is no longer editable:

And in the document, we see path outlines around the letters, letting us know that the text is in fact a shape:
Related: How to draw shapes in Photoshop
Step 5: Move each letter to its own layer
To overlap the letters and blend their colors together, we need to place each letter on a separate layer. Grab the Path Selection Tool (the black arrow tool) from the Toolbar:

Then, in Photoshop CC, go up to the Options Bar and change the Select option to All Layers. This will make it easier to select individual letters. In Photoshop CS6, this option is not available, but you'll still be able to select the letters just as easily:

Back in the document window, click anywhere on the white background to deselect the letters. Then, click on the first letter on the left to select it. A path outline will reappear around just that one letter:

To move this one letter to its own layer, go up to the Layer menu, choose New, and then choose Shape Layer via Cut (make sure you choose Cut and not Copy). Or, a faster way (and the way I recommend for this effect) is to press Shift+Ctrl+J (Win) / Shift+Command+J (Mac) on your keyboard:

It won't look like anything has happened, but in the Layers panel, we now see that the first letter has been moved to its own Shape layer above the original:

Continue moving letters to their own layers
To move the remaining letters to their own separate layers, click on a letter with the Path Selection Tool to select it (in Photoshop CS6, you'll need to double-click). Then press Shift+Ctrl+J (Win) / Shift+Command+J (Mac) to cut the letter from the original Shape layer onto its own layer. Continue moving through the letters one at a time from left to right until each one is on a separate layer. When you reach the final letter on the right, you can just leave it because it will be the only letter remaining on the original Shape layer:

Step 6: Change the Blend Mode of the letters to Multiply
In a moment, we're going to change the color of each letter and move the letters closer together so that they overlap. Since we want the colors in the overlapping areas to blend together, we need to change the blend mode for each Shape layer. Photoshop lets us quickly change the blend mode for multiple layers at once.
Click on the top layer in the Layers panel to select it. Then, to select the other Shape layers as well, press and hold your Shift key and click on the original Shape layer directly above the Background layer:

Change the blend mode in the upper left of the Layers panel from Normal to Multiply. We'll see the effect of the Multiply blend mode once we start overlapping the letters:

Step 7: Place the Shape layers in a layer group
While we have the Shape layers selected, let's place them into a layer group. Click on the menu icon in the upper right corner of the Layers panel:
![]()
Then choose New Group from Layers:

In the New Group from Layers dialog box, name the group "Letters", and then click OK:

Back in the Layers panel, the Shape layers now appear in a group named "Letters". Click the triangle to the left of the folder icon to twirl the group open:

Step 8: Change the color of each letter
Let's change the color of each letter. We'll start with the first letter on the left. Double-click on the thumbnail for the top Shape layer in the Layers panel:

This opens Photoshop's Color Picker. I'll choose a light blue. To use the same color I'm using, set the R value to 30, the G value to 117 and the B value to 197:

Click OK to close the Color Picker, and the first letter appears in its new color:

To change the color of the second letter, again double-click on its thumbnail in the Layers panel:

Choose a different color in the Color Picker. I'll choose green by setting R to 25, G to 161 and B to 53:

Click OK, and now the second letter appears in green (or whichever color you chose):

Changing the color of the remaining letters
Continue changing the color of each letter in the word by double-clicking on its thumbnail in the Layers panel and choosing a new color from the Color Picker. For the third letter ("L"), I'll choose yellow (R=255, G=190, B=0), and for the fourth letter ("O"), I'll go with magenta (R=158, G=33, B=150). For the "R", I'll use orange (R=244, G=99, B=36), and for the "F", I'll choose a bright pink (R=243, G=43, B=104).
I'll change the second last letter ("U") to the same blue that I used for the first letter (R=30, G=117, B=197). And finally, I'll use the same yellow for the last letter ("L") that I used for the third letter (R=255, G=190, B=0):

Step 9: Add a gradient to the layer group
The text is definitely looking more colorful, but we can enhance the colors even further by applying a gradient to the layer group itself. Click on the "Letters" layer group at the top of the Layers panel to select it:

Then click on the Layer Styles icon (the "fx" icon) at the bottom of the Layers panel:
![]()
Choose Gradient Overlay from the list:

This opens Photoshop's Layer Style dialog box set to the Gradient Overlay options. Click the triangle next to the gradient swatch to open the Gradient Picker. Then choose the Black, White gradient by double-clicking on its thumbnail (third from the left, top row):

Set the Blend Mode to Overlay, the Opacity to 100%, the Style to Linear, and the Angle to 90 degrees, and then click OK:

Applying the black to white gradient directly to the layer group and setting its blend mode to Overlay turns the flat color in each letter into a gradient, with a lighter shade of the color at the top and a darker shade at the bottom:

Related: How to draw gradients in Photoshop
Step 10: Select the Move Tool and set it to Auto Select Layers
At this point, all that's left to do is move the letters closer together so that they overlap. Select the Move Tool from the Toolbar:

Then in the Options Bar, make sure Auto-Select is turned on (checked), and that it's set to Layer, not Group. This will let us select each letter just by clicking on it:

Step 11: Drag the letters together so they overlap
Click on a letter with the Move Tool to select it. The Shape layer for that letter will highlight in the Layers panel. Then, drag the letter over to the letter beside it until part of the letters overlap. Hold Shift as you drag to make it easier to drag straight across. Here, I’ve clicked on the second letter (the green “O”) and I’ve dragged it over and slightly into the first letter (“C”). Notice that in the areas where the two letters overlap, the colors from each letter are blending together:

I'll click on the third letter ("L") to select it, and then I'll drag it to the left while holding Shift until part of it overlaps with the letter "O". Make sure you click once to select the letter first, release your mouse button, and then click a second time to drag it over, otherwise you'll end up selecting and moving two letters at once. In other words, make sure the Shape layer for the letter you want to move is highlighted in the Layers panel before you move it:

If you do accidentally select and move two letters at once, press Ctrl+Z (Win) / Command+Z (Mac) to undo your last step. Click anywhere in the white background to deselect the letters, and then click on the letter you need to select it.
Moving the remaining letters
Continue dragging the remaining letters together until they all overlap. Again, remember to click once on a letter to select it, release your mouse button, and then click a second time to move it. You can also nudge letters left and right using the left and right arrow keys on your keyboard. Here's my result after overlapping the remaining letters. The only problem is that, after moving the letters closer together, the word now looks too small in the document. We'll finish off the tutorial by learning how to resize it next:

Step 12: Resize the text
Since all of our letters are on separate layers, to resize the effect, we'll need to resize the layers as a group. Click once again on the "Letters" layer group at the top of the Layers panel to select it:

Press Ctrl+T (Win) / Command+T (Mac) on your keyboard to quickly select Photoshop's Free Transform command. Then, just as we did earlier, press and hold your Shift key and drag any of the corner handles to resize the text. Move the text to reposition it by clicking and dragging inside the Free Transform box:

Press Enter (Win) / Return (Mac) on your keyboard to exit out of Free Transform, and we're done! Here, after making a few minor adjustments to the spacing of the letters, is my final "colorful overlapping letters" text effect:
And there we have it! That's how to create an overlapping letters text effect, and how to blend the overlapping colors together, in Photoshop! Be sure to check out our Text Effects sections for more tutorials!