
How To Fill A Shape With A Photo In Photoshop
Learn step-by-step how to place an image into a shape in Photoshop. Watch the video or follow along with the complete written tutorial below it.
In this tutorial, you'll learn how to fill a shape with an image in Photoshop! As you will see, Photoshop makes it easy to place a photo into any type of shape, from a basic rectangle or circle to a fancy custom shape. For this tutorial, we will use one of Photoshop's ready-made custom shapes. But once you've learned the steps, you can start placing images into any shape you like!
Here's what the final "image in shape" effect will look like when we're done. Of course, this is just one example of the effect. There are many shapes to choose from in Photoshop, and you can even create your own. So once you've learned the steps, there's really no limit to what you can do:

Let's get started!
Step 1: Create A New Document
This tutorial is for Photoshop CC 2019 and earlier. For Photoshop 2020 and newer, see my updated tutorial.
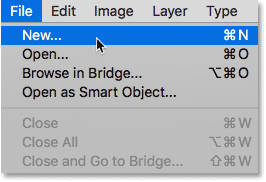
Let's start by creating a new document. Go up to the File menu in the Menu Bar along the top of the screen and choose New:
This opens the New Document dialog box. If you're using Photoshop CC, you'll see the newly-redesigned version of the New Document dialog box. If you're using Photoshop CS6, you'll see the older, traditional version. We'll look at the Photoshop CC version first, then we'll look at the CS6 version.
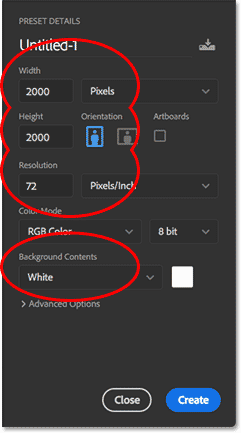
In Photoshop CC, the options for creating a new, custom document are found in the Preset Details panel along the right of the dialog box. For this tutorial, let's create a square-shaped document. Set the Width and Height to 2000 pixels. We'll set the Resolution to 72 pixels/inch, and the Background Contents to White. Click Create to create the new document:
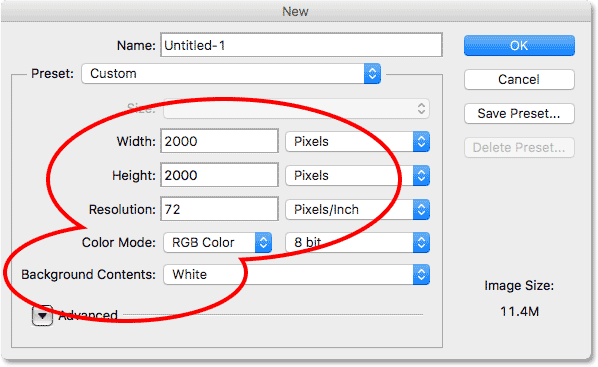
In Photoshop CS6, again set both the Width and Height to 2000 pixels, the Resolution to 72 pixels/inch and the Background Contents to White. Click OK to create the new document:
Watch the video and share your comments on our YouTube channel!
Step 2: Select The Custom Shape Tool
As I mentioned earlier, you can use any type of shape for this effect, from a simple rectangle or circle to a custom shape. For this tutorial, I'll use one of Photoshop's built-in custom shapes.
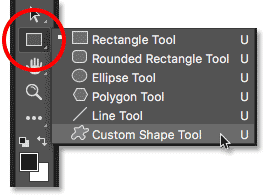
Select the Custom Shape Tool from the Toolbar. By default, the Custom Shape Tool is nested behind the Rectangle Tool. Right-click (Win) / Control-click (Mac) on the Rectangle Tool, then choose the Custom Shape Tool from the menu:
Step 3: Set The Tool Mode To "Shape"
There are three different types of shapes that we can draw in Photoshop. We can draw vector shapes, paths, or pixel-based shapes. For this effect, we want to draw vector shapes, which will let us draw the shape any size we need while keeping the edges nice and sharp.
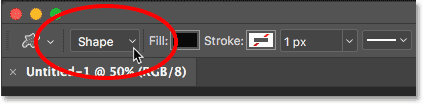
Photoshop refers to vector shapes simply as "shapes". With the Custom Shape Tool selected, make sure the Tool Mode option in the Options Bar is set to Shape:
Step 4: Set The Shape Color To Black
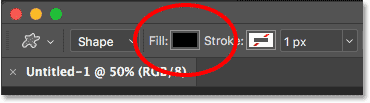
To let us see our shape against the white background, we'll set the fill color of the shape to black. You'll find the Fill color swatch in the Options Bar (directly beside the Tool Mode option).
By default, the color will already by black. If it isn't, press the letter D on your keyboard. This will reset your Foreground and Background colors to their defaults, making your Foreground color (and the shape's fill color) black:
Step 5: Load The Custom Shapes
Photoshop includes lots of ready-made custom shapes for us to choose from. But by default, only a handful of them are loaded into the program. To find the rest, we need to load them in ourselves.
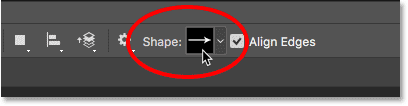
The Shape thumbnail in the Options Bar displays the shape that's currently selected. Click on the thumbnail to choose a different shape:
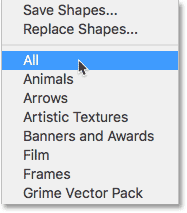
This opens the Custom Shape Picker, with thumbnails of all the shapes we can choose from. As I mentioned, only a handful of shapes are displayed by default. Let's load all of the shapes to give us more choice.
Click on the menu icon (the gear icon) in the upper right corner of the Custom Shape Picker:
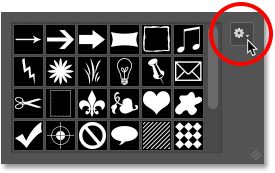
In the bottom half of the menu that appears, you'll see a list of all the custom shape sets we can choose from. Rather than loading each one separately to see what we get, let's just load them all in at once. To do that, select All from the top of the list:
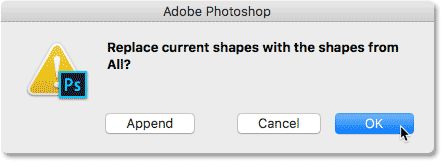
Photoshop will ask if you want to replace the current shapes with the new shapes. Since the default shapes are included in the various shape sets, we won't be losing anything by replacing them, so click OK:
Step 6: Choose A Custom Shape
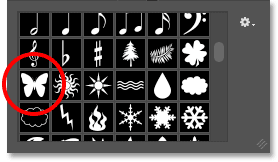
Back in the Custom Shape Picker, we now have many more shapes to choose from. Scroll through the thumbnails until you find the one you want to use. The heart shape (which is actually part of the default shapes) is a popular choice. But for something different, I'll choose the butterfly shape.
To select a shape, double-click on its thumbnail. This selects the shape and closes out of the Custom Shape Picker.
Step 7: Draw The Shape
To draw your shape, click in the upper left of your document to set a starting point. With your mouse button still held down, press and hold the Shift key on your keyboard and drag diagonally downward towards the bottom right corner of the document. Holding the Shift key as you drag locks the aspect ratio of the shape so you don't distort the look of it.
As you're drawing the shape, you'll see only a path outline of what the shape will look like:
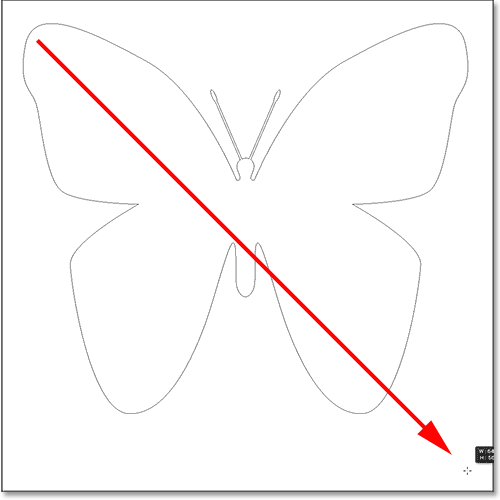
To complete the shape, release your mouse button, then release your Shift key. Make sure you release your mouse button first, then the Shift key, or the aspect ratio of the shape may change. Photoshop draws the shape, filling it with black:

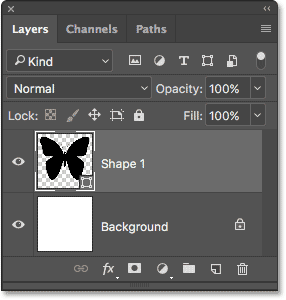
If we look in the Layers panel, we see the shape sitting on its own Shape layer above the white-filled Background layer:
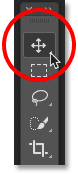
Step 8: Move The Shape Into The Center
To move the shape into the center of the document, select Photoshop's Move Tool from the Toolbar:
Then, click on the shape and drag it into the center. It should snap into place once you get close to the middle:

Step 9: Open Your Image
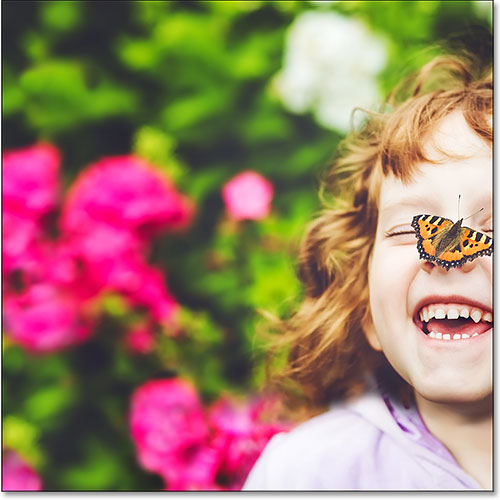
Open the image you want to place inside your shape. Here's the one I'm using (girl with butterfly photo from Adobe Stock). Your image will open in its own separate tabbed document:

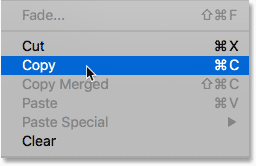
Step 10: Select And Copy The Image
Let's copy the image and paste it into the shape's document. Go up to the Select menu at the top of the screen and choose All. You'll see a selection outline appear around the image.

With the image selected, go up to the Edit menu and choose Copy:
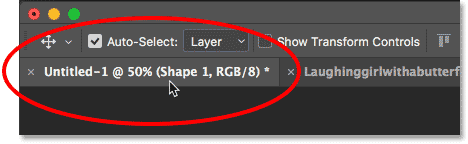
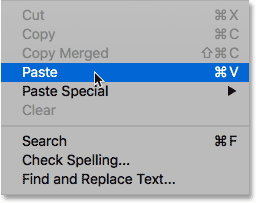
Step 11: Paste The Image Into The Shape Document
Switch back to the shape's document by clicking on its tab just below the Options Bar. If you didn't name the document when you created it (which we didn't), it's most likely named "Untitled-1":
Then, go back up to the Edit menu and this time, choose Paste:
Photoshop pastes the image into the document. At the moment, the image is completely blocking the shape from view. Also, my image is too big to fit entirely within the shape's document. We'll fix both of these problems in the next couple of steps:
Step 12: Create A Clipping Mask
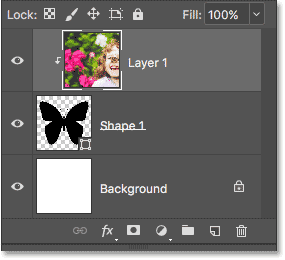
If we look again in the Layers panel, we see that Photoshop has placed the image on a new layer above the Shape layer:
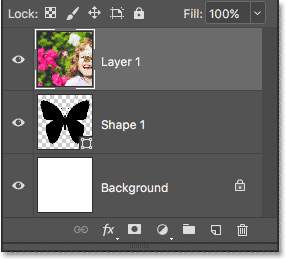
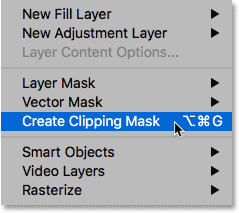
To place the image inside the shape, all we need to do is create a clipping mask. Make sure you have the image layer ("Layer 1") selected. Then, go up to the Layer menu at the top of the screen and chose Create Clipping Mask:
This "clips" the image on "Layer 1" to the Shape layer below it, which means that the only part of the image that remains visible in the document is the area that's sitting directly above (or in front of) the shape. The rest of the image is now hidden, creating the illusion that the image is actually inside the shape:

And if we look again in the Layers panel, we see that "Layer 1" is indented to the right, with a small arrow pointing down at the Shape layer below it. This is how Photoshop lets us know that the image is now clipped to the shape:
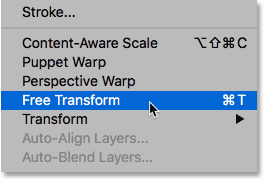
Step 13: Resize And Reposition The Image With Free Transform
To resize and reposition the image inside the shape, again make sure you have "Layer 1" selected. Then go up to the Edit menu and choose Free Transform:
This places the Free Transform box and handles (the little squares) around the actual dimensions of your image, including the area outside the visible canvas. If you can't see all of your Free Transform handles because your image is too big to fit entirely on the screen, go up to the View menu and choose Fit on Screen:
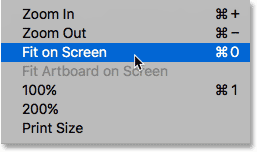
Photoshop will automatically adjust the zoom level so that the entire Free Transform box is visible. Here, we see my Free Transform box extending to the right of the canvas:
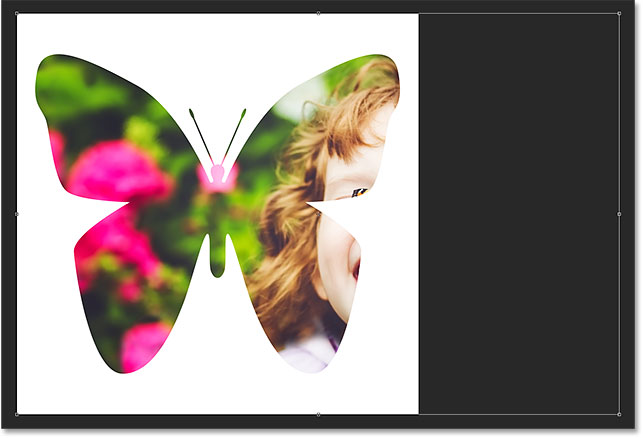
To resize the image inside the shape, press and hold your Shift key and drag any of the corner handles. Holding the Shift key as you drag locks the original aspect ratio of the shape as you're resizing it.
To move the image inside the shape, click anywhere inside the Free Transform box and drag the image into position.
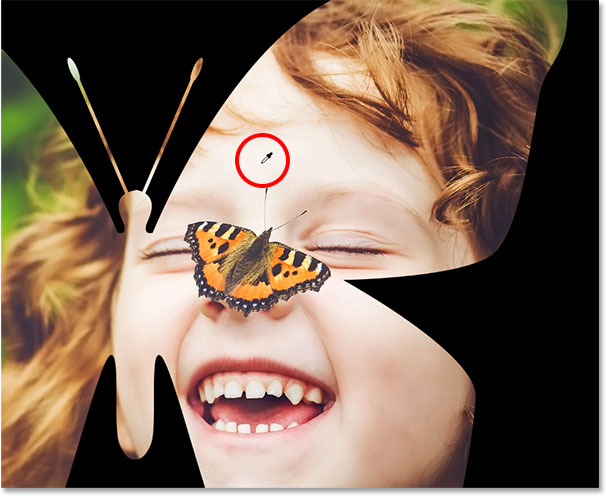
Here, I'm dragging the handle in the top right corner inward, and I've also moved the image to better fit the girl's face within the shape of the butterfly wing:
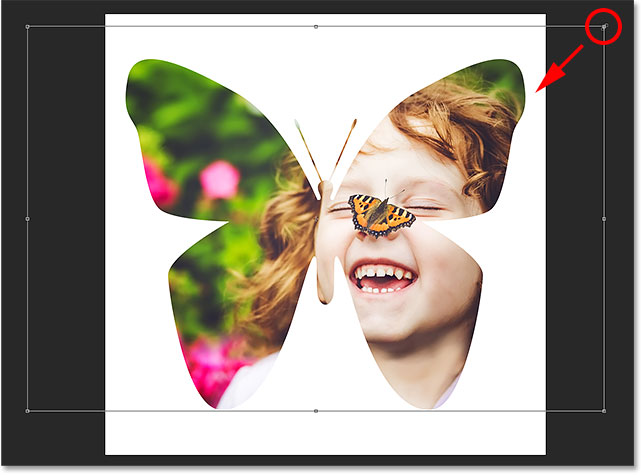
When you're ready, press Enter (Win) / Return (Mac) on your keyboard to commit the change and close out of the Free Transform command:

Step 14: Change The Background Color
At this point, the main "image in shape" effect is done! Of course, there's always more we can do to customize it and make it look even better. One thing we can do is change the color of the background.
The easiest way to change the background color is by using one of Photoshop's Solid Color fill layers. We'll need the Solid Color fill layer to appear between the Background layer and the Shape layer, so first, click on the Background layer in the Layers panel to select it:
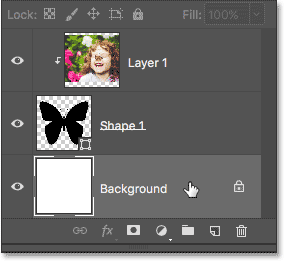
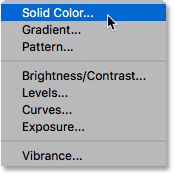
Then, click on the New Fill or Adjustment Layer icon at the bottom of the Layers panel:
Choose Solid Color from the top of the list:
Photoshop pops open the Color Picker where we can chose a new color. Black is a popular choice as the background color for this effect, so let's see what that looks like:
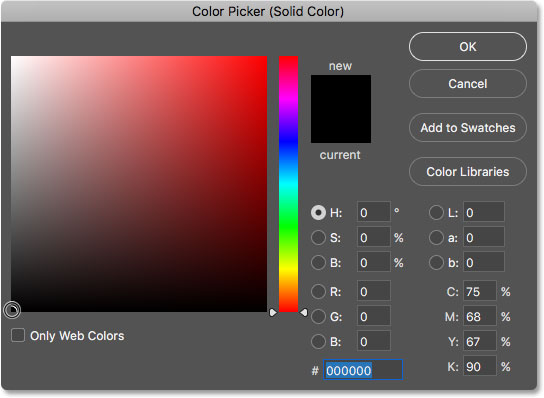
Black definitely brings out the details of the shape, but as the background color for a butterfly, I'm not sure it works:

I could choose a different color from the Color Picker itself. Or, I could sample a color directly from the image inside the shape, which often works better.
To do that, move your mouse cursor over the color you want to sample. Your cursor will temporarily switch to the Eyedropper Tool icon, letting you know it's ready to sample a color. I like to keep background colors subtle, so rather than choosing green from the trees or red from the flowers, I'll choose a light skin tone from the girl's forehead by clicking on it to sample it:
As soon as I click, the sampled color becomes the new background color. I like this new color better, so I'll click OK to close out of the Color Picker:

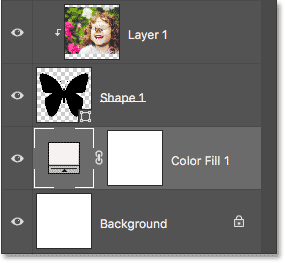
If we look in the Layers panel, we see our Solid Color fill layer, named "Color Fill 1", sitting between the Background layer and the Shape layer, right where we needed it:
Step 15: Add A Stroke
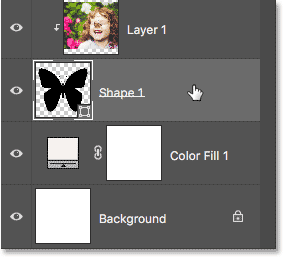
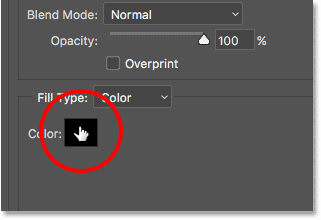
Finally, let's finish off the effect by adding a stroke around the shape. Click on the Shape layer in the Layers panel to select it:
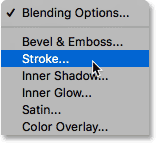
Then, click on the Layer Styles icon (the "fx" icon) at the bottom of the Layers panel:
Choose Stroke from the list:
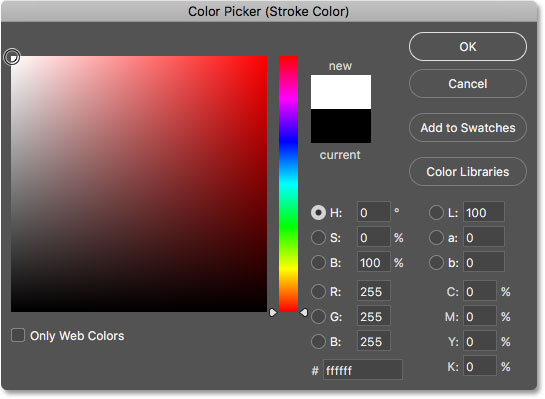
This opens Photoshop's Layer Style dialog box set to the Stroke options in the middle column. To change the stroke's color, click on the color swatch:
This again opens the Color Picker. I'll choose white for my stroke color, then I'll click OK to close out of the Color Picker:
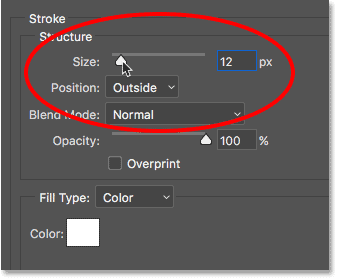
Back in the Layer Style dialog box, I'll set the Position of the stroke to Outside so that it appears around the outside of the shape. Then, I'll increase the Size value to adjust the thickness of the stroke. For this image, I think a size of around 12 px works well:
Click OK to close out of the Layer Style dialog box. And with that, we're done! Here, after changing the background color and adding a stroke around the butterfly, is my final "image in shape" effect:
And there we have it! Check out our Photo Effects section for more Photoshop effects tutorials! And don't forget, all of our Photoshop tutorials are now available as print-ready PDFs!