
Creating Photo Borders With Displacement Maps In Photoshop
In this Photoshop Effects tutorial, we're going to look at a great way to create unique and interesting photo borders by using other photos as displacement maps! Previously, we looked at how to create photo borders with masks and filters, which is an easy way to come up with interesting results simply by applying some of Photoshop's built-in filters to a layer mask. The downside to using that method though is that you're using the same filters every other Photoshop user has access to, which means you run the risk of creating the exact same border effects everyone else is creating. That may or may not be an issue for you, but the method we're going to look at here completely avoids that problem because it uses your own photos to create the effect, and since presumably you're the one who took your photos, you can use them to create photo borders that are as unique as you are!
What do I mean when I say we'll be using other photos as displacement maps? Well, first of all, don't let the term "displacement map" scare you off if you've never used one before. A displacement map is nothing more than a black and white photo or image which Photoshop uses to move, distort and reshape the pixels in another image. We've already looked at displacement maps in a previous tutorial where we used them to create photo realistic drop shadows. Any photo can be used as a displacement map, but if you're using them to create photo borders as we'll be doing here, you'll want to choose photos that have a lot of detail to them. The more detail, the more interesting the end result. In fact, your best bet is to avoid using traditional types of photos and try using "texture" photos instead. By "texture" photo, I mean photos of things like rocks, stones, wood, rust, bricks, fabrics - anything that has an interesting surface to it.
Where do you get these types of photos? The easiest way is to grab your digital camera, go outside and take pictures! Zoom in on the sidewalk and snap a photo of the concrete with all its nicks and cracks. Walk up to a tree and snap a close-up photo of the bark. See a piece of rusted metal somewhere? Point the camera and press the button! We'll see a couple of examples of texture photos I've taken in this tutorial. I could spend the whole day wandering around the neighborhood finding great textures. Of course, the neighbors may stop and stare at me, but life just isn't worth living if someone isn't thinking you've lost your mind.
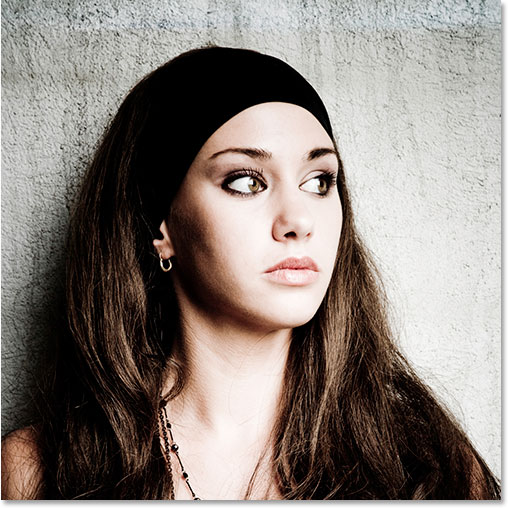
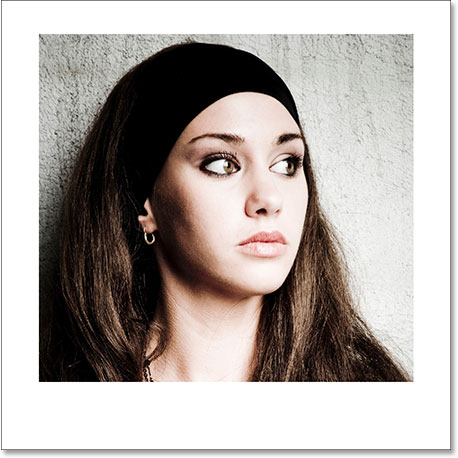
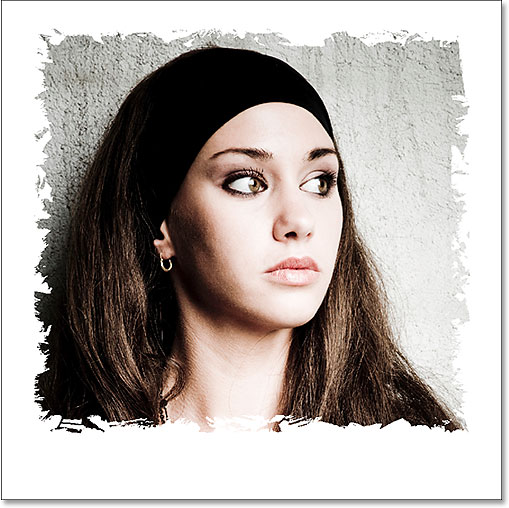
Here's the photo I'll be using as my main photo in this tutorial (in other words, the photo I'll be applying the border to):
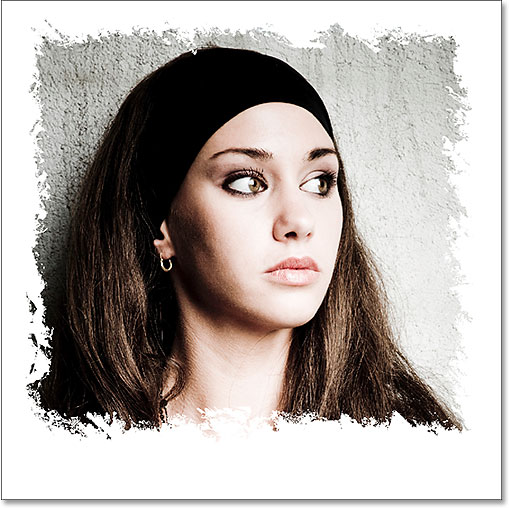
And here's what it will look like when we're done:
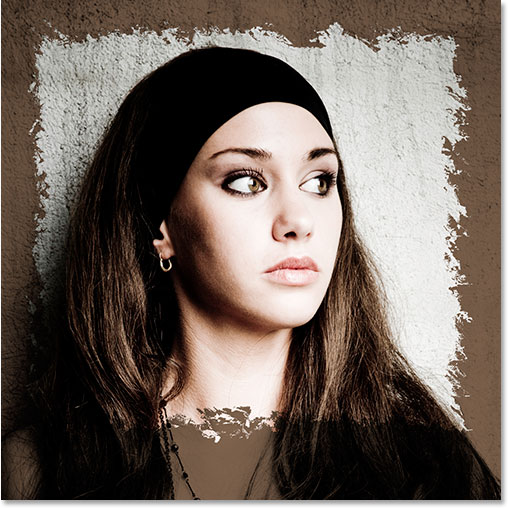
Of course, the main focus of this Photoshop tutorial is creating that jagged border we see around the main part of the image. The dark brown area around the edges of the photo was just something I added in for more interest, but we'll see how to do that as well at the end of the tutorial.
This tutorial is from our Photo Effects series. Let's get started!
Step 1: Duplicate The Background Layer
As always, let's begin by duplicating our Background layer so we're not working directly on our original image information. To do that, go up to the Layer menu at the top of the screen, choose New, and then choose Layer via Copy, or use the keyboard shortcut Ctrl+J (Win) / Command+J (Mac):
If we look now in our Layers palette, we can see the original Background layer on the bottom and a copy of the Background layer, which Photoshop has automatically named "Layer 1", above it:
Step 2: Add A New Blank Layer Between The Two Existing Layers
We need to add a new blank layer between our existing two layers. We currently have "Layer 1" selected in the Layers palette (the currently selected layer is highlighted in blue). Normally, Photoshop adds a new layer directly above the layer that's currently selected, but we need our new layer to appear below "Layer 1", not above it. To tell Photoshop to add the new layer below "Layer 1", we simply hold down the Ctrl (Win) / Command (Mac) key on the keyboard and click on the New Layer icon at the bottom of the Layers palette:
If we look in our Layers palette again, we can see that we now have a new blank layer, which Photoshop has named "Layer 2", between "Layer 1" and the Background layer:

Step 3: Fill The New Layer With White
Even though at the end of this tutorial I'll be doing something a little more interesting, for the time being let's use white as our border color. For that, we'll need to fill our new blank layer with white. Go up to the Edit menu at the top of the screen and choose Fill, or use the keyboard shortcut Shift+F5:

Either way brings up Photoshop's Fill dialog box. In the Contents section at the top of the dialog box, choose White from the selection box. Then, down in the Blending section at the bottom, make sure that Mode is set to Normal and Opacity is set to 100%:
Click OK in the top right corner when you're done to exit out of the dialog box and have Photoshop fill the new layer with white. Nothing will appear to have happened to the image and that's because "Layer 1" is above our new layer and blocking it from view, but if we look at the preview thumbnail for "Layer 2" in the Layers palette, we can see that the thumbnail is now filled with solid white, which tells us that the layer itself is now filled with white:
Step 4: Select "Layer 1"
Click on "Layer 1" in the Layers palette to select it:
Step 5: Select The Rectangular Marquee Tool
Grab the Rectangular Marquee Tool from the Tools palette:
Step 6: Drag Out A Selection Inside The Image
With the Rectangular Marquee Tool selected, drag out a rectangular selection where you want the photo border to appear inside the image. Typically, you'll want to leave an inch or so of space between the selection and the edges of the photo. In my case, I'm going to leave a bit more room at the bottom of my photo just to frame the woman's face a bit better:

Step 7: Add A Layer Mask
When you're happy with your selection, make sure you still have "Layer 1" selected, then click on the Layer Mask icon at the bottom of the Layers palette:
This adds a layer mask to "Layer 1", and since we had an active selection when we added the layer mask, Photoshop uses the selection to determine which parts of the layer should remain visible and which parts should be hidden from view. Any areas on the layer that were inside the selection remain visible, while areas outside of the selection will now be hidden. If we look at the Layers palette again, we can see that we now have a layer mask thumbnail to the right of the preview thumbnail on "Layer 1", and if we look closely at the thumbnail, we can see a large rectangular area in the center that's filled with white. This is the area that was inside our selection (the area that remains visible). Everything around the white rectangular area is the area that was outside of our selection (the area that will now be hidden), and we can see that it is filled with black:

If we look in our document window, we can see that we now have a white border showing around the edges of the image. The white border is actually "Layer 2", which we filled with white back in Step 3, peaking through from underneath "Layer 1". The only part of "Layer 1" that is still visible is the area that was inside our selection. Everything else on the layer that was outside of the selection is now hidden thanks to the layer mask:
Step 8: Open The Image You Want To Use As Your Displacement Map
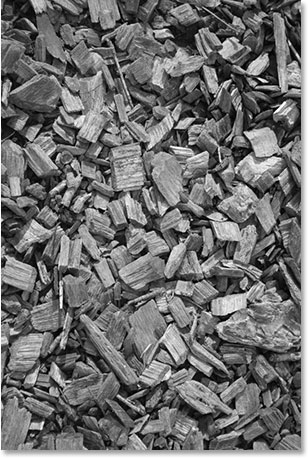
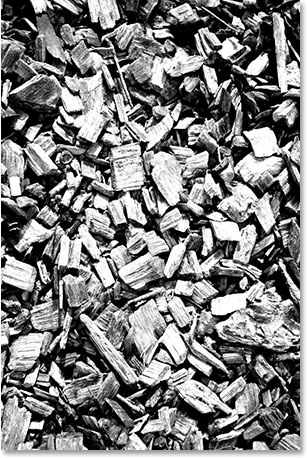
So far, all we have is a simple looking white border around our photo. Let's reshape our border into something much more interesting using a displacement map and Photoshop's Displace filter. Before we can use a displacement map though, we first need to create one, so open the photo you want to use as your displacement map. As I mentioned at the beginning of this tutorial, your best bet is to use a "texture" photo, meaning a close-up shot of something with an interesting surface to it, and the easiest way to obtain texture photos is to grab your digital camera, go outside and take some pictures! For example, here's a photo I took of some wood chips which were scattered on the ground along a walking path through a forest near my home:

This photo should work nicely as a displacement map.
Step 9: Desaturate The Image
We need to turn our photo into one that can be used as a displacement map. The first thing we need to do is remove all the colors from the image, and we can do that quickly and easily by going up to the Image menu at the top of the screen, choosing Adjustments, and then choosing Desaturate:
You can also use the keyboard shortcut Shift+Ctrl+U (Win) / Shift+Command+U (Mac). Either way will instantly remove all the colors from the photo, leaving us with a black and white image:
Step 10: Increase The Photo's Contrast With Levels
Next we need to increase the contrast in our image, making the darkest areas pure black and the brightest areas pure white. To do that, we'll use Photoshop's Levels command. Go up to the Image menu at the top of the screen once again, choose Adjustments, and then choose Levels, or use the keyboard shortcut to quickly access the Levels command, Ctrl+L (Win) / Command+L (Mac):

Either way brings up the Levels dialog box. In the center of the dialog box, you'll see the image histogram (the large black graph), and below the histogram are three small sliders - a black one on the far left, a white one on the far right, and a gray one in the middle. To make the darkest parts of the image pure black, click on the black slider on the far left and drag it over towards the right. As you drag, you'll see the dark areas in the image becoming darker and darker. Normally, when editing and retouching images, we'd only want to drag the black slider to the point where the left side of the histogram begins, but in this case, since we're doing this to give our displacement map more contrast, it's okay to drag the slider beyond that point. We'll lose some detail in the darkest areas of the image, but that's okay for what we're doing here.
Then, to make the brightest areas in the image pure white, click on the white slider on the far right and drag it towards the left. As you drag, you'll see the lightest areas in the photo becoming pure white. As with the black slider, if we were retouching the image, we'd only want to drag the white slider to the point where the right side of the histogram begins, but in this case, what we need most of all for our displacement map is lots of contrast in the image, so drag the white slider beyond that point until you have a lot of bright areas in the image. Again, we'll be losing some image detail in the brightest areas of the photo, but that's okay:
Click OK when you're done to exit out of the dialog box. Your image should now have lots of contrast to it as we can see here with my image:
Step 11: Apply The Gaussian Blur Filter
One final thing we should do with our image to prepare it for use as a displacement map is to apply a slight amount of blurring to it, just to remove any overly harsh edges. To do that, we'll use Photoshop's Gaussian Blur filter. Go up to the Filter menu at the top of the screen, choose Blur, and then choose Gaussian Blur:
When the Gaussian Blur dialog box appears, set the Radius value at the bottom to around 1 pixel. Again, we're just adding a subtle amount of blurring:
Click OK when you're done to exit out of the dialog box and apply the blur to the image.
Step 12: Save The Image As A Photoshop .PSD File
We're done preparing our image for use as a displacement map. All we need to do now is save it, and we need to save it as a Photoshop .PSD file, since those are the only types of files that Photoshop will allow us to use as displacement maps. You're going to want to save the file someplace where you can easily find it since we'll be using it in a moment. I'd recommend either saving it directly to your desktop or creating a folder on your desktop and saving all your displacement map images in the folder. I have a folder on my desktop named "displacement maps" and I'm going to save my file in that folder.
To save the file, use the keyboard shortcut Ctrl+S (Win) / Command+S (Mac), which is the quick and easy way to access Photoshop's "Save" command. Since this is the first time we're saving the file, Photoshop will actually bring up the Save As dialog box so we can tell it what to name the file, where to save it, and which file format to save it as. I'm going to name my file "wood-chips" (you'll probably want to name your file something different unless you also happen to be using a photo of wood chips) and I'll save it as a Photoshop .PSD file by choosing that option from the Format selection box:

Again, I'm going to save my file inside a folder on my desktop which I've named "displacement maps". Make sure you save your file someplace where you can easily access it. Click OK to save the file and exit out of the dialog box when you're done.
You can close out of the image's document window at this point since we no longer need it open.
Step 13: Prepare And Save A Second Image As A Displacement Map (Optional)
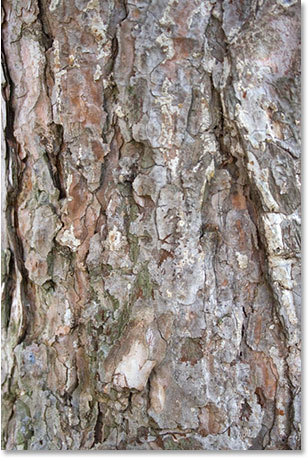
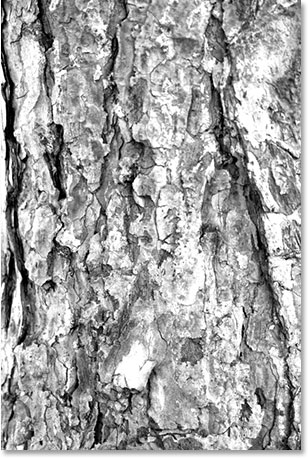
If you really want to create some interesting and unique photo borders, try using a couple of different images as displacement maps instead of just one. This is optional of course, but I'm going to open a second image to use as a displacement map. I'll use this photo I took of some tree bark:
Repeat steps 9-11 with your second image (assuming you're using one) to prepare it as a displacement map. When you're done, the image should be in black and white with a strong amount of contrast and it should have a slight amount of blurring applied to smooth out any harsh edges. Here's my image after preparing it for use as a displacement map:
I'll save this image to the same location as my previous image by pressing Ctrl+S (Win) / Command+S (Mac). Again, since this is the first time I'm saving the image, Photoshop will pop up the Save As dialog box. I'm going to name this image "tree-bark" and I need to save this one as a Photoshop .PSD file as well:

Click OK when you're done to save the image and exit out of the dialog box, then close out of the image's document window.
Step 14: Make Sure The Layer Mask On "Layer 1" Is Selected
At this point, all you should have open on your screen is the original photo (the one we're adding the border effect to). Make sure that you have the layer mask selected on "Layer 1". You can tell if the layer mask is selected or not by looking at "Layer 1" in the Layers palette. You should see a white highlight box around the layer mask thumbnail indicating that it's selected. If instead you see the highlight box around the preview thumbnail on the left, click on the layer mask thumbnail to select it:
We're going to create our photo border effect next!
Step 15: Apply The "Displace" Filter To The Layer Mask
Now that we've created one or two displacement maps, we can create our photo border effect using Photoshop's "Displace" filter. With the layer mask selected, go up to the Filter menu at the top of the screen, choose Distort, and then choose Displace:
Photoshop's "Displace" filter is actually broken up into two separate dialog boxes. The first one that appears allows us to set some options for how the displacement map is going to affect our image. At the top, you'll see two options - Horizontal Scale and Vertical Scale. These options determine how much of an impact the displacement map will have. By default, both options are set to 10. You can try the default values, but I'm going to increase both of these values to 20. Different values may work better for you depending on the effect you're trying to achieve as well as the size of your photo. Make sure you have the Stretch To Fit and Wrap Around options selected in the dialog box as well:
Click OK when you're done to exit out of this first dialog box, and Photoshop will pop up the second dialog box asking you to select the image you want to use as your displacement map. I'm going to choose the first photo I saved, my "wood-chips.psd" file:
Click Open to exit out of the dialog box and Photoshop will use the displacement map to reshape your photo border! If I look at my image in the document window now, I can see that my border now looks a whole lot more interesting than it did a moment ago:
Step 16: Apply The "Displace" Filter Again Using The Second Displacement Map (Optional)
If you prepared a second image for use as a displacement map like I did, we can use it to add even more interest to our photo border. Since the Displace filter was the last filter we used, we can quickly call it back up again using the keyboard shortcut Ctrl+Alt+F (Win) / Command+Option+F (Mac). Click OK when the first Displace filter dialog box appears to accept the same settings we used last time, and when the second dialog box appears, select the second image you saved. Here I'm selecting my "tree-bark.psd" image:
Once again, click Open to exit out of the dialog box and have Photoshop reshape your photo border once again, this time using your second image:
You could even try combining a third displacement map if you wanted to, but I'm happy with how my border looks at this point.
If you're happy with the border effect you've created, you can certainly stop here. The plain white border looks okay, but there's lots of ways we can make it more interesting. We'll finish off this tutorial with a quick look at how to add a bit more visual interest next!
Step 17: Delete The Solid White Layer ("Layer 2")
To make our image look a little more interesting, let's first delete our solid white layer. Click on "Layer 2" in the Layers palette and drag it down on to the trash bin at the bottom of the palette:
You'll be left with only two layers in the Layers palette, and the Background layer will be selected:
Your photo border will also seem to have disappeared in your document window, but don't worry, it's still there. We just can't see it at the moment.
Step 18: Select The Eyedropper Tool
We're going to sample a color from the image. For that, we'll need the Eyedropper Tool, so select it from the Tools palette:
Step 19: Sample A Color From The Image
With the Eyedropper Tool selected, click on a color from the image that would work nicely as a color for the border. I'm going to sample a light brown color from the woman's hair:
You'll see the color you've sampled appear in the Foreground color swatch near the bottom of the Tools palette:
Step 20: Add A "Hue/Saturation" Adjustment Layer
With the Background layer selected in the Layers palette, click on the New Adjustment Layer icon at the bottom of the palette:
Then select Hue/Saturation from the list of adjustment layers that appears:
When the Hue/Saturation dialog box appears, select the Colorize option in the bottom right corner. This will colorize the border around your image using the color you sampled a moment ago. I'm going to darken my border as well by lowering the Lightness value in the dialog box down to around -60. Finally, I'm going to reduce the saturation of the border color just a little by lowering the Saturation value to around 20:
Click OK when you're done to accept the changes and exit out of the dialog box. If we look at our Layers palette now, we can see our Hue/Saturation adjustment layer sitting between the Background layer and "Layer 1":
And here's what my final border effect now looks like after colorizing and darkening my border:
And there we have it! That's how to create interesting photo borders using displacement maps in Photoshop! Visit our Photo Effects section for more Photoshop effects tutorials!