
How To Blend Textures With Photos In Photoshop
Add more interest and creativity to your images by learning how to easily blend textures with your photos using layer blend modes in Photoshop!
In this Photoshop tutorial, we'll learn how to blend textures with photos using layer blend modes! Blend modes are simple yet powerful ways to combine two or more images together to give the original image a more artistic, creative edge. They can be lots of fun, but the result that any specific blend mode will give us can be nearly impossible to predict, especially when working with textures. In fact, the only real way to know which blend mode you'll like best is to try them all out, but with so many to choose from, that can take time.
Fortunately, as we'll learn, there's a handy trick that makes cycling through all of Photoshop's blend modes both fast and easy. We'll also learn which blend modes are more likely to give you great results and how to quickly jump right to them from the keyboard!
The great thing about textures is that you can find interesting ones almost everywhere you look, indoors or out, and to capture them, all you need is an inexpensive digital camera or even the camera on your smartphone or tablet. Point it at an interesting design on a leaf or a rock, a cloud in the sky, a piece of wood, patch of rust, frost on a window, or anything that catches your eye. You can also place different objects on a scanner to capture them as textures. Old book covers, maps, crumpled paper, even pieces of cloth or carpet make great choices. And of course, a quick Google search for Photoshop textures will turn up endless results. Save them all to a folder on your computer and before long, you'll have an entire collection of unique textures to choose from whenever you need them!
This tutorial is compatible with Photoshop CC (the version I'm using) and Photoshop CS6. If you're using Photoshop CS5 or earlier, you'll want to check out our original How To Blend Textures With Photos tutorial.
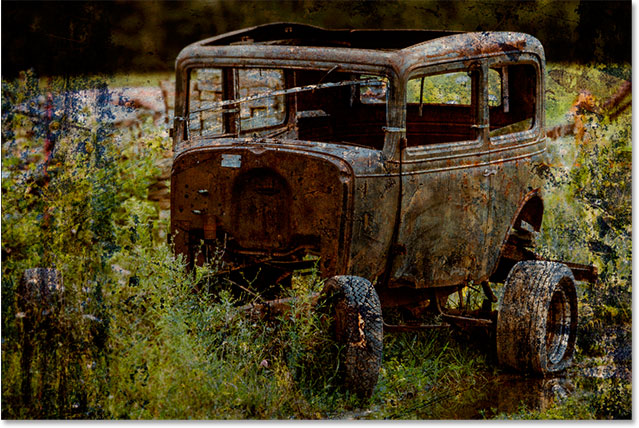
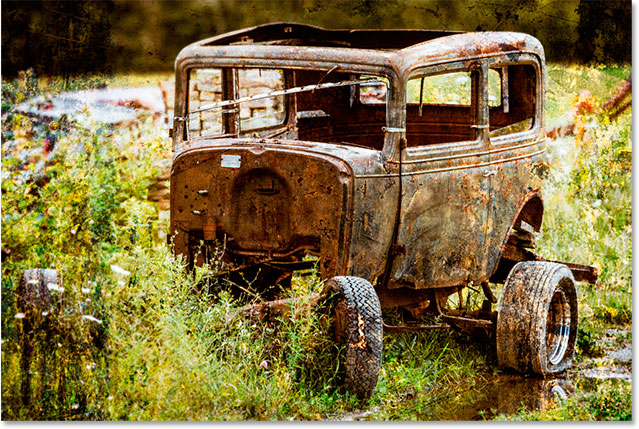
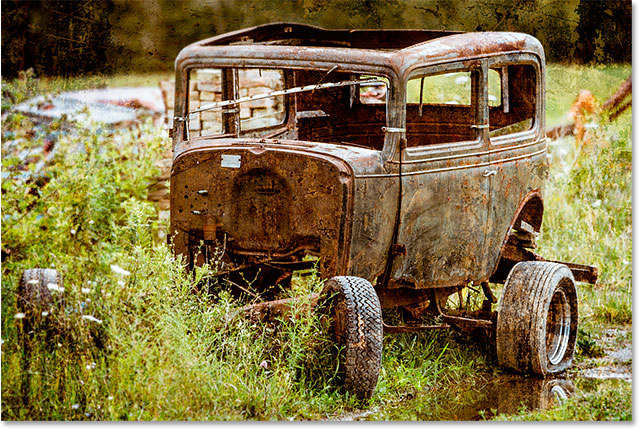
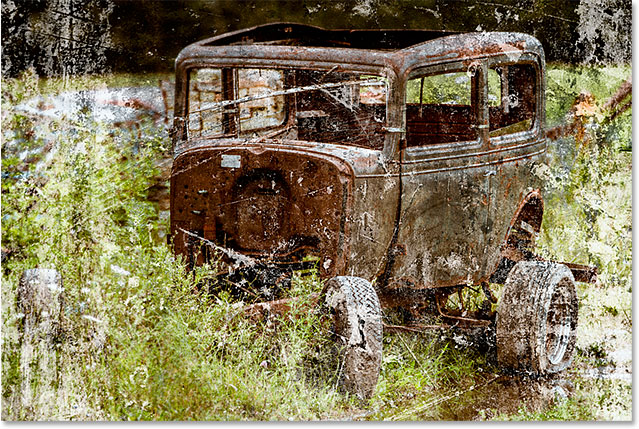
Here's the photo I'll be starting with:
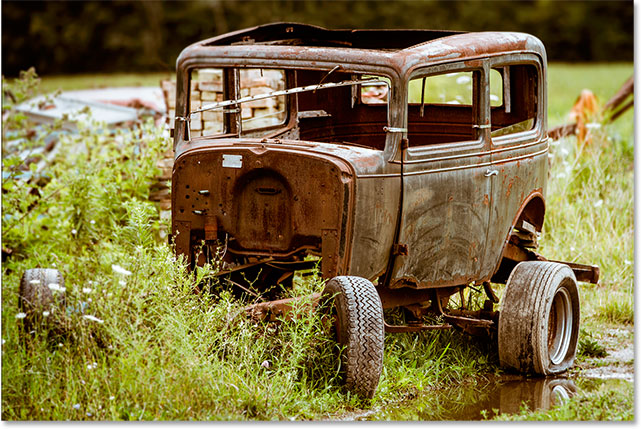
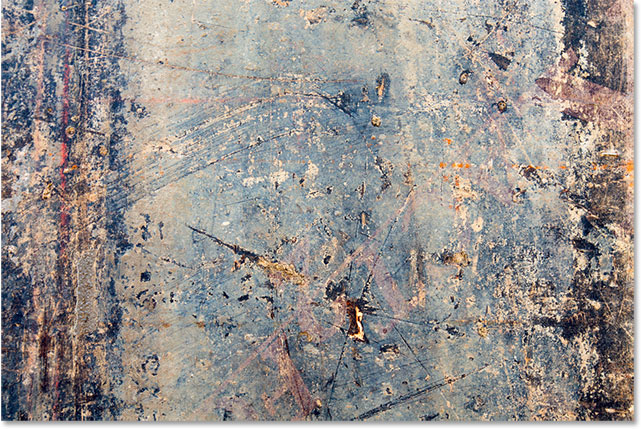
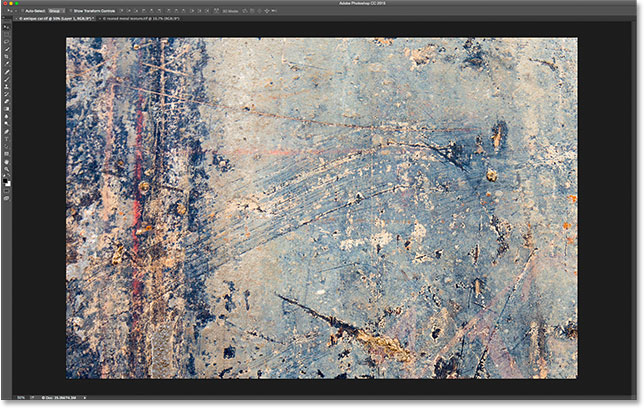
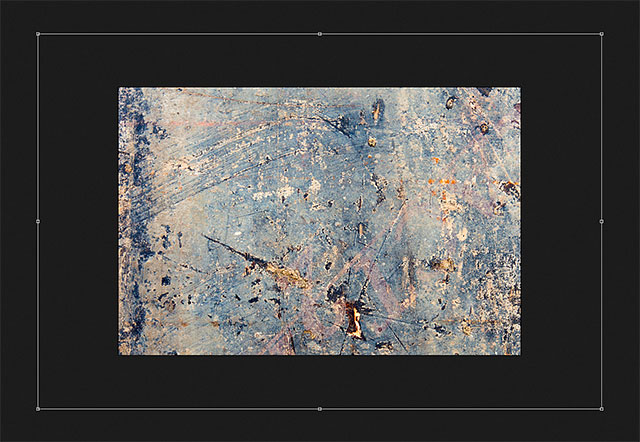
I like the photo, but given its subject matter, I think it would look even better if I grunged it up a bit using a texture. As I mentioned, you can find textures pretty much anywhere you look. In my case, I found this rusted, scratched up piece of metal:
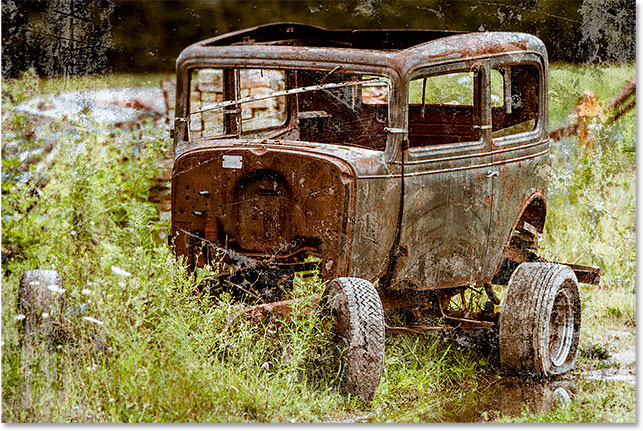
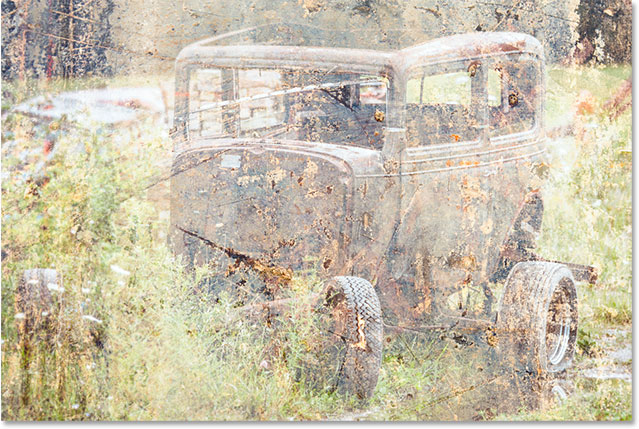
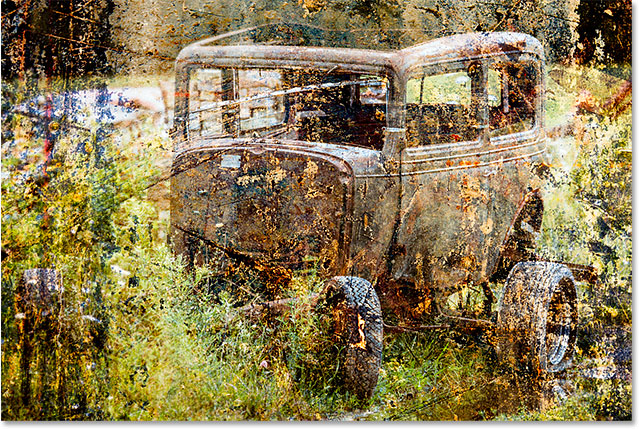
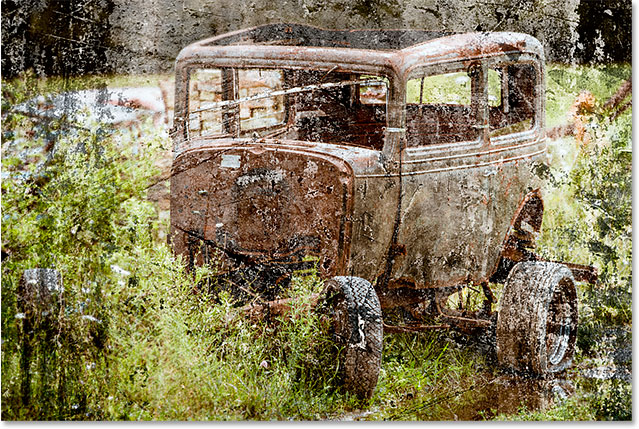
Here's what the final result will look like after blending the texture with the original image:
How To Blend Textures With Photos
Step 1: Select And Copy The Texture
To begin, open both your main photo and the image you're using for a texture in Photoshop. Each image will appear in its own separate tabbed document. The first thing we need to do is move the texture into the same document as the main photo. The easiest way to do that is to copy and paste it. Make sure the texture's document is the one that's active. You can switch between documents by clicking on the tabs along the top:
With the texture's document active, go up to the Select menu in the Menu Bar along the top of the screen and choose All. Or, press Ctrl+A (Win) / Command+A (Mac) on your keyboard:
A selection outline will appear around the image letting you know it's selected. To copy it, go up to the Edit menu at the top of the screen and choose Copy. Or, press Ctrl+C (Win) / Command+C (Mac) on your keyboard:
Step 2: Paste The Texture Into The Main Photo's Document
Switch over to the main photo's document by clicking on its tab:
With the photo's document now active, go back up to the Edit menu and this time, choose Paste Special, then Paste in Place:
The Paste in Place command not only pastes the texture into the document but also centers it. Depending on the size of your texture, it may be completely blocking the photo below it from view, as mine is here:
If we look in Photoshop's Layers panel, though, we see that the original photo is still there, sitting on the Background layer, while the texture has been placed on a brand new layer named Layer 1 above it:
Step 3: Resize The Texture If Needed With Free Transform
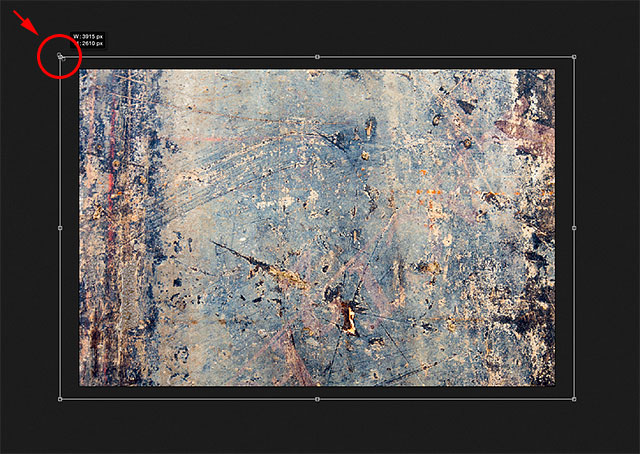
Unless your photo and texture both happen to be the exact same size, you'll need to resize the texture so it fits the image, and we can do that using Photoshop's Free Transform command. With Layer 1 selected in the Layers panel, go up to the Edit menu at the top of the screen and choose Free Transform. Or, press Ctrl+T (Win) / Command+T (Mac) to choose Free Transform from the keyboard:
Photoshop will place the Free Transform box and handles around the texture. If you can't see all of the Free Transform handles because they extend off the screen, go up to the View menu and choose Fit on Screen, or press Ctrl+0 (Win) / Command+0 (Mac) on your keyboard:
Photoshop will instantly zoom the image out far enough so that everything, including the Free Transform box and handles, is visible:
Click and drag any of the handles (the little squares around the bounding box) to resize the texture as needed. Dragging a handle on its own lets us freely distort the shape of the texture as we're resizing it. Since it's just a texture, that's usually okay, but if you want to lock the aspect ratio (the shape) of the texture in place as you're resizing it, press and hold the Shift key on your keyboard and drag any of the four corner handles.
If you press and hold Shift+Alt (Win) / Shift+Option (Mac) as you drag a corner handle, you'll resize the texture from the center rather than from the corner and keep its aspect ratio intact. When you're done, press Enter (Win) / Return (Mac) on your keyboard to accept the transformation and exit out of the Free Transform command:
Step 4: Select The Move Tool
Select Photoshop's Move Tool from the top of the Tools panel, or press the letter V to select the Move Tool from the keyboard. We're not actually going to use the Move Tool for anything, but in a moment, we'll learn a handy keyboard shortcut for quickly cycling through the layer blend modes so we can see which one will give us the best results for blending our texture with the photo.
What does that have to do with the Move Tool, you ask? Well, depending on which tool you have selected, the keyboard shortcut may or may not work. It does work with the Move Tool selected, and the Move Tool is at the top of the Tools panel, so selecting the Move Tool first is the easiest way to make sure the keyboard shortcut will work:

Step 5: Cycle Through The Layer Blend Modes
The Blend Mode option is found in the top left corner of the Layers panel. By default, it's set to Normal, which simply means that the layer is not blending with the layer(s) below it in any way (which is why the texture is currently blocking the photo from view in the document):
If you click on the word "Normal", you'll see a list of the other blend modes we can choose from, like Multiply, Screen, Overlay, and so on. We could, if we really wanted to, choose each blend mode one at a time by clicking on its name in the list, and you may want to do that if someone is paying you by the hour. But a much faster way to experiment with the various blend modes is to quickly cycle through them from your keyboard. Press and hold your Shift key and press the plus (+) or minus (-) keys on your keyboard. The plus (+) key will move you forward through the list of blend modes one at a time, while the minus (-) key will move backwards. For example, holding Shift and pressing the plus (+) key once changes the blend mode from Normal to Dissolve:
The Dissolve blend mode probably won't have much of an effect on your image, but other blend modes definitely will. For example, I'll keep my Shift key held down and press the plus (+) key a couple more times to move to the Multiply blend mode:

The Multiply blend mode is part of a group of blend modes that darken the overall image. Here, we see that the texture and the photo are now blending together. Yet while it looks interesting, in this case it's a bit too dark. Notice that the color from the texture is also blending into the image. We'll see how to change that a bit later:
I'll keep my Shift key held down and press the plus (+) key a few more times until I come to the Screen blend mode:
The Screen blend mode is the opposite of Multiply. It's part of a group of blend modes that lighten the image. Here, we get another interesting result, this time looking much lighter than what we saw with the Multiply mode:
Pressing the plus (+) key a few more times brings me to the Overlay blend mode:
Overlay is part of the contrast group of blend modes. It boosts contrast in the image and also increases color saturation at the same time. Like Multiply and Screen, Overlay is another mode that's often a good choice when blending textures with photos:
There are two more blend modes that you'll usually want to try, and they're both similar to Overlay in that they boost contrast and color saturation. The first is Soft Light which I'll switch to by pressing the plus (+) key again (with the Shift key held down):

Soft Light is a more subtle version of Overlay. It still increases contrast and color saturation, but as its name implies, the result is softer, less intense:
For a much stronger effect, try the Hard Light blend mode which I'll move to by pressing the plus (+) key one last time:
While Soft Light was a more subtle version of Overlay, Hard Light is the most intense of the three. In fact, it's usually too intense at first, as it is here, but we'll see how to adjust the strength of a blend mode in a moment:
The Blend Mode Keyboard Shortcuts
Generally, the Multiply, Screen, Overlay, Soft Light, and Hard Light blend modes will give you the best results for blending a texture with a photo, and there's keyboard shortcuts we can use to instantly jump to each one. We already know that we can cycle through the complete list of blend modes by pressing and holding the Shift key and pressing the plus (+) key to move forward or the minus (-) key to move backwards through the list. This gives us a fast and easy way to try each one and judge the results.
If you want to jump straight to one of the more commonly-used blend modes we've looked at, simply press and hold Shift+Alt (Win) / Shift+Option (Mac) on your keyboard and press the M key for Multiply, S for Screen, O for Overlay, F for Soft Light, or H for Hard Light.
Step 6: Remove The Color From The Texture
Even though it looks quite harsh at the moment, I’m going to stick with the Hard Light blend mode (you may prefer a different blend mode with your image). Yet there’s a few things I don’t like about the current result. First, not only is the texture itself blending in with the photo but so is the color from the texture. Sometimes you'll want to include the color because it can add even more interest, but in this case, I want to remove it. To do that, I'll use a Hue/Saturation adjustment layer.
With the texture layer (Layer 1) selected in the Layers panel, I'll press and hold the Alt (Win) / Option (Mac) key on my keyboard and click the New Fill or Adjustment Layer icon at the bottom of the Layers panel:
Then I'll choose Hue/Saturation from the list that appears:
This opens Photoshop's New Layer dialog box. I want the Hue/Saturation adjustment layer to affect only the texture layer below it, not the original image, so I'll select the Use Previous Layer to Create Clipping Mask option by clicking inside its checkbox:
I'll click OK to add the Hue/Saturation adjustment layer and close out of the dialog box. The options for the adjustment layer appear in the Properties panel. To remove the color from the texture, we just need to click and drag the Saturation slider all the way to the left, to a value of -100:
With the color desaturated, only the texture itself remains:
If we look again in the Layers panel, we see the Hue/Saturation adjustment layer clipped to the texture layer below it. You can toggle the texture's color on and off by clicking the adjustment layer's visibility icon. Click it once to turn the adjustment layer off and restore the color. Click it again to turn the adjustment layer back on and remove the color:
Step 7: Try Inverting The Texture
In addition to removing the color from the texture, we can also try inverting it, which means we'll reverse its brightness values, making light areas dark and dark areas light. To invert the texture, we'll use an Invert adjustment layer. Once again press and hold the Alt (Win) / Option (Mac) key on your keyboard and click the New Fill or Adjustment Layer icon at the bottom of the Layers panel:
This time, chose Invert from the list:

When the New Layer dialog box opens, select the Use Previous Layer to Create Clipping Mask option so that only the texture, not the original image, is affected by the adjustment layer:
Click OK to close out of the dialog box and add the Invert adjustment layer. There are no options for the Invert adjustment. Photoshop simply inverts the brightness values of the texture. In my case, I think the inverted version works better since it allows more of my original photo to show through:
The Invert adjustment layer appears in the Layers panel above the Hue/Saturation adjustment layer we added earlier, and like the Hue/Saturation adjustment layer, it's clipped to the texture layer (Layer 1) below it so that the original image on the Background layer is unaffected. To compare the inverted and original versions of the texture to see which one works better, simply click the Invert adjustment layer's visibility icon repeatedly to toggle the layer on and off:
Step 8: Lower The Texture's Opacity
The only problem remaining is that the texture still looks too intense, but we can easily fix that by lowering its opacity. First, click on the texture layer (Layer 1) to select it:
You'll find the Opacity option directly across from the Blend Mode option at the top of the Layers panel. By default, the opacity value is set to 100%, but the more you lower it, the more the original photo below the texture will show through. I'll lower the value down to 50%:
And here, after lowering the opacity, is my final result: