
Ghosting An Image With Photoshop CS6
In this photo effects tutorial, we'll learn how to "ghost" an image. In other words, we'll see how to give someone in a photo a more ghostly, supernatural look, a great effect whether you're a fan of horror movies or just looking for a fun and easy way to spruce up a photo for Halloween. This new version of our original Ghosting An Image tutorial is now fully updated for Photoshop CS6 and compatible with Photoshop CC (Creative Cloud). Check out the original version if you're using Photoshop CS5 or earlier.
New in this version of the tutorial, we'll be using Smart Objects and Smart Filters to create much of the effect, and we'll also be taking advantage of Photoshop's ability to nest Smart Objects inside of other Smart Objects! As we'll see, the benefit is that each of the Smart Filters we'll be applying to the image will have its own unique layer mask! If that sounds more advanced than your current Photoshop skill level, don't worry. As with all of our Photoshop tutorials, I'll be explaining every step along the way.
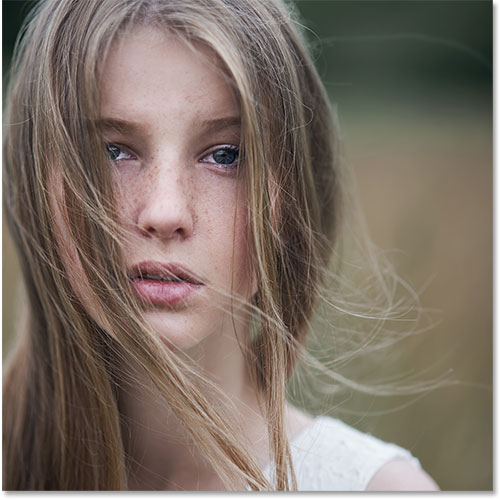
Of course, when creating any type of photo effect, it helps to start with the right type of image. Here's the one I'll be using (girl in field photo from Shutterstock):
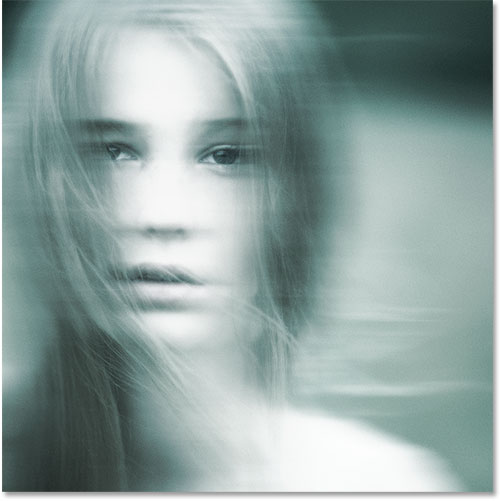
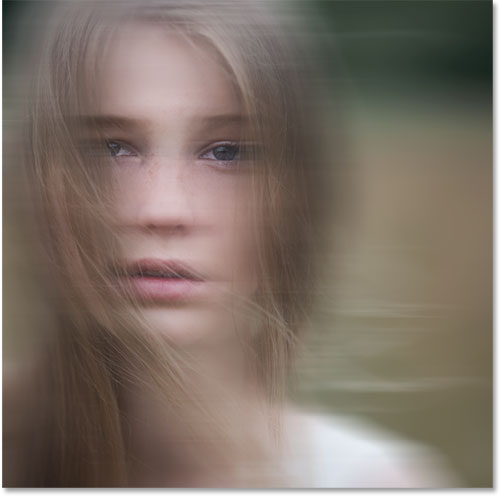
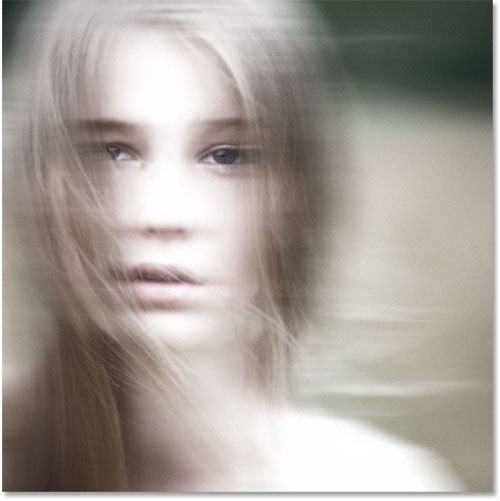
And here's what the final "ghosting" effect will look like:
How To Create A Ghost Image Effect
Step 1: Convert The Background Layer Into A Smart Object
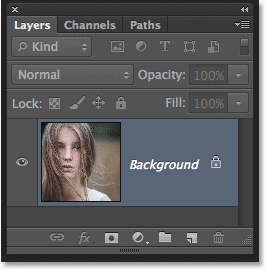
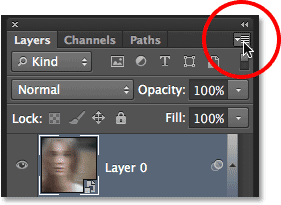
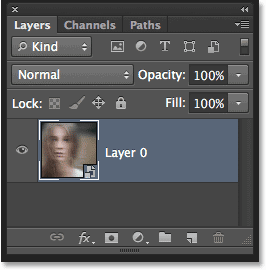
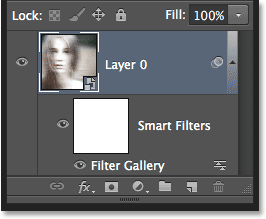
With my photo newly opened in Photoshop, if we look in my Layers panel, we see the image sitting on the Background layer which is currently the only layer in the document:
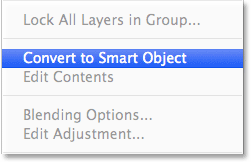
Let's convert this Background layer into a Smart Object. Click on the small menu icon in the top right corner of the Layers panel:
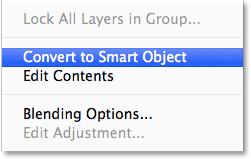
Choose Convert to Smart Object from the menu that appears:
It won't look like anything has happened to the image, but we can now see a small Smart Object icon in the bottom right corner of the layer's preview thumbnail in the Layers panel. This is Photoshop's way of telling us the layer is now a Smart Object:
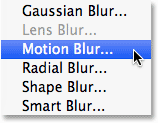
Step 2: Apply The Motion Blur Filter
We'll use a couple of Photoshop's filters to create the main ghosting effect, and we'll start with the Motion Blur filter. Go up to the Filter menu in the Menu Bar along the top of Photoshop's interface, choose Blur, then choose Motion Blur:
This opens the Motion Blur filter's dialog box. Start by setting the Angle for the blur to 0°. Then, increase the amount of blurring by dragging the Distance slider along the bottom of the dialog box. The further you drag it to the right, the more motion blur will be applied. The exact amount you use will depend a lot on the size of your image. In the original version of this tutorial, I was using a fairly small photo so I set my Distance value to around 95 pixels. This time, I'm using a much larger image so to achieve the same amount of blurring, I need to set the value much higher (to around 500 pixels). The easiest thing to do is to keep an eye on your image in the document window to judge the results as you drag the slider:
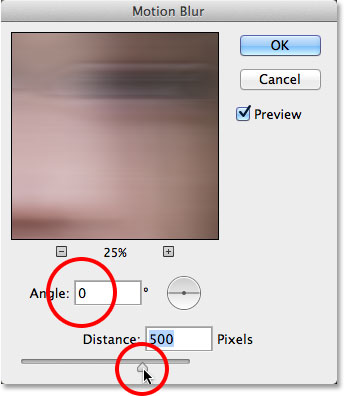
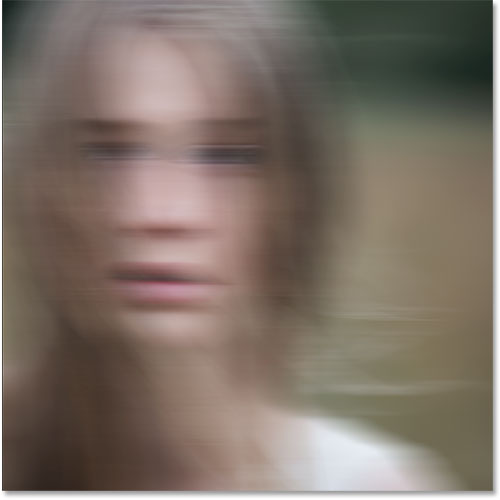
Click OK when you're done to close out of the Motion Blur dialog box. Your blur effect should look similar to this:
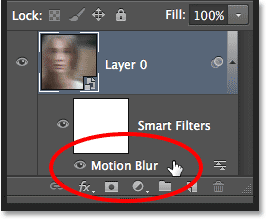
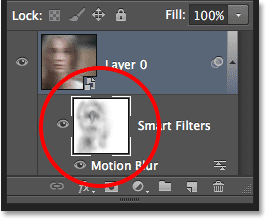
If we look again in the Layers panel, we see that because we first converted the Background layer into a Smart Object, the Motion Blur filter was added as a Smart Filter. If you don't think you added enough of a blurring effect, or maybe you added too much, just double-click on the Motion Blur filter's name below the Smart Object to re-open its dialog box and re-adjust the Distance slider. Your changes will be instantly updated in the image (click OK to close out of the dialog box again when you're done):
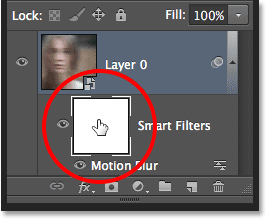
Step 3: Select The Smart Filter Mask
Click on the Smart Filter's mask thumbnail in the Layers panel to select the mask. A white highlight border will appear around it letting you know it's selected:
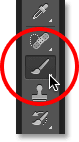
Step 4: Select The Brush Tool
We're going to use the mask to bring back some of the original non-blurred areas of the image. Select Photoshop's Brush Tool from the Tools panel along the left of the screen (or press the letter B on your keyboard to select the Brush Tool with the shortcut):
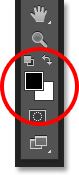
Step 5: Set The Brush Color To Black
We'll need to paint on the mask with black to reveal some of the original photo, which means we first need to set our brush color to black. Photoshop uses the current Foreground color as the brush color, so with the mask selected in the Layers panel, press the letter D on your keyboard. This will reset the Foreground and Background colors to their defaults, with white as the Foreground color and black as the Background color. Then, press the letter X on your keyboard to swap them, which sets the Foreground color to black.
You can see the current Foreground and Background colors in the color swatches near the bottom of the Tools panel. The Foreground color (upper left swatch) should now be black:
Step 6: Lower The Brush Opacity To 25%
With the Brush Tool selected, go up to the Options Bar along the top of the screen and lower the Opacity value to 25%. This will allow us to reveal the original image gradually with each brush stroke, making it easier to fine-tune the amount of blurring in a certain area (rather than the "all or nothing" approach we'd get by painting with a brush opacity of 100%):

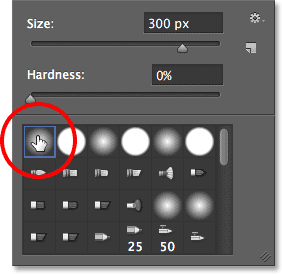
Step 7: Select A Round, Soft-Edge Brush
Right-click (Win) / Control-click (Mac) anywhere inside the image to open the Brush Preset picker and choose a round, soft-edge brush from the list. I'll choose the very first one in the top left corner by clicking on its icon. This gives us a brush with a Hardness value of 0%, or in other words, the softest edge possible. Press Enter (Win) / Return (Mac) when you're done to close out of the dialog box:
Step 8: Paint Over Areas To Reveal The Original Photo
With the Brush Tool in hand, black as your Foreground color and the brush opacity lowered to 25%, begin painting over areas where you want to reveal the original image through the motion blur effect, like the person's eyes, nose and mouth. Each time you paint a brush stroke over the same area, you'll reveal a bit more of the original image (make sure to release your mouse button in between brush strokes). You can adjust the size of your brush directly from your keyboard. Press the right bracket key ( ] ) repeatedly to make the brush larger or the left bracket key ( [ ) to make it smaller. If you accidentally paint over the wrong area, or you've revealed too much of the original image in a certain area, press the letter X on your keyboard to swap the Foreground and Background colors, which will set your Foreground color to white. Paint over the area with white to bring back the motion blur effect, then press X again to set your Foreground color back to black and continue painting.
Here, I've painted over the center area of the girl's face to reveal her eyes, nose and mouth through the motion blur effect, and I've also painted along some of her hair:
If we look at the mask thumbnail in the Layers panel, we can see where we painted with black. The rest of the area (filled with white) is where the motion blur effect remains at full strength:
Step 9: Nest The Smart Object Inside Another Smart Object
We've applied the Motion Blur filter, so we're ready to add our second filter. This second filter will need to be applied to the entire image, and that creates a potential problem. We'll need a separate mask for each of our filters, yet Photoshop only gives us one mask that's shared between all Smart Filters applied to the same Smart Object. We've already used that mask to hide some of the motion bur effect, so how can we get a separate mask for our second filter?
The answer is simple. We just need to nest our existing Smart Object inside another one! To do that, with the original Smart Object selected in the Layers panel, click once again on the menu icon in the top right corner of the Layers panel:
Choose Convert to Smart Object from the list, just as we did before:
It looks like we've lost our original Smart Object in the Layers panel, or at least lost the Motion Blur Smart Filter that was listed below it, but what's actually happened is that Photoshop has nested our initial Smart Object, along with its Motion Blur filter effect, inside a brand new Smart Object:
Step 10: Apply The Diffuse Glow Filter
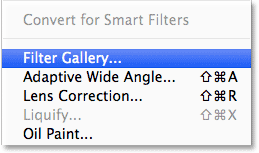
Let's apply our second filter, Diffuse Glow, which adds a glow effect to the image using our current Background color as the color for the glow. Before we select the filter, press the letter D on your keyboard just to quickly reset your Foreground and Background colors. This will make sure our Background color is set to white. Then, go up to the Filter menu at the top of the screen and choose Filter Gallery:
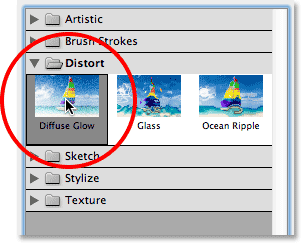
This opens Photoshop's large Filter Gallery dialog box, with a preview area on the left, the filters and filter categories in the middle column, and options for the currently selected filter on the right. Click on the Distort category in the middle column to twirl it open, then click on the Diffuse Glow filter to select it:
Related Tutorial: Restore Missing Filters in Photoshop CS6
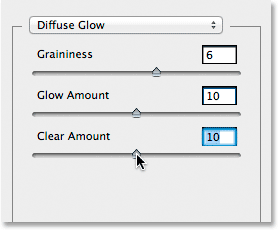
The options for the Diffuse Glow filter appear along the right of the Filter Gallery, and there's three options we can set. The first is Graininess, which adds a grain effect (you probably figured that one out). I'm going to set my Graininess value to 6 but as with each of these options, feel free to experiment on your own and see what you think works best.
The second option, Glow Amount, controls the intensity of the glow. I'll set mine to 10. Finally, Clear Amount behaves like the opposite to Glow Amount. Lower settings increase the range of the glow, causing more of the image to be affected, while higher settings limit its range. I'll set mine to 10 as well, but as I mentioned, feel free to try different settings with your image:
Click OK when you're done to accept your settings and close out of the Filter Gallery. Here's my image with Diffuse Glow applied:
If we look in the Layers panel, we see the Filter Gallery listed as a Smart Filter under the Smart Object. We also see that because we nested our initial Smart Object inside this second one, we now have a brand new mask to use with our Diffuse Glow filter, even though there's nothing we need to do with it since we want the Diffuse Glow effect to apply to the entire image:
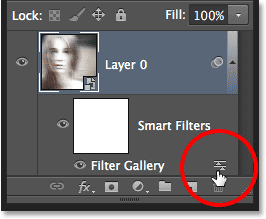
If you want to go back and edit any of your settings for the Diffuse Glow filter, simply double-click on the Filter Gallery Smart Filter. Or, if you find your glow effect is too strong, you can reduce its opacity value by double-clicking on the Blending Options icon:
This will open the Blending Options dialog box where you can either lower the filter's opacity or change its blend mode. You'll want to leave the blend mode set to Normal, but I'll lower my opacity down to 90% just to reduce the glow effect a little bit:
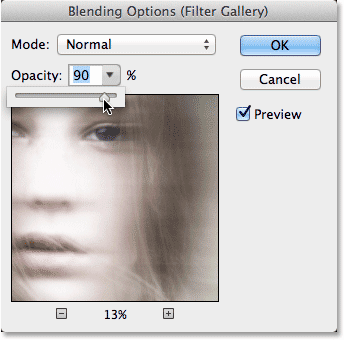
Click OK when you’re done to close out of the dialog box. Here’s my image after lowering the opacity:

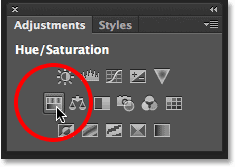
Step 11: Add A Hue/Saturation Adjustment Layer
Let's finish off the ghosting effect by colorizing it with a Hue/Saturation adjustment layer. Click on the Hue/Saturation icon in the Adjustments panel (first icon on the left, middle row):
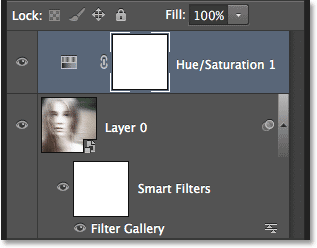
Photoshop adds a new Hue/Saturation adjustment layer directly above the Smart Object in the Layers panel:
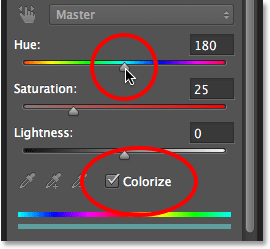
The controls and options for the Hue/Saturation adjustment layer appear in Photoshop's Properties panel. First, select the Colorize option near the bottom of the panel by clicking inside its checkbox. This will allow us to colorize the entire image with a single color. Then, drag the Hue slider left or right to select a color. You'll see the color changing in the document as you drag the slider. I think a greenish blue works well for the ghosting effect so I'll set my Hue value to around 180:
Here's my image after colorizing it:

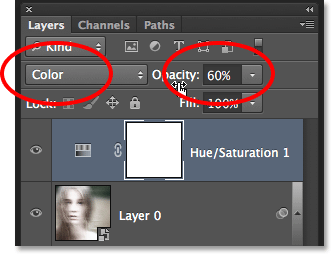
Step 12: Change The Blend Mode To Color And Lower The Opacity
Finally, change the blend mode of the Hue/Saturation layer from Normal to Color. The difference may be slight, but this will allow the adjustment layer to affect only the colors in the image without affecting the brightness values. You'll find the blend mode option in the top left of the Layers panel. Directly across from the blend mode option is the Opacity option. Lowering it from its default value of 100% will allow some of the original colors from the image to show through. You may or may not like the result with your image so this final step is optional, but in my case, I'll lower the opacity to around 60%:
And with that, we're done! Here, for comparison, is the original image once again:
And here, after changing the blend mode and lowering the opacity of the Hue/Saturation adjustment layer, is my final "ghost" effect: