
Editable Soft Glow With Smart Filters In Photoshop
If you're just joining us, this is the second of two Photoshop tutorials on how to enhance your photos, especially portrait shots, using a soft glow effect which not only softens the overall image but also helps to smooth skin, boost contrast and enhance colors, all at the same time.
There's a couple of ways to create this effect in Photoshop, both of which can be completed very easily. Both ways can also give you great looking results. The key difference between them is that one produces a static effect, meaning that it can't easily be changed or edited later, while the other remains fully editable even after the effect has been completed, allowing you to go back, make changes, and see if you can improve the results even further.
In the first of these two tutorials, we learned how to add a soft glow using the more basic and traditional method (the static method) that's better suited for beginner Photoshop users. It gave us great results but it didn't let us go back and make further changes or improvements. In this tutorial, we'll learn how to create the exact same soft glow effect while keeping it fully editable from start to finish, and we'll do that by taking advantage of Smart Objects and Smart Filters.
Smart Objects and Smart Filters may be considered more "advanced" features in Photoshop, but don't let that fool you. As we'll see, they're every bit as easy to use as normal layers and filters, with the added benefits of being extremely flexible and completely editable without any loss in image quality. As always, I'll cover everything step-by-step, explaining things as we go so that even if you're new to Photoshop, you can easily follow along.
If you haven't done so already, I encourage you to work through the first tutorial, Easy Soft Glow Effect In Photoshop, before moving on to this one since this tutorial will occasionally mention steps that were covered previously.
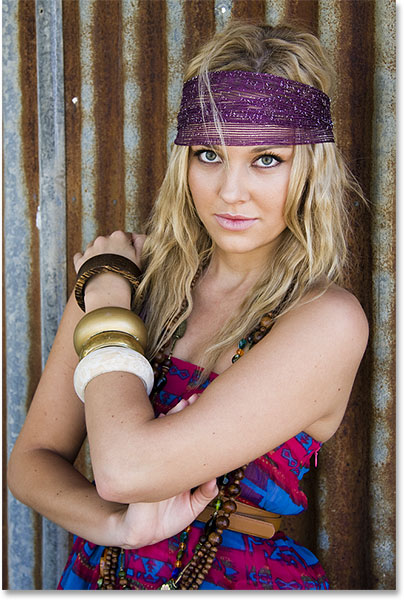
Here's the photo I'll be using (hippie girl photo from Shutterstock):
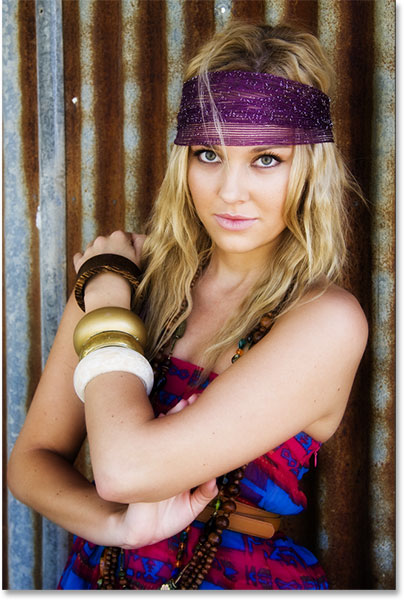
And here's how it will look after applying the soft glow effect:
This tutorial is part of our Portrait Retouching collection. Let's get started!
Step 1: Convert The Background Layer Into A Smart Object
In the previous tutorial where we learned the more traditional way of creating the soft glow effect, the first thing we needed to do was duplicate the Background layer. Here, we see my image sitting on the Background layer in the Layers panel, just like before:

This time, because we'll be keeping the effect fully editable, what we need to do instead is convert the Background layer into a Smart Object. What's a Smart Object? Think of Smart Objects in Photoshop as containers that hold layers, and converting a layer into a Smart Object is like placing the layer inside one of these containers. The containers are transparent so we can't actually see them, which is what makes Smart Objects a bit confusing at first. What we see in our document is not the Smart Object but the layer inside the Smart Object.
Smart Objects are very flexible. In fact, many of the things we can do to a layer, we can also do to a Smart Object. The important difference, though, is that when we edit a Smart Object, that's exactly what we're doing; we're editing the Smart Object itself, not the layer. In other words, we're editing the container, not what's inside the container. The layer inside the Smart Object always remains safe and unharmed, and that's what makes Smart Objects so flexible and editable; no matter what we do to a Smart Object, Photoshop always has that original, unedited layer inside of it to go back to.
This tutorial doesn't even begin to cover all of the things we can do with Smart Objects, but let's see how they can help us with our soft glow effect. To convert the Background layer into a Smart Object, click on the small menu icon in the upper right corner of the Layers panel:
Then choose Convert to Smart Object from the menu that appears:

Even though we've converted the Background layer into a Smart Object, it won't look like anything has happened to our image. That's because, as I mentioned earlier, Smart Objects are completely transparent; we don't actually see them, we see the layer inside them. However, if we look again in the Layers panel, we now see a small Smart Object icon in the lower right corner of the layer's preview thumbnail, telling us that sure enough, the layer is now sitting inside of a Smart Object container:
Step 2: Apply A Gaussian Blur Smart Filter
Smart Objects have plenty of uses on their own, but one of the best reasons for converting a layer into a Smart Object is that is allows us to apply Photoshop's filters to the layer as Smart Filters. In many ways, a Smart Filter is just like a normal filter in Photoshop. In fact, there's no difference at all between filters and Smart Filters when it comes to choosing them or using them. What makes Smart Filters so "smart" isn't what they can do; it's what they can do after what is is they've already done!
To show you what I mean, let's apply Photoshop's Gaussian Blur filter to the image, just like we did in the previous tutorial. This will soften the photo, creating the first part of our soft glow effect. The only difference is, this time, we'll be applying the filter not to a normal layer but to a Smart Object.
To do that, go up to the Filter menu in the Menu Bar along the top of the screen, choose Blur, and then choose Gaussian Blur:

This opens the Gaussian Blur dialog box. Just as before, the idea here is to soften the image by blurring it without going so far that we make our subject unrecognizable. We control the amount of blur using the Radius slider along the bottom of the dialog box. The further we drag the slider to the right, the stronger the blur appears. Photoshop gives us a live preview of the effect, so keep an eye on your image as you drag the slider to judge the results.
The amount of blur you need will depend a lot on the size of your image (larger images need more blur than smaller ones) as well as your own personal taste. Generally, a fairly low radius value of around 8 to 10 pixels is a good place to start:

Click OK when you're done to close out of the Gaussian Blur dialog box. Here's what my image looks like so far. Notice that we can still make out quite a lot of detail:

Step 3: Change The Blend Mode Of The Smart Filter To Soft Light
So far, there's really been no difference in how we've applied the Gaussian Blur filter from the way we did things in the previous tutorial where we created a static version of the soft glow effect. In both cases, we selected Gaussian Blur from under the Filter menu in the Menu Bar, we used the Radius slider to adjust the strength of the blur, and then we clicked OK to close out of the dialog box. Yet this time, somehow, we've managed to apply Gaussian Blur not as a normal filter but as a Smart Filter. How did we do that?
We did it by applying the Gaussian Blur filter not to a normal layer but to a Smart Object. Any filter applied to a Smart Object in Photoshop automatically becomes a Smart Filter. It's that easy! There's nothing else we need to do. In fact, if we look in our Layers panel once again, we now see Gaussian Blur listed as a Smart Filter below the Smart Object:

If you remember from the previous tutorial, the next step we needed to do after blurring the layer was change its blend mode from Normal to Soft Light. This is what turns our "blur" into a "glow". Problem is, in that tutorial, we had a separate, independent blur layer sitting above the image. This time, we don't. All we have is our Smart Object with a Smart Filter applied to it. So how do we change the blend mode?
Easy! We simply change the blend mode of the Smart Filter itself! To do that, double-click on the small Blending Options icon to the right of the words "Gaussian Blur":
This opens the Blending Options dialog box specifically for the Gaussian Blur Smart Filter. You'll find the Blend Mode option at the very top. I'll change it from Normal (the default setting) to Soft Light:

The Soft Light blend mode boosts contrast in the image by making dark areas darker and light areas lighter, and it makes colors appear richer and more vibrant. Here's the result I get just by changing the filter's blend mode to Soft Light:

Another blend mode to try is Overlay, which gives us results that are similar to Soft Light but the effect is more intense. I'll change my blend mode from Soft Light to Overlay in the Blending Options dialog box:

And here, we see that the glow effect is now much stronger:

Step 4: Lower The Filter's Opacity
To reduce the intensity of the glow, simply lower the opacity of the Gaussian Blur Smart Filter. You'll find the Opacity option directly below the Blend Mode option in the Blending Options dialog box.
Lowering the opacity of a Smart Filter has the same effect as lowering the opacity of an actual layer. The more we lower it from its default value of 100%, the more the original image shows through. I'll leave my blend mode set to Overlay for the moment and I'll lower the opacity down to 60%. I'm just experimenting here, and the values I'm using may be different from yours. Again, keep an eye on your image as you make these changes to judge the results:

And here, we see that the intensity of the glow has been reduced:

I think the effect is still a bit too strong, so I'll switch my blend mode back to Soft Light. But since Soft Light produces a more subtle effect, I'll increase the opacity to around 80%:

When you're happy with how your image looks, click OK to close out of the Blending Options dialog box. Here's my final result. Or at least, the result I think I'm happy with for the moment :

Step 5: Edit The Gaussian Blur Filter Settings (Optional)
So far so good, yet here we are near the end of the tutorial and we still haven't seen anything special about Smart Filters. Sure, we were able to change the blend mode and the opacity of the Gaussian Blur filter, but as we saw in the previous tutorial when we created a static version of this effect, we could have done the same things using a normal layer. What's so "smart" about Smart Filters?
What makes them smart is that, unlike normal filters in Photoshop, Smart Filters are completely editable. Now that I've been staring at my image for a few minutes, what if I start thinking,"You know, maybe a stronger blur amount would look better." I'd like to go back and change the radius value in the Gaussian Blur dialog box. If we had created the effect using the more traditional method without Smart Filters, there would be no easy way to do that. I'd have to either start over again, or at the very least, undo all of my steps to get back to the point just before I applied Gaussian Blur, which may or may not even be possible depending on how many steps I've done since then (Photoshop only lets us go back so far).
With Smart Filters, going back and making changes is never a problem. We can re-open a Smart Filter's dialog box and change any settings we like at any time, with no loss in image quality! All we need to do is double-click on the Smart Filter's name in the Layers panel. This will re-open its dialog box, ready for us to make our changes. For example, to re-open my Gaussian Blur dialog box, I'll simply double-click directly on the words "Gaussian Blur":

The Gaussian Blur dialog box re-appears. To increase the blur effect, I'll drag the Radius slider a bit more to the right, raising the value from 8 pixels (my original setting) to somewhere around 20 pixels. You'll find that as you increase the radius value, you'll lose a bit of contrast in favor of a softer look, which may or may not work better depending on your image. Click OK when you're done to close out of the Gaussian Blur dialog box once again:
Toggling The Smart Filter On And Off
You can toggle the effects of the Smart Filter on and off in the document to compare your results with the original image. This can help you decide if you need to go back and make further changes. To temporarily hide the effect, click on the visibility icon (the eyeball) directly to the left of the filter's name in the Layers panel:

With the filter off, we see the original image:
Click the visibility icon once again (the same spot where the eyeball appeared) to turn the Smart Filter back on and view the soft glow effect. And here, after increasing the radius value thanks to my editable Smart Filter, is my "new" final result:
And there we have it! That's how to enhance your images with a soft glow effect and keep the effect fully editable from start to finish using the power of Smart Objects and Smart Filters in Photoshop! Check out our Photo Retouching section for more Photoshop image editing tutorials!