
Sharpen Images With High Pass In Photoshop
In this Photoshop tutorial, we're going to learn how to easily sharpen an image using Photoshop's High Pass filter. While debates continue over which of Photoshop's two main sharpening filters is better, "Unsharp Mask" or the new (as of CS2) "Smart Sharpen", one method of sharpening images remains not only highly effective but also much easier to use than either of those sharpening filters, and that's by using Photoshop's High Pass filter.
The reason the High Pass filter technique works so well at sharpening images is because any areas in the image which are not an edge are left untouched. The only areas that have sharpening applied to them are the edges, which is exactly what you want, and also what all of those confusing options in the "Unsharp Mask" and "Smart Sharpen" filters are trying to help you achieve.
With the High Pass filter, you can often get better results than either of the sharpening filters can give you without fumbling around with confusing options. In this Photoshop tutorial, we'll look at how to use it.
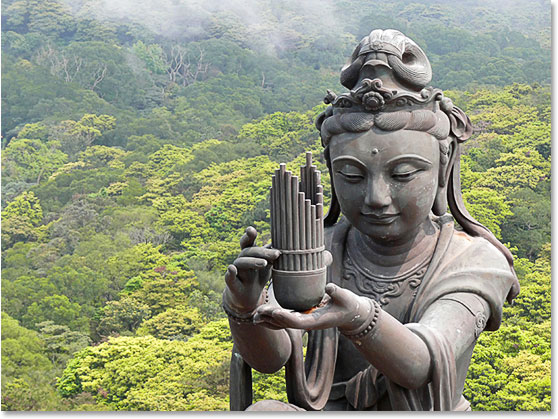
Here's the image I'll be using for this tutorial:

Here's how it will look after sharpening it with the High Pass filter:
Let's get started!
Step 1: Duplicate The Background Layer
The first thing we need to do is duplicate the Background layer, so I'll do that using the quick keyboard shortcut Ctrl+J (Win) / Command+J (Mac). I can see in my Layers palette now that I have my original Background layer at the bottom, which contains my original pixel information, and the duplicate of it, which Photoshop automatically names "Layer 1", above:

Step 2: Change The Blend Mode Of The Duplicate Layer To "Overlay"
Next, we need to change the blend mode of the duplicate layer from "Normal" to "Overlay". The reason is that the High Pass filter is going to turn all non-edge areas of the image into neutral gray, and the Overlay blend mode leaves all neutral gray areas alone, which means no sharpening will be applied to any of those areas. So to do that, go up to the Blend Mode options in the top left corner of the Layer Styles dialog box, click on the down-pointing arrow to the right of the word "Normal", and select Overlay from the list:

Your image will now appear to have way too much contrast, as we can see here with mine:

Don't worry, it's only temporary. We're changing the blend mode now so that we can see a preview of our sharpening being applied with the High Pass filter, which we'll do next.
Step 3: Apply The "High Pass" Filter To The Duplicate Layer
Now that we have the blend mode set to Overlay, which is going to allow us to see a preview of what we're doing, we can apply the High Pass filter. To do that, go up to the Filter menu at the top of the screen, choose Other down near the bottom, and then choose High Pass. This brings up the High Pass filter dialog box:
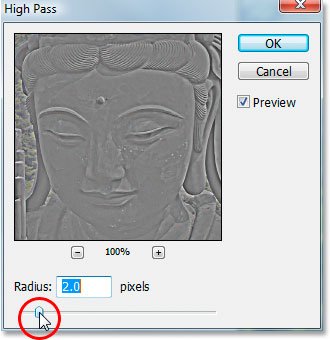
Photoshop's High Pass filter is very simple to use. It has a slider bar at the bottom to increase or decrease the intensity of the filter (the "Radius" value), as well as an input box if you'd prefer to type a value directly into it, and that's all there is to it except for the large preview area and the "Preview" checkbox in the top right corner. Definitely much simpler than "Unsharp Mask" or "Smart Sharpen".
To sharpen your image with the High Pass filter, keep an eye on your image in the document window and adjust the Radius value by dragging the slider bar left or right. As you drag towards the right, you'll be adding more sharpening, and as you drag to the left, you'll be reducing the amount of sharpening. You're going to want to start off with a very low radius value, somewhere between 2-5 pixels, and even that may be too much depending on the pixel dimensions of your image. I'm using a small version of the image for this tutorial, and I can already see that 2 pixels is too high. If you go too high, you'll begin to see a halo effect around the edges of your image, and you want to avoid that, so back off on the radius value by dragging the slider bar to the left once the halos begin to appear.
For my image, and again I'm using a small version of the photo for this tutorial, I'm going to set my Radius value to 1.2 pixels, which gives me a nice amount of sharpening around the edges in the image without sharpening any non-edge areas:

Here's my image after sharpening it with a radius value of 1.2 pixels:

If you're working on a larger image, which you probably area if the image came out of your digital camera, you'll most likely end up using a higher radius value, but again, don't go too far. Lower pixel values work best.
There's a couple of things we can do now to fine-tune the sharpening, which we'll look at next.
Step 4: Change The Blend Mode To "Soft Light" Or "Hard Light" If Needed To Adjust Sharpening
Now that we've applied our sharpening to the image, one of the ways we can fine-tune it is by changing the blend mode of our duplicate Background layer. Right now, we're using the "Overlay" blend mode, which is sort of the "average" amount of sharpening. If you want to increase the sharpening amount, go back up to the Blend Mode options in the top left corner of the Layers palette, click on the down-pointing arrow to the right of the word "Overlay" and change the blend mode to Hard Light:

If you want to reduce the amount of sharpening, change the blend mode from "Overlay" to Soft Light, again by clicking on the down-pointing arrow in the top left of the Layers palette and selecting "Soft Light" from the list:

For comparison, here's the same image using all three blend modes to adjust the sharpening. The image on the left is using Soft Light, the one in the middle is set to Overlay, and the one on the right is set to Hard Light:
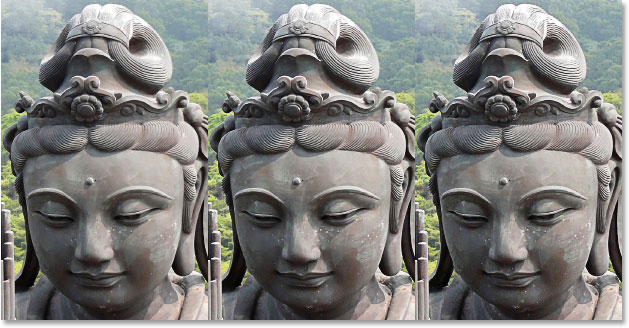
The difference may not be easy to see on your monitor with these low resolution images, but if you're working on larger images, the difference between the three blend modes will be more apparent.
Step 5: Reduce The Sharpening Amount By Lowering The Layer Opacity
Another simple way to fine-tune the sharpening is by adjusting the duplicate layer's opacity value. Lowering the opacity value will reduce the amount of sharpening. You'll find the Opacity option in the top right corner of the Layers palette, directly beside the blend mode options. I'm going to set my blend mode to Hard Light and then lower the opacity of the layer to 80%:
Here, after lowering the opacity, is my final result:
And there we have it! That's how to sharpen images with the High Pass filter in Photoshop! Check out our Photo Retouching section for more Photoshop image editing tutorials!