
How To Replace The Sky In A Photo With Photoshop
In this Photoshop tutorial, we'll learn how to easily replace the sky in a photo! We'll use a basic selection tool and a layer mask to separate the sky from the area below it, then we'll learn how Photoshop's Advanced Blending sliders make it easy to hide the original sky so the new sky can takes its place!
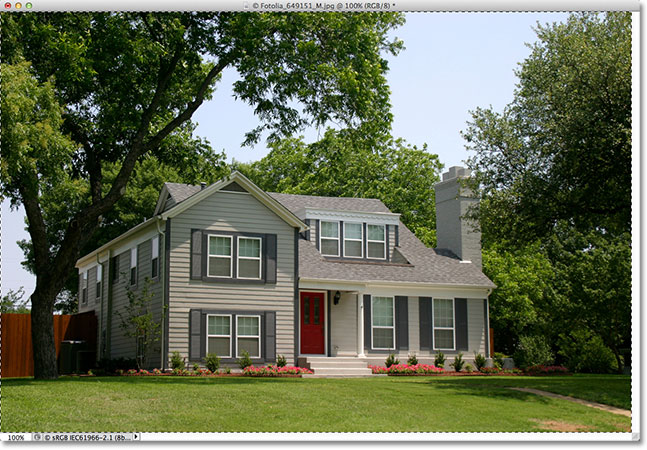
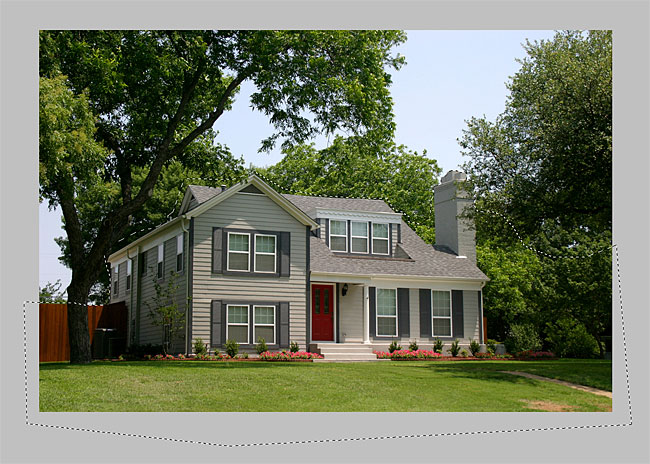
Here's the photo I'll be starting with. I purposely chose this photo because of all the trees, with the sky poking through the leaves and branches. You may be thinking that the Magic Wand or the Color Range Command would be good choices for selecting the sky, but in this tutorial, we're going to learn how to use the Advanced Blending sliders, found in the Layer Style dialog box, to both select the original sky and hide it from view at the same time:

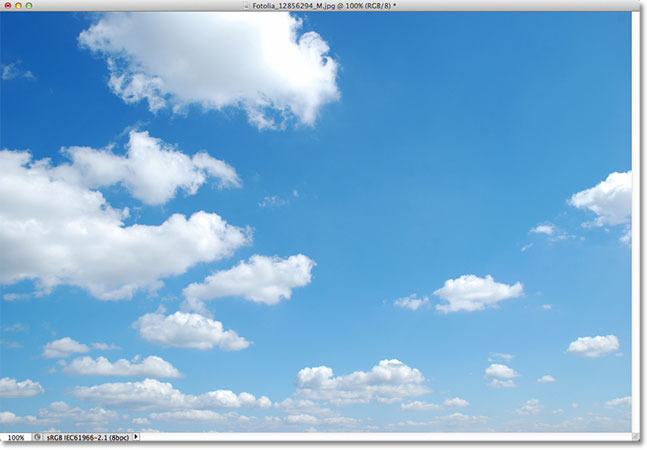
Here's the image of the sky I'll be using the replace the original sky in the above photo. One thing I should point out before we continue is that both of these photos have the exact same pixel dimensions (width and height). To keep things simple, you'll want to make sure that both of your photos are the same size as well, which may mean you'll need to resize one of them before moving on:
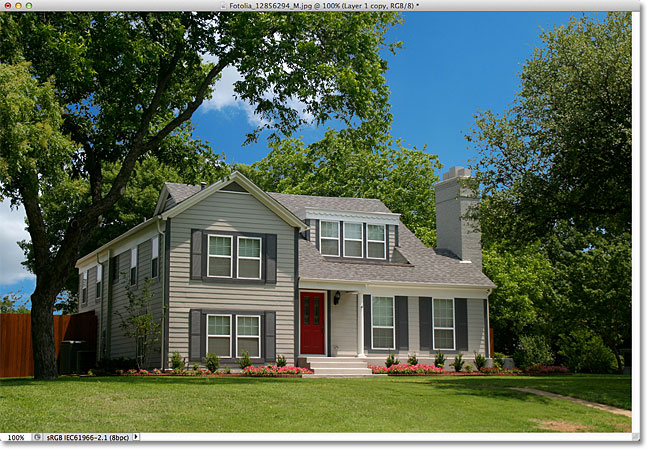
Here's what the final result will look like with the new sky added in:
I'll be using Photoshop CS5 for this tutorial but any recent version of Photoshop will work. Let's get started!
Step 1: Select And Copy The Original Photo
The first thing we need to do is move both of our photos into the same document so we can blend them together. With both your original photo and your replacement sky photo open in Photoshop, make sure the original photo's document is active, then press Ctrl+A (Win) / Command+A (Mac) on your keyboard to select the image. You'll see a selection outline appear around its edges. Once the photo is selected, press Ctrl+C (Win) / Command+C (Mac) on your keyboard to copy the image to the clipboard:
Step 2: Paste The Original Photo Into The Sky Photo's Document
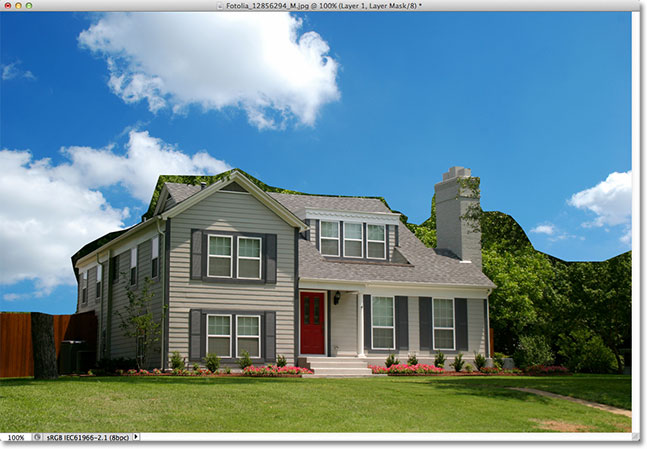
Switch over to the replacement sky photo's document, then press Ctrl+V (Win) / Command+V (Mac) on your keyboard to paste the original photo into the document. If we look in the Layers panel, we see that Photoshop placed the original photo on its own layer (Layer 1) directly above the sky photo on the Background layer, which is why the original photo is now blocking the sky photo from view in the document window:
Step 3: Duplicate Layer 1
Photoshop's Advanced Blending sliders, which we'll be using shortly, can select and hide areas of an image based on their color, which means they should have no problem selecting and hiding the blue sky without affecting the green trees. But when we tell the blending sliders to hide areas of blue, they won't simply look at the sky. They'll look across the entire photo and hide all areas that contain blue. Remember that other colors may also contain blue, especially gray or white which contain every color, which means there's a good chance other areas of the photo will be affected by the sliders unless we first take steps to prevent that from happening, which is what we're about to do.
The first thing we'll do is make a copy of our main photo. Make sure Layer 1 is active in the Layers panel (it should be highlighted in blue), then press Ctrl+J (Win) / Command+J (Mac) on your keyboard to quickly duplicate the layer. Nothing will seem to have happened in the document window, but we can see in the Layers panel that we have now a copy of Layer 1 above the original:
Step 4: Turn The Top Layer Off
We don't need the top layer (Layer 1 copy) for now, so click on its visibility icon (the eyeball) on the far left of the layer to temporarily turn it off and hide it from view in the document:
Step 5: Select Layer 1
Click on Layer 1 in the Layers panel to once again make it the active layer:
Step 6: Select The Area Below The Sky
Next, we'll draw a selection outline around the area of the photo below the sky. In other words, the area we want to protect from the Advanced Blending sliders. You can use Photoshop's standard Lasso Tool for this if you like. I prefer using the Polygonal Lasso Tool which I'll select by clicking on the Lasso Tool icon in the Tools panel and holding my mouse button down until the fly-out menu appears. Then I'll choose the Polygonal Lasso Tool from the menu:
With the Polygonal Lasso Tool in hand, I'll click around the area I want to protect to select it. For the most part, I can be fairly loose with my selection through the trees as long as I stay below any areas where the blue sky is showing through. The only part where I need to be more precise with my selection is along the top of the house, especially the area around the top of the chimney where it's completely exposed to the sky above it. The chimney and sky are very similar in tone and color which will cause problems with the Advanced Blending sliders, so I'll need to be careful and keep my selection tight around the top of the chimney:
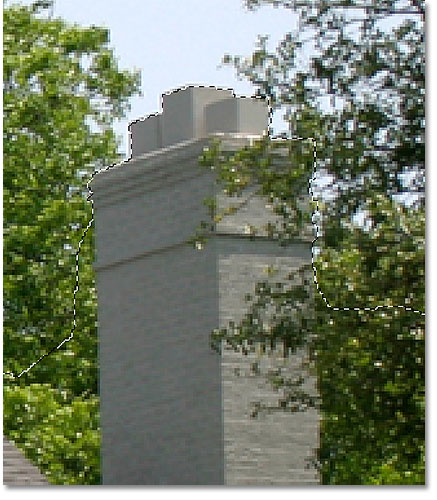
Other than that, the selection is pretty simple. Everything I want to protect from the Advanced Blending sliders is now selected:
Step 7: Add A Layer Mask
Now that we've selected the area we're protecting, let's convert the selection into a layer mask. Click on the Layer Mask icon at the bottom of the Layers panel:
Photoshop adds a new layer mask to Layer 1, and if we look at the mask's preview thumbnail in the Layers panel, we see that the area we selected is filled with white, which means it should still be visible in the document, while the area that was not selected is filled with black and should now be hidden from view:
And if we look at the image in the document window, sure enough, that's exactly what we see. The area I selected is still visible, while the area above it is now hidden, revealing the sky photo on the Background layer below it. We've replaced the sky in the original photo, but it's not looking terribly professional just yet:
Step 8: Select And Turn On The Top Layer
Click on the top layer (Layer 1 copy) to make it the active layer, then click on its visibility icon to turn the layer back on in the document:
The entire original photo will re-appear in the document window:
Step 9: Open The Blending Options And Change The "Blend If" Option To Blue
Double-click directly on the top layer's preview thumbnail in the Layers panel:
This opens Photoshop's Layer Style dialog box set to the Blending Options in the middle column. What we're looking for are the two slider bars at the bottom of the dialog box, in the Advanced Blending section. Directly above the slider bars is the Blend If option which, by default, is set to Gray. Click on the word Gray and choose Blue from the list that appears:
Step 10: Drag The Top Right Slider Towards The Left
As soon as you change the option to Blue, the two slider bars will change from black-to-white gradients to black-to-blue gradients. You can ignore the slider bar at the bottom. The one we want is the top one (the one that says This Layer above it). Click on the small slider below the far right of the top bar and begin dragging it towards the left:
As you drag the slider, you'll begin to see the original sky in the photo disappearing, revealing the replacement sky underneath. Notice that the area we selected back in Step 6 is not being affected by the slider. Only the sky itself is disappearing. Continue dragging the slider towards the left until most of the original sky is gone:

Step 11: Adjust The Transition Between The Photos To Remove Fringing
The only problem now is that we're seeing a lot of harsh edges and fringing around the trees and leaves, which is color that's left over from the original sky. To fix that, we need to soften the transition between the two photos, and to do that, we need to split the slider in half.
Release the slider for a moment, then press and hold your Alt (Win) / Option (Mac) key on your keyboard. With the key held down, click back on the slider and continue dragging it towards the left. This will split the slider into two halves that we can now drag independently of each other (you can release your Alt / Option key at this point). We can adjust the softness of the transition between the original photo and the replacement sky photo by increasing or decreasing the distance between the two halves of the slider.
Keep an eye on your image in the document window as you drag each half of the slider left or right until all of the fringing around the trees and leaves (and anywhere else you happen to notice fringing) disappears:
When you're done, click OK in the top right corner of the Layer Style dialog box to close out of it. Here's my final result after removing the fringing:
And there we have it! That's how to easily replace the sky in a photo using a simple selection, a layer mask and the Advanced Blending sliders in Photoshop! Check out our Photo Retouching section for more Photoshop image editing tutorials!