How to Make Someone Smile with Photoshop’s Liquify Filter
Learn how to quickly add a smile to your subject, or improve an existing smile, with Photoshop and its easy-to-use Liquify filter! Exclusively for Photoshop CC.
Back in 2016, Adobe added a powerful new feature to Photoshop's Liquify filter known as Face-Aware Liquify, which lets Photoshop automatically detect facial features in your image. And in this tutorial, I'll show you how to use Face-Aware Liquify, along with its Face Tool, to easily curve and reshape a person's mouth into a perfect smile!
Of course, smiles don't exist on their own. Other features, like the eyes and cheeks, also come into play. So along with adding a smile, I'll show you how to make the smile more realistic with a few simple adjustments to other facial features as well.
If you're using Photoshop CC, you have your own reason to smile, since Face-Aware Liquify is only available in the most recent versions of Photoshop. Let's see how it works!
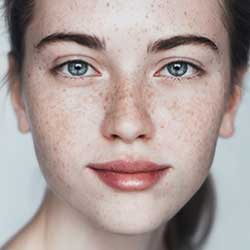
For this tutorial, I'll use this image from Adobe Stock:

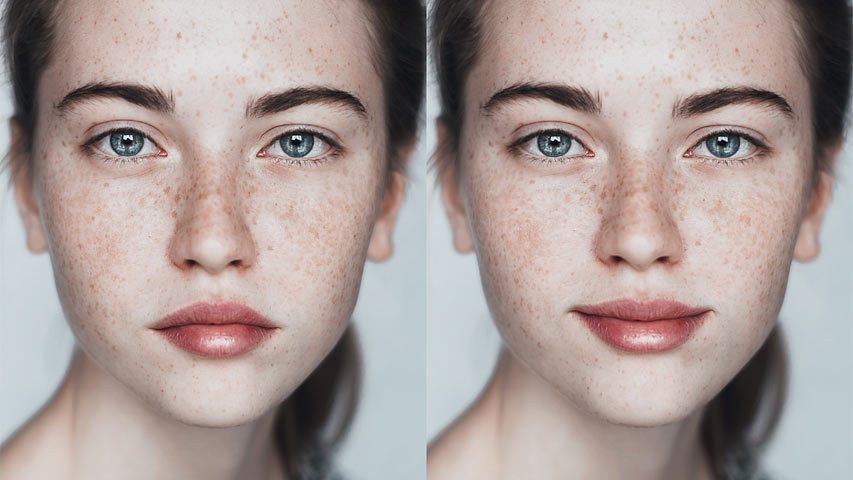
And here's how it will look with her rather serious expression transformed into a warm, friendly smile:

Let's get started!
How to add a smile in Photoshop
We'll start by learning how to add the initial smile using a single, quick adjustment. And then I'll show you how to enhance the smile with some additional adjustments.
Step 1: Convert the Background layer into a smart object
In the Layers panel, we see the image on the Background layer:

To make our subject smile, we'll use Photoshop's Liquify filter. And the best way to use Liquify is to apply it as a smart filter. Smart filters are non-destructive, so we won't make any permanent changes to the image. And they're fully editable, so we can always go back and adjust our settings later.
To apply Liquify as a smart filter, we first need to convert the Background layer (or whichever layer your image is sitting on) into a smart object. Click the menu icon in the upper right of the Layers panel:
And then choose Convert to Smart Object from the menu:

A smart object icon appears in the lower right of the layer's preview thumbnail, telling us that our image is now safely inside a smart object:
Related: Resize images without losing quality with Smart Objects
Step 2: Rename the smart object "Smile"
Notice that the name of the smart object has changed from "Background" to "Layer 0". Before we go any further, let's give it a more meaningful name.
Double-click on the name "Layer 0" to highlight it:

And then change the name to "Smile". Press Enter (Win) / Return (Mac) on your keyboard to accept it:

Step 3: Select the Liquify filter
With our smart object in place, go up to the Filter menu in the Menu Bar and choose Liquify:

The image opens inside Photoshop's Liquify filter dialog box:

Step 4: Zoom in on the subject's face
Along the left of the dialog box is a toolbar. To zoom in on your image, select the Zoom Tool from the bottom of the toolbar:

And then click a few times on your subject's face to zoom in. Once you've zoomed in, press and hold your spacebar to temporary access the Hand Tool and drag the image to center it within the preview area:

Related: Tips, tricks and shortcuts for navigating images in Photoshop
Step 5: Select the Face Tool
To add or enhance your subject's smile, select the Face Tool from the toolbar. This is the tool we'll be using for most of our adjustments, and it's only available in Photoshop CC:

Step 6: Drag the curve of the mouth upward
With the Face Tool selected, move your mouse cursor over the person's mouth. Various icons will appear on the screen, each representing a different property of the mouth (Upper Lip, Lower Lip, Mouth Width, and so on). Hover your cursor over an icon to display a tool tip showing the property's name. Each property can be adjusted simply by clicking and dragging on its icon.
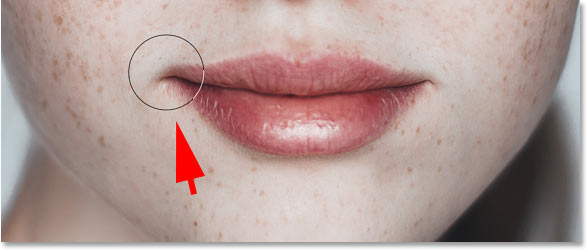
To adjust the smile, hover your cursor over one of the two Smile icons (the curved dotted line on either side of the mouth). Your cursor will change into a curved double arrow, and the tool tip will display "Smile":
Then, to bend and reshape the curve of the mouth, just click and drag upward:

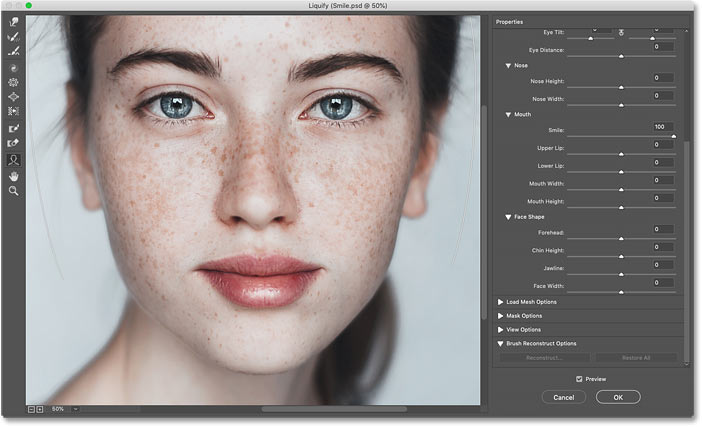
Using the Smile slider
Another way to reshape the smile is by dragging the Smile slider in the Properties panel along the right of the dialog box. You'll find it, along with sliders for the other mouth properties, in the Face-Aware Liquify section. Drag the Smile slider to the right to add more of a curve, or drag to the left to reduce it:

And just by dragging, either directly on the image or using the Smile slider in the Properties panel, we've given our subject a warmer, friendlier smile:
Comparing the two smiles
To compare the new smile with the original, toggle the Preview option on and off by clicking inside its checkbox. You'll find the Preview option just above the OK and Cancel buttons in the bottom right of the dialog box.
You can also toggle the preview on and off by pressing the letter "P" on your keyboard:

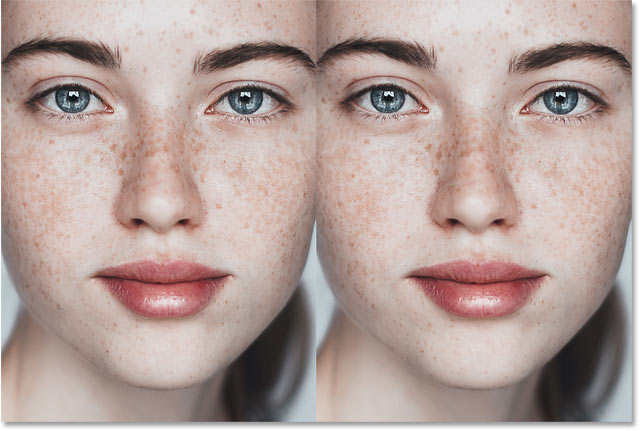
Here we see the original smile on the left, and the new smile on the right:

Step 7: Widen the smile with the Mouth Width slider
If the smile looks good enough to you at this point, you could stop here. Just click OK to close the Liquify filter dialog box and you're done! But there are a few more things we can do to enhance the smile.
One thing we can do is make the smile a bit wider. And we can do that using the Mouth Width slider in the Properties panel. Keep an eye on your image in the preview area and begin dragging the slider to the right. As you drag, the sides of the mouth expand outward.
Don't drag too far, since we still want our subject to look like herself (or himself). We're just widening the smile a little bit. With my image, a value of just 25 works well:

On the left is the original width of the smile, and on the right is the slightly wider smile. The difference is subtle, but in this case, subtle is what we want:
Step 8: Adjust the lip thickness with the Upper and Lower Lip sliders
You can also adjust the thickness of the person's lips using the Upper Lip and Lower Lip sliders in the Properties panel.
Note that these two sliders behave opposite to each other. Dragging the Upper Lip slider to the left reduces the thickness of the top lip, and dragging to the right increases it. But the opposite is true with the Lower Lip slider. Dragging left increases the thickness while dragging to the right decreases it.
I'll reduce the top lip by dragging the Upper Lip slider to -30. And I'll reduce the bottom lip even more by dragging the Lower Lip slider to 70. Of course, you'll probably want different values for your image, or you may not need to adjust the lips at all:

And here we see the original lips on the left and the adjusted, thinner lips on the right:
Step 9: Click and drag the cheeks upward
When we smile, it's not only our mouth that curves upward. Our cheeks also push upward. And just like we've done with the mouth, we can adjust the person's cheeks using the Liquify filter's Face Tool.
You won't find a slider for the cheeks in the Properties panel. But if you move your mouse cursor over one of the cheeks in the preview area, your cursor will change into a four-pointed directional arrow. And the tool tip will display "Move Cheek":

Try to follow the natural curve of the mouth as you click on the left cheek and drag it upward and a bit to the left. Then do the same thing with the right cheek, dragging it upward and slightly to the right:

And here are the original cheeks on the left and the raised cheeks on the right. The lighting in this image makes the difference less obvious, but the cheeks do look less flat and more rounded in the version on the right:

Step 10: Lower the height of the eyes
You may have noticed that by raising the cheeks, we also slightly raised the height of the eyes. But generally, people tend to look friendlier and more relaxed with the eyes lower. So let's bring the eyes back down, and again, we can do that using the Face Tool.
Hover your mouse cursor over the center of one of the eyes. The cursor will again change into a four-pointed directional arrow. And this time, the tool tip will display "Move Eye":

Then drag the eye down a short distance to its original location. You can even drag the eye a bit lower than its original height to give your subject a warmer, friendlier look. Press "P" on your keyboard to toggle the preview on and off so you can compare the original eye height with the new height. As always when making adjustments to facial features, subtle adjustments work best.
Once you've dragged the first eye, do the same thing with the other eye, lowering it by the same amount:

On the left is the original eye height after raising the cheeks, and on the right is the result after lowering the eyes back down:

Related: How to change eye color in Photoshop
Step 11: Select the Forward Warp Tool
And finally, one more way we can enhance the smile is by curling the corners of the mouth upward. But we can't do that with the Face Tool. Instead, select the Forward Warp Tool from the top of the toolbar:

Step 12: Drag the corners of the mouth upward
We'll start with the corner on the left. Position your brush cursor so that the corner of the mouth is roughly centered within the brush. Then change the size of the brush so that it's just large enough to include some of the surrounding area as well.
You can adjust the brush size from the keyboard. Press the left bracket key ( [ ) to make the brush smaller, or the right bracket key ( ] ) to make it larger:

Then simply click and drag the corner a short distance upward:
Do the same thing with the other side, centering the corner of the mouth within the brush cursor and then dragging upward:

Step 13: Click OK to close the Liquify filter dialog box
We're finished with our edits, so click OK to commit your changes and close the Liquify filter dialog box:

And with that, we're done! Here's a final comparison showing the original, unedited image on the left and the final result with the much nicer looking smile on the right:

How to toggle the Liquify filter on and off, and edit your settings
Back in the Layers panel, the Liquify filter is now listed as a smart filter below the "Smile" smart object. To toggle the filter on and off, click the visibility icon to the left of the filter's name. Turn the filter off to view the original smile, and then turn it back on to view the edited version.
If you need to make any changes, double-click on the filter's name to reopen the Liquify dialog box, edit your settings, and then click OK to once again close the dialog box:

And there we have it! That's how to add a smile to your subject using the Liquify filter and its Face-Aware features in Photoshop!
Check out our complete Face-Aware Liquify tutorial to learn more about this great feature. Or visit our Photo Editing section for more portrait retouching tutorials! And don't forget, all of our tutorials are now available to download as PDFs!