
Photoshop Black and White Conversions – Hue/Saturation Adjustment
In the previous tutorial in this series on the many ways of converting color photos to black and white in Photoshop, we learned how to create custom black and white photos by combining different amounts of the Red, Green and Blue color channels into a single grayscale image using the Channel Mixer.
The process itself was simple enough - drag a few sliders to control the amount that each channel is being added to the image while trying to keep the total amount of all three channels at 100% to avoid losing any highlight detail. Simple, perhaps, as long as you understand how color channels work and don’t mind being forced to think like a computer.
But what if you don’t want to think like a computer? What if you see yellow, for example, not as a mixture of equal parts red and green but as, well, yellow? What if you just want to be able to darken areas in your black and white version that used to be yellow simply by selecting Yellows from a list and dragging a slider to darken them? In this tutorial, we’ll see how to do exactly that. We’ll look at one of Photoshop’s best ways to convert color images to black and white, a way that gives us lots of control over the results and yet is so incredibly simple that if you can select colors from a list and drag a slider, you have all the skills you need! What magical tool is it that can make our life so simple? It’s actually one we’ve already looked at back at the beginning of this series. It’s time to take a second, more advanced look at Photoshop’s Hue/Saturation adjustment!
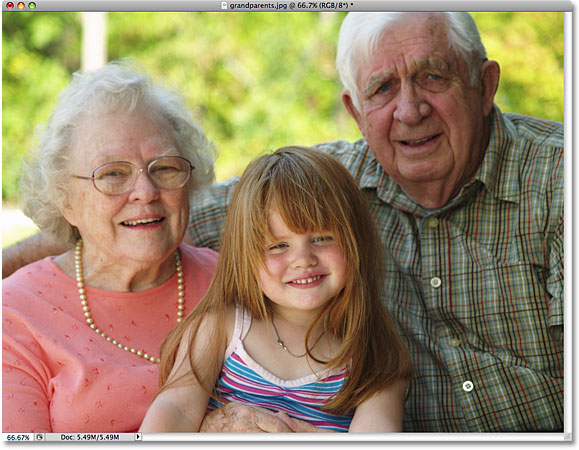
Here, for the last time, is the photo I’m using throughout this series of tutorials:
Let's get started!
Step 1: Add A Hue/Saturation Adjustment Layer
As with most of Photoshop's image adjustments, the Hue/Saturation adjustment comes in two flavors. There's the standard version which makes changes directly to the image itself and there's the adjustment layer version. As we learned in the Non-Destructive Photo Editing with Adjustment Layers tutorial, it's always best to work with adjustment layers because we get the exact same results as we'd see with standard image adjustments (found under the Image > Adjustments menu in the Menu Bar at the top of the screen) without harming a single pixel in the original photo.
To add a Hue/Saturation adjustment layer, click on the New Adjustment Layer icon at the bottom of the Layers palette (it's the circle split diagonally between black and white) and choose Hue/Saturation from the list of adjustment layers that appears:
You'll see the new Hue/Saturation adjustment layer appear directly above the Background layer in the Layers palette:

Step 2: Desaturate The Photo
If you’re using Photoshop CS4 as I’ve been using in these tutorials, you’ll find the various controls for the Hue/Saturation adjustment layer in the Adjustments Panel, which is new to CS4. If you’re using Photoshop CS3 or earlier, the controls will appear in a dialog box that pops open on your screen.
Creating a custom black and white version of a color photo using a Hue/Saturation adjustment layer is a two-step process. The first step, which we looked at back in the Desaturating the Color tutorial, is to create an initial black and white version by desaturating the color in the entire image, and we can do that simply by dragging the Saturation slider all the way to the left:

If we look at the photo in the document window, we see that all the color has been removed:

Step 3: Lighten Or Darken Different Colors In The Image
So far, so good. We’ve removed the color from the overall image. Well, big deal, right? We’ve already looked at plenty of ways to do that. So what makes the Hue/Saturation adjustment technique so special? What makes it special, since you asked, is that we can now create a custom black and white version by lightening or darkening specific areas of the image based on their original color!
If you look near the top of the Hue/Saturation dialog box (or the Adjustments Panel in Photoshop CS4, which I'll refer to as the dialog box from now on to keep things simple), you'll see an option that's currently set to Master:

This option allows us to choose which colors we're affecting in the image. As we can see, by default, the option is set to Master, which means that any changes we make to the sliders in the dialog box will affect all colors in the image equally. That's why we were able to desaturate all the colors at once when we dragged the Saturation slider to the left.
If you click on the word Master, a drop-down list will appear which allows us to select any of the six main colors in the image (red, yellow, green, cyan, blue, and magenta). By choosing a specific color, we can adjust only the areas in the image that originally contained that color, leaving all other areas unaffected. Once we've chosen the color we need, we can simply drag the Lightness slider towards the left to darken areas in the photo that originally contained that color, or drag the slider towards the right to lighten those areas.
For example, let's say I want to make the three people in the photo appear lighter. Even though I can't actually see the original color now that we've desaturated the image, I know that skin tone always contains lots of red, so I'll click on the word Master and select Reds from the list of colors that appears:

With Reds selected, I can now lighten the skin tones (as well as any other areas in the image that originally contained red) by dragging the Lightness slider towards the right. Keep an eye on your image in the document window as you drag the slider to judge the results. I'm going to drag my Lightness slider to a value of around +50, but your photo will be different from mine so use the setting that works best for your image:

The skin tones now appear lighter in the black and white version of the photo:

You can do the same thing with any of the six original main colors. Simply choose a different color from the list, then drag the Lightness slider left or right to darken or lighten any areas in the image that originally contained that color.
If you can't remember what the original color of an object or area was, click on the layer visibility icon (the "eyeball") on the left of the Hue/Saturation adjustment layer in the Layers palette to temporarily hide the adjustment layer from view:
This will hide the effects of the adjustment layer and temporarily restore the image to the full color version:
I think the background in my black and white version is a little too bright, and by looking once again at the full color version, I can easily see that the background contains mostly trees. Although trees appear green to us, there's actually more yellow than green in tree leaves and other plants, so if I want to darken that area of the photo, I'll need to select Yellows from the list of colors in the Hue/Saturation dialog box.
Before we select any other colors, though, we first need to turn the Hue/Saturation adjustment layer back on. To do that, click once again on the layer visibility icon in the Layers palette:

This will return the photo in the document window to its black and white state. To darken the trees in the background, I'll select Yellows from the list of colors in the Hue/Saturation dialog box:

Then, with the yellows selected, I'll darken the trees in the background, as well as any other areas in the image that originally contained yellow, by dragging the Lightness slider towards the left. Again, you'll want to keep an eye on your image in the document window as you drag the slider to judge the results, since all photos are different:

Here's my black and white version after darkening the trees in the background:

Don't be afraid to select the wrong color from the list and lighten or darken the wrong area of the image, since you can always drag the Lightness slider back to its original location to undo any changes you've made. Since we're using the adjustment layer version of the Hue/Saturation command, every change we make in the dialog box is completely separate from the image itself. No pixels in the original photo are ever harmed, so feel free to experiment as much as you like with the various colors and the Lightness slider until you're satisfied with the results.
Keeping The Black And White Version Fully Editable
If you think you'll want to come back to the image at some point in the future to make further tweaks to the black and white version, make sure you save the document as a Photoshop .PSD file. This will keep the Hue/Saturation adjustment layer intact in the Layers palette, allowing you to quickly re-open its dialog box and make any further changes you need.
In Photoshop CS3 or earlier, to re-open the Hue/Saturation dialog box at any time, simply double-click on its thumbnail in the Layers palette. Click OK in the top right corner of the dialog box when you're done making your changes to close out of it. In Photoshop CS4, click once on its thumbnail in the Layers palette to view the Hue/Saturation controls in the Adjustments Panel:

As we’ve seen, Hue/Saturation adjustment layers make it easy, natural and fun to convert color photos to black and white, and if you’re using Photoshop CS2 or earlier, I think you’ll agree that this method is your best choice for getting great results without a lot of confusion or hassle.
If, on the other hand, you want the absolute best way of converting color photos to black and white and you’re using Photoshop CS3 or higher, you’ll definitely want to check out the Black and White image adjustment, brand new in Photoshop CS3!