Applying Smart Filters To Editable Type In Photoshop
In this tutorial, we'll learn how to apply filter effects to live, editable type in Photoshop by taking advantage of Smart Objects and Smart Filters! I'll be using Photoshop CC.
Photoshop has lots of powerful features for working with type, but one thing we can't do is apply filters to Type layers. That's because Photoshop's filters are designed for manipulating pixels, and type in Photoshop is made from vectors. That's a shame, because if we could somehow apply filters to our type, it would unlock a world of creative possibilities. If only there was some way to do it.
Thankfully, as we'll see in this tutorial, there is! In fact, there's a couple of ways, but one way is definitely better than the other. The classic, old school way of applying filters to type is to first rasterize the Type layer, which means converting it from vectors into pixels. Since filters are designed to work with pixels, we can then apply any filters we like to the text. But there's a couple of drawbacks to this approach.
The main problem is that once we've converted the Type layer into pixels, the text is no longer editable. And, whenever we apply filters to normal, pixel-based layers, the filters are applied as static effects, which means that like the text itself, they're not editable after we've applied them.
A better way to apply filters to type is to convert the Type layer into a Smart Object. A Smart Object is like a virtual container that holds the Type layer inside of it. Anything we do at that point is done not to the Type layer itself but to the Smart Object surrounding it. Photoshop lets us apply most of its filters to Smart Objects, all while keeping the Type layer inside fully editable. And, whenever we apply filters to Smart Objects, they're applied not as static effects but as Smart Filters!
What's a Smart Filter? In many ways, a Smart Filter is just like a normal filter, except that it remains fully editable even after we apply it. We can go back at any time, re-open the Smart Filter's dialog box and try different settings without any loss in quality, and without making permanent changes to the image (or in this case, to the type). Smart Filters have other features, too. We can turn Smart Filters on and off, apply multiple Smart Filters to the same Smart Object, and even change a Smart Filter's blend mode and opacity independently of the Smart Object itself. And, Smart Filters come with a built-in layer mask in case we don't want the effect(s) to be applied to the entire text. We'll be looking at all of these features throughout this tutorial.
Smart Objects and Smart Filters are two of the most powerful features in Photoshop, and when combined with Type layers, there's no limit to what we can do. Let's see how it works!
How To Use Smart Filters With Type
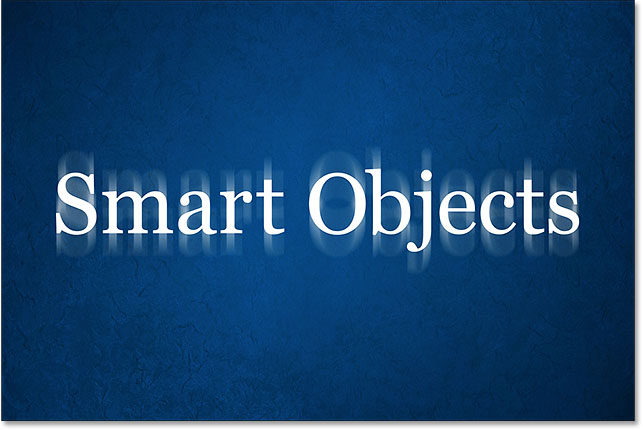
Here's a document that I have open in Photoshop CC. To save us some time, I've already gone ahead and added some text (the words "Smart Objects"). I downloaded the background image from Adobe Stock, but if you want to follow along, you can use anything you like for your background, just as long as you can see your text in front of it:

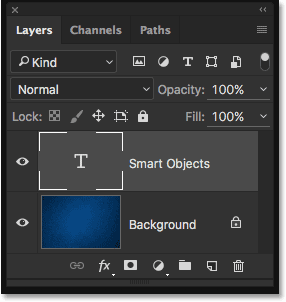
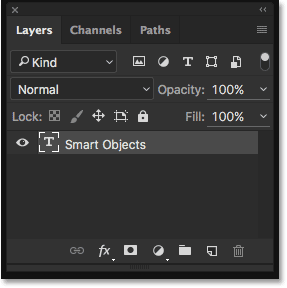
If we look in my Layers panel, we see that my document is made up of two layers; the blue image is on the Background layer, and my type is on a separate Type layer above it. We know it's a Type layer because of the letter "T" in the thumbnail:
Converting The Type Layer To A Smart Object
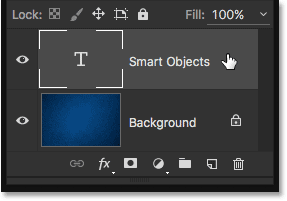
Let's see what happens if I try to apply one of Photoshop's filters to the Type layer. First, I'll click on the Type layer to make sure it's selected:
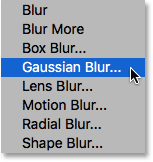
I'll try applying the Gaussian Blur filter. To do that, I'll go up to the Filter menu in the Menu Bar along the top of the screen, then I'll choose Blur, and then Gaussian Blur:
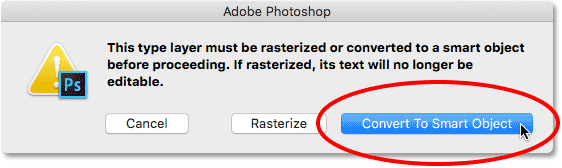
Rather than applying the filter, Photoshop pops up a dialog box warning me that the Type layer will need to either be rasterized or converted to a Smart Object before proceeding, and that the text will no longer be editable if I choose to rasterize it. I want to keep everything editable, so I'll click on the Convert To Smart Object button:
As soon as I choose "Convert To Smart Object", the Gaussian Blur filter's dialog box opens. But before we look at it, let's look again in the Layers panel to see what just happened in the background.
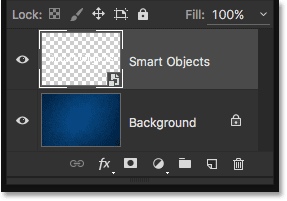
Notice that the Type layer is no longer a Type layer. The thumbnail, which previously displayed nothing but a letter "T", is now showing us the actual contents of the layer. And, a small icon now appears in the lower right of the thumbnail. This is a Smart Object icon, and it tells us that the layer has been converted to a Smart Object. The Type layer is still there, but it's now sitting inside the Smart Object. We'll see how to access and edit the Type layer a bit later on:
Applying A Smart Filter
Now that we've confirmed that the Type layer has in fact been converted to a Smart Object, I'll go ahead and apply the Gaussian Blur filter. I'll start by setting the Radius value to around 6 pixels. This tutorial isn't going to cover any specific filter in great detail. We're simply learning how to apply Smart Filters to type and the advantages that Smart Filters offer. Once you know the basics of how they work, you can easily experiment with your own filters and settings:

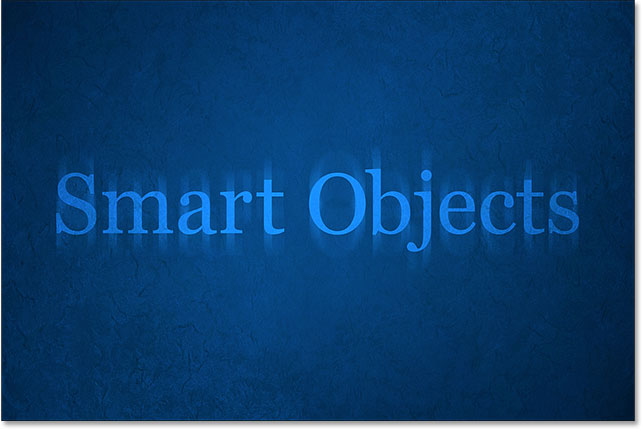
With the Radius value set, I'll click OK to close out of the Gaussian Blur dialog box, and here we see that I've added a fairly subtle blurring effect to the text:

Now that I've applied the Gaussian Blur filter, what if I decide that I need to change the blur amount? If I had simply rasterized the text and then applied Gaussian Blur directly to the pixel-based layer, the filter would not be editable at this point. The only way I could change the blur amount would be to either re-apply the filter over top of my initial blur effect (which means I'd be blurring the already-blurred text), or I would need to undo my last step and then re-apply the filter with a different setting.
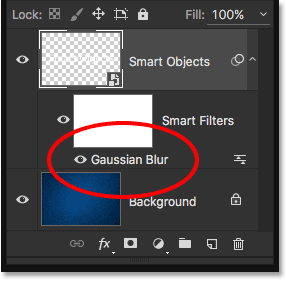
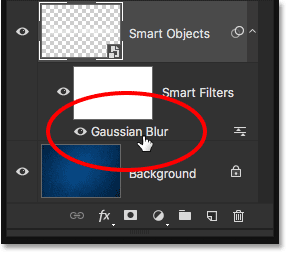
Yet because I applied Gaussian Blur to a Smart Object, Photoshop automatically converted it into a Smart Filter! If we look again in my Layers panel, we can see Gaussian Blur listed as a Smart Filter below the Smart Object:
Editing A Smart Filter
That's really all there is to applying filters as Smart Filters in Photoshop. We simply need to convert the layer into a Smart Object first, and then apply the filter to the Smart Object. Photoshop will automatically convert it into a Smart Filter.
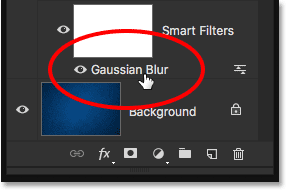
As I mentioned earlier, the main benefit with Smart Filters is that they can be edited after we've applied them. To re-open a Smart Filter's dialog box and change its settings, all we need to do is double-click on the filter's name in the Layers panel. I'll double-click on "Gaussian Blur":
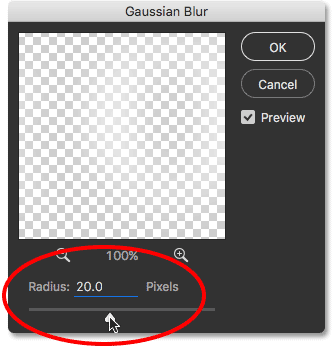
This re-opens the filter's dialog box to the settings that are currently being used (in my case, a Radius value of 6 pixels). Notice that I said the settings that are "currently being used", and that's because Smart Filters are entirely non-destructive. My Gaussian Blur filter wasn't actually applied to the type the way a normal filter would be permanently applied to a pixel-based layer. Instead, Photoshop is simply showing us a live preview of what the type looks like using my current Gaussian Blur settings. And because it's just a preview, we can change the settings at any time.
For example, I'll increase my Radius value from 6 pixels to 20 pixels:
I'll click OK to once again close the Gaussian Blur dialog box, and now we see that the blurring on the type appears much stronger. It's important to understand here that this is not a "second round" of blurring. In other words, Photoshop did not apply a 20 pixel blur on top of the previous 6 pixel blur. Instead, it replaced the previous setting with the new one, as if the previous one never happened:

To prove it, if I wanted to reduce the amount of blurring, I could just double-click on the Gaussian Blur filter's name once again to re-open its dialog box:
I'll lower the Radius value down to 2 pixels so it's even less than the initial amount (6 pixels):
I'll click OK to close out of the dialog box, and here we see that I've gone from a very noticeable 20 pixel blur a moment ago down to a very subtle 2 pixel blur, something that wouldn't be possible if I was just re-applying the Gaussian Blur filter over and over again. Yet thanks to Smart Filters, nothing we do is permanent. We can go back and change a Smart Filter's settings at any time:

Undoing Smart Filter Edits
I'm going to quickly undo my last step by going up to the Edit menu at the top of the screen and choosing Undo Edit Filter Effect (Gaussian Blur), or by pressing Ctrl+Z (Win) / Command+Z (Mac) on my keyboard:
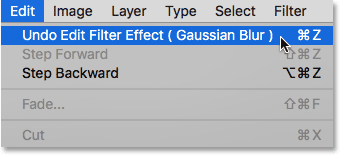
Notice that the name of the command is "Undo Edit Filter Effect", not "Undo Gaussian Blur". That's because my previous step wasn't adding the filter, it was editing the filter, and Photoshop considers adding and editing Smart Filters to be separate steps. When I choose the command, Photoshop undoes the last edit I made to the Gaussian Blur filter's settings, returning me back to my previous Radius value of 20 pixels. I could also have re-opened the dialog box and made the change manually, but undoing my last step was just faster. If I had additional filter edits I wanted to undo, I could step backwards through them one at a time by pressing Ctrl+Alt+Z (Win) / Command+Option+Z (Mac) repeatedly:
Showing And Hiding Smart Filters
Another feature of Smart Filters is that we can easily hide the filter's effect without deleting or undoing the filter. If we look directly to the left of a Smart Filter's name in the Layers panel, we see a little eyeball. This is the Smart Filter's visibility icon. To temporarily hide the effect and view the text without the filter applied, simply click the icon to turn the filter off:
With Gaussian Blur turned off, I'm back to seeing the original text without the blurring effect:
To turn the Smart Filter back on, click on the empty spot where the eyeball used to be:
And now we're back to seeing the text with the blur applied:
Deleting Smart Filters
What if I decide I don't need the Gaussian Blur filter at all? I could just turn it off by clicking its visibility icon like I did a moment ago, but if I really don't need it, I can just get rid of it.
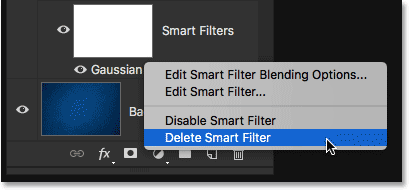
One way to remove a Smart Filter is to right-click (Win) / Control-click (Mac) on the filter in the Layers panel and choose Delete Smart Filter from the menu that appears. I find that this is generally the faster way to do it:
The more common way to delete a Smart Filter, though, is to simply click and drag it down onto the Trash Bin at the bottom of the Layers panel:
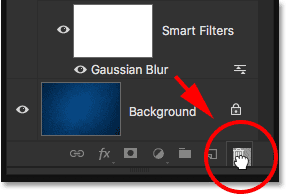
Either way removes the filter from the Smart Object:
Since I don't have any other Smart Filters applied at the moment, and since the Gaussian Blur Smart Filter didn't make any permanent changes to the document, my text returns to its original state:
Trying A Different Filter
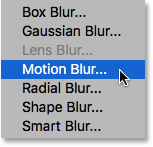
Thanks to their non-destructive nature, it's easy to try out and experiment with different Smart Filters without worrying about messing things up, since, as we've seen, we can always hide or delete them if we don't like the results. I'll add a motion blur to my text using Photoshop's Motion Blur filter. To apply it, I'll go up to the Filter menu at the top of the screen, then I'll choose Blur, and then Motion Blur:
This time, Photoshop doesn't warn me about first needing to either rasterize the Type layer or convert it to a Smart Object, and that's because it was already converted to a Smart Object back when I applied the Gaussian Blur filter. Instead, Photoshop goes ahead and opens the Motion Blur filter's dialog box.
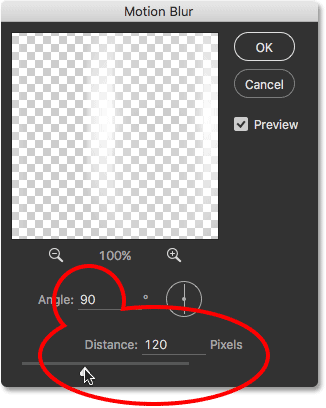
I'll create a vertical blurring effect by setting the Angle to 90°, and I'll increase the Distance to around 120 pixels:
I'll click OK to close out of the Motion Blur dialog box, and here we see the text with the motion blur applied:

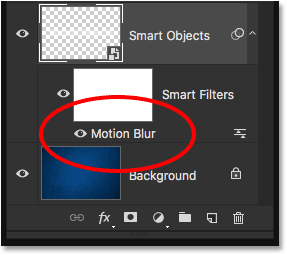
If we look in the Layers panel, we see Motion Blur listed as a new Smart Filter under the text:
Changing A Smart Filter's Blend Mode And Opacity
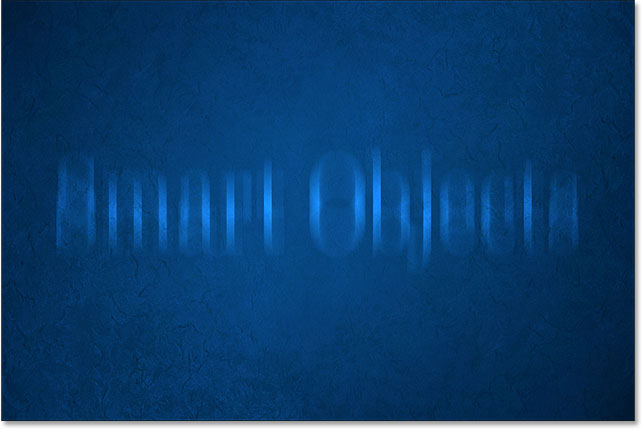
Another advantage that Smart Filters have over normal filters is that we can adjust the blend mode and opacity of a Smart Filter separately from the layer itself. If you're familiar with layer blend modes in Photoshop, you know that we can change a layer's blend mode in the upper left of the Layers panel. I'll change the blend mode of my Smart Object from Normal (the default mode) to Overlay:
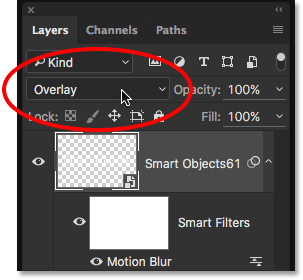
And here we see the result, with the entire effect (the type and the motion blur) blended in with the blue background:
I'll set the blend mode back to Normal:
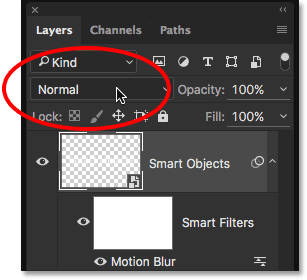
This returns us back to the way things looked before:
This time, I'll change the blend mode not of the layer (the Smart Object) but of the Motion Blur filter itself. To do that, I'll click on the Blending Options icon directly to the right of the Smart Filter's name. Each Smart Filter we add (we'll be learning how to add multiple Smart Filters in the next section) will have its own, independent Blending Options icon:
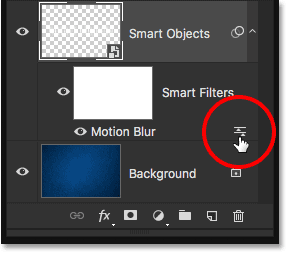
This opens the Blending Options dialog box, with the same blend mode and opacity options at the top that we would find in the Layers panel. The difference here is that these options will affect only the Smart Filter, not the contents of the Smart Object.
For example, I'll once again change the blend mode from Normal to Overlay. And while I'm here, I'll lower the opacity down to 80% so that the blurring effect isn't quite as intense:

I'll click OK to close out of the dialog box, and here we see a very different result. The Motion Blur filter is now blending not with the blue background but with the type inside the Smart Object, allowing the letters to show through the blurring effect. And, because I lowered the filter's opacity, the motion blur looks a little more faded than it did before, yet the type itself is not affected. It remains at 100% opacity:
Watch what happens if I now change the Smart Object's blend mode in the Layers panel back to Overlay. Remember, I've already used the Blending Options dialog box to change the blend mode for the Motion Blur filter itself to Overlay, and now I'm also changing the blend mode for the Smart Object to Overlay:

Here, we see yet another result that's different from the first two. Photoshop is first blending the Motion Blur filter in with the type, allowing the letters to show through the blurring effect. Then, it's blending the whole thing (the type and the blurring effect) in with the blue background. Being able to change a Smart Filter's blend mode and opacity separately from, or along with, the Smart Object itself lets us create unique looks for our text that wouldn't be possible using normal, static filters:
I'll set the Smart Object's blend mode back to Normal, but I'll leave the Motion Blur filter set to Overlay:

And now that the Smart Object is no longer blending in with the blue background, we're back to seeing white text:
Adding Multiple Smart Filters To The Type
So far, we've learned that to apply a Smart Filter to type in Photoshop, we first need to convert the Type layer into a Smart Object, at which point any filter we apply to it automatically becomes a Smart Filter. We've seen how to apply a single Smart Filter, but we can also apply multiple Smart Filters to the same Smart Object.
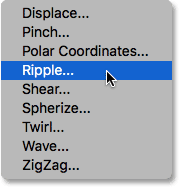
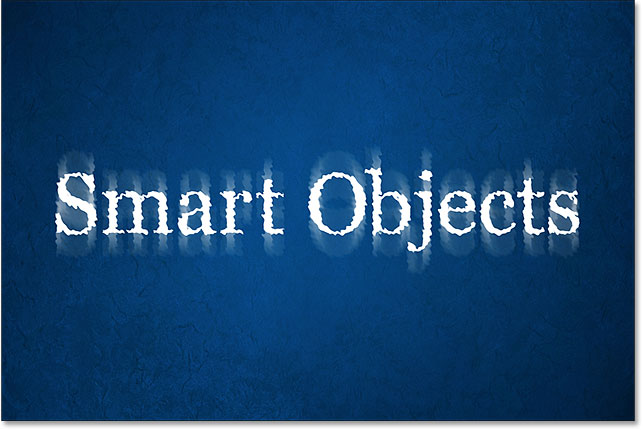
Let's say I'm happy with my motion blur effect, and now I'd like to add a second filter to my text. We've already tried a couple of the blur filters, so this time, I'll try something different. I'll go up to the Filter menu, then I'll choose Distort, and then Ripple:
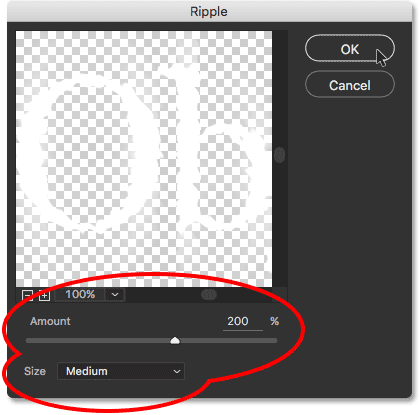
This opens the Ripple filter's dialog box. To make the effect easy to see in the screenshots, I'll set the Amount value to 200%, and I'll leave the Size set to Medium:
As its name implies, Photoshop's Ripple filter creates a water ripples effect. I'll click OK to close out of the dialog box, and here's the result. I now have two filters being applied to my type; first the Motion Blur filter and then the Ripple filter:
Changing The Order Of Smart Filters
If we look in the Layers panel, we see that Ripple has been added as a new Smart Filter above the Motion Blur filter:
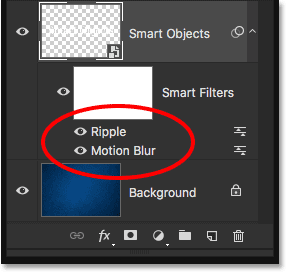
The order in which the Smart Filters are listed is important. That's because Photoshop applies the filters from the bottom up. In this case, it means that the Motion Blur filter is being applied to the type first (since it's the one at the bottom of the list) and then Ripple is applied after.
You may wonder why that matters, and it's because the order in which the filters are applied can change the overall appearance of the effect. For example, if I zoom in close, notice that at the moment, the motion blur streaks are showing the same ripple effect as the type. The reason is that the Ripple filter is being applied after the Motion Blur filter, so the ripple effect is being added not just to the type but also to the blur streaks:

To change the order of the filters, all we need to do is click on them in the Layers panel and drag them above or below the other filters. In my case, I'll click on the Ripple filter and drag it below Motion Blur. The white horizontal bar that appears tells me where the filter will be moved to when I release my mouse button:
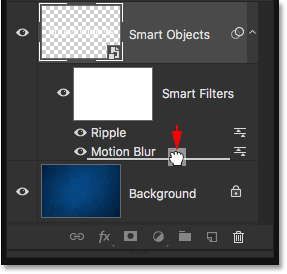
I'll go ahead and release my mouse button, at which point Photoshop drops the Ripple filter below Motion Blur:
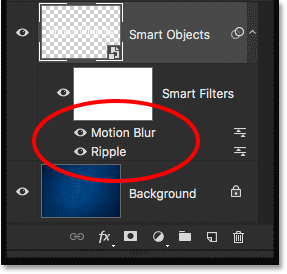
Since Ripple is now at the bottom of the list, it's being applied to the type first, and then Motion Blur is applied after it. If I zoom in again on the effect, we see that the blur streaks no longer have the ripple effect applied. Instead, we're seeing the opposite; the motion blur is now being applied to the ripples:

I think I liked it better before, so I'll undo my change and return the Motion Blur filter to the bottom of the list by going up to the Edit menu and choosing Undo Move Filter Effect, or by pressing Ctrl+Z (Win) / Command+Z (Mac) on my keyboard:

Adding A Third Filter
I'll add one more filter to my type, just for fun. I'll go up the Filter menu, then I'll choose Stylize, and then Wind:
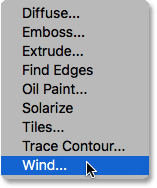
When the Wind dialog box appears, I'll leave the options set to their defaults, with Method set to Wind and Direction set to From the Right:
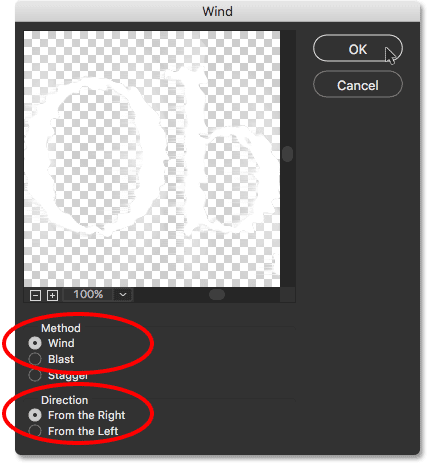
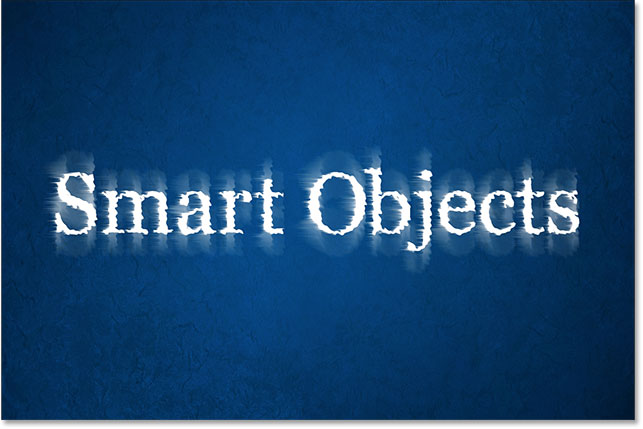
I'll click OK to close out of the dialog box, and here's the result, with the letters now looking like they're being blown toward the left by the wind. Again, if you look closely, you'll notice that the motion blur streaks also show the same wind effect as the type, and that's because the Motion Blur filter is being applied first, then the Ripple filter, and then the Wind filter on top of it:
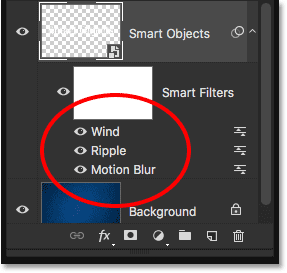
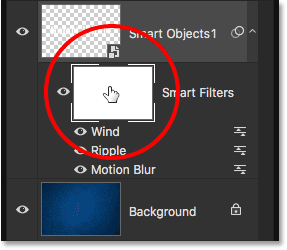
Here in the Layers panel, we see that Wind has been added as a new Smart Filter above the Ripple and Motion Blur filters. At this point, I could drag them up or down to change their order, or double-click on a filter's name to edit its settings. I could turn a filter off temporarily by clicking its visibility icon, or I could change a filter's blend mode or opacity by double-clicking on its Blending Options icon. There's so many possibilities with Smart Filters, but to keep us on track, I'll fight the urge to experiment and just leave everything the way it is:
Editing The Text
Even with three Smart Filters being applied to it, the text inside the Smart Object remains fully editable. The only issue that may cause a bit of confusion at first is that we can't simply grab the Type Tool, click on the text in the document and then edit it the way we normally would. That's because the text is sitting inside the Smart Object, so to get to the text, we first need to open the Smart Object.
To do that, double-click directly on the Smart Object's thumbnail in the Layers panel:

This will open your text in its own separate Photoshop document:

If we look in the Layers panel, we see that the document contains nothing more than a single Type layer:
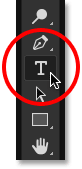
At this point, we can edit the text the way we normally would. I'll grab the Type Tool from the Toolbar along the left of the screen:
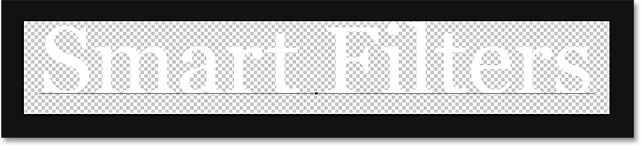
With the Type Tool in hand, I'll change my text from "Smart Objects" to "Smart Filters" by clicking and dragging over the word "Objects" to highlight it:
Then, I'll simply change it from "Objects" to "Filters":
To save our changes, we need to save the document by going up to the File menu at the top of the screen and choosing Save:
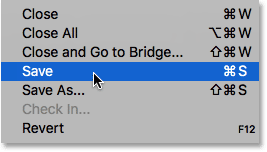
Then, since we don't need to have this document open anymore, we can close it by going back up to the File menu and choosing Close:
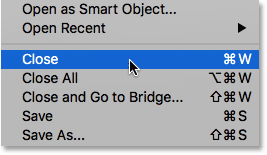
This closes the Smart Object's document and returns us to our main document where we find our text, along with our Smart Filter effects, updated with the changes we made:

Isolating The Filter Effects With The Layer Mask
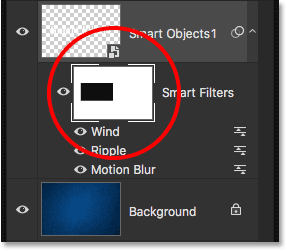
One last but important feature of Smart Filters in Photoshop is that they come with a built-in layer mask, which lets us isolate the filter effects to just a certain part of the text. If we look in the Layers panel, we can see the white-filled layer mask thumbnail directly above the list of Smart Filters. All filters in the list share the same mask.
To use the layer mask, we first need to click on its thumbnail to select it:
You can learn all about layer masks in our Understanding Layer Masks In Photoshop tutorial, but in short, the way the mask works is that areas filled with white on the mask are the areas where the effects of the Smart Filters are visible in the document. At the moment, as we can see in the thumbnail, the entire mask is filled with white, which is why we can see the filter effects across the entire text.
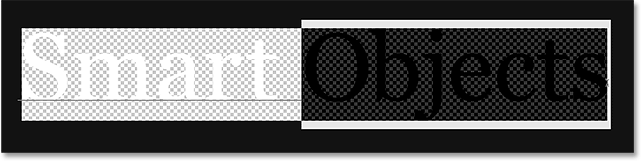
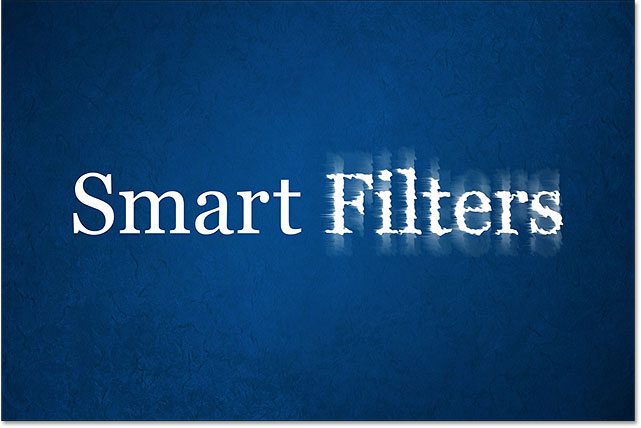
To hide the filter effects over a certain part of the text, we just need to fill that area of the mask with black. For example, let's say I want to hide the effects from the word "Smart" and leave them visible only on the word "Filters". To quickly do that, I'll grab Photoshop's Rectangular Marquee Tool from the Toolbar:
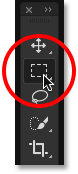
With the Rectangular Marquee Tool in hand, I'll drag out a selection box around the word "Smart" and its filter effects:

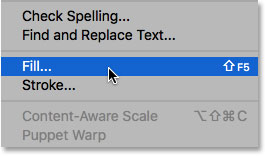
Then, with the layer mask selected, I'll fill the selection with black using Photoshop's Fill command. To get to it, I'll go up to the Edit menu and choose Fill:
When the Fill dialog box appears, I'll set the Contents option at the top to Black, and I'll leave the other options set to their defaults:
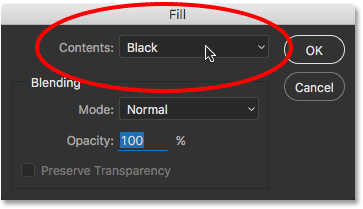
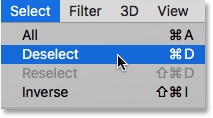
I'll click OK to close out of the dialog box, at which point Photoshop fills the selected area of the layer mask with black. To remove the selection outline, I'll go up to the Select menu and choose Deselect, or I could quickly press Ctrl+D (Win) / Command+D (Mac) on my keyboard. Either way works:
And now, after filling the selection with black, the filter effects no longer appear around the word "Smart", yet they're still visible around the word "Filters":
Let's take one last look in the Layers panel where we can see the area of the layer mask that's now filled with black. Again, to learn more about layer masks, be sure to check out our Understanding Layer Masks tutorial: