
How to Resize a Selection in Photoshop with Transform Selection
Learn how to resize a selection outline, including how to skew, distort and even warp your selection, without resizing the pixels inside it using the Transform Selection command in Photoshop! A step-by-step tutorial.
Download the PDF: Resize Selection Outlines With Transform Selection
Did you know that Photoshop has a feature that lets you resize a selection outline without resizing the pixels inside it? It's called Transform Selection. And in this tutorial, I show you how it works!
Which version of Photoshop do I need?
I'm using Photoshop 2022 but Transform Selection has been around forever so any recent version will work. You can get the latest Photoshop version here.
Let's get started!
Opening the image
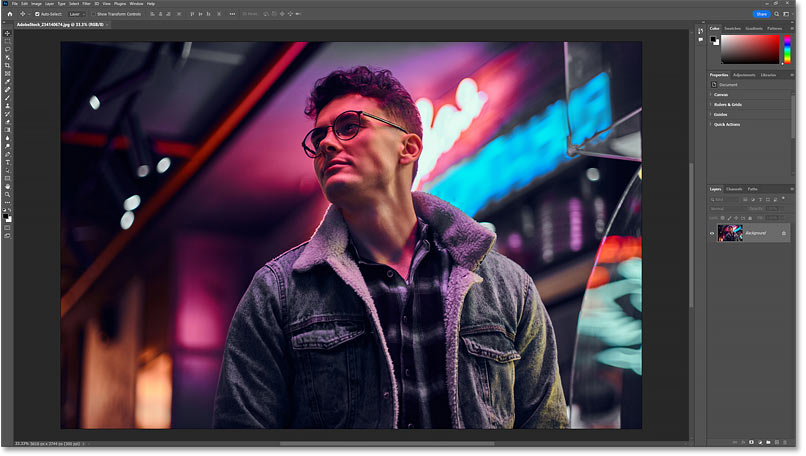
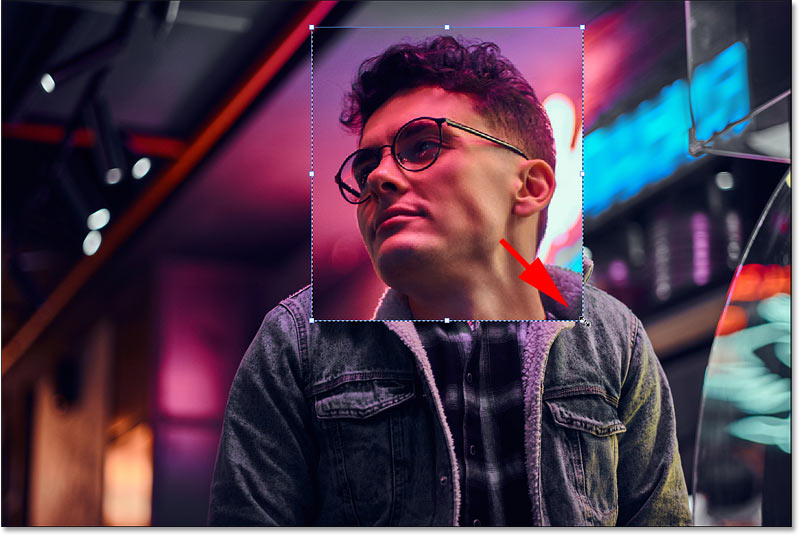
For this tutorial, I'll use this image from Adobe Stock.
Drawing an initial selection outline
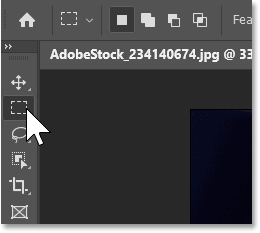
Transform Selection works best with geometric selection outlines, the kind you draw with the Rectangular or Elliptical Marquee Tool. So I’ll select the Rectangular Marquee Tool from the toolbar.
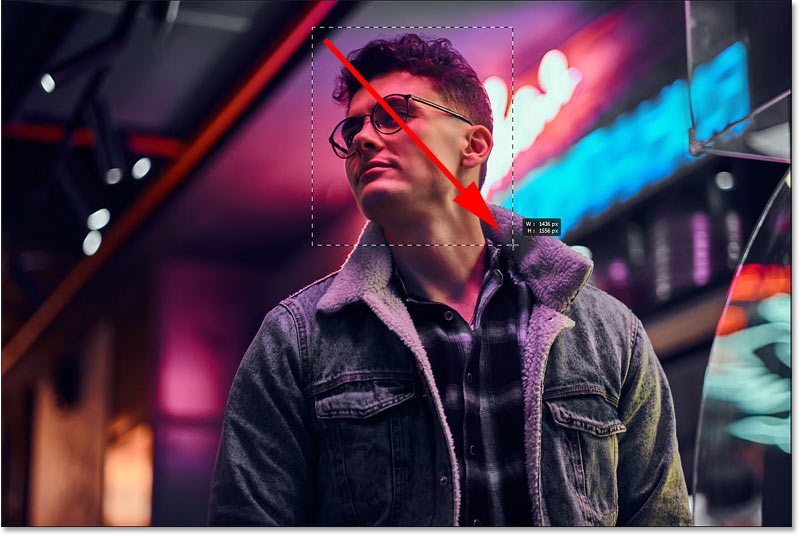
Then I’ll drag out an initial selection outline.
Resizing the image with Free Transform
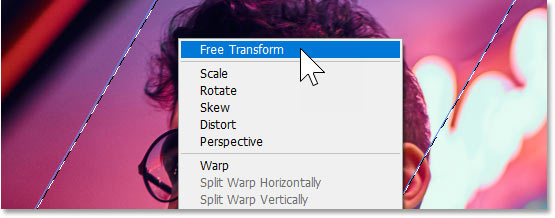
To show you the difference between Photoshop's Free Transform command and Transform Selection, I'll go up to the Edit menu in the Menu Bar and choose Free Transform.
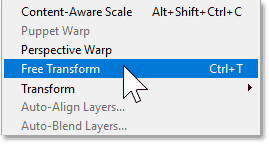
Photoshop places a transform box and handles around the selection. And because I'm using Free Transform, if I drag one of the handles, I resize the image inside the selection.
I’ll click the Cancel button in the Options Bar to undo that.
Where to find the Transform Selection command
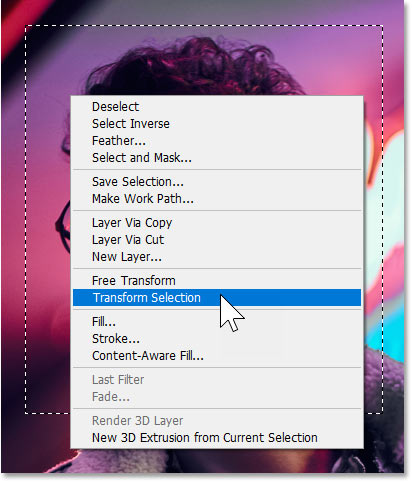
To resize just the selection outline, go up to the Select menu and choose Transform Selection.
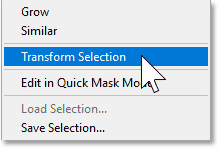
Or right-click inside the selection outline and choose Transform Selection from the menu.
Resizing the selection outline with Transform Selection
With Transform Selection active, the same transform box and handles that we saw with Free Transform appear around the selection. But this time when we drag a handle, the image remains in place and we resize the selection outline itself.

How to unlock the aspect ratio
In the Options Bar, the link icon between the Width and Height fields is active by default, which is why dragging a handle resizes the selection outline with the aspect ratio locked.
To unlock the aspect ratio, hold the Shift key on your keyboard as you drag the handles.

How to reposition the selection outline
You can click and drag inside the transform box to reposition the outline.

How to rotate the selection outline
And you can rotate the outline by clicking and dragging just outside it. Hold the Shift key as you drag to rotate the outline in 15 degree increments.

How to undo a transformation
To undo your last step with Transform Selection, press Ctrl+Z on a PC or Command+Z on a Mac. Press repeatedly to undo multiple steps.
The Skew, Distort and Perspective options
If you right-click inside the transform box, you have access to the same options that you have with Free Transform, including Skew, Distort, Perspective, and even Warp. But with Transform Selection, these options apply to the selection outline itself.
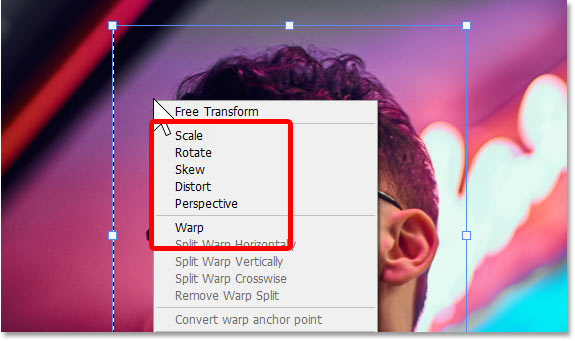
Skew
If you choose Skew from the menu:
You can drag the top or bottom handle left or right to skew the outline horizontally. Hold the Alt key on a PC or the Option key on a Mac as you drag to move both handles together in opposite directions.

And you can drag the left or right handle up or down to skew the outline vertically. Again hold Alt on a PC or Option on a Mac to move both side handles together in opposite directions.
Distort
If you right-click inside the transform box and choose Distort:

Then you can drag any of the corner handles on their own.
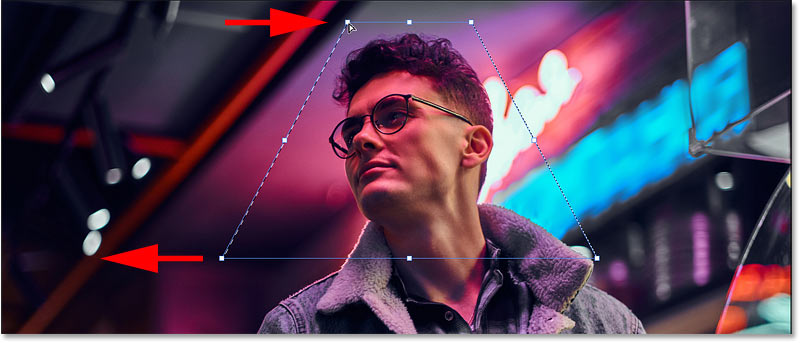
Perspective
And if you choose Perspective:
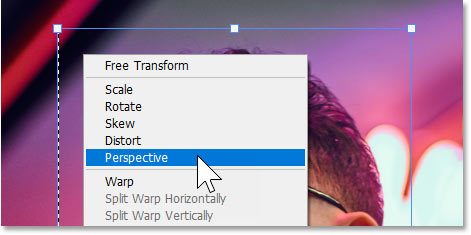
Then dragging a corner handle horizontally or vertically moves the opposite corner at the same time but in the opposite direction.
Here I'm dragging the top left handle inward, which moves the top right handle inward as well. And I'm dragging the bottom left handle outward which also moves the bottom right handle outward.
How to warp a selection outline with Transform Selection
If you right-click inside the Transform Selection box and choose Warp:
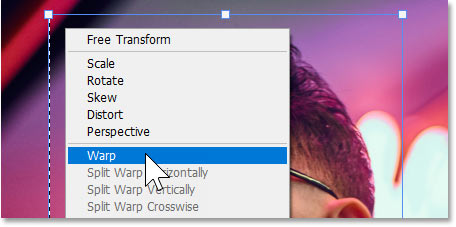
A grid appears in your selection outline. You can use the grid to warp the outline into different shapes.

You can drag a corner point. Each point can be moved independently of the others.
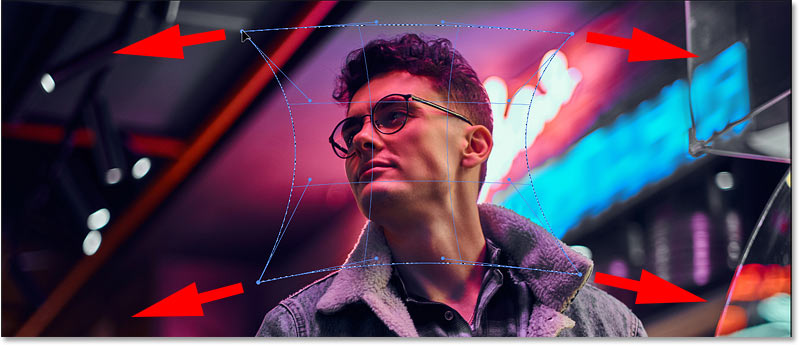
Or you can drag the direction handles that extend outward from the corner points.
And you can even click and drag directly on the grid outline itself (although clicking exactly on the grid outline can be tricky). Here I'm dragging the bottom of the grid downward.

How to reset the warp grid
If you totally mess things up while in Warp mode (it's easy to do), click the Reset button in the Options Bar to reset the grid and start over.
I’ll do a simple warp by dragging the left and right sides of the grid outward and the top and bottom in towards the center.
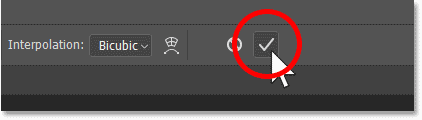
How to accept the transformation
To accept your changes to the outline and close the Transform Selection command, click the checkmark in the Options Bar. Or you can click the Cancel button next to the checkmark to close Transform Selection without saving your changes. But I’ll click the checkmark.
And now my selection outline appears with its new shape.
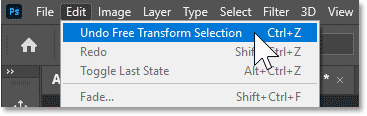
How to undo Transform Selection
I'll undo the transformation and restore the original size and shape of my selection outline by going up to the Edit menu and choosing Undo Free Transform Selection.
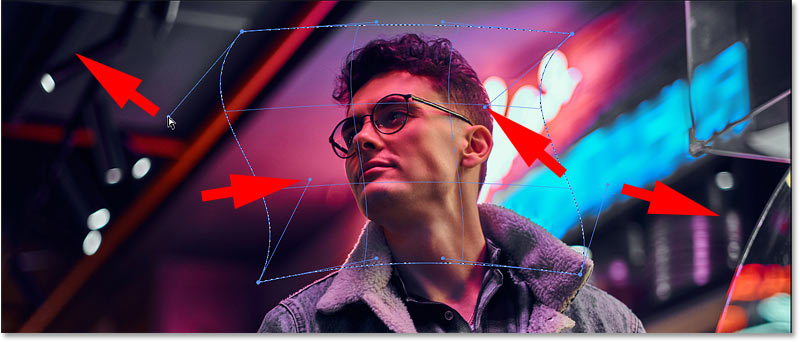
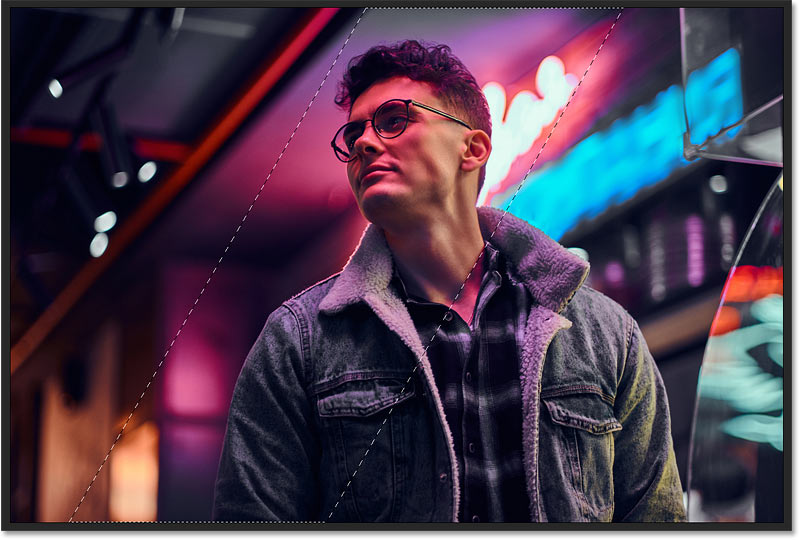
Resizing the selection outline into a diagonal strip
What I want to do with this image is select a narrow strip that runs diagonally from top to bottom, so I can then place the strip either on a transparent background or on a solid color background.
Selecting Transform Selection
So with my original selection outline back in place, I'll right-click inside the outline and choose Transform Selection.
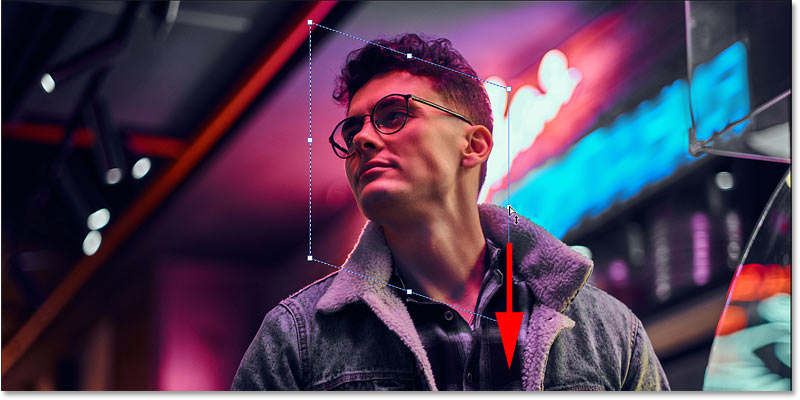
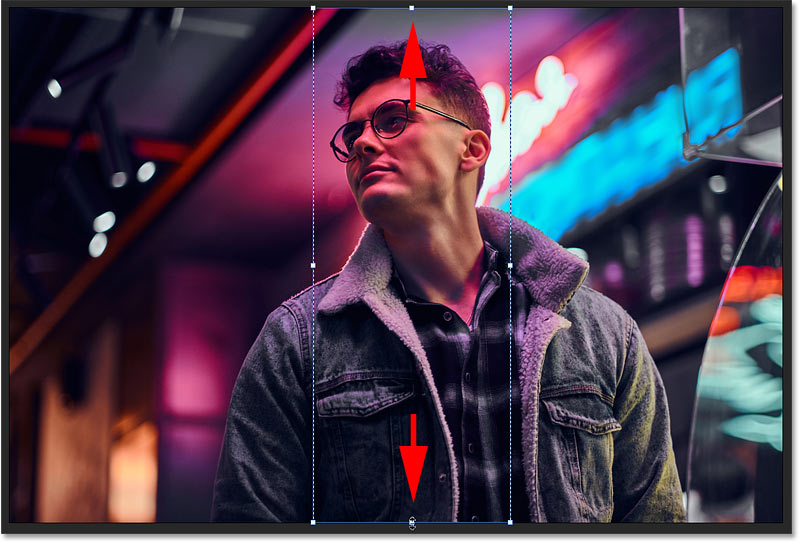
Resizing the selection outline
Then I’ll hold the Shift key on my keyboard to unlock the aspect ratio so I can drag the top handle to the top of the image and the bottom handle to the bottom of the image.
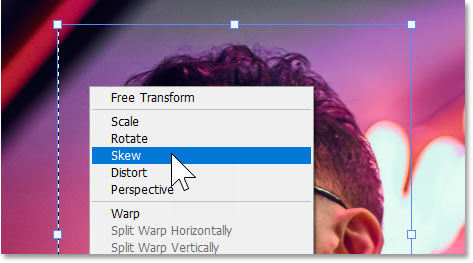
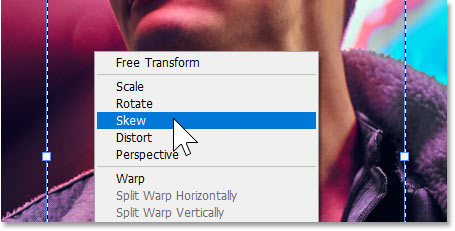
Skewing the selection outline
Since I want the outline to be diagonal, not vertical, I need to skew it. So I’ll right-click inside the transform box and choose Skew.
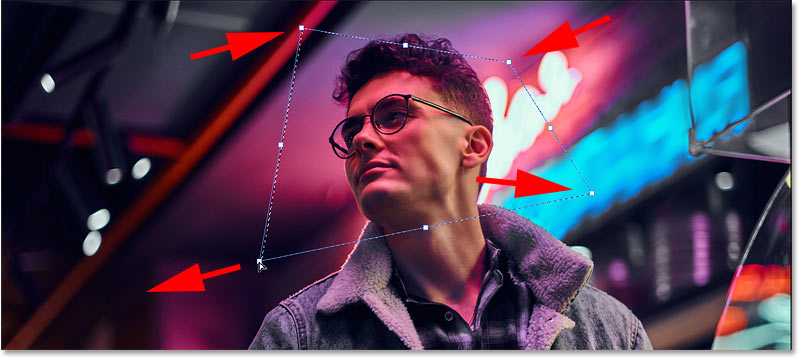
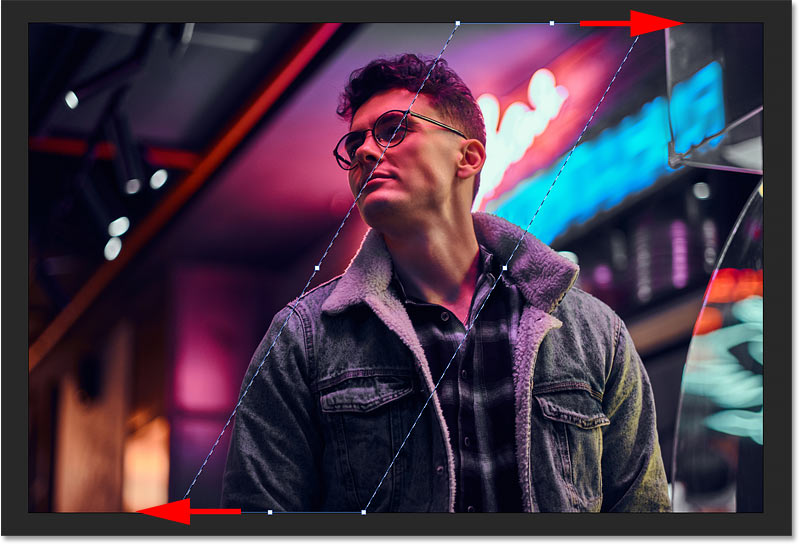
Then I’ll drag the top handle to the right. While I'm dragging, I’ll hold the Alt key on a PC or the Option key on a Mac so that the bottom handle moves along with it in the opposite direction.
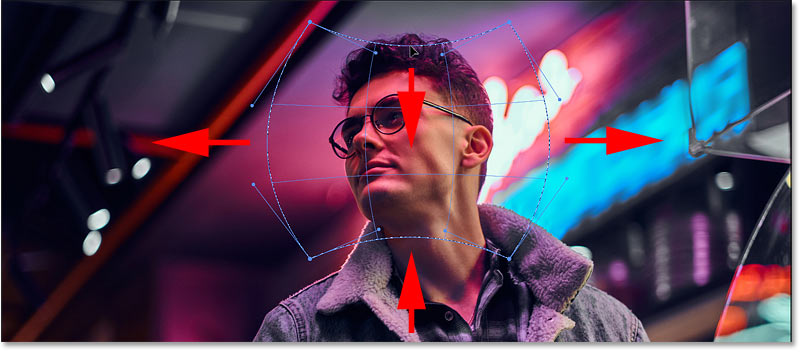
Resetting Transform Selection back to the default mode
To adjust the width of the outline, I’ll drag the side handles. But because I’m still in Skew mode, I first need to right-click inside the transform box and reset Transform Selection back to its default mode which is Free Transform.
Then I can hold Shift on my keyboard and drag the side handles as needed to resize the outline.

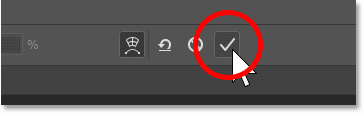
Accepting the transformation
To accept it and close Transform Selection, I’ll click the checkmark in the Options Bar.
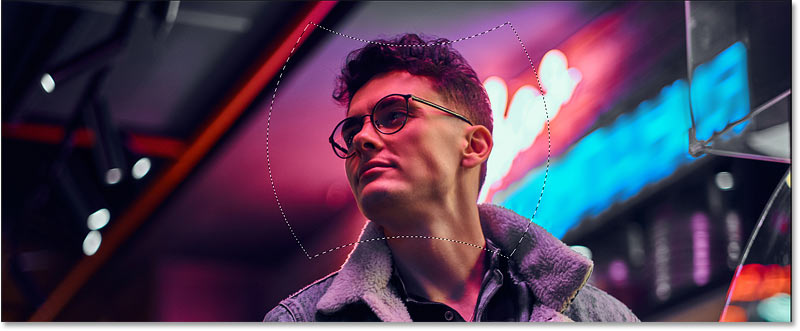
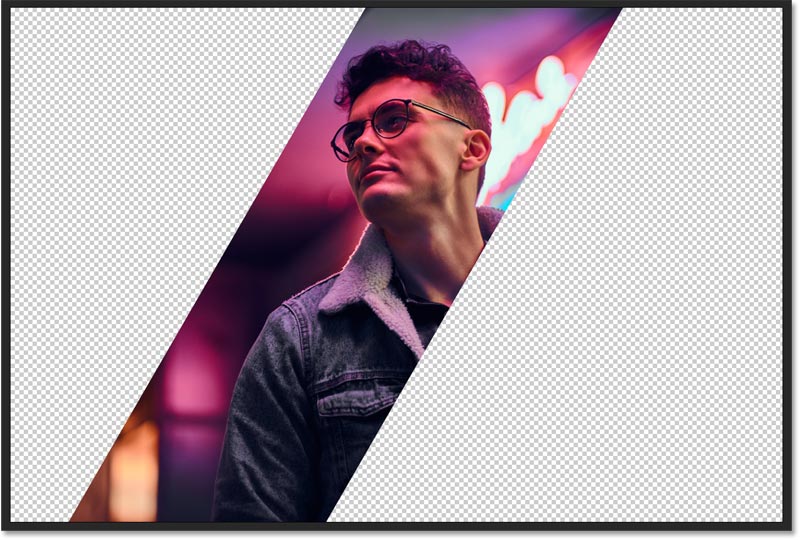
And my selection outline is now at the size and shape that I need.
Completing the effect
At this point, we’ve covered everything you need to know to resize selection outlines with Photoshop's Transform Selection command. But if you want to keep reading, I’ll quickly finish off the effect.
Converting the selection outline into a layer mask
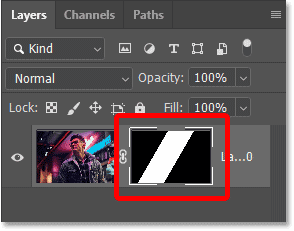
I want to hide everything outside the selection outline and replace it with transparency. So I’ll convert the outline into a layer mask.
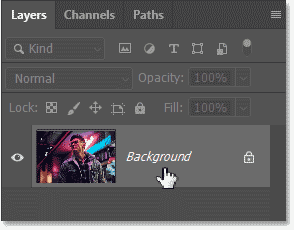
In the Layers panel, we see the image on the Background layer.
To turn a selection outline into a mask, all you need to do is click the Add Layer Mask icon at the bottom of the Layers panel.
And everything that was outside the outline is instantly replaced with transparency.
Back in the Layers panel, we see that Photoshop converted the selection outline into a layer mask. The white part of the mask is where the image is visible and the black part is where it’s hidden.
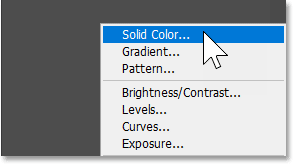
Adding a solid color background
But instead of a transparent background, I want to fill the background with a solid color. So I’ll add a Solid Color fill layer by clicking the New Fill or Adjustment Layer icon at the bottom of the Layers panel:
And choosing Solid Color.
I’ll accept the default fill color for now, which is black, by clicking OK in the Color Picker.
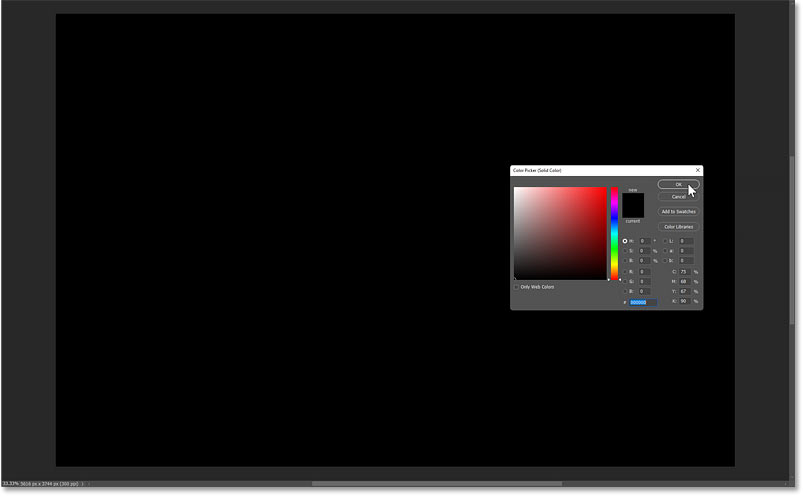
Then back in the Layers panel, I’ll drag the fill layer below the image.
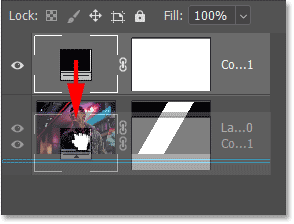
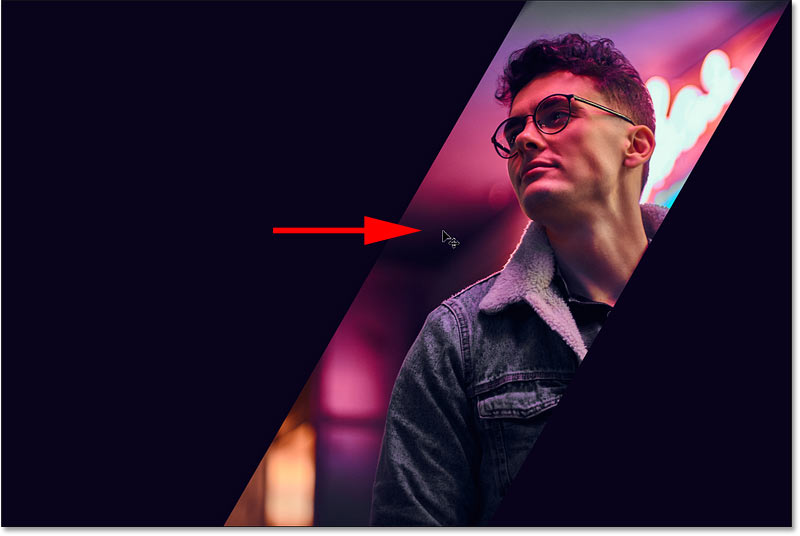
And the area around the selection is now filled with black.

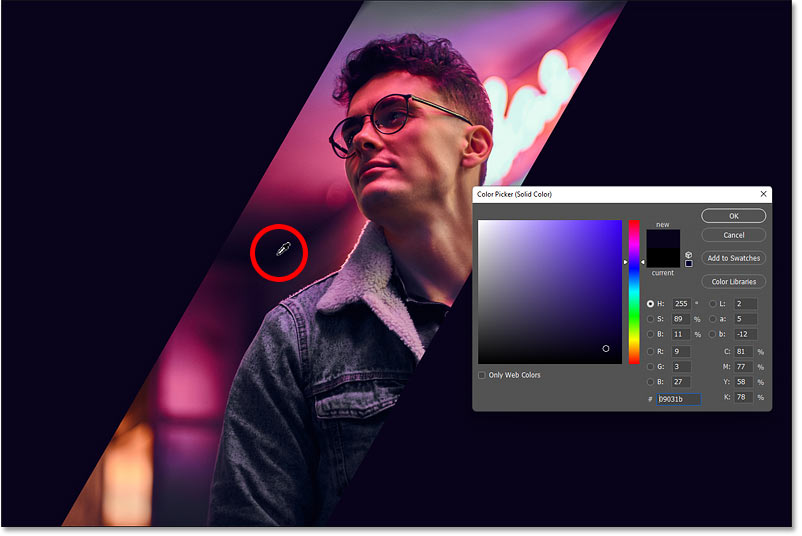
Sampling a background color from the image
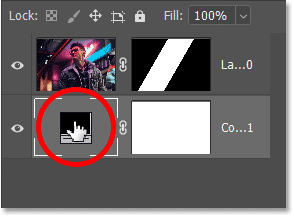
To change the background color, I’ll double-click on the fill layer’s color swatch in the Layers panel.
Then instead of choosing a color from the Color Picker, I’ll click on a color in the image to sample it. And that color instantly becomes the new background color. I’ll accept it by clicking OK to close the Color Picker.
Repositioning the image
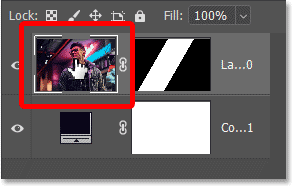
Finally, I need to move the image over to the right. So in the Layers panel, I’ll click on the image layer to make it active.
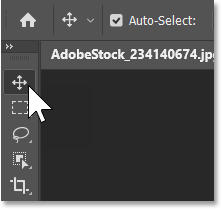
I’ll select the Move Tool from the toolbar.
Then I’ll click on the image and drag it over to the right, leaving room for some text, a logo or anything else I need to display in the blank area on the left.
And there we have it! Check out my Photoshop Basics section for more tutorials. And don't forget, all of my tutorials are now available to download as PDFs!