Creating Repeating Patterns From Custom Shapes In Photoshop
This is the third tutorial in our series on creating and using simple repeating patterns in Photoshop. In previous tutorials, we covered the basics of creating our own repeating patterns by first designing a single tile, saving the tile as a pattern, then using the pattern to fill an entire layer. Next, we learned how to add color to our patterns with Solid Color and Gradient fill layers.
In this tutorial, we'll look at how we can use much of what we've already learned to create fun and interesting repeating patterns from Photoshop's custom shapes!
Step 1: Create A New Document
As we learned back at the beginning of this series, the first thing we need to do is design a single tile which will become our repeating pattern. For that, we need a new blank document, so go up to the File menu in the Menu Bar along the top of the screen and choose New:

This opens Photoshop's New Document dialog box. The size of the document we create here will become the size of the tile that will be repeating as a pattern. Since smaller tiles need to repeat more than larger ones to fill the same amount of space, tile size has a big impact on the overall appearance of the pattern. You'll want to experiment with different tile sizes for your own designs later, but for this tutorial, enter 100 pixels for both the Width and Height of the document and make sure Background Contents is set to Transparent. You can leave the Resolution value set to its default 72 pixels/inch:

Click OK when you're done to close out of the dialog box. The new blank document will appear on your screen. At only 100 pixels x 100 pixels, the document can be a bit small to work with, so I'll zoom in on it by holding down my Ctrl (Win) / Command (Mac) key and my spacebar, which temporarily switches us to Photoshop's Zoom Tool (you'll see the mouse cursor change into a magnifying glass) and clicking a few times inside the document window. Here, I've zoomed in to 500%:

Step 2: Add Guides In The Center Of The Document
Next, we need to find the exact center of our document, and we can do that using Photoshop's guides. Back when we covered the basics of creating repeating patterns, we learned how we can add guides using the New Guide command. This time, we'll add guides using Photoshop's rulers. Either way of adding guides is fine so feel free to use whichever method you prefer. For this tutorial though, go up to the View menu at the top of the screen and choose Rulers:

You'll see Photoshop's rulers appear along the top and left of the document. Click anywhere inside the left ruler and, with your mouse button held down, drag a vertical guide out into the center of the document. When you get close enough to the center, the guide will snap into place. Release your mouse button to place the guide:

Next, click anywhere inside the top ruler and, again with your mouse button still held down, drag a horizontal guide down into the center of the document. When you're close enough to the center, the guide will snap into place. Release your mouse button to place the second guide:

Once both guides have been added, you can turn the rulers off by going back up to the View menu and again choosing Rulers. Or, you can use the handy keyboard shortcut Ctrl+R (Win) / Command+R (Mac) to quickly turn the rulers on and off when needed. The spot where both guides intersect is the exact center of the document. In my screenshot here, the guides appear in red. If you've been following along from the first tutorial in the series, you'll know that's because I changed the color of my guides in Photoshop's Preferences, just to make them easier to see in the screenshots. The default guide color is cyan which is the color your guides will appear in if you haven't changed it in the Preferences:

Step 3: Select The Custom Shape Tool
Select the Custom Shape Tool from the Tools panel. By default, it's hiding behind the Rectangle Tool, so click on the Rectangle Tool and hold your mouse button down for a second or two until a fly-out menu appears, then select the Custom Shape Tool from the bottom of the list:

Step 4: Choose The "Fill Pixels" Option
Photoshop gives us three different ways that we can use its shape tools. We won't get into specifics about them here, but in general, we can use them to draw vector shapes, paths, or pixel-based shapes. Photoshop will only allow us to save our design as a pattern if it was made with pixels, so we first need to tell Photoshop that we want the shapes we're about to draw to be filled with pixels, and we do that in the Options Bar along the top of the screen. Near the far left of the Options Bar is a series of three icons. Each icon selects one of the three types of shapes we can draw. Click on the third icon (the one on the right) to choose the Fill pixels option:
Step 5: Choose A Custom Shape
Now that we've told Photoshop to draw pixel-based shapes, we need to choose the shape we want to draw. Click on the shape preview thumbnail in the Options Bar:

This opens the Shape Picker, which displays small thumbnails of all the shapes we currently have to choose from. To choose a shape, simply click on its thumbnail. I'll choose the Heart shape by clicking on it. Once you've chosen a shape, press Enter (Win) / Return (Mac) to close out of the Shape Picker:

Step 6: Draw The Shape In The Center Of The Document
We need to draw our shape in the center of the document, which is why we added guides to find the center for us. We want our shape to be black for now, so press the letter D on your keyboard to quickly reset Photoshop's Foreground and Background colors to their defaults if needed, which will set the Foreground color to black. You can see the current Foreground and Background colors by looking at their thumbnails near the bottom of the Tools panel:

With the Foreground color set to black, position your mouse cursor directly over the center of the document so the cursor's target symbol lines up with the vertical and horizontal guides, then click and, with your mouse button held down, begin dragging out the shape. After you've started dragging, hold down Shift+Alt (Win) / Shift+Option (Mac) and keep them held down as you continue dragging out the shape. Holding the Shift key down will maintain the original aspect ratio of the shape so you don't end up making it taller and thinner or shorter and wider than it should be, while the Alt (Win) / Option (Mac) key tells Photoshop to draw the shape out from its center. When you're done, your document should look similar to this (my document is zoomed in to 500% which is why the edges of the shape look blocky):

Step 7: Turn Off The Guides
Now that we've drawn our shape, the guides are no longer needed and are just getting in the way, so let's turn them off. Go up to the View menu at the top of the screen, choose Show, then choose Guides. You'll see a checkmark to the left of the word Guides which tells us they're currently turned on. Selecting them while they're on will turn them off:

Step 8: Duplicate The Layer
Let's make our design a bit more interesting before saving it as a pattern. Make a copy of the layer by going up to the Layer menu at the top of the screen, choosing New, then choosing Layer via Copy:

You could also use the keyboard shortcut Ctrl+J (Win) / Command+J (Mac) to quickly copy the layer. Either way tells Photoshop to make a copy of Layer 1, which it creatively names "Layer 1 copy", and place it above the original in the Layers panel:

Step 9: Apply The Offset Filter
Just as we did when we were learning the basics of creating repeating patterns, we'll use Photoshop's Offset filter to add a little more interest to our tile. Go up to the Filter menu at the top of the screen, choose Other, then choose Offset:

This opens the Offset filter dialog box. We want to enter half the width of our document into the Horizontal value box and half the height of the document into the Vertical value box. Since our document is 100 pixels x 100 pixels, set both the Horizontal and Vertical options to 50 pixels. Then, make sure the Wrap Around option is selected at the bottom of the dialog box:

Click OK when you're done to close out of the dialog box. The Offset filter has essentially split the copy of the heart shape into four equal parts and placed them in each corner of the document. It may look strange at the moment, but it won't when we see the pattern repeating a bit later. The heart shape in the center of the document is the original shape we added back in Step 6:

Step 10: Save The Design As A Pattern
With the design of our tile completed, we're ready to save it as a pattern. Go up to the Edit menu at the top of the screen and choose Define Pattern:

Photoshop will pop open the Pattern Name dialog box so we can give our new pattern a name. It's good practice to include the size of your tile in the name in case you end up designing several similar tiles, all at different sizes. I'll name my pattern "Hearts 100x100" since the dimensions of the tile are 100 px x 100 px. When you're done, click OK to close out of the dialog box. The pattern is now saved and ready for use:

Step 11: Create A New Document
Let's create a new document to fill with our newly created pattern. As we did in Step 1, go up to the File menu and choose New. This time when the New Document dialog box appears, enter 1000 pixels for both the Width and Height of the document and change the Background Contents to White. Leave the Resolution value set to 72 pixels/inch. Click OK to close out of the dialog box. The new document, filled with white, will appear on your screen:

Step 12: Add A New Blank Layer
Rather than filling the Background layer with our pattern, which will limit what we can do with it later, we'll add the pattern on its own layer. Click on the New Layer icon at the bottom of the Layers panel:
Photoshop adds a new blank layer named "Layer 1" above the Background layer:

Step 13: Select The Paint Bucket Tool
In the previous tutorials in this series, we learned how we can fill a layer with a pattern using Photoshop's Fill command. This time, let's see how we can do the same thing using the Paint Bucket Tool, which also lets us fill a layer or selection with either a color or a pattern. You'll find the Paint Bucket Tool in the Tools panel. By default, it's hiding behind the Gradient Tool, so click on the Gradient Tool and hold your mouse button down until a fly-out menu appears, then choose the Paint Bucket Tool from the list:

Step 14: Change The Source To Pattern
With the Paint Bucket Tool selected, go up to the Options Bar and set the Source for the Paint Bucket to Pattern (by default, it's set to Foreground):

Step 15: Select The Pattern
With Pattern selected, click on the pattern preview thumbnail in the Options Bar:

This opens Photoshop's Pattern Picker where we can choose the pattern we want to use. The pattern we just created will be the last one in the list. Click on its thumbnail to select it. Once you've selected the pattern, press Enter (Win) / Return (Mac) to close out of the Pattern Picker:

Step 16: Click Inside The Document To Add The Pattern
Make sure Layer 1 is selected in the Layers panel (selected layers are highlighted in blue), then with the pattern chosen in the Options Bar, simply click anywhere inside the document with the Paint Bucket Tool, which will instantly fill the document with the pattern. The tile repeats as many times as needed to fill the entire space:

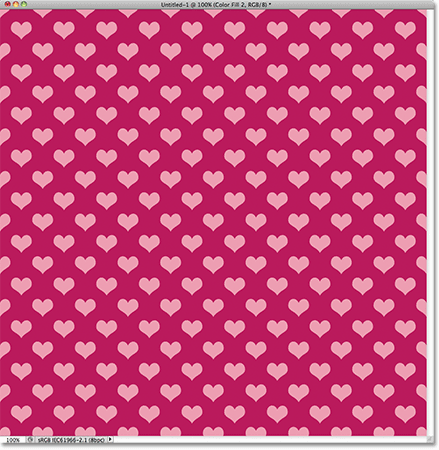
At the moment, our pattern is in black and white but we can easily colorize it. You'll find all steps needed for colorizing patterns in our previous Repeating Patterns - Adding Colors And Gradients tutorial so I won't bother repeating everything here, but here's a quick example of how the same pattern can look after colorizing both the white background and the pattern itself:

We can see in the Layers panel that I've added the colors using nothing more than two Solid Color fill layers, one for the background and one for the pattern. Again, you'll find all the steps needed in the previous tutorial:

Loading Additional Custom Shapes
Back in Step 5 when we chose a custom shape from the Shape Picker, you may have noticed that by default, Photoshop doesn't give us many shapes to choose from. Unless you were hoping to add repeating arrows, light bulbs or envelopes to your design, you may have been a little disappointed in the selection. Fortunately, there are lots of other shapes we can choose from. We just need to load them in ourselves. Here's how.
With the Shape Picker open, click on the small arrow icon in the top right corner:

This opens a menu with various options, including a list of additional shape sets we can choose from. I won't go through all of them since you can experiment with them on your own, but as an example, I'll choose the Animals shape set:

Photoshop will ask if you want to replace the current shapes with the new ones or if you want to keep the current shapes and append the new ones to the end of the list. Choose Append:

Back in the Shape Picker, scroll through the thumbnails to find the new shapes added after the original ones. Select any of the newly added shapes by clicking on its thumbnail. I'll choose the Dog Print shape:

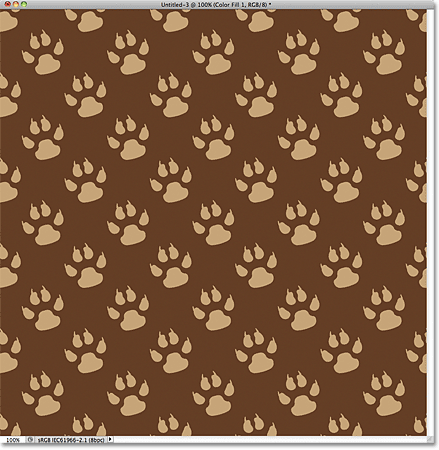
And here's an example of what the repeating pattern would look like with the dog print shape using the steps we've covered in this tutorial. In this case, I created a slightly larger 150 pixel x 150 pixel document for my tile (see Step 1) and in the Offset filter dialog box (Step 8), I set the Horizontal and Vertical options to 75 pixels each (half the width and height of the document). Once again, color has been added to the pattern using a Solid Color fill layer for the background and another for the pattern itself:

If none of the custom shapes Photoshop ships with suit the needs of your design, you can easily create your own custom shapes! Be sure to check out our Creating Custom Shapes In Photoshop tutorial for all the details!