
Using A Photo As Its Own Background In Photoshop
In this Photoshop Effects tutorial, we're going to learn how to use a photo as its own background, which is a great effect to use with wedding photography but can also be used with any image. We're going to be creating two copies of our photo, using one as our main image and the other as the background, which we'll be colorizing, flipping and fading into more of a watermark-style image.
We'll then take our main photo, reduce it in size, give it a nice border and shadow effect, and finally, move it into the perfect spot in front of the background. We'll even be sampling some colors from the image to make sure everything blends in nicely. This is an easy photo effect to create and takes very little time from start to finish.
Before we begin... This version of the tutorial is for Photoshop CS5 and earlier. If you're using Photoshop CC or CS6, you'll want to follow along with the fully updated version.
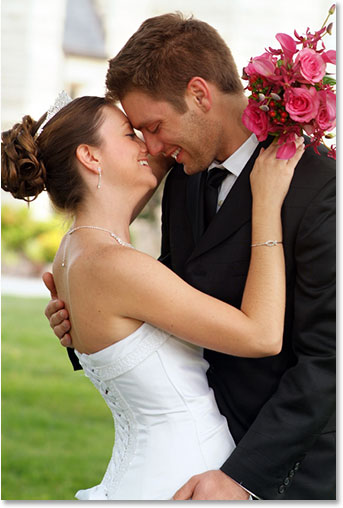
Here's the image I'll be starting with:
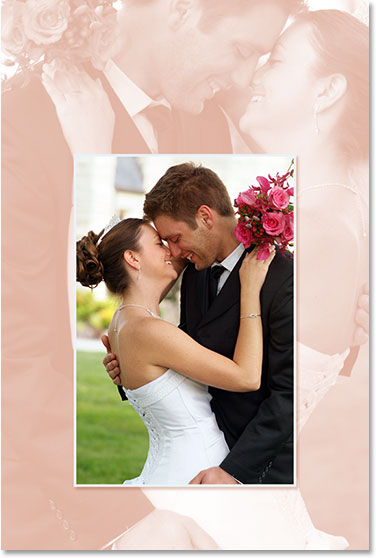
And here's the final effect we're going for:
This tutorial is from our Photo Effects series. Let's get started!
Step 1: Duplicate The Background Layer Twice
The first thing we need to do for this photo effect is create a couple of copies of our image. We can see in the Layers palette that we currently have just one layer, the Background layer, which contains our photo:

Let's make a couple of copies of it, and for that, we'll use the handy keyboard shortcut Ctrl+J (Win) / Command+J (Mac). Use the keyboard shortcut once to create the first copy, then use it again to create a second copy. You should now have three layers in your Layers palette:

The main reason why we've created two copies here is to avoid working on our original Background layer, since it contains our photo's original pixel information and we always want to keep that safe in case we need to go back to it.
Step 2: Hide The Top Layer
The layer at the top of the Layers palette is going to become our main page, but we're going to work on the layer below it for now, which is going to become our background. In order to see what we're doing though, we need to hide the top layer. To do that, click on its layer visibility icon (the icon that looks like an eyeball) on the left of the layer in the Layers palette:
Nothing will appear to have happened to your image when you hide the top layer, since all three layers contain the exact same image, but we'll now be able to see what we're doing when we turn the layer below it into our background, which we'll do next.
Step 3: Sample A Color From The Image To Use For The Background
Let's create our background. First, click on the middle layer in the Layers palette to select it:

We need to sample a color from the image which we're going to use to colorize the background. To do that, grab the Eyedropper Tool from the Tools palette, or press I on your keyboard to quickly select it:

Then, with the Eyedropper Tool selected, click on an area inside your image which contains the color you want to use for your background. I'm going to sample a color from the woman's cheek, which should work nicely:

You'll see the color appear as your Foreground color in the Tools palette:

Step 4: Colorize The Background Using A Hue/Saturation Adjustment Layer
Now that we have our sampled color, let's use it to colorize the background. Click on the New Adjustment Layer icon at the bottom of the Layers palette:

Then select Hue/Saturation from the list:

This brings up Photoshop's "Hue/Saturation" dialog box. There's no need to fumble around with any sliders here trying to pick a color because we've already chosen the color we want to use, so all we need to do is select the Colorize option in the bottom right corner of the dialog box:

As soon as you select that option, Photoshop goes ahead and colorizes the image using the sampled color:

I'm going to boost the saturation of the color by dragging the Saturation slider to the right until the saturation value is at 50. Then, to give the background a washed-out appearance, I'm going to drag the Lightness slider to the right to a value of around 75:

Click OK when you're done to exit out of the dialog box. Here's my image after being colorized and lightened:

Step 5: Flip The Image Horizontally
There's one last thing to do with our background. Let's flip it horizontally so it appears as a mirror image of our main photo. To do that, we first need to select the correct layer. At the moment, we have the Hue/Saturation adjustment layer selected in the Layers palette, so click on "Layer 1" below it which contains our background image. Then go up to the Edit menu at the top of the screen, choose Transform, and then choose Flip Horizontal. The photo will flip sideways, giving us our "mirror image" and completing our work on the background:

Step 6: Turn The Top Layer Back On
We're done with our background, so let's work on our main image, which is on the top layer in the Layers palette. The layer is currently hidden, so click once again on its layer visibility icon to turn it back on:

When you click on the icon, the eyeball will re-appear and the original image will appear in the document, temporarily blocking the background we just worked on from view.
Step 7: Resize The Main Image With Free Transform
We're going to make our main image smaller, and we'll do that using Photoshop's Free Transform command. First, click on the top layer in the Layers palette to select it. Then use the keyboard shortcut Ctrl+T (Win) / Command+T (Mac) to bring up the Free Transform handles around the image. Hold down Shift+Alt (Win) / Shift+Option (Mac) and drag any of the corner handles inward to reduce the size of the photo. Holding Shift constrains the proportions of the image as you drag, and holding Alt/Option tells Photoshop to resize the image from its center. It's a judgment call on your part how small you want to make your image. I'm going to make mine roughly 60% of its original size:

Press Enter (Win) / Return (Mac) when you're happy with the new size of your image to accept the transformation.
Step 8: Add A Stroke To The Main Image
Let's add a thin border around our main image. We'll use a Stroke Layer Style for that. Click on the Layer Styles icon at the bottom of the Layers palette:
Then select Stroke from the bottom of the list of Layer Styles:

This brings up Photoshop's Layer Style dialog box set to the Stroke options in the middle column. Let's choose a color for our stroke, again by sampling a color from the image. To do that, click on the color swatch, which by default appears red:

When you click on the color swatch, Photoshop's "Color Picker" will appear, which is normally where you would choose a new color, but we're going to ignore it since we want to sample a color directly from the image itself. To do that, move your mouse over the main image and you'll see your mouse cursor change into the Eyedropper icon. Then, just as we did before, click on an area inside the image to sample the color. I'm going to sample a shade of white from the bride's dress:

When you click inside the image, you'll see the Stroke's color swatch change to the color you just sampled. When you're happy with the color you've chosen, click OK in the top right corner of the Color Picker to close out of it (even though we never actually used it).
Once you have your stroke color chosen, go up to the Stroke Size option at the top of the dialog box and set it to about 4px. You may want to set it a bit higher if you're using a large, high resolution image, but we're not going for a polaroid look here. We want something a little more elegant, especially if you're doing this with a wedding photo, so try to keep your stroke fairly thin. Also, set the Position option to Inside:

Don't click OK just yet. We have one more Layer Style to add.
Step 9: Add A Drop Shadow
Let's add a Drop Shadow before closing out of the Layer Style dialog box. Click directly on the words Drop Shadow on the left of the dialog box:

This will bring up the Drop Shadow options in the middle column, where the Stroke options were a moment ago. By default, Photoshop sets the Drop Shadow color to black, but that's too harsh for this effect, so let's choose a different color. Just as we did with the Stroke, click on the color swatch:

This will again bring up Photoshop's Color Picker, and again I'm going to ignore it because I want to sample a color directly from the image. I want my Drop Shadow to be roughly the same color as what I used to colorize my background, but just a little darker (since it's a shadow, after all), so I'm going to sample a color from the man's face, which is slightly darker than the woman's:

As you click inside the image, the Drop Shadow color will change to whichever color you just clicked on, so you can see a preview of your shadow color as you're clicking. When you're happy with the color, click OK in the Color Picker to exit out of it. Your color swatch in the Layer Style dialog box will now have changed to the color you sampled.
With my color chosen, I'm going to lower the Opacity of my Drop Shadow to about 40% so it's not too intense, and I'm going to change my Angle to about 130°:

Click OK when you're done to exit out of the Layer Style dialog box. Your image should now look something like this:

Step 10: Reposition The Main Image As Needed
Things are looking good, except for one thing. My main image in front is blocking the man and woman's face in the background, so the first thing I'm going to do is move the main image. To move it, we need the Move Tool, so either select it from the Tools palette or press V on your keyboard:

Then, with the top layer still selected, click inside the document and drag the main image into its new location. I'm simply going to drag mine down a little, so to make sure I'm dragging in a straight line, I'm going to hold down my Shift key as I click and drag:

Step 11: Resize And Reposition The Background Image As Needed
Since the couple's faces in the background are still being blocked by the top portion of my main image, I'm going to finish things off by increasing the size of my background image. Normally you wouldn't want to increase the size of an image because it tends to make images look soft and dull, but since this image is being used simply as a background, we can get away with it. Before I can make the background larger though, I first need to select its layer, so I'm going to click on "Layer 1" in the Layers palette to select it.
If you're currently working with your image in a document window, you're doing to want to press the F key on your keyboard at this point to switch Photoshop to Full Screen Mode With Menu Bar, otherwise you won't be able to see what you're doing with the Free Transform handles. Then just as we did before, I'm going to use the keyboard shortcut Ctrl+T (Win) / Command+T (Mac) to bring up the Free Transform handles, this time around the background image. I'm going to hold down my Shift key to constrain my image porportions, as well as Alt (Win) / Option (Mac) to resize the image from its center, and I'm going to click on any of the corner handles and drag it outward to enlarge my background image:

I'm also going to reposition my background slightly by simply clicking anywhere inside of it with the Free Transform handles still active and dragging it into its new position. I'm going to move mine up a little and a little to the right until my background seems to be balanced nicely with the main image. When you're happy with the size and location of your background image, press Enter (Win) / Return (Mac) to accept the change and you're done!
Here, after making my background a bit larger and moving it slightly so it balances better with the main image, is my completed effect:
And there we have it! That's how to use a photo as its own background with Photoshop! Check out our Photo Effects section for more Photoshop effects tutorials!