Use the Oil Paint Filter in Photoshop to Turn Photos to Paintings
Learn how to use Photoshop's Oil Paint filter to turn photos into beautiful and stunning paintings. Discover how the Oil Paint filter's brush and lighting options affect different aspects of the painting effect, and how to combine two Oil Paint filters on the same image! A step-by-step tutorial.
Download the PDF: Using The Oil Paint Filter
The Oil Paint filter in Photoshop can turn any photo into what looks like an oil painted masterpiece. In this tutorial, you'll learn how to use it create an oil painting effect, even if (like me) you have no painting skills at all.
You'll even learn how to combine two Oil Paint filters on the same image, with different settings for different areas, for even better results.
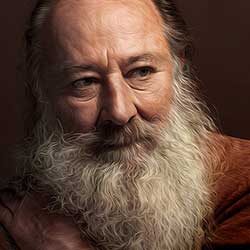
You can follow along with your own image. I’ll use this photo from Adobe Stock.
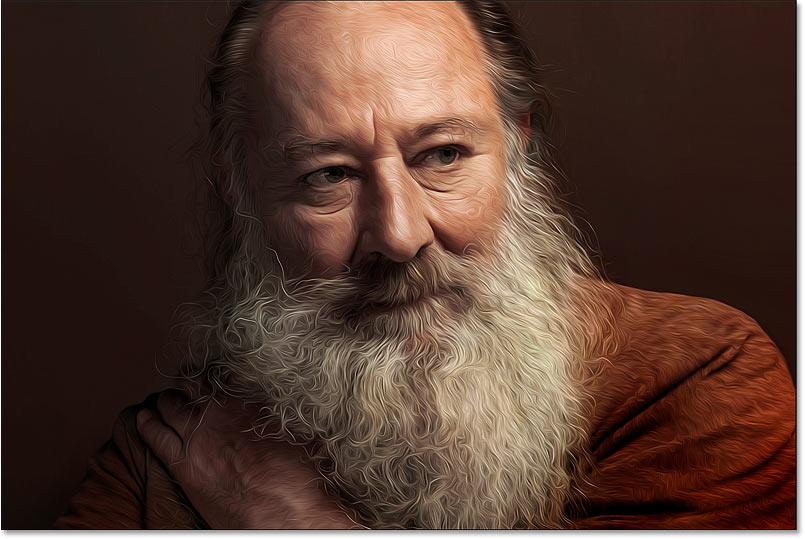
Here’s an example of what the oil painting effect will look like when we're done. And it's as easy as dragging a few sliders.
Which version of Photoshop do I need?
The Oil Paint filter first appeared way back in Photoshop CS6 but then disappeared in Photoshop CC, only to reappear again in CC 2015. Then in Photoshop 2022, the Oil Paint filter received a performance upgrade, making it faster when working on larger images.
So I recommend Photoshop 2022 or higher for the best results. I’m using Photoshop 2023. You can get the latest Photoshop version here.
Let's get started!
Related tutorials:
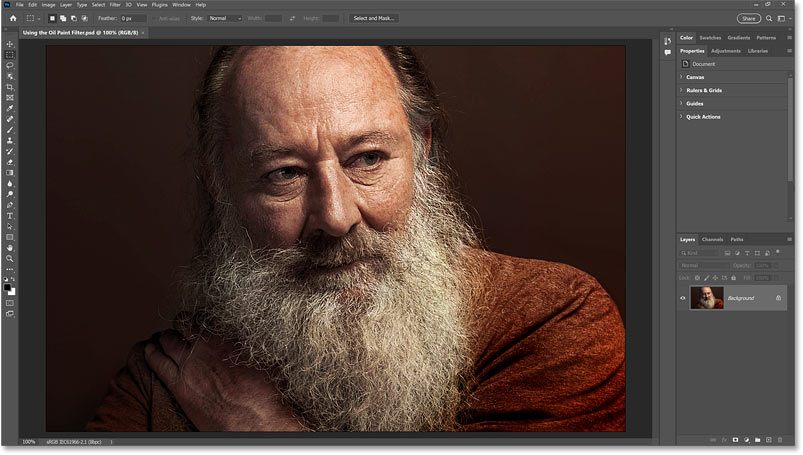
Step 1: Convert your layer into a smart object
Before applying the Oil Paint filter, first convert the layer into a smart object. This will let you apply Oil Paint as a smart filter which will keep the filter settings editable in case you want to go back and make changes.
This is especially helpful if you need to apply two copies of the Oil Paint filter on the same image, as we’ll see how to do later.
In the Layers panel, right-click on an empty gray part of the layer.

Then choose Convert to Smart Object from the menu.

A smart object icon appears in the layer’s thumbnail, telling us that the layer is now a smart object.
Video: Using the Oil Paint filter
Step 2: Select the Oil Paint filter
Next go up to the Filter menu in the Menu Bar, choose Stylize and then Oil Paint.

This opens the Oil Paint filter dialog box.

Related tutorial: Watercolor painting effect in Photoshop
Step 3: Make sure Preview is turned on
Make sure the Preview option in the dialog box is turned on. This will give you a live preview of the oil paint effect as you adjust the sliders.

Step 4: Center part of your image in the preview window
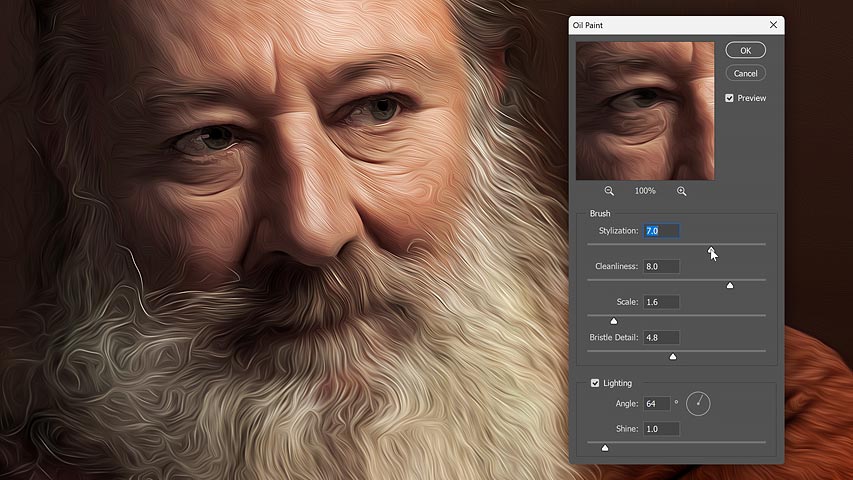
Then click on part of the image to center it inside the preview window. I’ll click on the man’s eye.

You can then inspect that part of the image in the preview window at the 100 percent zoom level, while still having the document zoomed out far enough to see how the oil paint effect looks on your entire image.
And you can click and drag inside the preview window to scroll the image around and inspect different areas.

Step 5: Drag the Brush sliders to create the oil paint effect
The Oil Paint filter is very simple to use. The first four sliders from the top control different aspects of the brush. And the options at the bottom let you adjust the lighting.
We’ll start with the brush options to create the main effect, and then we’ll see how the lighting options can change the intensity of the effect.
But one thing to note is that all of these sliders work together. So the result you get from dragging one slider will depend on your settings for the others.
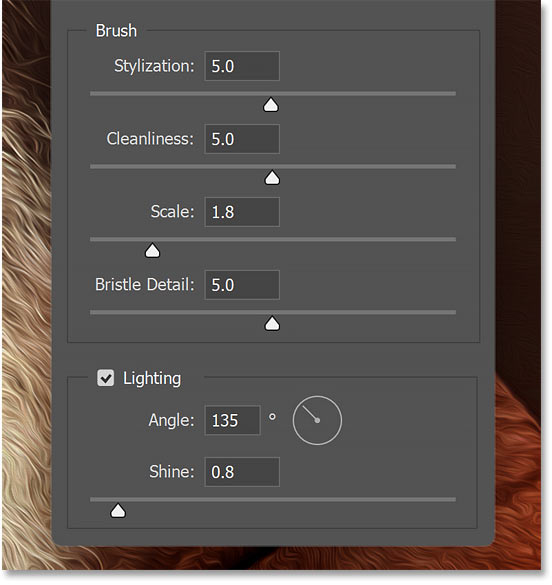
Stylization
The Stylization slider at the top controls the length of the brush strokes. Drag it to the left for shorter, more detailed strokes.

Or to the right for longer, more fluid strokes.

Cleanliness
The Cleanliness slider controls the smoothness of the brush strokes. Dragging it to the left gives the painting a gritty look with lots of texture and detail.

And dragging to the right gives it a smoother, cleaner appearance.

Different slider combinations produce different results
I mentioned that all of these sliders work together to create the overall oil paint effect. And that is especially true with these first two sliders.
I’ll drag both the Stylization slider and the Cleanliness slider all the way to the right to their maximum values. This gives the painting the longest strokes and the smoothest strokes possible.

But if I lower the Cleanliness amount, notice how the brush strokes tend to look shorter even though the Stylization slider (which controls the length of the strokes) is still at its maximum value.

If I drag Cleanliness back to the right but I lower the Stylization, the painting looks very detailed and textured even with Cleanliness (which controls the smoothness) at its highest setting.

And if I then lower the Cleanliness value as well, the texture and detail are brought out even more. So you’ll definitely need to experiment with the sliders to get the look you want to achieve.
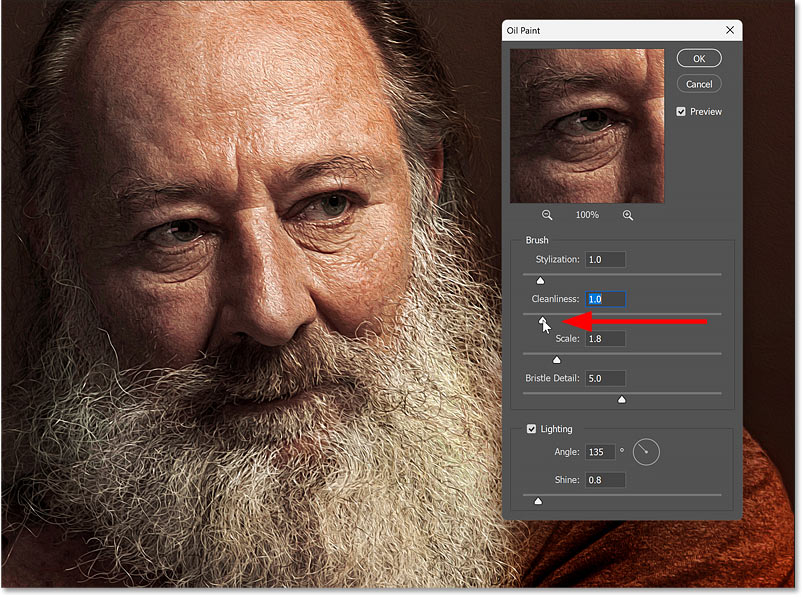
Some areas of the painting look better than others
Before we continue on with the next slider, let’s quickly look at a problem you’ll often run into when trying to find the best Oil Paint filter settings for your image.
I’ll set Stylization to 7 and Cleanliness to 8 because I really like the smooth, wispy effect, especially in the man’s hair and beard.

But I don’t like how those settings affect his eyes, which are too smudged and distorted.

For now, I’ll ignore the problem with his eyes and just focus on finding the best settings for the overall image.
Once we have the main effect, I’ll show you how to apply a second Oil Paint filter using different settings and then combine the two filters together using a layer mask.
Scale
The Scale slider controls the thickness of the brush strokes. Larger values give you a wider brush.

And smaller values give you a thinner brush.
Larger Scale values tend to work better with high resolution images. But all of these sliders will give you different results depending on the size of your image. So if I was working with a smaller image, I would need to dial back the settings to get a similar effect.

Bristle Detail
The final brush slider is Bristle Detail which sharpens or softens the brush strokes.
Lower values give you a softer image and higher values bring out more detail. But the effect is fairly subtle even at higher settings.

Step 6: Adjust the lighting
Once you’ve used the Brush sliders to create the main oil paint effect, use the Lighting options to control the direction and intensity of the imaginary light source that’s shining on the painting.
Angle
The Angle option sets the direction of the light source. Some angles will bring out the details in the brush strokes more than others.
You can adjust the angle either by dragging the dial or by using the scrubby slider (click and drag across the word Angle).

Shine
And Shine controls the intensity of the light. Higher values can make the painting look like it’s on display in an art gallery.

But lower values are more subtle and tend to look better.

Turning the lighting off
Or you can uncheck the Lighting option to turn off the light source, which often looks great since the result is very clean. But I’ll leave it on for this tutorial to make the brush strokes easier to see.

Toggling the oil paint preview on and off
To compare the Oil Paint filter’s effect with the original image, simply toggle the Preview option on and off using the checkbox. You can also toggle it by pressing the letter P on your keyboard.
On the left is my original image (cropped around the area with the most detail). And on the right is with the Oil Paint effect turned on. Other than his eyes looking too smudged (which we’ll learn how to fix in a moment), I’m happy with the overall effect.

How to combine two Oil Paint filters on the same image
The only part of the oil painting that I don’t like is with his eyes where the effect is too strong. I need to bring back more detail in them without affecting anything else. So what I need is a way to use different Oil Paint filter settings for different parts of the image. But how do we do that?
Well, we can’t do that using a single Oil Paint filter. But what we can do is make a copy of the filter, adjust the settings in the copy, and then combine the results from both filters into the final oil painting effect.
Step 1: Make a copy of the smart object
First make a copy of your smart object by pressing Ctrl+J on your keyboard (Command+J on a Mac).
The copy appears above the original. And notice that it includes a copy of the Oil Paint smart filter.

Step 2: Reopen the Oil Paint filter dialog box
Then open the copy’s Oil Paint filter dialog box by double-clicking on the words Oil Paint
.

Step 3: Adjust the filter settings
This reopens the Oil Paint dialog box with the same settings you used on the original image.
Since I want to bring back more detail in the man’s eyes, I’ll lower the Stylization slider from 7 down to 2.

The problem is that, while I’ve restored detail in his eyes, I’ve also restored it everywhere else.
But that’s okay because we can combine the results from both Oil Paint filters using a layer mask. So I’ll click OK to accept it and close the dialog box.

Step 4: Add a layer mask filled with black
With the copy of the smart object active in the Layers panel, go up to the Layer menu, choose Layer Mask, and then Hide All.

This adds a layer mask filled with black, which hides the effect of the second Oil Paint filter.

Step 5: Select the Brush Tool
Then select the Brush Tool from the toolbar.

Step 6: Paint with white to reveal the effect of the second filter
Press the letter D on your keyboard to make sure that your Foreground color (and your brush color) is set to white.

Right-click on the image to open the Brush Options. Set the Hardness to 0 percent for a soft edge brush. And adjust the brush size as needed.
Press Enter on a Windows PC or Return on a Mac to close the Brush Options dialog box.

Then simply paint over the areas where you want the effect from the second Oil Paint filter to show through.
In my case I’ll paint over his eyes to bring back the detail in just those areas, while keeping the original Oil Paint filter settings in the rest of the image.

And there we have it! That’s how to turn any photo into an oil painted masterpiece using the Oil Paint filter in Photoshop.
Related tutorials:
Don't forget, all of my Photoshop tutorials are now available to download as PDFs!