
Smooth And Soften Skin In Photoshop
In this Photoshop tutorial, we'll learn an easy way to soften and smooth someone's skin in a photo without blurring out important image details, such as the person's eyes and mouth.
The technique we'll be looking at is actually a slight variation on a method normally used for advanced image sharpening, which serves as a great example of why it's much more important to understand what you're doing rather than simply memorizing a bunch of steps or "recipes". The more you understand what you're doing in Photoshop and why, the more your mind will open to new ideas and new possibilities.
This version of the tutorial is for Photoshop CS5 or earlier. Using Photoshop CS6 or CC? You'll want to check out our fully updated version.
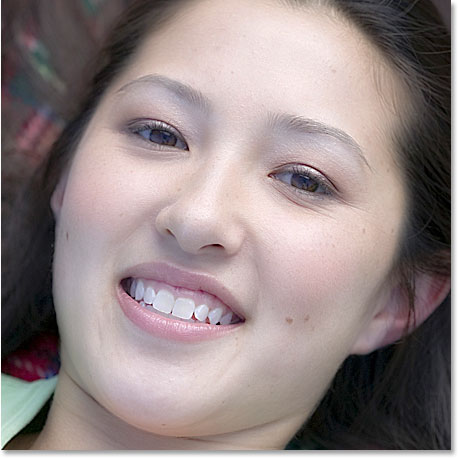
Here's the image I'll be working with in this tutorial. Since this is a tutorial on skin softening and smoothing, I've cropped away most of the image so we can focus on the young woman's face:

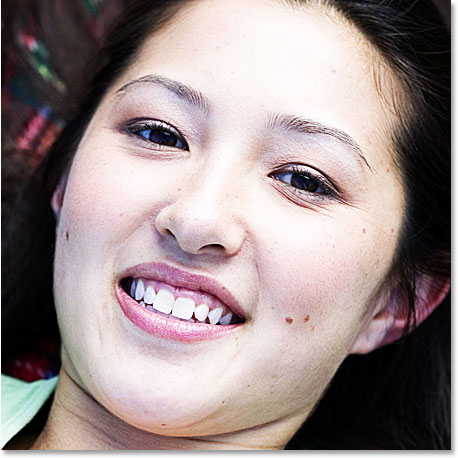
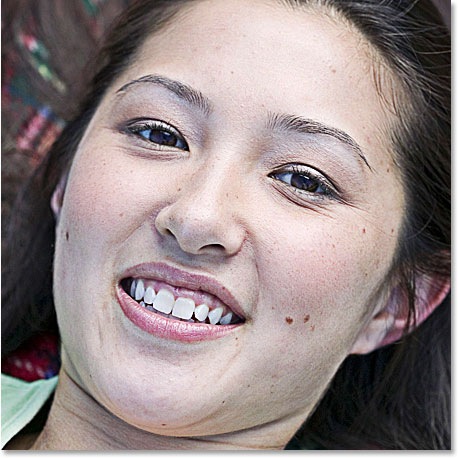
It's a nice photo on its own, but it would probably look even better if we softened her skin a little. Here's what she'll look like when we're done:

This tutorial is part of our Portrait Retouching collection. Let's get started!
Step 1: Duplicate The Background Layer
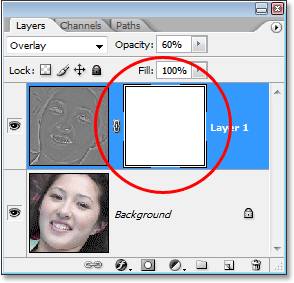
With my image newly opened in Photoshop, I can see in my Layers palette that I currently have one layer, the Background layer, which contains my original image:
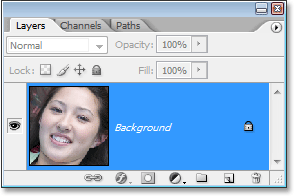
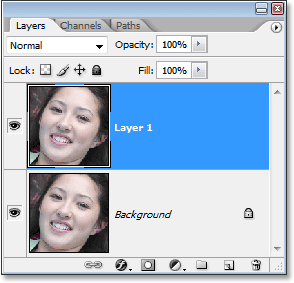
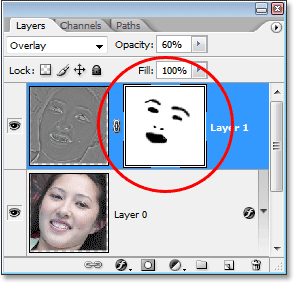
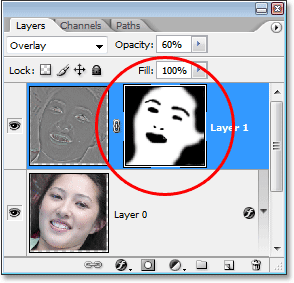
I know I say this in every tutorial, but it can't be stressed enough how important it is to leave the original image information untouched. If we lose it and we make a mistake, we have nothing to fall back on. That's why the first thing we should always do before doing anything else is make a copy of the Background layer. To do that, either go up to the Layer menu at the top of the screen, choose New, and then choose Layer via Copy, or simply use the keyboard shortcut Ctrl+J (Win) / Command+J (Mac). Either way tells Photoshop to make a copy of the Background layer, and if I look again in my Layers palette, I can see that I now have the copy, which Photoshop has automatically named "Layer 1", above the original Background layer:
Step 2: Change The Blend Mode Of "Layer 1" to "Overlay"
With "Layer 1" selected in the Layers palette (the currently selected layer is highlighted in blue), go up to the layer blend mode option in the top left corner of the Layers palette. It's the drop-down box that's currently set to "Normal". Click on the small down-pointing arrow to the right of the word "Normal", which brings up a list of all the different layer blend modes we have to choose from, and select Overlay from the list:
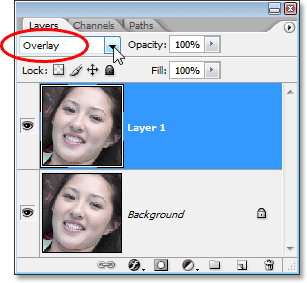
As soon as you change the blend mode to Overlay, you'll see a big increase in contrast and color saturation in your image:
This increased contrast and color saturation can make for an interesting effect on its own, depending on the image you're using, but it's not the effect we're going for here. The only reason we've changed the blend mode to Overlay is so we can see what we're doing in the next step.
Step 3: Apply The "High Pass" Filter To "Layer 1"
To smooth and soften the woman's skin, we're going to use Photoshop's High Pass filter. If you're familiar with the High Pass filter, it's most likely because you've used it before as an advanced way of sharpening images. I say "advanced" not because it's somehow difficult or complicated to use but because it usually gives you better sharpening results than you'd get by using Photoshop's classic Unsharp Mask filter. Check out our Sharpen Images With The High Pass Filter tutorial for more information.
One of the reasons why learning Photoshop can seem nearly impossible sometimes is because we tend to get stuck on the names of things rather than focusing on what they do. For example, if you had never used the High Pass filter before and someone asked you what it does, what would you tell them? "Well, it's a filter that passes high over the image." That may sound technically impressive (sort of, I think), but what does it mean? I sure wouldn't know.
So rather than worry about the name Adobe has given to something, let's look at what it does, which is all that really matters. Before we do that though, let's bring the filter up on the screen. To access the High Pass filter, make sure you still have "Layer 1" selected, then go up to the Filter menu at the top of the screen, choose Other down near the bottom of the list, and then select High Pass:
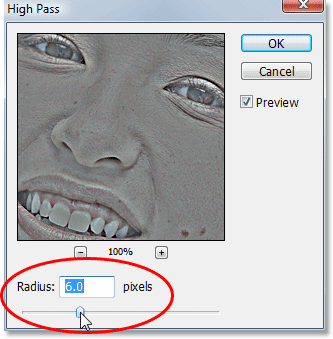
This brings up the High Pass filter's dialog box, which is made up of a large preview area and a single option, Radius, down at the bottom. The High Pass filter looks for details in an image, such as the edges around people, objects, and so on. The reason why it's so effective at image sharpening is because it allows us to sharpen only the edges in an image while leaving everything else untouched. If my goal was to sharpen the image I'm using in this tutorial, the High Pass filter would do a great job of sharpening the woman's eyes, mouth, hair, etc., without sharpening her skin. What I want, though, is sort of the opposite of what I just described. I want to use the filter to find the edges not so I can sharpen them, but so I can smooth and soften everything except the edges.
To do that, begin dragging the slider at the bottom of the dialog box to the right until you have your Radius value set to somewhere around 6 pixels. If you're using a high resolution image, try a higher setting somewhere around 9-10 pixels. As you drag the slider towards the right, if you keep an eye on the preview area in the dialog box, you'll see more and more areas of the image become affected by the filter, starting with only the finest details and then gradually expanding to include more and more of the photo. If we were sharpening the image, we would want to stick to a very low Radius value to target only the edges themselves, but for our softening effect, we need to go a bit higher:
Click OK when you're done to exit out of the dialog box. If I look at my image now in the document window, it looks like I've gone way too far with my image sharpening:
You may be wondering why the image in the preview window of the High Pass filter's dialog box looked gray while the image in the document window didn't (and still doesn't). The reason is because in Step 2, we changed the blend mode of "Layer 1" to Overlay, and in Overlay mode, any part of the layer that is 50% gray (meaning the shade of gray you get half-way between pure black and pure white) is hidden from view. Areas that are either lighter or darker than 50% gray are blended in with the layer(s) below the layer we're working on, affecting the contrast and color saturation of the image. That may sound complicated, but don't worry if you don't fully understand how the Overlay blend mode works. We have an entire tutorial coming up on blend modes in Photoshop, so for now, all we need to know is that we changed the blend mode to Overlay in Step 2 so that we could see what we were doing with the High Pass filter in Step 3.
Our image isn't looking all that great after applying the High Pass filter, but we're going to fix that in the next couple of steps.
Step 4: Invert "Layer 1"
So far, we've used the High Pass filter to sharpen all the edge details in the image, but what we really want to do is smooth and soften everything that is not an edge detail, like the woman's skin. In other words, we want the opposite of what we currently have. We want to soften all the non-detail areas while leaving the edges alone. To do that, all we need to do is invert the layer!
With "Layer 1" still selected, go up to the Image menu at the top of the screen, choose Adjustments, and then choose Invert, or for a faster way, use the keyboard shortcut Ctrl+I (Win) / Command+I (Mac):

Once you've inverted "Layer 1", take a look at your image in the document window. A moment ago, the image was suffering from an extreme amount of sharpening, but now everything appears soft and blurred-out. That is, everything except the important details in the image. The woman's eyes and mouth are slightly blurred out, but nowhere near the extent of her skin:

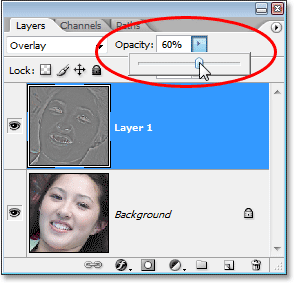
Step 5: Lower The Opacity Of "Layer 1" To Fine-Tune The Amount Of Skin Softening
We've definitely succeeded in smoothing and softening her skin, but we need to take the effect down a few notches to keep things looking realistic. For that, all we need to do is lower the opacity of "Layer 1". Go up to the Opacity option in the top right corner of the Layers palette (directly across from the blend mode option). You'll see the word "Opacity" and that it's currently set to a full 100%. Click on the right-pointing arrow, which brings up a small slider bar, and simply lower the opacity of "Layer 1" until the smoothing looks more natural. There's no set amount to lower it to since it will depend on your image, so just keep an eye on your image in the document window as you drag the slider. I'm going to lower my opacity down to about 60%. Again, your value may be different:
With my opacity lowered, the softening now looks much better:
Notice how the minor amount of softening over her eyes and mouth has become almost completely unnoticeable at this point, while her skin is nice and smooth. If "almost completely unnoticeable" isn't quite good enough for you and you want to make absolutely certain there is no softening at all over those areas, continue on to the next step.
Also, throughout this tutorial I've been referring to this technique as a way to smooth and soften skin. At the moment, we're actually softening the entire photo. We haven't done anything yet to limit the softening to only the person's skin. You may very well like the effect of having the entire photo softened, and if that's the case, there's no need to remove the effect from the rest of the image. If you do want to limit the softening to just the skin, continue on.
Step 6: Add A Layer Mask To "Layer 1"
To completely remove any softening from the important details in the woman's face, I'll need to use a layer mask. To add a layer mask, again make sure "Layer 1" is selected and then click on the Layer Mask icon at the bottom of the Layers palette:
Nothing happens to the image in the document window, but we can see in the Layers palette that we now have a layer mask thumbnail added to "Layer 1":
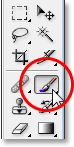
Step 7: Select The Brush Tool
We're going to paint on the layer mask, and for that, we need the Brush Tool, so either grab it from the Tools palette or press the letter B on your keyboard to select it with the keyboard shortcut:
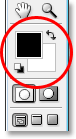
Step 8: Set Your Foreground Color To Black
Since we need to paint with black, we'll need to set our Foreground color to black, since the Brush Tool paints with whichever color we have our Foreground color currently set to. By default, whenever we have a layer mask selected (which we currently do), Photoshop sets the Foreground color to white, while setting the Background color to black. We can easily swap them by pressing the letter X on the keyboard. As we can see in the Foreground and Background color swatches near the bottom of the Tools palette, we now have black as our Foreground color (the top left square) and white has become our Background color (bottom right square):
Step 9: Paint Over The Details In The Face To Hide The Softening Effect
With our Brush Tool selected and black as our Foreground color, we can now paint away the softening effect over any areas where we don't want it. Painting with black on the layer mask doesn't actually "remove" the effect, it simply hides it from view. If we change our minds later and want to bring the effect back in areas where we've hidden it, all we'd need to do is paint with white over those areas to reveal the effect once again.
If you need more information about layer masks, be sure to check out our Understanding Layer Masks tutorial in the Photoshop Basics section of the website.
Using a small, soft-edged brush, I'll paint over the woman's eyes and mouth to completely hide the softening effect from those areas. You can change the size of your brush at any time by pressing the left bracket key on your keyboard to make the brush smaller or the right bracket key to make it larger. Also, you can control how soft or hard the edge of the brush is with your keyboard. Hold down your Shift key and press the left bracket key to make the brush edges softer, and hold down Shift and press the right bracket key to make the edges harder. Here, I'm painting over the woman's eyes with my brush:
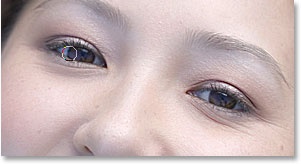
I'll continue painting away any softening effect over her mouth, especially her teeth since we don't want them to appear soft, and maybe over the bottom of her nose and her eyebrows as well. If we look at the layer mask thumbnail, we can see all the areas where I've painted with black:
And here's what my image now looks like. The areas I've painted over are now completely free of any softening, even though it was very subtle to begin with:

Step 10: Paint Away The Effect From The Rest Of The Image
As I mentioned a moment ago, you don't have to limit the softening effect to only the skin if you like how the effect looks when applied to the entire photo. But if you do want to limit the softening and smoothing to just the person's skin, simply use your Brush Tool and with black still as your Foreground color, paint over everything in the photo except for the person's skin.
In my case, my photo is cropped tightly around the woman's face so there isn't much else in the photo for me to paint over, but I'll go ahead anyway and paint with black around the rest of the photo. We can see by looking again at the layer mask thumbnail in the Layers palette that I've now painted with black all around her face, removing the softening effect from everywhere except her skin:
And here, with the softening and smoothing effect now being applied only to the woman's skin, is my final result:
And there we have it! That's how to easily smooth and soften skin with Photoshop! Check out our Photo Retouching section for more Photoshop image editing tutorials!